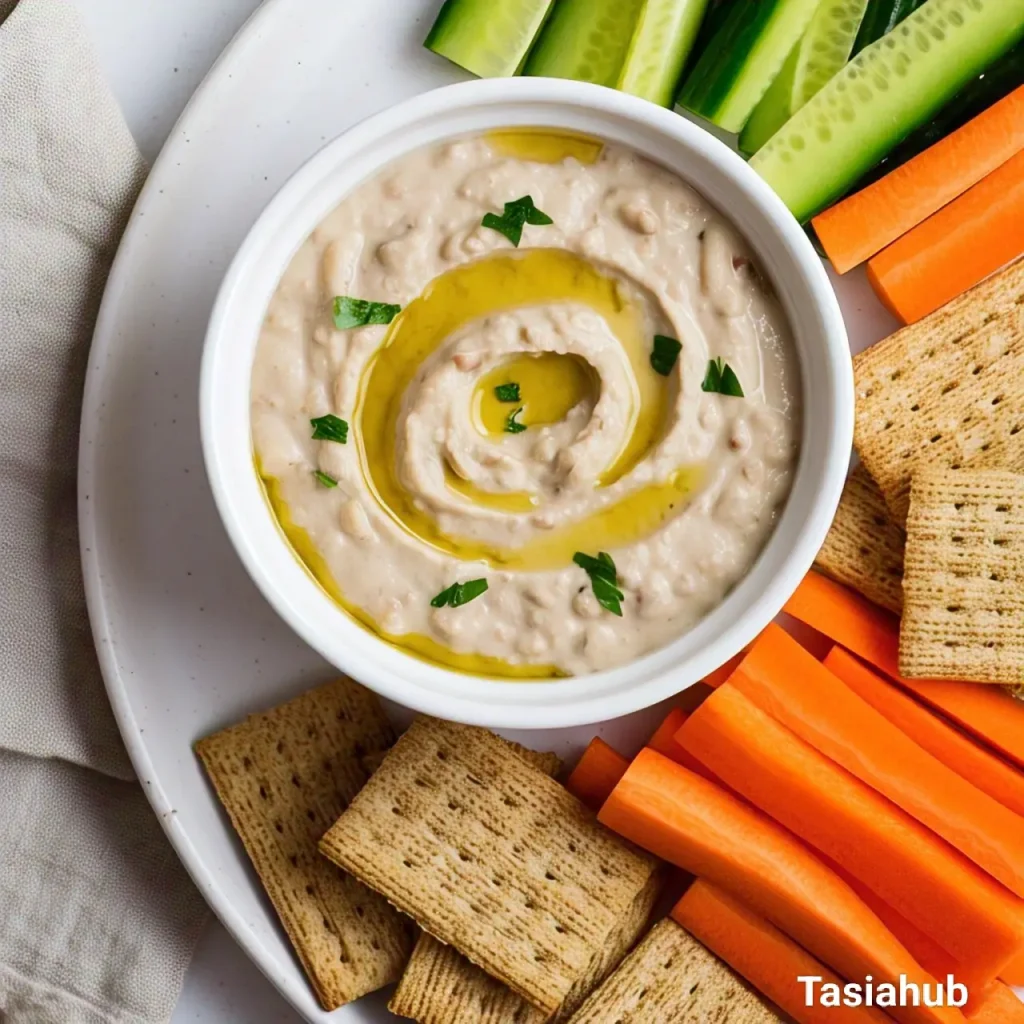
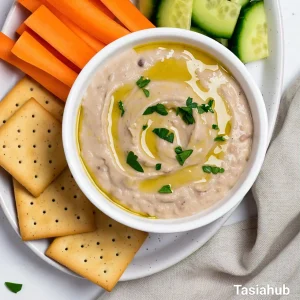
White Bean Dip

When it comes to easy and delicious dips, white bean dip is a crowd-pleaser that hits the spot every time. It’s smooth, creamy, and packed with flavor, making it perfect for just about any occasion.
Whether you’re hosting a party, looking for a snack for the kids, or need something to spice up your next movie night, this dip has you covered. It’s simple to make, requires just a few ingredients, and can be whipped up in minutes.
I love this dip because it’s one of those dishes that always comes in handy. I can make it in no time, and it’s always a hit at get-togethers. Whether I’m serving it with crunchy veggies, pita chips, or spreading it on toast, it’s the kind of dish that’s perfect for any time of the day.
Plus, it’s super budget-friendly, making it perfect for when I want to eat something delicious without breaking the bank. It’s the kind of recipe I’ll keep coming back to for years!
Packed with protein from the beans and full of fresh flavors like garlic, lemon, and olive oil, it’s a snack that tastes indulgent without the guilt. It’s great for a quick weeknight appetizer or as a light meal when you’re craving something satisfying but not too heavy.
What is White Bean Dip?
White bean dip is a creamy, smooth dip made primarily from white beans, such as cannellini or great northern beans. These beans are pureed with a blend of flavorful ingredients like garlic, lemon, olive oil, and herbs, creating a dip that’s both rich and refreshing.
It’s similar to hummus but has a lighter, less intense flavor, making it a great option for those who love creamy dips but want something a little different.
While many dips rely on heavy cream cheese or sour cream, this one is lighter yet still creamy. The white beans add a subtle, nutty flavor that pairs perfectly with fresh herbs and spices. Plus, it’s naturally gluten-free and can be made vegan, making it an inclusive option for various dietary preferences!
Why You’ll Love It
- It’s super easy to make – With just a handful of ingredients, you can whip this up in no time. No complicated steps, just blend, chill, and serve!
- It’s healthy – Packed with protein and fiber from the white beans, it’s a great choice for those looking for a snack that’s both satisfying and nutritious.
- Perfect for any occasion – Whether it’s a game night, a family gathering, or just a snack at home, white bean dip is always a hit.
- Kid-friendly – The creamy texture and mild flavor make it a great dip for little ones to enjoy with veggies or crackers.
- You can customize it – Add your favorite spices or toppings like roasted red peppers, fresh herbs, or even a bit of cheese to make it your own!
Ingredient List
For the White Bean Dip:
- 2 cups cooked white beans (canned or freshly cooked)
- 1/4 cup olive oil
- 2 cloves garlic, minced
- 2 tbsp fresh lemon juice
- 1/2 tsp salt (or to taste)
- 1/4 tsp black pepper
- 1/2 tsp dried oregano
- 1/4 tsp paprika (optional, for a little kick)
- 2 tbsp fresh parsley, chopped (optional, for garnish)
For Serving:
- Veggies (carrot sticks, cucumber slices, bell peppers)
- Pita chips or crackers
Ingredient Notes
- I always use cannellini beans—they’re creamy and have a mild flavor that blends well in this dip.
- Don’t skip the garlic! It adds a punch of flavor that makes the dip so delicious.
- Fresh lemon juice is key—bottled lemon juice just doesn’t cut it. Fresh lemon gives a much brighter, zesty flavor.
- For a richer taste, use extra virgin olive oil. It adds depth and makes the dip even creamier.
- Feel free to adjust the seasoning to suit your tastes. If you like it spicier, add more paprika or even a pinch of cayenne pepper!
Kitchen Tools Needed
- Blender or Food Processor – To blend the white beans. I love using my Ninja blender because it’s quick and easy to clean.
- Garlic Press – To easily mince the garlic without the mess.
- Measuring Spoons and Cups – To get the right balance of ingredients. I use stainless steel measuring spoons for durability and precision.
- Cutting Board – For chopping the garlic and any veggies. A large bamboo cutting board is my go-to — it’s eco-friendly and easy on the knives.
- Serving Bowl – For serving the dip.
Instructions
Step 1: Prepare Your Ingredients
- Drain and rinse your white beans if you’re using canned beans. If you’re using freshly cooked beans, make sure they’re cooled and drained.
- Mince the garlic — this step is super simple, but it helps build flavor. I recommend using a garlic press if you have one, but a knife works just fine too.
- Chop your fresh parsley if you’re using it as a garnish later. This will give your dip a fresh, colorful pop when you’re ready to serve it!
Step 2: Blend the Ingredients
- Add the white beans, olive oil, garlic, lemon juice, salt, pepper, oregano, and paprika to your blender or food processor.
- Pulse a few times to start breaking up the beans. Then, blend continuously until the dip is super smooth and creamy. You might need to scrape down the sides of the blender once or twice to make sure everything gets fully incorporated.
Pro Tip: If you find the dip too thick, you can add a little more olive oil or water, just a teaspoon at a time, until it reaches your desired consistency. It should be smooth and spreadable, not too runny.
Expect the dip to be thick and creamy at this stage. The color will be a light beige from the beans, and the texture should be velvety.
Step 3: Taste and Adjust
- Taste the dip and decide if you want more salt, pepper, or lemon juice. If you prefer a little more tang, squeeze in a bit more lemon. If you love garlic, feel free to add another clove!
- Blend again for a few seconds to mix in any adjustments.
Pro Tip: Don’t be afraid to adjust the seasoning! A little extra salt can bring out the flavors, and a dash more lemon juice can balance out the richness of the beans.
Step 4: Chill (Optional)
If you have time, I recommend chilling the dip in the fridge for about 30 minutes before serving. This helps the flavors meld together and gives the dip a thicker consistency. If you’re in a rush, though, you can skip this step and dig in!
Step 5: Serve and Enjoy
Once the dip is ready, transfer it to a serving bowl. Sprinkle some fresh parsley on top for a pop of color and extra flavor. You can also add a light drizzle of olive oil for a touch of richness.
Serve it with your favorite dippers — veggies, pita chips, or crackers — and enjoy!
Pro Tip: If you’re serving this at a party or gathering, you can even make it ahead of time and keep it covered in the fridge. It’ll stay fresh for about 3 days!
Now, you’ve got yourself a simple, creamy, and flavorful white bean dip ready to share (or enjoy all on your own)!
Tips and Tricks for Success
- Use fresh lemon juice – I can’t stress this enough! Fresh lemon juice adds such a bright and tangy flavor that bottled juice just can’t match. Plus, it gives the dip a little extra zing that makes it stand out!
- Make it creamy with a splash of water – If the dip is too thick after blending, don’t be afraid to add a little water (or extra olive oil) to get the perfect texture. Just add a teaspoon at a time and blend until you get that smooth, creamy consistency.
- Season to taste – I always recommend tasting your dip before serving. Sometimes, I’ll add a little extra salt or lemon juice to balance out the flavors. It’s one of those dips that you can truly personalize to your taste.
- Add a kick with chili flakes – If you like a little heat, sprinkle some red chili flakes or cayenne pepper into the dip. It adds just the right amount of warmth without overwhelming the flavors.
- Serve with a variety of dippers – The best part of this dip is how versatile it is! You can serve it with everything from carrot sticks and cucumber slices to pita chips and even crusty bread. Try a few different options to keep things interesting!
Ingredient Substitutions and Variations
- No white beans? No problem! You can easily swap them out for other beans like chickpeas or navy beans. Chickpeas will give you a slightly firmer dip, while navy beans will offer a similar creamy texture to white beans.
- Need a dairy-free option? This recipe is naturally dairy-free, but if you want a bit more creaminess, try adding a spoonful of tahini. It’ll give your dip a rich, nutty flavor that pairs beautifully with the beans.
- Want a cheesy flavor? If you’re not dairy-free, a sprinkle of grated Parmesan or a few cubes of cream cheese can make your dip extra indulgent and creamy.
- Herb variations – While I love using parsley, you can swap in fresh basil, thyme, or even rosemary for a unique twist on the flavor. Each herb will bring its own personality to the dip!
- Add roasted veggies – If you want to amp up the flavor, consider adding roasted garlic, roasted red peppers, or even a bit of sun-dried tomatoes. These ingredients will give the dip a smoky depth that’s irresistible!
Serving Suggestions
- With fresh veggies – I love serving this dip with crunchy carrot sticks, cucumber slices, or bell pepper strips. The fresh veggies provide a nice contrast to the creamy dip and make for a healthy, satisfying snack.
- With pita chips – For a fun and crispy option, I always go for pita chips. The saltiness and crunch of the chips complement the smooth, garlicky dip so well.
- Spread on toast – For a quick lunch, spread this white bean dip on whole-grain toast and top it with a few slices of avocado. It’s light, filling, and super tasty.
- As a topping for roasted vegetables – I love drizzling this dip over roasted veggies like sweet potatoes, zucchini, or cauliflower. It adds a creamy, herby element to the dish.
- With crackers or bread – A classic option that never gets old! Serve it with your favorite crackers or a freshly baked baguette for dipping.

Storage and Reheating Instructions
- Store in an airtight container – Keep the dip in a sealed container in the fridge for up to 3 days. It will stay fresh, and the flavors will continue to develop as it sits!
- Refrigerate right after serving – Make sure to cover and refrigerate any leftover dip immediately after serving to keep it safe and fresh.
- No need to reheat – White bean dip is delicious served cold or at room temperature, so there’s no need to heat it again. Just take it out of the fridge about 15 minutes before serving if you want it to be a little less cold.
- For longer storage – If you want to keep it for a week or longer, try freezing the dip in a freezer-safe container. Just thaw it in the fridge overnight and give it a quick stir before serving!
Frequently Asked Questions
How long does white bean dip last in the fridge?
White bean dip stays fresh in an airtight container in the fridge for up to 3 days. After that, it might start losing some of its creamy texture, but it’s still safe to eat!
Can I make this dip ahead of time?
Yes! Making it ahead of time lets the flavors come together. Just store it in the fridge for a few hours (or overnight) and give it a quick stir before serving.
Can I make this dip spicier?
Absolutely! If you love a little heat, try adding a pinch of cayenne pepper, chili flakes, or even a dash of hot sauce to the mix. Taste as you go to get the perfect level of spice.
Can I use frozen beans instead of canned?
Yes! If you’re using frozen beans, just cook and cool them first before blending. You’ll get the same creamy texture as canned beans, and it’s a great way to use up frozen beans you have on hand.
What can I serve with white bean dip?
Anything you like! Some of my favorites are crunchy veggie sticks (like carrots and cucumbers), pita chips, crackers, or toasted bread. It’s super versatile and can be paired with lots of dippers.
Is this dip vegan?
Yes, this white bean dip is naturally vegan, so it’s a great option for plant-based eaters. Just be sure to skip any dairy toppings like cheese if you’re sticking to a vegan diet.
There you have it — an easy, creamy, and flavorful white bean dip that’s sure to be a hit at your next snack session or gathering! Whether you’re serving it with veggies, crackers, or on toast, it’s a versatile and delicious option that will satisfy every craving.
If you make this dip, I’d love to hear how it turns out! Drop a comment below or connect with me on social media to share your thoughts and any fun twists you added.
White Bean Dip
Equipment
- Blender or Food Processor
- Garlic Press
- Measuring Spoons and Cups
- Cutting board
- Serving bowl
Ingredients
For the White Bean Dip:
- 2 cups cooked white beans canned or freshly cooked
- 1/4 cup olive oil
- 2 cloves garlic minced
- 2 tbsp fresh lemon juice
- 1/2 tsp salt or to taste
- 1/4 tsp black pepper
- 1/2 tsp dried oregano
- 1/4 tsp paprika optional, for a little kick
- 2 tbsp fresh parsley chopped (optional, for garnish)
For Serving:
- Veggies carrot sticks, cucumber slices, bell peppers
- Pita chips or crackers
Instructions
Step 1: Prepare Your Ingredients
- Drain and rinse your white beans if you’re using canned beans. If you’re using freshly cooked beans, make sure they’re cooled and drained.
- Mince the garlic — this step is super simple, but it really helps build flavor. I recommend using a garlic press if you have one, but a knife works just fine too.
- Chop your fresh parsley if you’re using it as a garnish later. This will give your dip a fresh, colorful pop when you’re ready to serve it!
Step 2: Blend the Ingredients
- Add the white beans, olive oil, garlic, lemon juice, salt, pepper, oregano, and paprika to your blender or food processor.
- Pulse a few times to start breaking up the beans. Then, blend continuously until the dip is super smooth and creamy. You might need to scrape down the sides of the blender once or twice to make sure everything gets fully incorporated.
- Pro Tip: If you find the dip too thick, you can add a little more olive oil or water—just a teaspoon at a time — until it reaches your desired consistency. It should be smooth and spreadable, not too runny.
- Expect the dip to be thick and creamy at this stage. The color will be a light beige from the beans, and the texture should be velvety.
Step 3: Taste and Adjust
- Taste the dip and decide if you want more salt, pepper, or lemon juice. If you prefer a little more tang, squeeze in a bit more lemon. If you love garlic, feel free to add another clove!
- Blend again for a few seconds to mix in any adjustments.
- Pro Tip: Don’t be afraid to adjust the seasoning! A little extra salt can really bring out the flavors, and a dash more lemon juice can balance out the richness of the beans.
Step 4: Chill (Optional)
- If you have time, I recommend chilling the dip in the fridge for about 30 minutes before serving. This helps the flavors meld together and gives the dip a thicker consistency. If you’re in a rush, though, you can skip this step and dive right in!
Step 5: Serve and Enjoy
- Once the dip is ready, transfer it to a serving bowl. Sprinkle some fresh parsley on top for a pop of color and extra flavor. You can also add a light drizzle of olive oil for a touch of richness.
- Serve it with your favorite dippers — veggies, pita chips, or crackers — and enjoy!
- Pro Tip: If you’re serving this at a party or gathering, you can even make it ahead of time and keep it covered in the fridge. It’ll stay fresh for about 3 days!
- Now, you’ve got yourself a simple, creamy, and flavorful white bean dip ready to share (or enjoy all on your own)!
Notes
Nutritional Value per Serving
- Calories: 120-140 kcal
- Protein: 4g
- Fat: 9g
- Carbohydrates: 12g
- Fiber: 3g
- Sugar: 1g
- Sodium: 150mg
- Cholesterol: 0mg
The nutritional information provided on this website is an estimate only and is intended for general guidance. We cannot guarantee its accuracy and recommend consulting a qualified healthcare professional or registered dietitian for personalized nutrition advice.