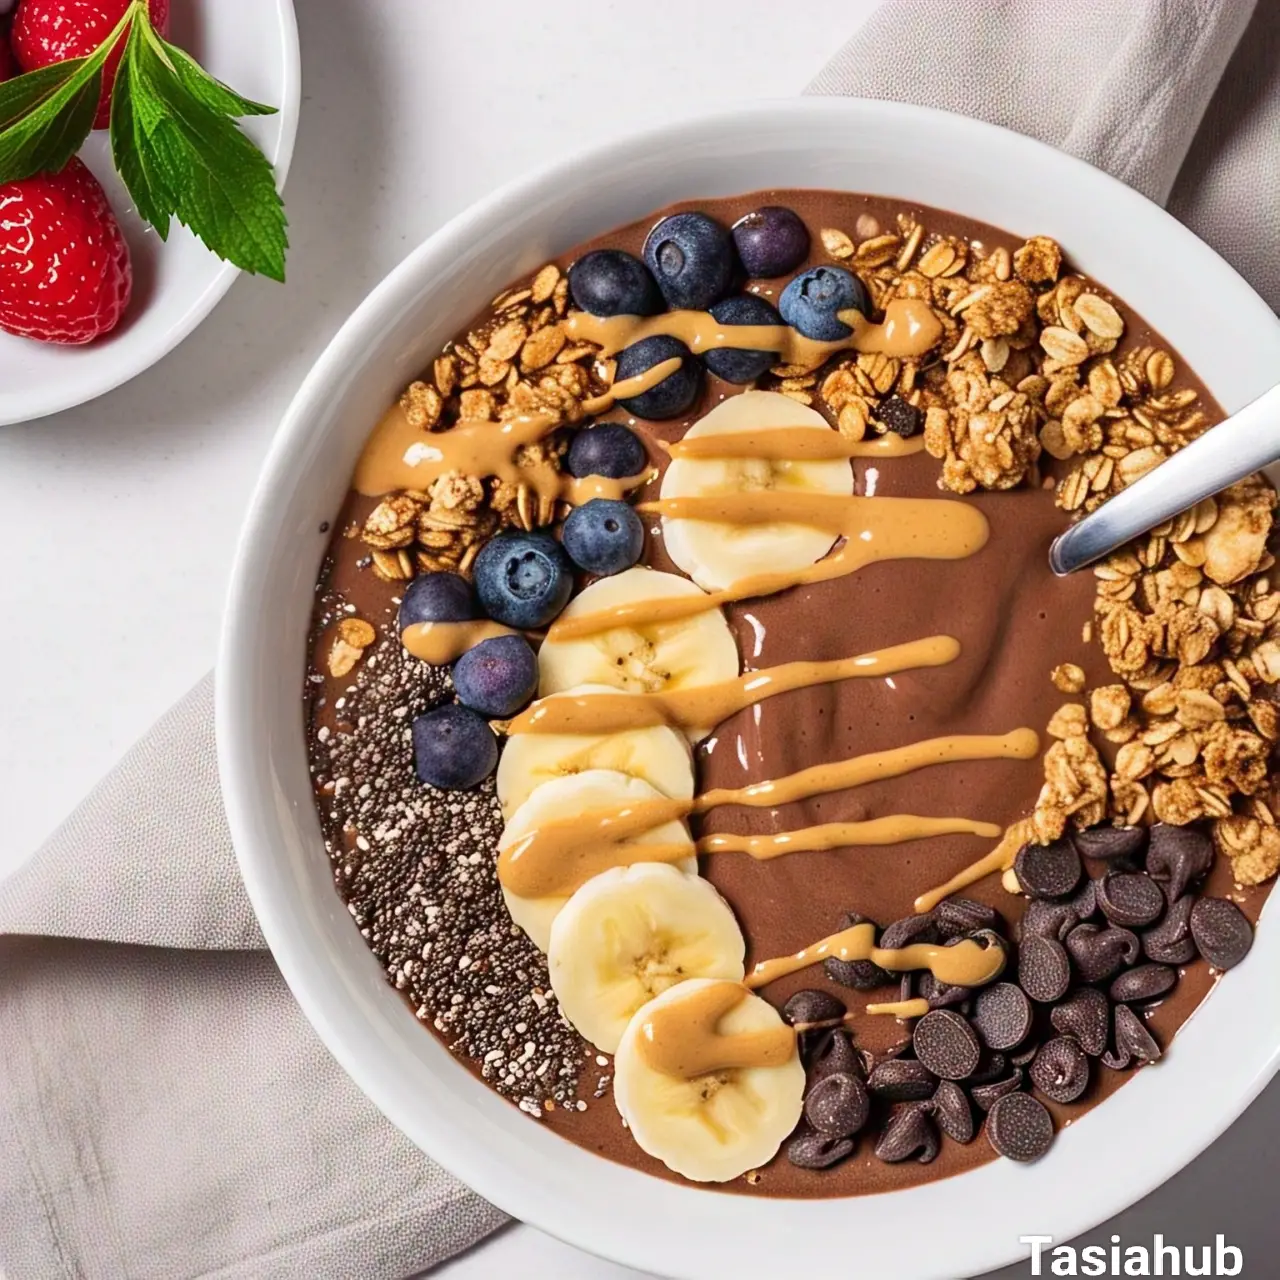
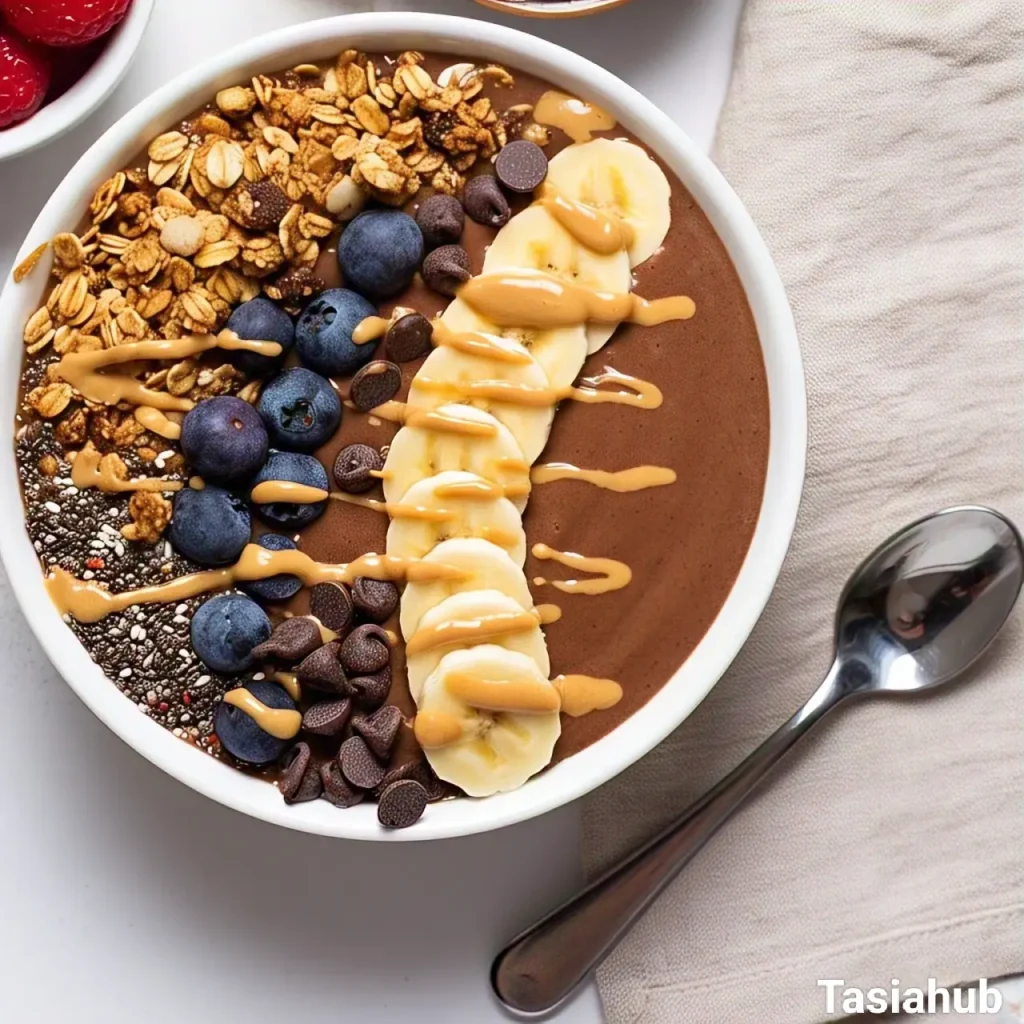
Chocolate Smoothie Bowl
I’ll admit, I can’t resist a good chocolate craving, and sometimes, just a square of chocolate isn’t enough. That’s when I turn to this chocolate smoothie bowl. It satisfies my sweet tooth but gives me a nourishing boost too.
You can enjoy it on busy mornings when you’re running out the door, or as a treat on weekends when you’re relaxing at home. And if you have kids or a family, they’ll love it too – it’s an easy way to sneak in some healthy ingredients while still feeling like they’re indulging in a dessert.
This chocolate smoothie bowl is everything you want in a quick, comforting meal that doesn’t require a ton of time or effort. It’s perfect for those days when you’re craving something a little special but want to keep it simple and wholesome. Trust me, once you try it, you’ll be making it a part of your routine, whether it’s as a morning energizer or a late-night treat.
What makes this recipe so special is how easy it is to whip up. With just a few simple ingredients, you get a bowl full of chocolatey delight that feels comforting but is also packed with nutrients. Whether you’re starting your day with it, need a quick pick-me-up in the afternoon, or want something sweet to end your evening, this smoothie bowl fits the bill.
What is a Chocolate Smoothie Bowl?
A Chocolate Smoothie Bowl is a delicious, thick smoothie served in a bowl and topped with a variety of yummy ingredients. It’s made by blending frozen fruits, cocoa, and a liquid like milk or almond milk, creating a creamy base that’s rich in chocolate flavor.
You can customize it with any toppings you like — fresh fruit, granola, nuts, seeds, or even a drizzle of honey. What makes it a “bowl” instead of just a drink is the texture; it’s thick and spoonable, making it perfect for those times you want something filling yet refreshing.
What sets this recipe apart from regular smoothies is its consistency and the way it’s presented. Unlike a typical smoothie, which is more of a drink, the smoothie bowl is made to be eaten with a spoon, making it feel like a more substantial meal. Plus, the toppings add a fun, personal touch, letting you experiment with different flavors and textures each time you make it. It’s like a dessert, but one you can feel good about!
Why You’ll Love It
- It’s super customizable! Want more crunch? Add granola. Need a protein boost? Toss in some nuts or seeds. The choice is all yours, and you can change it up based on your mood or what you have on hand.
- It satisfies your chocolate cravings without the guilt. It’s rich and indulgent but made with wholesome ingredients that are full of nutrients. That means you get your chocolate fix while fueling your body with good stuff!
- It’s perfect for busy mornings. Blend, pour, top, and you’re done! This recipe is quick to make, making it ideal for those hectic mornings when you need something satisfying but don’t have a lot of time.
- It’s a crowd-pleaser. Whether you’re making it for yourself or sharing with friends or family, this chocolate smoothie bowl is always a hit. Kids love the fun toppings, and adults appreciate the healthy twist on a sweet treat.
- It’s like dessert for breakfast! Who doesn’t love the idea of starting your day with something that tastes like a dessert but is packed with vitamins and fiber? This smoothie bowl feels like a treat, but it’s a nutritious meal to kick off your morning right!
Ingredient List
- For the Base:
- 1 frozen banana
- 1/2 cup frozen spinach (optional for added nutrients)
- 2 tablespoons cocoa powder (unsweetened)
- 1/2 cup milk (dairy or non-dairy like almond milk)
- 1/2 cup Greek yogurt (for creaminess and protein)
- For the Toppings:
- 1/4 cup granola
- 1 tablespoon chia seeds or flaxseeds (optional)
- 1/4 cup fresh berries (strawberries, blueberries, or raspberries)
- 1 tablespoon peanut butter or almond butter (optional for extra flavor)
- A few dark chocolate chips (for extra chocolatey goodness)
Ingredient Notes
- I always use unsweetened cocoa powder because it gives the smoothie bowl that rich, deep chocolate flavor without added sugar.
- Frozen banana is key! It helps make the base thick and creamy. You can freeze ripe bananas ahead of time for convenience.
- Don’t skip the Greek yogurt — it adds creaminess and a protein boost to keep you full longer.
- For a dairy-free option, use almond milk or any plant-based milk you prefer — it works just as well!
- Granola adds a nice crunch, but feel free to substitute with nuts or seeds if you want more texture.
Kitchen Tools Needed
- Blender – A high-speed blender is perfect for creating that smooth, creamy texture for the base. I love using my Ninja blender because it blends everything quickly and evenly, even frozen fruits.
- Spatula – Useful for scraping the sides of your blender to make sure everything gets blended perfectly. I always use a silicone spatula because it’s gentle on my blender and doesn’t scratch the sides.
- Measuring Cups and Spoons – To measure out your ingredients precisely. I use stainless steel measuring cups for durability and easy cleaning.
- Bowls and Spoons – A wide, shallow bowl works best for smoothie bowls. I love a ceramic bowl because it keeps the smoothie cold and looks cute when serving.
- Cutting Board & Knife – For slicing up fresh fruits or chopping nuts. A wooden cutting board gives it a rustic touch, and the sharp chef’s knife makes the job easier.
Instructions
Step 1: Prep Your Ingredients
- Grab your frozen banana: This is going to be the base of your smoothie bowl. If you haven’t already frozen your banana, slice it up and pop it in the freezer for at least a few hours. Frozen bananas create that creamy texture we love.
- Gather the rest of your ingredients: Measure out the cocoa powder, Greek yogurt, and your choice of milk. It’s always good to have everything ready to go so you can just toss it all in the blender.
Pro Tip: If your banana is too frozen to blend easily, let it sit for a minute or so to soften up slightly, but not too long, or it’ll get mushy.
Step 2: Blend the Base
- Add your frozen banana to the blender first. This helps the other ingredients blend smoothly.
- Toss in the Greek yogurt and cocoa powder. If you’re adding spinach, throw that in too for some extra greens without compromising the flavor!
- Pour in the milk: Start with 1/2 cup, but if you like a thinner consistency, feel free to add a splash more. You want it thick enough to eat with a spoon, but not so thick that you can’t blend it.
- Blend it all: Start blending on a low speed and gradually increase it to high. Blend for about 30 seconds to 1 minute until everything is smooth and creamy. The consistency should be thick enough that it holds its shape when you pour it into a bowl, but not a solid chunk — think soft-serve ice cream.
The texture should be smooth and creamy, with a rich, chocolatey color. If it’s too thick to blend, add a tiny bit more milk. If it’s too thin, add more frozen banana or a small scoop of Greek yogurt.
Pro Tip: If the smoothie is having trouble blending, stop and scrape down the sides with a spatula to make sure everything gets evenly mixed.
Step 3: Assemble the Smoothie Bowl
- Pour the smooth chocolate base into your bowl. You should have a nice, thick layer that fills the bottom of the bowl without spilling over.
- Top it off: This is where the fun begins! Grab your granola, fresh berries, peanut butter, and any other toppings you love. I like to layer them artfully, creating little piles of granola, fruit, and chocolate chips on top for that Instagram-worthy look.
Optional Topping Ideas: If you’re out of granola, try adding crushed nuts or seeds. Don’t have berries? Sliced banana or coconut flakes work just as well!
Step 4: Serve and Enjoy
- Grab your spoon: You’ve earned it! Dig into that creamy, chocolatey bowl full of delicious goodness. Take a bite, and enjoy the combination of smooth, chocolate base and crunchy, fresh toppings.
Pro Tip: If you’re making this as a dessert, you can add a drizzle of honey or a few more chocolate chips for extra sweetness.
Tips and Tricks for Success
- Freeze your fruit ahead of time: Trust me, frozen bananas are your best friend when it comes to making a thick smoothie bowl. It gives you that creamy texture that makes every bite feel like a treat. I always keep a stash of frozen bananas in my freezer, so I’m never caught off guard when the craving hits!
- Get creative with toppings: The beauty of a smoothie bowl is in the toppings! Don’t be afraid to mix it up. If you’re feeling adventurous, add some coconut flakes, cacao nibs, or even a spoonful of almond butter for that extra rich flavor. You can also switch up the fruit depending on the season — mangoes, peaches, or kiwi work great too.
- Adjust the sweetness to your taste: If you like your bowls on the sweeter side, add a bit of honey, maple syrup, or a few pitted dates to the base. If you prefer it less sweet, stick to the natural sweetness of the banana and let the cocoa shine through.
- Don’t over-blend: Blending for too long can turn the mixture into a runny drink, so once everything’s smooth and creamy, stop! You want that thick texture, so it’s best to keep an eye on it. A quick blend is all it takes.
- Make it a meal prep item: If you’re really into smoothie bowls, make a big batch of the base (without the toppings) and store it in the fridge for 1-2 days. When you’re ready to eat, just add your favorite toppings and you’re good to go!
Ingredient Substitutions and Variations
- Milk: Swap out regular milk for almond milk, coconut milk, or even oat milk for a dairy-free option. Each will give a slightly different flavor, so pick your favorite!
- Greek Yogurt: If you don’t have Greek yogurt, use any thick yogurt or even a dairy-free yogurt like coconut or almond yogurt. For an extra protein boost, try adding a scoop of your favorite protein powder instead!
- Frozen Spinach: Totally optional, but spinach is a sneaky way to add more nutrients without changing the flavor. You can also use kale or even swap it for frozen cauliflower for a creamier base.
- Cocoa Powder: If you’re not a fan of cocoa powder, you can use dark chocolate chips (melt them and blend them in), or for a lighter, sweeter option, try carob powder.
- Toppings: Get creative! You can use granola, but also try sliced almonds, pumpkin seeds, or even cinnamon to add flavor. Don’t have berries? Try using sliced bananas or tropical fruits like mango or pineapple for a refreshing twist.
- Sweeteners: If you prefer something a little sweeter, swap the banana for a frozen mango or a spoonful of honey, agave syrup, or stevia.
Serving Suggestions
- As a Quick Breakfast: I love starting my day with this smoothie bowl! It’s light but filling, and the toppings give it that extra fun factor. Pair it with a warm cup of coffee or green tea for the perfect morning boost.
- Post-Workout Snack: This bowl is loaded with protein and healthy fats, making it a great post-workout treat. Pair it with a handful of mixed nuts or a protein bar for an added energy boost.
- Dessert for the Sweet Tooth: If you’re craving something sweet after dinner but don’t want to overindulge, this chocolate smoothie bowl is a fantastic choice. Serve it with a side of dark chocolate or a few homemade cookies for that dessert vibe!
- As a Fun Family Treat: This smoothie bowl is perfect for kids (and adults) to get creative with toppings. Have a mini topping bar with granola, berries, and chocolate chips, and let everyone customize their bowl. It’s a fun and healthy family activity!
- For a Cozy Afternoon Snack: When you need something light yet satisfying in the afternoon, this bowl hits the spot. Pair it with a handful of nuts or a piece of dark chocolate to make it a little more indulgent.

Storage and Reheating Instructions
- Storage: Store the base of your smoothie bowl (without toppings) in an airtight container in the fridge for up to 2 days. When ready to eat, just pour it into a bowl and add your favorite toppings.
- Freezing: If you have leftovers or want to prep ahead, you can freeze the base! Just pour it into an airtight container or ice cube trays and freeze. When you’re ready to eat, let it thaw for about 15-20 minutes or blend it again with a splash of milk for a quick treat.
- Toppings: It’s best to add the toppings fresh, as they don’t hold up well after being refrigerated. However, granola and nuts can be stored in a separate container to maintain their crunch.
- Reheating: Since this is a cold dish, there’s no need to reheat. Just let it sit at room temperature for a few minutes if it’s frozen or straight from the fridge before serving.
Frequently Asked Questions
Can I make this smoothie bowl dairy-free?
Absolutely! You can swap the Greek yogurt for a dairy-free alternative, like coconut yogurt or almond yogurt. For the milk, use almond, coconut, or oat milk for a totally dairy-free option!
How can I make this smoothie bowl sweeter?
If you like things a bit sweeter, feel free to add a natural sweetener like honey, maple syrup, or a few pitted dates. Adjust to taste, but remember, the banana already adds some natural sweetness!
Can I use fresh fruit instead of frozen?
Frozen fruit helps create the thick, creamy texture that makes a smoothie bowl so enjoyable. Fresh fruit won’t give you the same consistency, but you can freeze fresh fruit overnight to get the same result.
How do I store leftover smoothie bowls?
If you have leftover base, store it in an airtight container in the fridge for up to 2 days. When ready to eat, just add your toppings and enjoy. For longer storage, you can freeze the base and blend it again later with a splash of milk.
Can I prep this ahead of time?
Yes! You can prep the base of the smoothie bowl ahead of time and store it in the fridge or freezer. When you’re ready to serve, just add your toppings and you’re good to go!
What toppings do you recommend?
I love topping my bowl with granola, fresh berries, nuts, and a drizzle of peanut butter. But you can get creative — try adding coconut flakes, cacao nibs, or even a few chocolate chips for an extra indulgent touch!
I’d love to hear how your smoothie bowl turns out! Whether you’re making it for breakfast, dessert, or just a midday treat, feel free to share your thoughts or even tag me in your creations on social media. Let’s connect and keep the smoothie bowl love going!

Chocolate Smoothie Bowl
Equipment
- Blender
- Spatula
- Measuring cups and spoons
- Bowls and Spoons
- Cutting Board & Knife
Ingredients
For the Base:
- 1 frozen banana
- 1/2 cup frozen spinach optional for added nutrients
- 2 tablespoons cocoa powder unsweetened
- 1/2 cup milk dairy or non-dairy like almond milk
- 1/2 cup Greek yogurt for creaminess and protein
For the Toppings:
- 1/4 cup granola
- 1 tablespoon chia seeds or flaxseeds optional
- 1/4 cup fresh berries strawberries, blueberries, or raspberries
- 1 tablespoon peanut butter or almond butter optional for extra flavor
- A few dark chocolate chips for extra chocolatey goodness
Instructions
Step 1: Prep Your Ingredients
- Grab your frozen banana: This is going to be the base of your smoothie bowl. If you haven’t already frozen your banana, slice it up and pop it in the freezer for at least a few hours. Frozen bananas create that creamy texture we love.
- Gather the rest of your ingredients: Measure out the cocoa powder, Greek yogurt, and your choice of milk. It’s always good to have everything ready to go so you can just toss it all in the blender.
- Pro Tip: If your banana is too frozen to blend easily, let it sit for a minute or so to soften up slightly, but not too long or it’ll get mushy.
Step 2: Blend the Base
- Add your frozen banana to the blender first. This helps the other ingredients blend smoothly.
- Toss in the Greek yogurt and cocoa powder. If you’re adding spinach, throw that in too for some extra greens without compromising the flavor!
- Pour in the milk: Start with 1/2 cup, but if you like a thinner consistency, feel free to add a splash more. You want it thick enough to eat with a spoon but not so thick that you can’t blend it.
- Blend it all together: Start blending on a low speed and gradually increase it to high. Blend for about 30 seconds to 1 minute until everything is smooth and creamy. The consistency should be thick enough that it holds its shape when you pour it into a bowl, but not a solid chunk—think soft-serve ice cream.
- The texture should be smooth and creamy, with a rich chocolatey color. If it’s too thick to blend, add a tiny bit more milk. If it’s too thin, add more frozen banana or a small scoop of Greek yogurt.
- Pro Tip: If the smoothie is having trouble blending, stop and scrape down the sides with a spatula to make sure everything gets evenly mixed.
Step 3: Assemble the Smoothie Bowl
- Pour the smooth chocolate base into your bowl. You should have a nice, thick layer that fills the bottom of the bowl without spilling over.
- Top it off: This is where the fun begins! Grab your granola, fresh berries, peanut butter, and any other toppings you love. I like to layer them artfully, creating little piles of granola, fruit, and chocolate chips on top for that Instagram-worthy look.
- What to expect: The smooth base should be cold and thick, with toppings adding color and texture. The toppings will stay in place, giving the bowl a satisfying, hearty feel.
- Optional Topping Ideas: If you’re out of granola, try adding crushed nuts or seeds. Don’t have berries? Sliced banana or coconut flakes work just as well!
Step 4: Serve and Enjoy
- Grab your spoon: You’ve earned it! Dig into that creamy, chocolatey bowl full of delicious goodness. Take a bite, and enjoy the combination of smooth, chocolate base and crunchy, fresh toppings.
- Pro Tip: If you’re making this as a dessert, you can add a drizzle of honey or a few more chocolate chips for extra sweetness.
Notes
Nutritional Value (Approximate per serving)
- Calories: ~350-400 calories
- Protein: ~15-20g
- Fat: ~10-15g
- Carbohydrates: ~50-60g
- Fiber: ~5-7g
- Sugar: ~25-30g
The nutritional information provided on this website is an estimate only and is intended for general guidance. We cannot guarantee its accuracy and recommend consulting a qualified healthcare professional or registered dietitian for personalized nutrition advice.