Mango Smoothie Bowl

Have you ever had one of those mornings where you want something healthy, delicious, and super quick — but also something that makes you feel like you’re having breakfast on a tropical vacation? That’s exactly where the mango smoothie bowl comes in. It’s bright, refreshing, and bursting with that sweet mango goodness that just makes your taste buds do a little happy dance.
I started making smoothie bowls when I got tired of my regular oats and toast routine. I wanted something that looked good, tasted better, and didn’t take forever to whip up.
It’s thick, creamy, naturally sweet, and you can load it up with your favorite toppings — think coconut flakes, granola, and a handful of berries. It’s like your favorite smoothie, but better because you get to eat it with a spoon and feel fancy about it.
What I love most about this smoothie bowl is how customizable it is. You can keep it simple with just mango and banana, or mix things up with other tropical fruits. Whether you’re powering through a busy morning, looking for a post-workout refuel, or just want a guilt-free treat in the middle of the day, this bowl has your back.
So grab your blender, some ripe mangoes, and a few toppings you love, and let’s make something that tastes like sunshine in a bowl!
What is a Mango Smoothie Bowl?
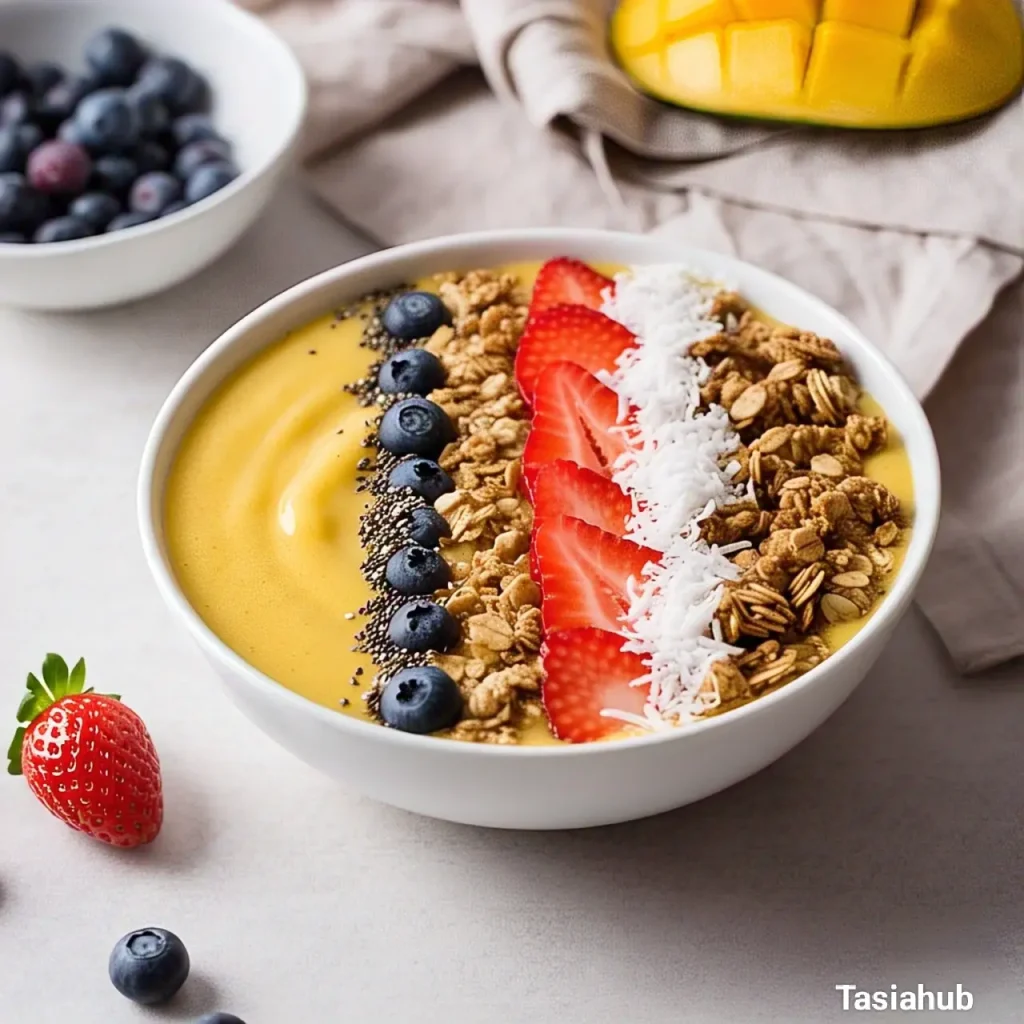
A mango smoothie bowl is a thick, spoonable version of your favorite mango smoothie, served in a bowl and topped with a variety of healthy and colorful add-ons. Unlike traditional smoothies that you sip through a straw, smoothie bowls have a thicker consistency — think of it like soft-serve ice cream but made entirely from fruit and wholesome ingredients.
The main star here is, of course, mango — fresh or frozen — blended with creamy elements like banana, yogurt, or plant-based milk to create a velvety base.
This tropical treat isn’t just pretty to look at; it’s packed with vitamins, fiber, and natural sweetness. It’s also one of those recipes where you can get creative with toppings — whether you’re into crunchy granola, berries, shredded coconut, or a drizzle of nut butter. It’s a fun way to start the day, and it keeps you full and satisfied for hours.
Why You’ll Love It
- Naturally sweet and refreshing: Ripe mangoes bring a tropical burst of flavor without needing any added sugar.
- Quick and easy to make: Just blend a few ingredients and top with your favorites — ready in under 10 minutes!
- Perfect for hot weather: It’s cold, creamy, and super cooling, especially during warmer months.
- Customizable: You can switch up the base or toppings depending on what you have on hand or your mood.
- Nutrient-rich: Full of vitamins A and C, fiber, and antioxidants to start your day strong.
Ingredient List
For the Smoothie Base:
- 1 large ripe mango (fresh or frozen)
- 1 small banana (preferably frozen for extra creaminess)
- 1/2 cup Greek yogurt or dairy-free yogurt
- 1/2 cup coconut water or any plant-based milk (like almond or oat milk)
- 1 tablespoon honey or maple syrup (optional, depending on sweetness preference)
For the Toppings:
- 2 tablespoons granola
- 1 tablespoon shredded coconut
- Fresh berries (e.g., strawberries, blueberries, or raspberries)
- Chia seeds or flaxseeds (optional for extra fiber)
- A drizzle of almond butter or peanut butter (optional)
Ingredient Notes
- Mango: I recommend using fresh mango when in season for the best flavor, but frozen mango is a great option too if you want a thicker consistency.
- Banana: The banana adds a natural creaminess. Make sure it’s ripe for a sweeter taste.
- Greek Yogurt: Use full-fat Greek yogurt for extra richness, or a dairy-free alternative like coconut yogurt for a vegan version.
- Sweetener: I always use honey for a natural sweetness, but maple syrup is a great vegan option. Adjust to your taste!
- Granola: Choose a granola with no added sugars for a healthier topping. You can even make your own at home if you’re feeling crafty!
Kitchen Tools Needed
- Blender: The key tool to make your smoothie base smooth and creamy. I love using the Ninja Professional Blender because it blends everything perfectly and is easy to clean.
- Cutting Board and Knife: To chop the mango and banana. A sharp knife makes all the difference when cutting through the mango!
- Measuring Cups and Spoons: For precise measurements of liquids and yogurt. I use Pyrex glass measuring cups for their accuracy and durability.
- Spoon: For assembling and eating your smoothie bowl (obviously!). A wide, shallow spoon works best for scooping up those thick, creamy layers.
- Toppings Containers: Small bowls or jars to organize your toppings before adding them to the smoothie bowl. I like using Mason jars because they’re great for portion control and easy to store.
Instructions
Step 1: Prepare the Ingredients
Start by peeling and chopping the mango and banana. If you’re using frozen mango, you can skip the peeling but still chop it into smaller pieces. Slice the banana into chunks to help it blend smoothly.
Step 2: Blend the Smoothie Base
Place the mango, banana, Greek yogurt, and coconut water (or plant-based milk) into your blender. Blend on high until everything is smooth and creamy. If it’s too thick, add a bit more coconut water or milk to adjust the consistency.
Pro Tip: If you like your smoothie bowl extra thick, use less liquid to make it scoopable.
Step 3: Taste and Sweeten
Take a quick taste test! If you prefer a sweeter bowl, add honey or maple syrup. Blend again for a few seconds to mix in the sweetener.
Step 4: Pour and Assemble
Once the base is perfect, pour it into a bowl. Use the back of a spoon to spread it evenly, creating a smooth surface for your toppings.
Step 5: Add the Toppings
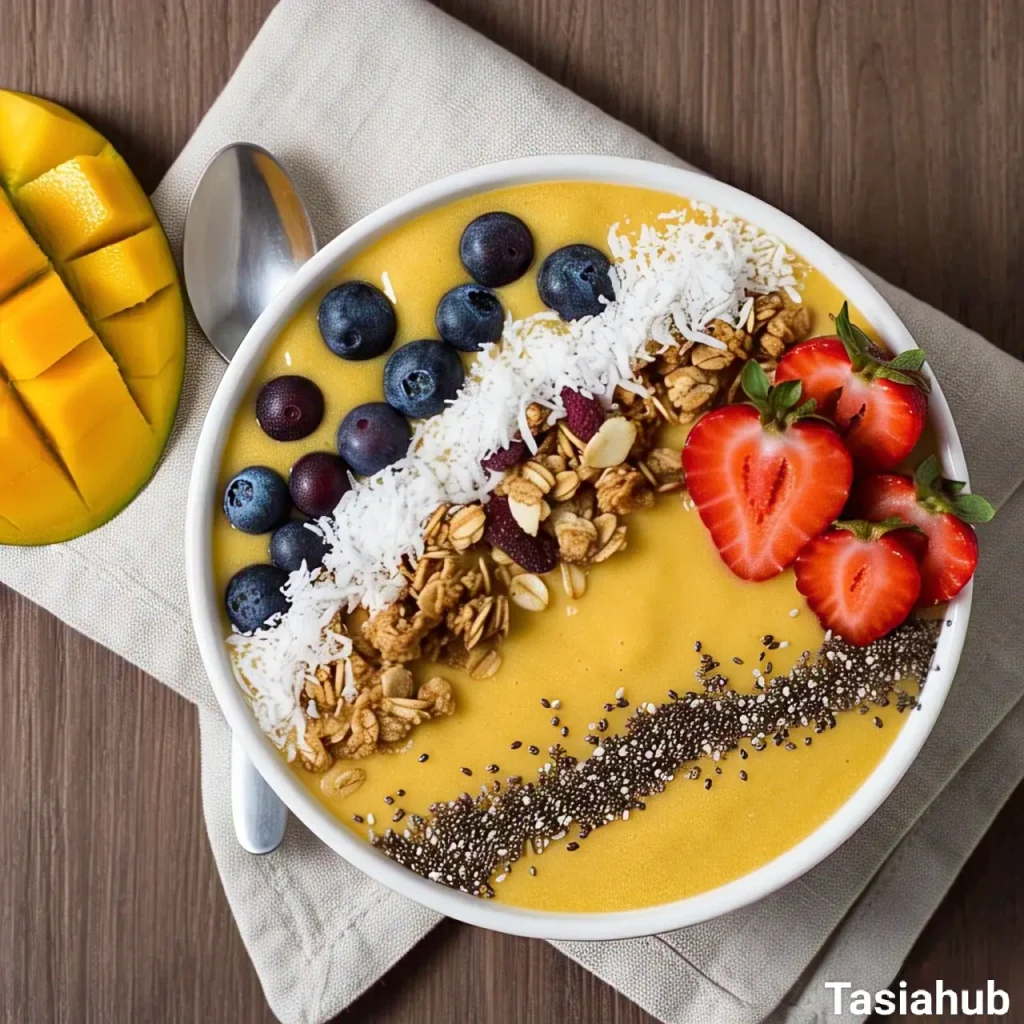
Now for the fun part! Top your smoothie base with granola, shredded coconut, fresh berries, chia seeds, and a drizzle of almond butter or peanut butter.
Pro Tip: Arrange the toppings in a visually pleasing way for that Instagram-worthy look (but feel free to get creative!).
Step 6: Serve and Enjoy
Grab a spoon and dig in! The best part about a smoothie bowl is that you get to enjoy all the layers of texture in each bite. Enjoy it immediately, or store any leftovers in the fridge for later (though it’s best fresh!).
Tips and Tricks for Success
- Use Frozen Fruit for Extra Creaminess: If you want a super-thick smoothie bowl, frozen fruit is your friend! It helps create that ice cream-like texture that makes each bite feel like a treat.
- Go Easy on the Liquid: You want your smoothie bowl to be thick enough to hold the toppings without sinking into it. Add liquid slowly and keep blending until you reach the consistency you love.
- Make It Your Own with Toppings: The best part of a smoothie bowl is the toppings! If you’re feeling extra, throw in some cacao nibs, granola clusters, or even a drizzle of dark chocolate for a fun twist. Don’t be afraid to get creative!
- Prep Your Fruit in Advance: If you’re in a rush, prep the mango and banana the night before and store them in a freezer bag. This way, your smoothie bowl is practically ready to go in the morning!
- Don’t Skip the Yogurt (or its Replacement): The yogurt adds creaminess and richness. If you’re going dairy-free, make sure to pick a plant-based yogurt that is thick and creamy, like coconut or cashew-based options.
Ingredient Substitutions and Variations
- No Greek Yogurt? You can use regular yogurt, coconut yogurt, or even a splash of coconut cream for a richer texture.
- No Coconut Water? Any plant-based milk works great here — almond, oat, or cashew milk all blend well and add a creamy texture.
- Add Protein: Want to make this more of a post-workout meal? Add a scoop of your favorite protein powder into the blend. Vanilla or tropical flavors work best for a smooth taste.
- Tropical Twist: Switch up the mango with other tropical fruits like pineapple, papaya, or kiwi for a unique flavor combo.
- Go Nutty: For extra texture and healthy fats, top your smoothie bowl with nuts like almonds, walnuts, or cashews. They also add a nice crunch alongside the granola!
Serving Suggestions
- Top it with Fresh Mint: A few sprigs of fresh mint can add a refreshing herbal note that complements the sweetness of the mango perfectly.
- Pair with a Side of Toasted Coconut Chips: If you’re craving extra crunch, some toasted coconut chips on the side will add texture and intensify the tropical flavor.
- Serve as a Post-Workout Snack: After a workout, I love having this smoothie bowl as a quick, nutrient-packed snack. The banana and yogurt provide a great source of carbs and protein for recovery.
- For a Brunch Spread: If you’re hosting brunch or a weekend get-together, set up a smoothie bowl bar with different fruits and toppings. Guests can customize their bowls!
- With a Glass of Fresh Juice: Pair this bowl with a refreshing glass of fresh orange juice for a bright, vitamin-packed breakfast.
Storage and Reheating Instructions
- Storage: If you have leftovers, store your smoothie bowl base (without toppings) in an airtight container in the fridge for up to 24 hours. It’s best eaten fresh, though!
- Toppings: Store your toppings separately in small containers or jars to prevent them from getting soggy. The granola especially stays crisp when kept in a dry container.
- Freezing Leftovers: You can freeze the smoothie base in a freezer-safe container for up to 2 weeks. To enjoy it later, just let it thaw for a few minutes or blend it again with a bit of liquid to regain that creamy texture.
- I’ve found that topping the bowl just before serving keeps it fresh and crunchy. If I make too much in advance, I typically save the toppings for the next day and just blend a new batch of smoothie base. Keeps things fun and fresh!
Frequently Asked Questions
Can I make this smoothie bowl without yogurt?
Yes, you can! If you’re not a fan of yogurt, you can substitute it with a splash of coconut cream or even use a bit of avocado for creaminess. It’ll still turn out smooth and delicious!
Can I use a different fruit besides mango?
Absolutely! While mango is the star of this bowl, you can switch it up with other tropical fruits like pineapple, papaya, or even berries for a new flavor profile. Just be sure to adjust the sweetness as needed.
How can I make my smoothie bowl extra creamy?
For a creamier texture, use frozen fruit, especially frozen bananas. You can also add a small amount of coconut cream or cashew butter for richness.
Can I prepare the smoothie bowl in advance?
You can prepare the base ahead of time and store it in the fridge for up to 24 hours. However, it’s best to add your toppings just before serving to keep them fresh and crunchy.
How do I make the smoothie bowl dairy-free?
To make it dairy-free, swap out the yogurt for a plant-based alternative like coconut yogurt or almond yogurt. Use plant-based milk (like almond, oat, or coconut) in place of dairy milk.
Can I freeze the smoothie bowl for later?
Yes! You can freeze the smoothie base in an airtight container for up to 2 weeks. Just blend again with a little more liquid if you want to restore its creamy texture when you’re ready to eat.
I’d love to hear how you make this mango smoothie bowl your own! Drop me a comment or connect with me on social media to share your twists on this recipe.

Mango Smoothie Bowl
Equipment
- Blender
- Cutting Board and Knife
- Measuring cups and spoons
- Spoon
- Toppings Containers
Ingredients
For the Smoothie Base:
- 1 large ripe mango fresh or frozen
- 1 small banana preferably frozen for extra creaminess
- 1/2 cup Greek yogurt or dairy-free yogurt
- 1/2 cup coconut water or any plant-based milk like almond or oat milk
- 1 tablespoon honey or maple syrup optional, depending on sweetness preference
For the Toppings:
- 2 tablespoons granola
- 1 tablespoon shredded coconut
- Fresh berries e.g., strawberries, blueberries, or raspberries
- Chia seeds or flaxseeds optional for extra fiber
- A drizzle of almond butter or peanut butter optional
Instructions
Step 1: Prepare the Ingredients
- Start by peeling and chopping the mango and banana. If you’re using frozen mango, you can skip the peeling but still chop it into smaller pieces. Slice the banana into chunks to help it blend smoothly.
Step 2: Blend the Smoothie Base
- Place the mango, banana, Greek yogurt, and coconut water (or plant-based milk) into your blender. Blend on high until everything is smooth and creamy. If it’s too thick, add a bit more coconut water or milk to adjust the consistency. Pro Tip: If you like your smoothie bowl extra thick, use less liquid to make it scoopable.
Step 3: Taste and Sweeten
- Take a quick taste test! If you prefer a sweeter bowl, add honey or maple syrup. Blend again for a few seconds to mix in the sweetener.
Step 4: Pour and Assemble
- Once the base is perfect, pour it into a bowl. Use the back of a spoon to spread it evenly, creating a smooth surface for your toppings.
Step 5: Add the Toppings
- Now for the fun part! Top your smoothie base with granola, shredded coconut, fresh berries, chia seeds, and a drizzle of almond butter or peanut butter. Pro Tip: Arrange the toppings in a visually pleasing way for that Instagram-worthy look (but feel free to get creative!).
Step 6: Serve and Enjoy
- Grab a spoon and dig in! The best part about a smoothie bowl is that you get to enjoy all the layers of texture in each bite. Enjoy it immediately, or store any leftovers in the fridge for later (though it’s best fresh!).
Notes
Nutritional Value (Per Serving)
- Calories: ~350–400 kcal
- Protein: ~10g
- Fat: ~9g
- Carbohydrates: ~60g
- Fiber: ~7g
- Sugar: ~35g
- Vitamin C: Over 100% of your daily value
- Vitamin A: ~30–40% of daily value
- Calcium: ~15–20% of daily value
- Iron: ~8–10% of daily value
The nutritional information provided on this website is an estimate only and is intended for general guidance. We cannot guarantee its accuracy and recommend consulting a qualified healthcare professional or registered dietitian for personalized nutrition advice.