Strawberry Smoothie Bowl
If you’re like me and love a good, refreshing treat, a strawberry smoothie bowl is exactly what you need to brighten up your day. It’s sweet, creamy, and packed with fresh fruit — plus, it’s so easy to make!
Imagine starting your morning with a bowl full of strawberries, a creamy blend of yogurt, and your favorite crunchy toppings. Whether you’re having it for breakfast, a mid-day snack, or even as a light dessert, it’s the perfect way to fuel your body and satisfy your sweet tooth.
I first tried making this smoothie bowl during a hot summer day when I was craving something cool and healthy. I had all these fresh strawberries in my fridge, and I thought, “Why not make something delicious and fun?” I blended them up with a few simple ingredients and added toppings that I love.
What came out of it was a colorful, yummy bowl that I couldn’t stop eating. It quickly became one of my go-to snacks. The best part? You can customize it however you like, so it’s never boring!
Trust me, once you try it, you’ll want to have it all the time!
What is a Strawberry Smoothie Bowl?
A strawberry smoothie bowl is a thicker, more satisfying version of a regular smoothie, served in a bowl and topped with your favorite ingredients. It starts with a blend of fresh strawberries, yogurt (or a dairy-free alternative), and sometimes other fruits like bananas or berries to make it even more delicious.
The mixture is thickened so it has a creamy texture, perfect for spooning. It’s then topped with crunchy granola, nuts, seeds, or even a drizzle of honey to balance out the flavors. It’s like eating your smoothie with a spoon instead of sipping it through a straw!
Why You’ll Love It
- Quick and Easy: It takes less than 10 minutes to prepare, making it a perfect go-to when you’re short on time but still want something healthy.
- Full of Nutrients: Packed with vitamins, antioxidants, and fiber, it’s a great way to start your day or recharge during the afternoon.
- Customizable: You can adjust the toppings, add different fruits, or even sneak in some protein for an extra boost.
- Refreshing and Delicious: The natural sweetness of strawberries makes it a satisfying treat without any added sugar.
- Perfect for Any Time of Day: Whether you enjoy it in the morning, as a mid-day snack, or even for dessert, it’s the perfect fit for your schedule and tastebuds.
Ingredient List
For the Smoothie Base:
- 1 ½ cups frozen strawberries
- 1 ripe banana
- ½ cup plain Greek yogurt (or dairy-free yogurt)
- ½ cup almond milk (or milk of choice)
- 1 tablespoon honey or maple syrup (optional for sweetness)
For Toppings:
- ¼ cup granola
- 2 tablespoons chia seeds or flax seeds
- Fresh strawberries (for garnish)
- 1 tablespoon coconut flakes (optional)
- 1 tablespoon peanut butter or almond butter (optional)
Ingredient Notes
- I always use frozen strawberries for the smoothie base — it gives the bowl that creamy, thick texture that makes it feel indulgent.
- Greek yogurt adds a nice creaminess and tang, but if you’re looking for a dairy-free option, coconut yogurt works great, too.
- Bananas help to naturally sweeten the smoothie base and add to the thick texture. Make sure it’s ripe for the best flavor!
- Don’t skip the granola — it adds the perfect crunch that balances out the smoothness of the base.
- Chia seeds are my go-to for a fiber and omega-3 boost, but feel free to swap them out for flax seeds if that’s what you have on hand.
- I love drizzling a bit of peanut butter on top for extra protein, but if you’re a fan of almond butter, that’s a great option too.
Kitchen Tools Needed
- Blender: To blend the smoothie base into a creamy, thick consistency. I use a Ninja blender because it crushes frozen fruit effortlessly and gives the smoothest texture.
- Spoon or Small Bowl: For scooping and serving the smoothie bowl.
- Measuring Cups and Spoons: To make sure you’re adding just the right amounts of ingredients. I love using Pyrex measuring cups because they’re durable and easy to clean.
- Cutting Board and Knife: For slicing your banana and any extra fruit you want to add to the topping.
- Spatula or Scraper: To scrape every last bit of the smoothie base out of the blender. I love using a silicone spatula because it’s gentle on the blender and helps get every drop!
- Topping Containers: For organizing your toppings while you prep the smoothie. I use small glass bowls to keep everything neat and accessible while assembling the bowl.
Instructions
Step 1: Prepare the Smoothie Base
- Add frozen strawberries to your blender: Start by placing the 1 ½ cups of frozen strawberries into the blender. Using frozen strawberries helps give the smoothie that thick, creamy texture that you want for a bowl.
- Add the banana: Peel the ripe banana and break it into chunks before adding it to the blender. This will add natural sweetness and help thicken the base.
- Add Greek yogurt and milk: Pour in ½ cup of plain Greek yogurt and ½ cup of almond milk (or any milk you prefer). The yogurt makes the base creamy, and the milk helps it blend smoothly. If you like it a little sweeter, add a tablespoon of honey or maple syrup.
-
Blend it up: Secure the lid and blend on medium-high speed for 30 seconds to 1 minute until everything is smooth and creamy. If the mixture is too thick, you can add a splash more milk to help it blend better. You want the consistency to be thick but still spoonable.
- Pro Tip: If your blender is struggling to blend the frozen fruit, stop and scrape the sides, then continue blending. You can also pulse a few times to help break it down.
Step 2: Assemble the Smoothie Bowl
- Pour the smoothie base into your bowl: Once your smoothie is nice and creamy, carefully pour it into a bowl. You want to make sure the base fills the bowl almost to the top for a nice, full smoothie bowl.
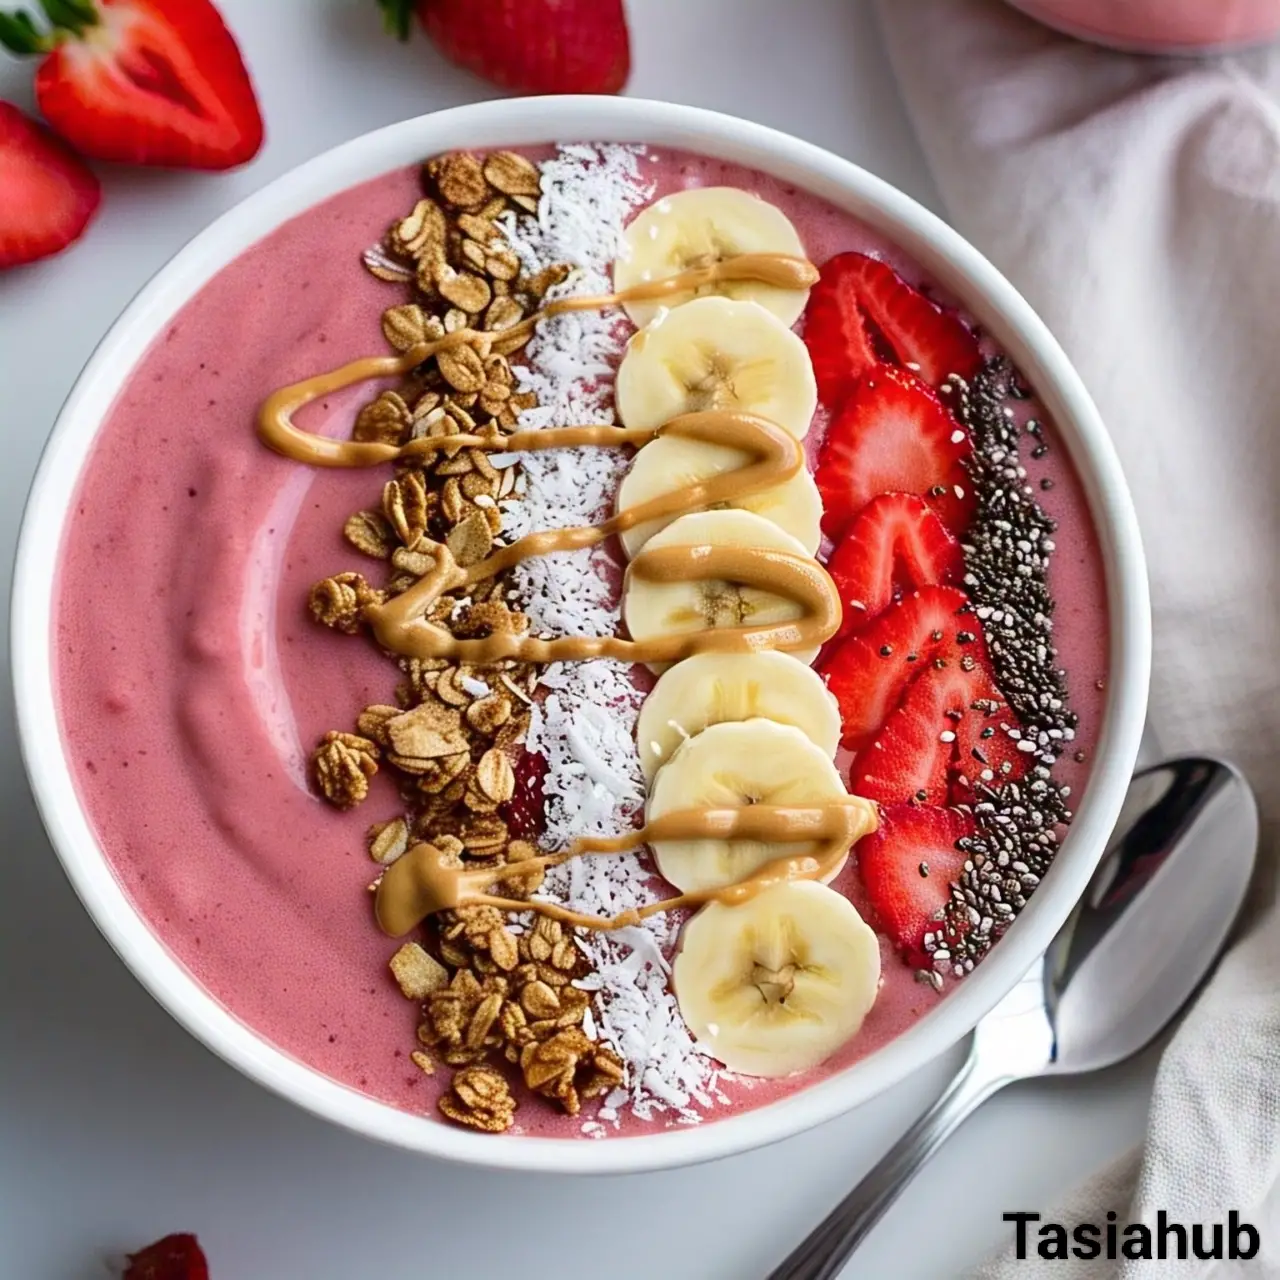
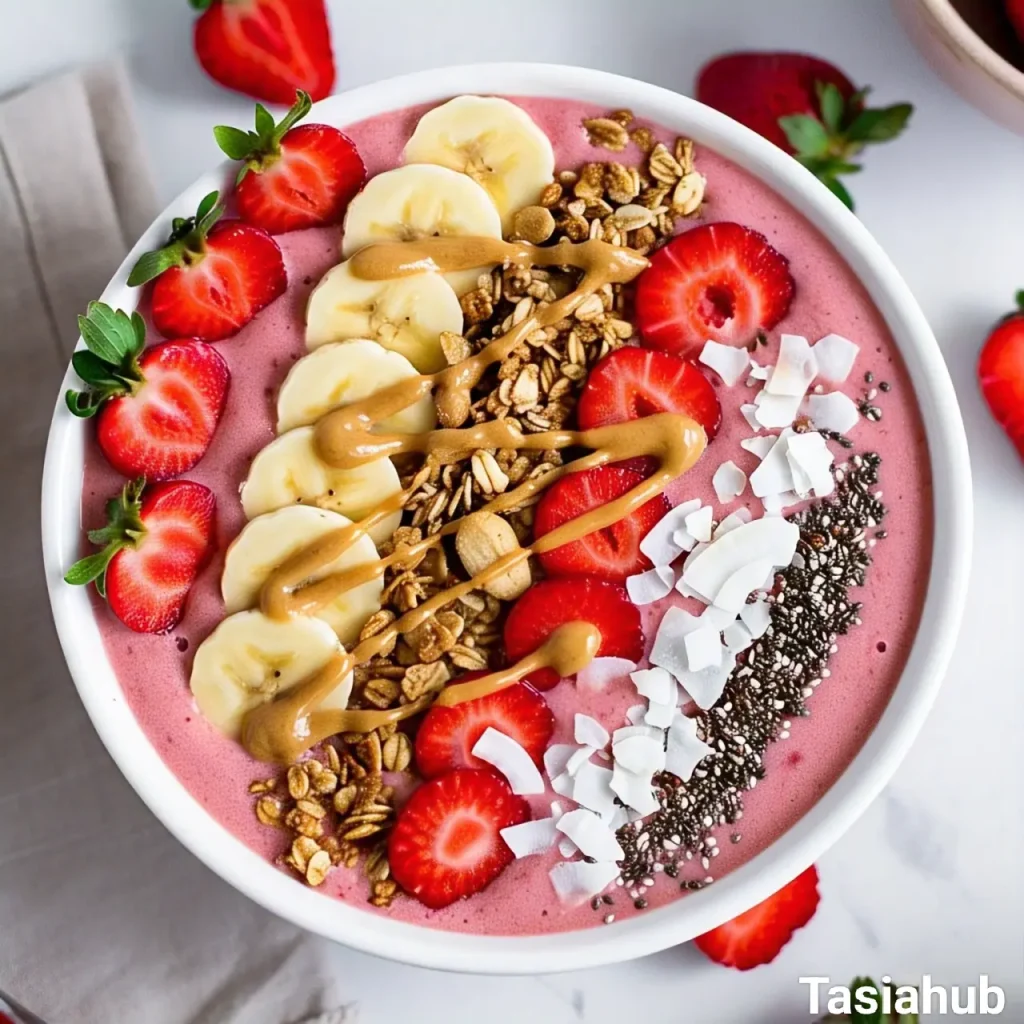
- Add your toppings: Now for the fun part — add your favorite toppings! Start with a generous scoop of granola for crunch, followed by a sprinkle of chia seeds or flax seeds. Add fresh strawberries for color and sweetness, and don’t forget to drizzle a little peanut butter or almond butter for some protein.
-
Garnish and finish: If you like coconut, sprinkle some coconut flakes on top for an extra tropical feel. You can also drizzle a little honey or maple syrup if you want a bit more sweetness.
- Pro Tip: Arrange your toppings in sections (like a swirl or in lines) to make the bowl look more visually appealing. It’s like making your smoothie bowl an art project!
Step 3: Serve and Enjoy
-
Grab your spoon and dig in: Once your toppings are all set, it’s time to enjoy your beautiful strawberry smoothie bowl.
- Pro Tip: If you’re planning to make this ahead of time, you can store the smoothie base in the fridge (without the toppings) for up to a day. Just add the toppings fresh when you’re ready to eat!
And that’s it! You’ve made yourself a delicious and healthy strawberry smoothie bowl. Enjoy!
Tips and Tricks for Success
- Use frozen fruit: Always use frozen strawberries (and any other fruit you add) to create a thick, creamy consistency that’s perfect for a smoothie bowl. Fresh fruit will give you a thinner texture.
- Don’t skimp on toppings: The toppings are what make the smoothie bowl exciting! Get creative with granola, seeds, nuts, fresh fruit, and even a drizzle of nut butter for extra flavor and texture.
- Adjust sweetness to taste: If you prefer a sweeter bowl, you can always add more honey, maple syrup, or a sweetener of your choice. Start small and taste-test!
- Blend in stages if needed: If your blender isn’t blending the frozen fruit well, pause and scrape the sides of the blender. You can also pulse it a few times to help break it down evenly.
- Serve immediately for best texture: For the best texture and flavor, serve the smoothie bowl immediately after assembling. Letting it sit too long can cause the base to become too thin.
Ingredient Substitutions and Variations
- Yogurt options: If you’re dairy-free, swap plain Greek yogurt for coconut yogurt or any plant-based yogurt you prefer. Both will still give you that creamy base.
- Milk alternatives: Any plant-based milk works here! Almond milk, oat milk, or coconut milk are great choices, depending on your flavor preferences.
- Other fruits: While strawberries are the star, feel free to add other fruits like blueberries, mango, or pineapple for a tropical twist. You can even make a mixed berry version if you have frozen berries on hand.
- Add protein: If you want an extra protein boost, blend in a scoop of protein powder (vanilla or unflavored) or toss in a spoonful of peanut butter or almond butter.
- Nutty topping alternatives: If you’re not a fan of granola, try using toasted oats, crushed nuts, or even a handful of cereal for crunch.
- Sweetener options: Instead of honey or maple syrup, you could use agave, stevia, or a date syrup for a healthier, lower-calorie option.
Serving Suggestions
- As a Breakfast Bowl: Start your morning with a strawberry smoothie bowl. Pair it with a warm cup of coffee or green tea to balance out the sweetness and add a boost of energy to your day.
- Post-Workout Fuel: This smoothie bowl is perfect for refueling after a workout. Add extra protein with a scoop of protein powder or a dollop of nut butter, and you’ve got a satisfying recovery meal.
- Light Dessert: Craving something sweet but want to keep it healthy? This smoothie bowl works wonderfully as a light dessert. Top with a few dark chocolate shavings for an indulgent yet guilt-free treat.
- Snack for Busy Days: On days when you’re running around, this smoothie bowl makes an easy, energizing snack. Prep it in the morning, and store it in the fridge for later when you need a quick pick-me-up.
- Meal Prep Option: If you like to meal prep, you can make the smoothie base in advance and store it in the fridge for up to a day. Just add your toppings when you’re ready to eat!

Storage and Reheating Instructions
- Smoothie Base Storage: The smoothie base can be stored in an airtight container in the fridge for up to 24 hours. Keep in mind that it will thicken as it sits, so you may need to add a little more milk to loosen it up before eating.
- Toppings: I recommend adding fresh toppings just before serving. Toppings like granola and fresh fruit are best enjoyed immediately to retain their texture and flavor.
- Freezing the Base: If you want to make the smoothie base ahead of time, you can freeze it! Pour the base into an ice cube tray and freeze it for up to 1 month. When you’re ready, just pop out a few cubes, blend them with a splash of milk, and enjoy!
Frequently Asked Questions
How do I make my smoothie bowl thicker?
To make your smoothie bowl thicker, use more frozen fruit and less liquid. Frozen bananas or strawberries are perfect for creating that creamy texture. If it’s still too runny, simply add a few more frozen ingredients until it thickens up.
Can I make this smoothie bowl in advance?
You can make the smoothie base ahead of time and store it in the fridge for up to 24 hours. However, it’s best to add the toppings fresh right before eating to keep them crunchy and colorful.
What toppings can I use besides granola?
The options are endless! You can top your smoothie bowl with seeds, nuts, coconut flakes, cacao nibs, or even a handful of your favorite berries. For something extra, drizzle peanut butter or almond butter on top for added flavor and protein.
Is this recipe gluten-free?
Yes! This strawberry smoothie bowl is naturally gluten-free as long as you choose gluten-free toppings like certified gluten-free granola or oats. Always check the packaging if you’re using packaged ingredients.
Can I use fresh strawberries instead of frozen?
You can, but using fresh strawberries will give you a thinner smoothie base. If you’re craving that thick, creamy texture, I highly recommend using frozen fruit.
Can I make this smoothie bowl vegan?
Absolutely! To make it vegan, simply swap the Greek yogurt for a dairy-free yogurt, like coconut yogurt, and use a plant-based milk like almond or oat milk.
Have any more questions or want to share your smoothie bowl creations? I’d love to hear from you! Drop a comment below or connect with me on social media for more fun recipes and tips.
Strawberry Smoothie Bowl
Equipment
- Blender
- Spoon or Small Bowl
- Measuring cups and spoons
- Cutting Board and Knife
- Spatula or Scraper
- Topping Containers
Ingredients
For the Smoothie Base:
- 1 ½ cups frozen strawberries
- 1 ripe banana
- ½ cup plain Greek yogurt or dairy-free yogurt
- ½ cup almond milk or milk of choice
- 1 tablespoon honey or maple syrup optional for sweetness
For Toppings:
- ¼ cup granola
- 2 tablespoons chia seeds or flax seeds
- Fresh strawberries for garnish
- 1 tablespoon coconut flakes optional
- 1 tablespoon peanut butter or almond butter optional
Instructions
Step 1: Prepare the Smoothie Base
- Add frozen strawberries to your blender: Start by placing the 1 ½ cups of frozen strawberries into the blender. Using frozen strawberries helps give the smoothie that thick, creamy texture that you want for a bowl.
- Add the banana: Peel the ripe banana and break it into chunks before adding it to the blender. This will add natural sweetness and help thicken the base.
- Add Greek yogurt and milk: Pour in ½ cup of plain Greek yogurt and ½ cup of almond milk (or any milk you prefer). The yogurt makes the base creamy, and the milk helps it blend smoothly. If you like it a little sweeter, add a tablespoon of honey or maple syrup.
- Blend it up: Secure the lid and blend on medium-high speed for 30 seconds to 1 minute until everything is smooth and creamy. If the mixture is too thick, you can add a splash more milk to help it blend better. You want the consistency to be thick but still spoonable.
- Pro Tip: If your blender is struggling to blend the frozen fruit, stop and scrape the sides, then continue blending. You can also pulse a few times to help break it down.
Step 2: Assemble the Smoothie Bowl
- Pour the smoothie base into your bowl: Once your smoothie is nice and creamy, carefully pour it into a bowl. You want to make sure the base fills the bowl almost to the top for a nice, full smoothie bowl.
- Add your toppings: Now for the fun part — add your favorite toppings! Start with a generous scoop of granola for crunch, followed by a sprinkle of chia seeds or flax seeds. Add fresh strawberries color and sweetness, and don’t forget to drizzle a little peanut butter or almond butter for some protein.
- Garnish and finish: If you like coconut, sprinkle some coconut flakes on top for an extra tropical feel. You can also drizzle a little honey or maple syrup if you want a bit more sweetness.
- Pro Tip: Arrange your toppings in sections (like a swirl or in lines) to make the bowl look more visually appealing. It’s like making your smoothie bowl an art project!
Step 3: Serve and Enjoy
- Grab your spoon and dig in: Once your toppings are all set, it’s time to enjoy your beautiful strawberry smoothie bowl.
- Pro Tip: If you’re planning to make this ahead of time, you can store the smoothie base in the fridge (without the toppings) for up to a day. Just add the toppings fresh when you’re ready to eat!
Notes
Nutritional Value (Per Serving)
- Calories: ~250–300 kcal
- Protein: ~8–10g
- Fat: ~7–10g
- Carbohydrates: ~35–40g
- Fiber: ~6–8g
- Sugar: ~20–25g
- Calcium: Good source
- Vitamins: High in vitamin C, potassium, and antioxidants
The nutritional information provided on this website is an estimate only and is intended for general guidance. We cannot guarantee its accuracy and recommend consulting a qualified healthcare professional or registered dietitian for personalized nutrition advice.