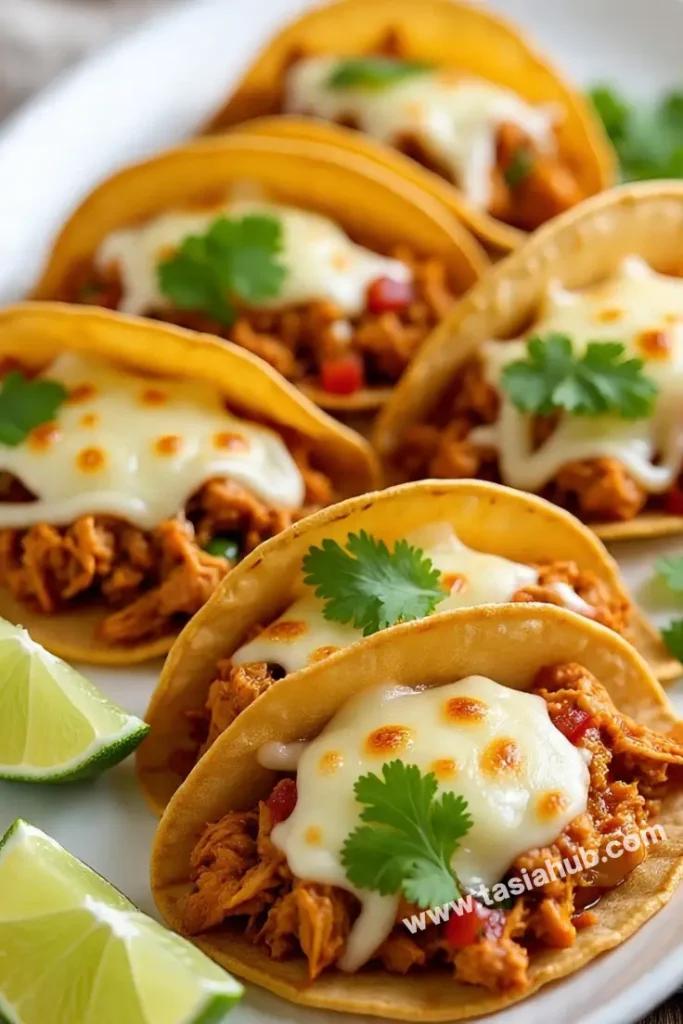
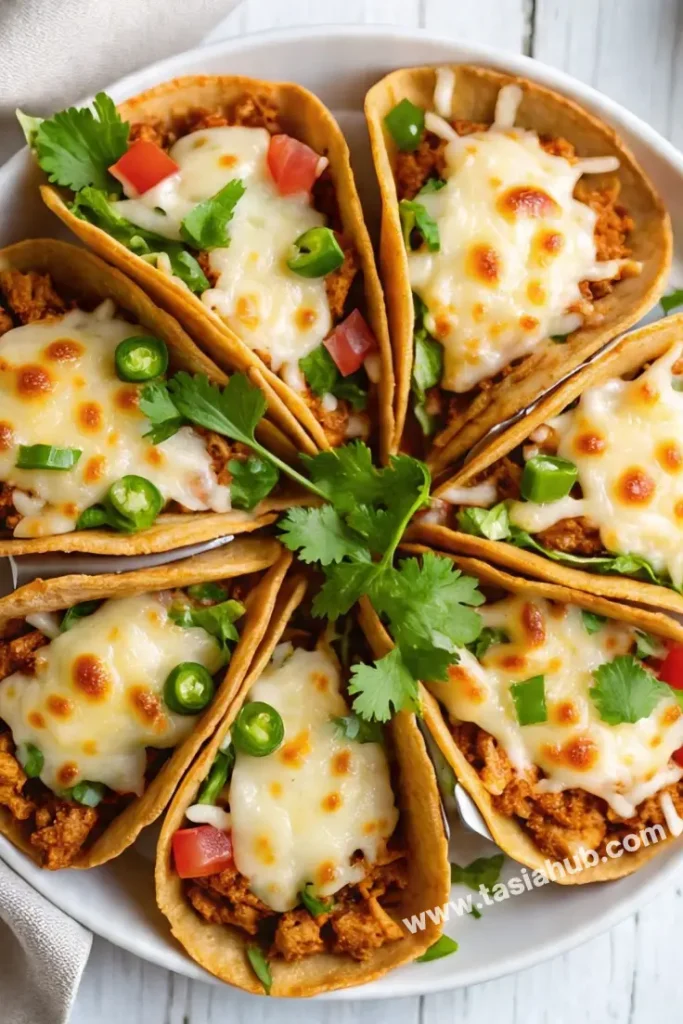
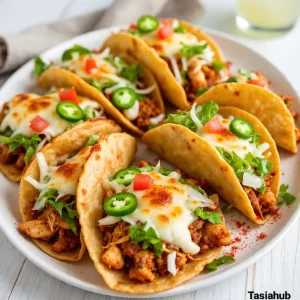
Baked Chicken Tacos

Let’s talk about tacos—specifically, baked chicken tacos that are crispy, cheesy, and ridiculously easy to make. If you’re craving something comforting but don’t want to spend all night in the kitchen, this is your answer. These tacos bring together juicy shredded chicken, bold seasonings, melted cheese, and that irresistible crunch you get from baking everything to golden perfection. It’s the kind of meal that feels like a treat but is low-effort enough for a weeknight.
What makes baked chicken tacos special is how everything comes together in the oven. You line up your taco shells, stuff them with a well-seasoned chicken filling, sprinkle on lots of cheese, and bake until the edges are toasty and the insides are melty. It’s fast, family-friendly, and leaves you with fewer dishes—because who wants a messy stovetop clean-up after taco night?
This is also a great way to use up leftover rotisserie chicken or any cooked chicken you already have in the fridge. Just shred it, mix with your favorite taco spices and salsa, and you’re basically halfway done. The oven does the heavy lifting, and all you have to do is load up the tacos and pop them in.
Baked chicken tacos are a go-to for casual dinners, game days, or even meal prep if you’re planning ahead. They’re easy to customize too—add black beans, corn, jalapeños, or use a mix of cheeses to switch things up. Plus, since everything is held together in the taco shell as it bakes, they’re less messy and easier to serve than traditional tacos. It’s taco night made even better.
Why You’ll Love It
- Crispy, Oven-Baked Goodness: Baking the tacos makes the shells perfectly crispy on the edges while keeping the inside warm and cheesy. No soggy bottoms here!
- Quick and Easy: With pre-cooked or rotisserie chicken, this recipe comes together in under 30 minutes. It’s ideal for busy weeknights when you want something satisfying without the fuss.
- Great for a Crowd: These tacos are made all at once in a single baking dish, so they’re perfect for feeding a group—whether it’s family dinner, game night, or casual get-together.
- Customizable Fillings: You can easily tweak the filling based on what you have on hand—add beans, corn, hot sauce, or switch up the protein. The possibilities are endless.
- Kid-Approved & Freezer-Friendly: They’re cheesy, crunchy, and fun to eat, which makes them a hit with kids. Plus, you can prep and freeze a batch for easy dinners later on.
Ingredient List
For the Taco Filling:
- 2 cups cooked shredded chicken (rotisserie works great)
- 1 cup salsa (any kind you like—mild, medium, or spicy)
- 1/2 cup refried beans
- 1 teaspoon chili powder
- 1/2 teaspoon cumin
- 1/2 teaspoon garlic powder
- Salt to taste
For Assembling:
- 10–12 hard taco shells
- 1 1/2 cups shredded cheese (Mexican blend or cheddar)
- Cooking spray or a light drizzle of oil
Optional Toppings (after baking):
- Sour cream
- Shredded lettuce
- Diced tomatoes
- Jalapeños
- Fresh cilantro
Ingredient Notes
- Shredded Chicken: Rotisserie chicken saves time and adds tons of flavor. You can also use leftover grilled or baked chicken.
- Salsa: Go for a chunky salsa—it keeps the filling from getting too watery.
- Refried Beans: This helps hold everything together and adds a creamy texture to the filling.
- Taco Shells: Stand-and-stuff shells are the easiest to fill and bake without tipping over.
- Cheese: A mix of cheddar and Monterey Jack or a pre-shredded Mexican blend melts beautifully and gives that gooey, cheesy finish.
- Spices: Don’t skip the cumin and chili powder—they bring warmth and depth to the chicken filling.
Kitchen Equipment Needed
- Large Mixing Bowl – For combining the chicken, beans, salsa, and spices.
- Baking Dish (9×13) – Holds the tacos upright while they bake. I love using a ceramic one—it retains heat well and looks nice for serving.
- Spoon or Small Spatula – Makes filling the taco shells less messy.
- Measuring Spoons & Cups – For getting the seasoning and filling ratios just right.
- Aluminum Foil (optional) – Helps keep tacos from browning too quickly if needed.
- Oven Mitts – Always helpful when pulling out a hot dish—better safe than sorry!
Instructions
Step 1: Preheat the Oven
- Set your oven to 375°F (190°C).
- Lightly grease a 9×13 baking dish with cooking spray or a drizzle of oil. This helps the taco shells crisp up and prevents sticking.
Step 2: Make the Chicken Filling
- In a large mixing bowl, combine 2 cups of shredded chicken, 1 cup of salsa, 1/2 cup of refried beans, 1 tsp chili powder, 1/2 tsp cumin, 1/2 tsp garlic powder, and a pinch of salt.
- Stir until everything is evenly coated and combined. The mixture should be moist but not runny.
Pro Tip: If your salsa is very watery, strain it slightly before mixing—it keeps the taco shells from getting soggy.
Step 3: Warm the Taco Shells (Optional but Helpful)
- Place taco shells on a baking sheet and warm them in the oven for about 3–4 minutes.
- This makes them more flexible and less likely to crack when filling.
Step 4: Fill the Taco Shells
- Carefully stand the taco shells upright in your prepared baking dish.
- Spoon 2–3 tablespoons of the chicken filling into each shell. Fill them about 3/4 of the way to leave room for cheese.
Pro Tip: If your shells are tipping over, lightly scrunch a strip of foil between them to help them stay upright.
Step 5: Add the Cheese
- Sprinkle a generous amount of shredded cheese over the top of each taco. Use about 1 to 2 tablespoons per taco, depending on how cheesy you like it.
- Make sure the cheese is spread evenly—it melts better and gives that golden finish.
Step 6: Bake the Tacos
- Place the baking dish in the oven and bake for 12–15 minutes, or until the cheese is melted and bubbly and the edges of the taco shells are lightly golden.
- Watch closely during the last few minutes to avoid burning.
Pro Tip: For extra crispy tacos, bake uncovered. If you want a softer texture, loosely tent the dish with foil.
Step 7: Add Toppings and Serve
- Remove from the oven and let the tacos sit for 2–3 minutes to cool slightly and firm up.
- Top with your favorite extras—shredded lettuce, diced tomatoes, jalapeños, sour cream, or fresh cilantro.
- Serve immediately while hot and crisp!
Tips and Tricks for Success
- Use Stand-and-Stuff Shells: They’re much easier to fill and arrange upright in the baking dish—no tipping over or losing filling.
- Don’t Overfill: Keep the filling about 3/4 full to avoid overflow and soggy shells. A little goes a long way once everything melts together.
- Preheat Shells Briefly: Warming them for just a few minutes before filling keeps them from cracking and helps them crisp up better.
- Layer Smartly: Put a little cheese on the bottom and the top if you want extra cheesy tacos that hold together better.
- Serve Immediately: These are best straight out of the oven while the shells are still crisp. If you’re serving later, keep the shells and filling separate until ready to bake.
Ingredient Substitutions and Variations
- Swap the Protein: Use ground beef, ground turkey, shredded pork, or even black beans for a vegetarian version.
- Try Different Beans: If you don’t have refried beans, mashed black beans or pinto beans work well too.
- Use Soft Tortillas: Want something less crunchy? Use small flour tortillas and roll them like taquitos before baking.
- Change Up the Salsa: Use green salsa (salsa verde), smoky chipotle salsa, or even enchilada sauce for a twist in flavor.
- Add Veggies: Mix in corn, chopped bell peppers, or diced onions to boost the flavor and texture.
- Play with the Cheese: Mozzarella, pepper jack, or even a sprinkle of feta can add a fun flavor twist.
Serving Suggestions
- With Mexican Rice or Cilantro Lime Rice: A scoop of rice on the side makes it a complete, satisfying meal.
- Add a Simple Side Salad: I love serving these tacos with a crunchy green salad tossed in lime vinaigrette—it adds freshness and balance.
- Serve with Guacamole and Chips: A bowl of guac and some tortilla chips is always a hit, especially if you’re serving a crowd.
- Pair with Street Corn (Elote): That creamy, spicy, cheesy corn on the cob is the perfect complement to these baked tacos.
- Top with a Drizzle of Hot Sauce or Crema: Personalize each taco with a drizzle of chipotle mayo, sour cream, or your favorite hot sauce.
Storage and Reheating Instructions
- Storage: Store leftover tacos in an airtight container in the fridge for up to 2 days. Keep in mind the shells may soften over time.
- Separate if Possible: If you’re prepping ahead, store the filling and shells separately to avoid sogginess.
- Reheat in the Oven: Place tacos on a baking sheet and warm in a 350°F (175°C) oven for 10–12 minutes to crisp them back up.
- Microwave Option: You can reheat in the microwave for 1–2 minutes, but the shells will be softer. Still tasty—just less crispy.
- Freezing Tip: The chicken filling freezes well! Store it in a freezer-safe bag or container for up to 2 months. Just thaw and use when ready.
Frequently Asked Questions
Can I make these tacos ahead of time?
Yes! You can prep the filling a day in advance and store it in the fridge. When you’re ready to eat, just fill the taco shells, add cheese, and bake fresh for best texture.
What kind of salsa works best?
Go with a chunky salsa to avoid making the filling too watery. I personally love using fire-roasted tomato salsa for an extra smoky flavor.
How do I keep the taco shells from getting soggy?
Don’t skip the pre-bake! Warming the shells first and using a thicker filling (thanks to the refried beans) helps keep everything nice and crispy.
Can I use soft tortillas instead of hard taco shells?
Absolutely! Use small flour tortillas and roll them like taquitos or enchiladas before baking. You’ll get a softer, more wrap-style result.
Are these tacos spicy?
Not unless you want them to be! The heat level depends on your salsa and seasoning. You can always add hot sauce or jalapeños for extra kick.
What’s the best way to store leftovers?
If you have leftovers, try to store the filling and taco shells separately. This keeps the shells from turning soggy. When ready to eat, just reassemble and pop into the oven or microwave.
Did you try this recipe? Let me know in the comments how it turned out!
Don’t forget to share your photos on Instagram and tag me @tasiahub_ or use the hashtag #tasiahub. I’d love to see your creations!
Baked Chicken Tacos
Equipment
- Large mixing bowl
- Baking Dish (9×13)
- Spoon or small spatula
- Measuring spoons & cups
- Aluminum Foil (Optional)
- Oven Mitts
Ingredients
For the Taco Filling:
- 2 cups cooked shredded chicken rotisserie works great
- 1 cup salsa any kind you like—mild, medium, or spicy
- 1/2 cup refried beans
- 1 teaspoon chili powder
- 1/2 teaspoon cumin
- 1/2 teaspoon garlic powder
- Salt to taste
For Assembling:
- 10 –12 hard taco shells
- 1 1/2 cups shredded cheese Mexican blend or cheddar
- Cooking spray or a light drizzle of oil
Optional Toppings (after baking):
- Sour cream
- Shredded lettuce
- Diced tomatoes
- Jalapeños
- Fresh cilantro
Instructions
Step 1: Preheat the Oven
- Set your oven to 375°F (190°C).
- Lightly grease a 9×13 baking dish with cooking spray or a drizzle of oil. This helps the taco shells crisp up and prevents sticking.
Step 2: Make the Chicken Filling
- In a large mixing bowl, combine 2 cups of shredded chicken, 1 cup of salsa, 1/2 cup of refried beans, 1 tsp chili powder, 1/2 tsp cumin, 1/2 tsp garlic powder, and a pinch of salt.
- Stir until everything is evenly coated and combined. The mixture should be moist but not runny.
- Pro Tip: If your salsa is very watery, strain it slightly before mixing—it keeps the taco shells from getting soggy.
Step 3: Warm the Taco Shells (Optional but Helpful)
- Place taco shells on a baking sheet and warm them in the oven for about 3–4 minutes.
- This makes them more flexible and less likely to crack when filling.
Step 4: Fill the Taco Shells
- Carefully stand the taco shells upright in your prepared baking dish.
- Spoon 2–3 tablespoons of the chicken filling into each shell. Fill them about 3/4 of the way to leave room for cheese.
- Pro Tip: If your shells are tipping over, lightly scrunch a strip of foil between them to help them stay upright.
Step 5: Add the Cheese
- Sprinkle a generous amount of shredded cheese over the top of each taco. Use about 1 to 2 tablespoons per taco, depending on how cheesy you like it.
- Make sure the cheese is spread evenly—it melts better and gives that golden finish.
Step 6: Bake the Tacos
- Place the baking dish in the oven and bake for 12–15 minutes, or until the cheese is melted and bubbly and the edges of the taco shells are lightly golden.
- Watch closely during the last few minutes to avoid burning.
- Pro Tip: For extra crispy tacos, bake uncovered. If you want a softer texture, loosely tent the dish with foil.
Step 7: Add Toppings and Serve
- Remove from the oven and let the tacos sit for 2–3 minutes to cool slightly and firm up.
- Top with your favorite extras—shredded lettuce, diced tomatoes, jalapeños, sour cream, or fresh cilantro.
- Serve immediately while hot and crisp!
Notes
Nutritional Value (Per Taco)
- Calories: 200–250 kcal
- Protein: 12–15g
- Carbohydrates: 15–20g
- Fat: 10–14g
- Fiber: 2–4g
- Sugar: 1–2g