4th of July Popcorn
Looking for a festive and ridiculously easy treat to add some spark to your Independence Day celebration? 4th of July Popcorn is the answer. It’s one of those snacks that looks super fun and colorful, yet takes minimal effort to pull together — perfect for backyard BBQs, poolside movie nights, or just munching while watching fireworks. The combo of sweet, salty, and crunchy with a red, white, and blue twist makes this popcorn totally irresistible for both kids and adults.
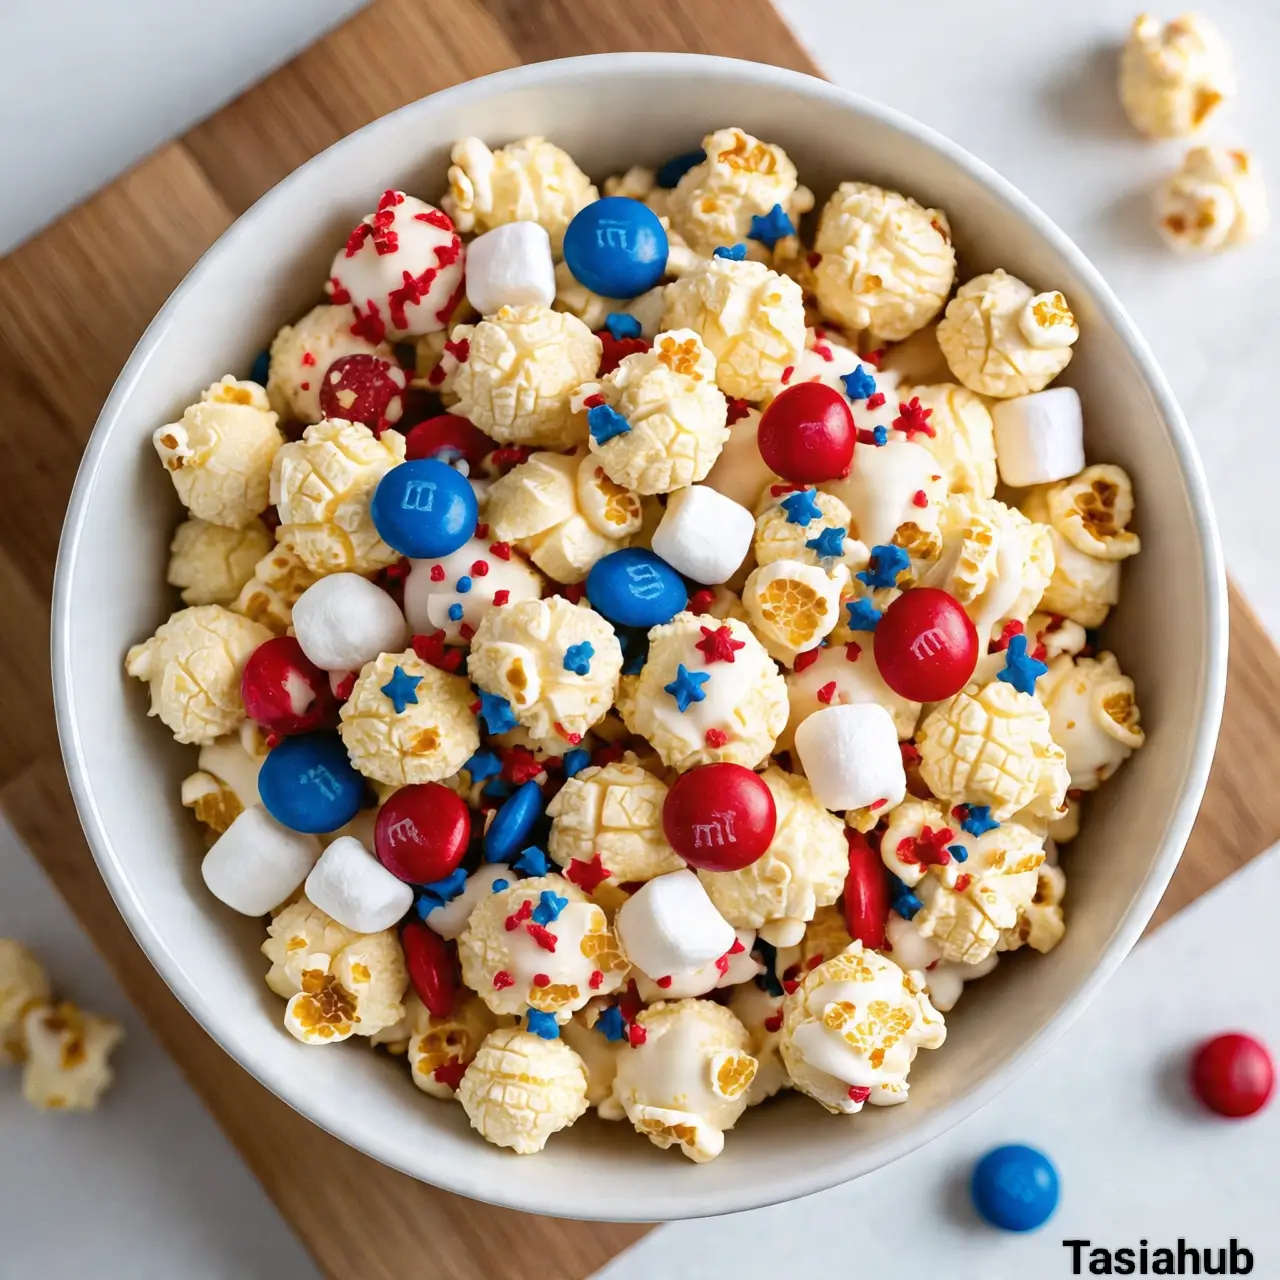
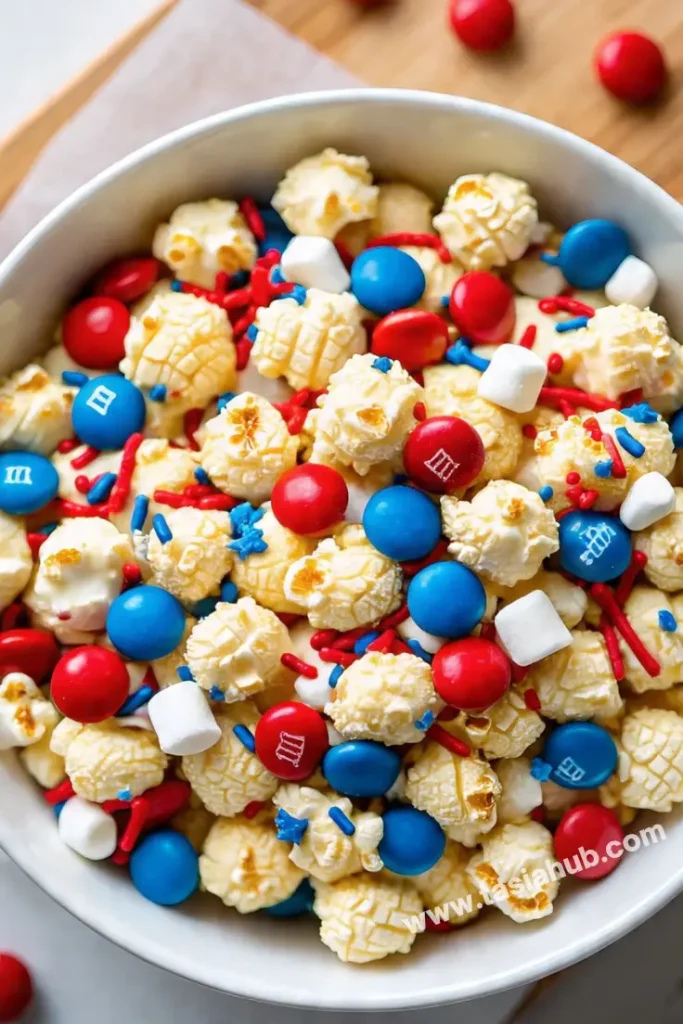
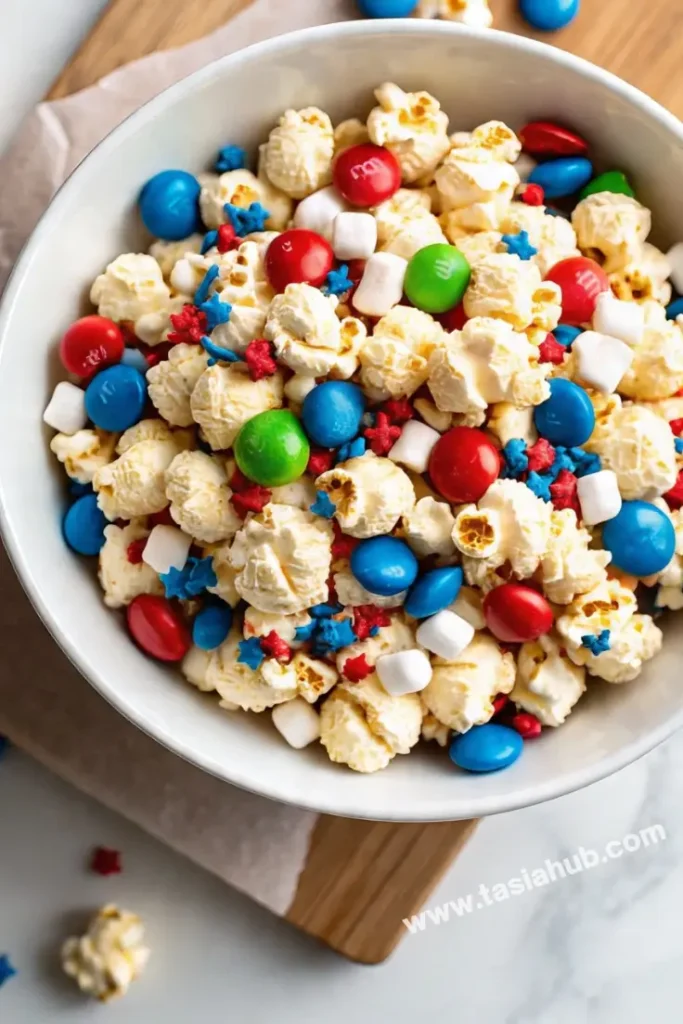
This treat is all about the vibe. You take regular popcorn, coat it in white chocolate or candy melts, and then sprinkle it with patriotic sprinkles, candy pieces, or even mini marshmallows. It’s totally customizable depending on what you have on hand, which means you can make a big batch in no time without stressing over exact measurements. It’s one of those recipes where the goal is fun, not perfection — which honestly makes it more enjoyable to prepare and share.
I especially love that this recipe doubles as a cute party favor. Just scoop the popcorn into little treat bags or cups, tie them with red and blue ribbon, and boom — instant party-ready snack. It’s also a fun one to make with kids. They love helping drizzle the melted chocolate and tossing on the sprinkles (a little too enthusiastically, usually). It’s messy, creative, and delicious — a win all around.
Whether you’re hosting a big celebration or just hanging out with a few close friends and family, this 4th of July Popcorn adds that festive touch without taking up your whole day. You get something colorful and crowd-pleasing, with very little effort — and it tastes as fun as it looks.
Why You’ll Love It
- Super Easy to Make – No fancy ingredients or cooking skills required. Just pop, drizzle, and sprinkle!
- Festive and Eye-Catching – The red, white, and blue colors instantly give your snack table that 4th of July wow-factor.
- Perfect for Parties – Serve it in bowls, cups, or little treat bags — it’s a hit at BBQs, picnics, fireworks shows, and more.
- Kid-Friendly Fun – Kids love helping decorate it, and even picky eaters can’t resist the sweet-salty combo.
- Customizable – Add in your favorite candies, sprinkles, pretzels, or even cereal — make it your own with what you have on hand!
Ingredient List
- 8 cups popped popcorn (plain or lightly salted)
- 1 ½ cups white chocolate chips or white candy melts
- 2 tablespoons red, white, and blue sprinkles
- ½ cup red and blue M&M’s (or any patriotic-colored candy)
- Optional: mini marshmallows, pretzels, or colored candy drizzle
Ingredient Notes
- Popcorn – Use air-popped or lightly salted popcorn. Avoid buttery microwave popcorn—it can mess with the chocolate coating.
- White chocolate chips/candy melts – Candy melts are easier to work with and set faster, but white chocolate chips work fine if melted gently.
- Sprinkles – Go for jimmies or confetti-style sprinkles for best texture and color payoff. Nonpareils can get a bit messy.
- M&M’s – I usually grab a red, white & blue mix (available seasonally), but you can sort regular ones too.
- Add-ins – Mini pretzels or marshmallows add great texture! Drizzling extra colored candy melts on top gives it that “wow” look.
Kitchen Equipment Needed
- Large mixing bowl – For tossing the popcorn and mix-ins together. I love using a big lightweight plastic one so nothing spills over.
- Microwave-safe bowl or double boiler – To melt the white chocolate or candy melts smoothly.
- Baking sheet lined with parchment paper – Perfect for spreading the coated popcorn to cool and harden without sticking.
- Spatula or wooden spoon – Helps mix everything gently without crushing the popcorn.
- Measuring cups/spoons – For getting the candy and sprinkles just right (though it’s okay to eyeball for fun).
Instructions
Step 1: Pop the Popcorn
- Start by popping about 8 cups of popcorn. You can use an air popper, stovetop, or even plain microwave popcorn.
- Once popped, remove any unpopped kernels — no one wants a surprise crunch!
- Transfer the popcorn to a large mixing bowl.
Pro Tip: Use plain or lightly salted popcorn. Buttered popcorn can prevent the chocolate from sticking properly.
Step 2: Melt the White Chocolate or Candy Melts
- Add 1 ½ cups of white chocolate chips or candy melts to a microwave-safe bowl.
- Microwave in 20-second bursts, stirring after each round, until fully melted and smooth.
- Be careful not to overheat — white chocolate burns quickly!
Pro Tip: Stir even if it doesn’t look melted yet — the residual heat helps it smooth out without scorching.
Step 3: Drizzle and Toss
- Drizzle the melted chocolate over the popcorn in the large bowl.
- Use a rubber spatula or clean hands (wear gloves if preferred) to gently toss the popcorn until it’s evenly coated.
- Make sure most pieces have a little chocolate on them — that’s what helps the toppings stick!
Pro Tip: Work quickly! White chocolate starts to set fast, especially if your kitchen is cool.
Step 4: Add the Festive Toppings
- While the coating is still tacky, sprinkle on your red, white, and blue sprinkles and add the M&M’s (and any extras like marshmallows or pretzels).
- Gently toss again just to distribute the mix-ins without breaking the popcorn.
Step 5: Let It Set
- Line a baking sheet with parchment paper.
- Spread the coated popcorn mixture out in an even layer — try to keep it loose so it doesn’t clump too much.
- Let it sit at room temperature for 20–30 minutes or until the chocolate is completely set.
Pro Tip: If you’re short on time, pop the tray into the fridge for about 10 minutes to speed things up.
Step 6: Break Apart and Serve
- Once fully set, gently break the popcorn into clusters or individual pieces.
- Serve immediately or store in an airtight container for up to 3–4 days (if it lasts that long!).
Pro Tip: For parties or gifts, portion it into cupcake liners, small treat bags, or mason jars — it looks adorable and stays fresh!
Tips and Tricks for Success
- Work quickly with the melted chocolate – Once it’s poured, mix fast before it starts to harden. Have your sprinkles and candies ready to go.
- Use parchment or wax paper – This makes cleanup a breeze and keeps the popcorn from sticking to your tray.
- Let it cool completely before storing – Warm popcorn or unset chocolate can lead to soggy, sticky results in containers.
- Avoid buttered popcorn – The oils can prevent the chocolate from sticking and throw off the flavor balance.
- Make it ahead – You can prep this 1–2 days before your party. Just store it in an airtight container in a cool spot.
Ingredient Substitutions and Variations
- White Chocolate Chips → Candy Melts – Candy melts are easier to work with and set more quickly if you’re short on time.
- M&M’s → Skittles, Sixlets, or jellybeans – Use any red, white, and blue candy for a colorful crunch.
- Sprinkles → Colored sugar or crushed candy canes – For a different texture or festive flavor twist.
- Mini Marshmallows → Mini pretzels or cereal – Add more crunch with pretzels or cereal like Cheerios or Rice Chex.
- Popcorn → Kettle corn – For a sweet-salty variation that’s extra addictive!
Serving Suggestions
- Party Snack Bowls – Serve in large bowls at your 4th of July BBQ or picnic table so guests can grab and munch easily.
- Individual Treat Bags – Scoop into clear treat bags, tie with red and blue ribbon, and hand out as party favors—super cute and mess-free.
- Movie Night Snack – I love pairing this popcorn with a cozy summer movie night on the couch—bonus points if you’re watching fireworks from home!
- Kids’ Party Cups – Portion into mini paper cups for little hands. It keeps serving sizes tidy and adds a festive touch to the kids’ table.
- Dessert Platter Filler – Add it to a dessert board alongside cookies, brownies, and fruit skewers for a colorful, crunchy addition.
Storage and Reheating Instructions
- Store in an airtight container – Keep at room temperature for up to 3–4 days for maximum freshness.
- Avoid warm or humid spots – Heat can cause the chocolate to melt and make the popcorn soggy.
- No fridge needed (unless you’re setting it) – Once set, store at room temp. Refrigeration can cause condensation and ruin the texture.
- Re-crisp if needed – If the popcorn softens, pop it in a 250°F (120°C) oven for 5–7 minutes, then let it cool completely before storing again.
- Don’t stack it too tightly – Clumping can crush the popcorn and ruin the fun mix-ins—use shallow containers if possible.
Frequently Asked Questions
Can I use microwave popcorn for this recipe?
Yes, as long as it’s plain or lightly salted! Avoid buttered varieties since the oils can mess with the chocolate coating.
How far in advance can I make this?
You can make it 1–2 days ahead. Just store it in an airtight container at room temperature and keep it away from heat and moisture.
Can I make this without white chocolate?
Absolutely! You can use colored candy melts (red or blue) or even skip the coating altogether and just toss in colorful candies and sprinkles for a lighter version.
How do I keep the popcorn from getting soggy?
Let everything cool and set completely before storing. Also, make sure your add-ins are dry (no fresh fruit or wet toppings!).
Is this safe for kids with allergies?
Always check your ingredient labels—especially for chocolate, candy, and sprinkles. For a nut-free version, skip M&M’s or choose allergen-friendly alternatives.
Can I double or triple the recipe for a big crowd?
Definitely! Just melt the chocolate in batches so it’s easier to manage, and spread everything out on multiple trays to cool evenly.
Did you try this recipe? Let me know in the comments how it turned out!
Don’t forget to share your photos on Instagram and tag me @tasiahub_ or use the hashtag #tasiahub. I’d love to see your creations!

4th of July Popcorn
Equipment
- Large mixing bowl
- Microwave-safe bowl or double boiler
- Baking sheet lined with parchment paper
- Spatula or wooden spoon
- Measuring Cups & Spoons
Ingredients
- 8 cups popped popcorn plain or lightly salted
- 1 ½ cups white chocolate chips or white candy melts
- 2 tablespoons red white, and blue sprinkles
- ½ cup red and blue M&M’s or any patriotic-colored candy
- Optional: mini marshmallows pretzels, or colored candy drizzle
Instructions
Step 1: Pop the Popcorn
- Start by popping about 8 cups of popcorn. You can use an air popper, stovetop, or even plain microwave popcorn.
- Once popped, remove any unpopped kernels — no one wants a surprise crunch!
- Transfer the popcorn to a large mixing bowl.
- Pro Tip: Use plain or lightly salted popcorn. Buttered popcorn can prevent the chocolate from sticking properly.
Step 2: Melt the White Chocolate or Candy Melts
- Add 1 ½ cups of white chocolate chips or candy melts to a microwave-safe bowl.
- Microwave in 20-second bursts, stirring after each round, until fully melted and smooth.
- Be careful not to overheat — white chocolate burns quickly!
- Pro Tip: Stir even if it doesn’t look melted yet — the residual heat helps it smooth out without scorching.
Step 3: Drizzle and Toss
- Drizzle the melted chocolate over the popcorn in the large bowl.
- Use a rubber spatula or clean hands (wear gloves if preferred) to gently toss the popcorn until it’s evenly coated.
- Make sure most pieces have a little chocolate on them — that’s what helps the toppings stick!
- Pro Tip: Work quickly! White chocolate starts to set fast, especially if your kitchen is cool.
Step 4: Add the Festive Toppings
- While the coating is still tacky, sprinkle on your red, white, and blue sprinkles and add the M&M’s (and any extras like marshmallows or pretzels).
- Gently toss again just to distribute the mix-ins without breaking the popcorn.
Step 5: Let It Set
- Line a baking sheet with parchment paper.
- Spread the coated popcorn mixture out in an even layer — try to keep it loose so it doesn’t clump too much.
- Let it sit at room temperature for 20–30 minutes or until the chocolate is completely set.
- Pro Tip: If you’re short on time, pop the tray into the fridge for about 10 minutes to speed things up.
Step 6: Break Apart and Serve
- Once fully set, gently break the popcorn into clusters or individual pieces.
- Serve immediately or store in an airtight container for up to 3–4 days (if it lasts that long!).
- Pro Tip: For parties or gifts, portion it into cupcake liners, small treat bags, or mason jars — it looks adorable and stays fresh!
Notes
Nutritional Value (per serving, approximate)
- Calories: 200–250 kcal
- Fat: 10–12g
- Carbohydrates: 30–35g
- Sugar: 18–22g
- Protein: 2–3g