4th of July Ice Cream Cake
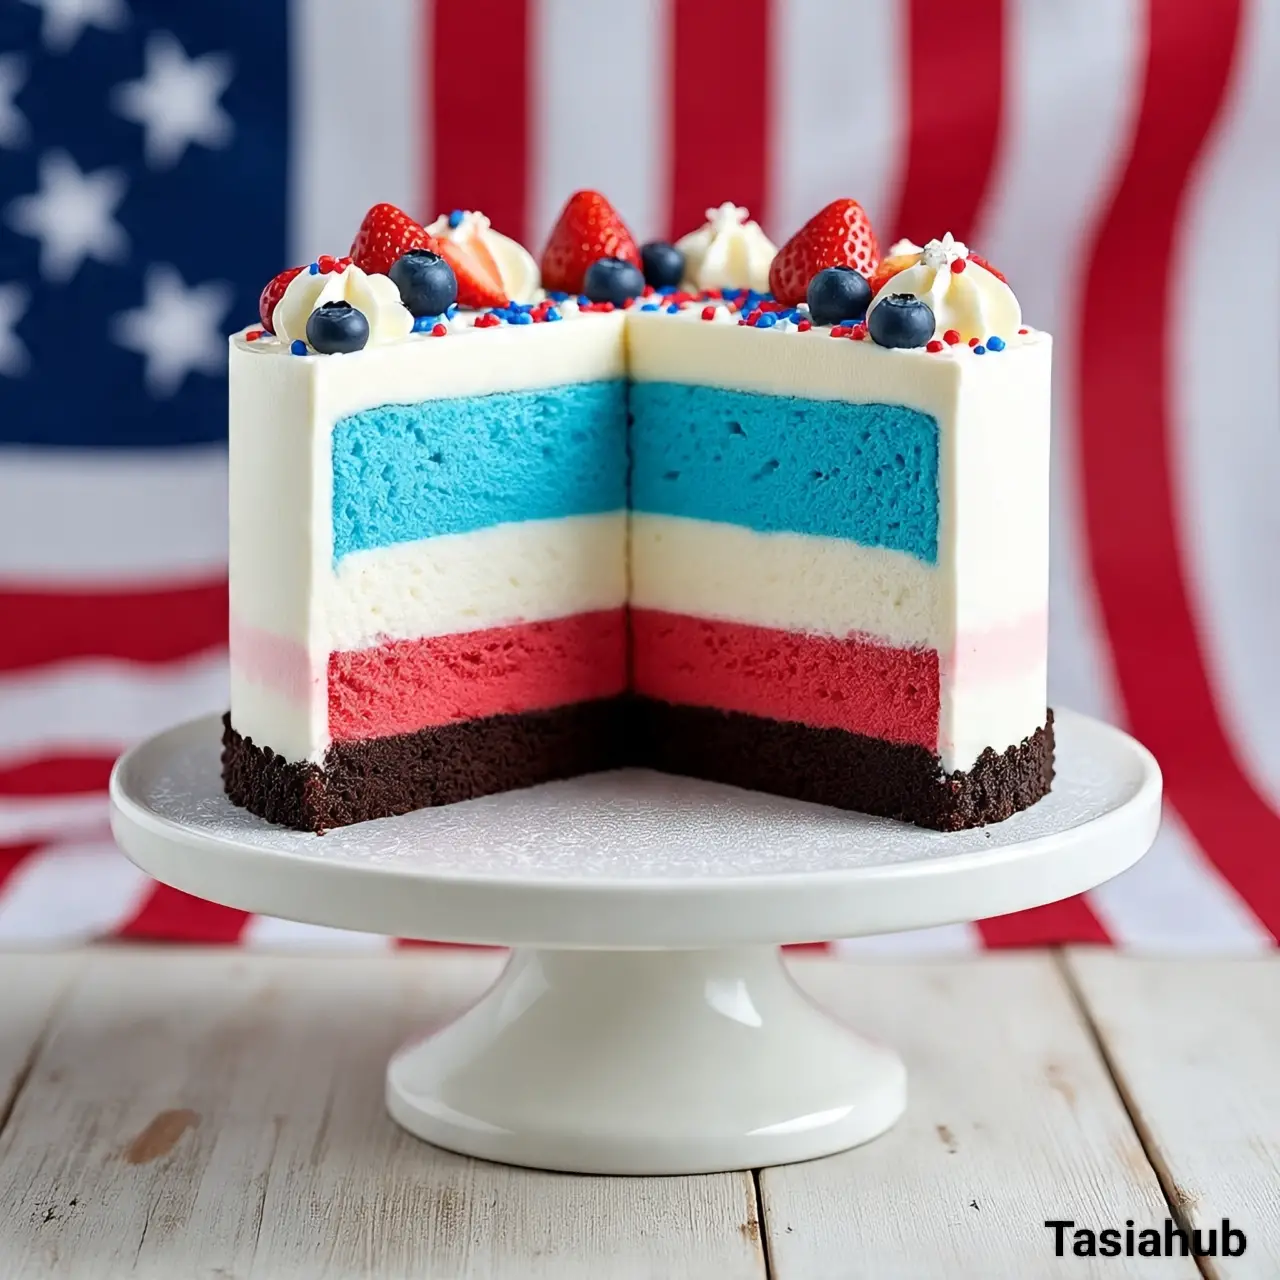
What better way to cool down and celebrate on the 4th of July than with an ice cream cake that’s bursting with patriotic colors and layered with sweet, creamy goodness? This dessert is a total showstopper—festive, refreshing, and perfect for summer celebrations. Whether you’re hosting a backyard barbecue, heading to a potluck, or just chilling with the family and watching fireworks, this cake brings the wow without too much fuss.
The beauty of this ice cream cake is that it looks impressive, but it’s surprisingly simple to put together. It combines classic American flavors—think vanilla, berry, and a touch of chocolate or cookie crunch—with red, white, and blue colors that scream “Independence Day.” You don’t need to be a professional baker either; this is the kind of recipe that’s forgiving, fun, and even better if the kids help out. Plus, no oven time required, which is a huge win in summer heat.
This cake layers together different flavors of ice cream, sometimes broken up by crushed cookies, cake bits, or even whipped topping to add texture and contrast. You can get creative with it—use store-bought ingredients to save time or go fully homemade if you’re feeling ambitious. And the best part? You build it in a simple springform pan or loaf tin and let the freezer do all the work. Once it’s set, decorate with berries, sprinkles, or colored whipped cream, and you’re ready to serve.
There’s something a little nostalgic about it too—it’s the kind of dessert that reminds you of childhood summers, flag-themed parties, and running barefoot with sparklers. But even as adults, this cake feels like the best kind of indulgence: cold, creamy, and completely celebratory. Whether you make it once a year or turn it into a summer staple, it’s bound to bring smiles and second servings.
Why You’ll Love It
- Festive and Eye-Catching: With layers of red, white, and blue, this ice cream cake is a patriotic centerpiece that instantly brightens up your dessert table.
- No-Bake and Easy to Assemble: No oven, no problem! It’s a fun, low-effort dessert that anyone can make—perfect for hot summer days when you’d rather not turn on the stove.
- Customizable Flavors: You can mix and match your favorite ice cream flavors, use store-bought shortcuts, or add your own personal twist with cookies, brownies, or fresh berries.
- Make-Ahead Friendly: This cake needs freezer time, which means you can make it a day or two in advance and have one less thing to worry about on the 4th.
- A Hit with All Ages: Kids love the colorful layers and creamy texture, while adults appreciate the nostalgic flavor and cool relief from the summer heat.
Ingredient List
For the Ice Cream Cake Layers
- 1.5 quarts vanilla ice cream (softened)
- 1.5 quarts strawberry or raspberry ice cream (softened)
- 1.5 quarts blueberry or blue raspberry ice cream (softened)
- 1 package (14 oz) Oreo cookies or chocolate sandwich cookies (crushed)
- 1/2 cup unsalted butter (melted)
For the Topping & Decorations
- 2 cups heavy whipping cream
- 1/4 cup powdered sugar
- 1/2 teaspoon vanilla extract
- Fresh strawberries and blueberries (for garnish)
- Red, white, and blue sprinkles
Ingredient Notes
- Use good-quality ice cream – It really makes the flavor pop. I like using brands like Häagen-Dazs or Tillamook for creaminess and taste.
- Let your ice cream soften – Don’t rush this part! Softened ice cream spreads evenly and gives you cleaner layers.
- Crushed Oreos make the best base – You can swap with graham crackers or shortbread if you prefer a lighter crust.
- Don’t skip the whipped cream topping – Homemade whipped cream gives this cake a fluffy, fresh finish.
- Fresh berries add a burst of flavor and color – Especially important if you’re serving this as the main dessert on the 4th.
Kitchen Equipment Needed
- 9-inch springform pan – Perfect for easy layering and releasing the cake cleanly.
- Mixing bowls – You’ll need a few for mixing crust, whipping cream, and holding ice cream.
- Hand mixer or stand mixer – Makes whipping the cream fast and effortless. I love using my KitchenAid for this.
- Spatula or offset spatula – For smoothing each ice cream layer evenly.
- Food processor or zip-top bag + rolling pin – To crush the cookies for the crust.
- Parchment paper – Optional, but lining the bottom helps with clean slices.
- Freezer space – Make sure there’s a flat shelf ready; the cake needs several hours to set properly.
Instructions
Step 1: Prepare the Cookie Crust
- Crush the cookies: Add your Oreo cookies to a food processor and pulse until finely ground. No processor? Place them in a zip-top bag and crush with a rolling pin.
- Mix with melted butter: In a bowl, stir together the crushed cookies and melted butter until the texture is like wet sand.
- Press into pan: Line the bottom of a 9-inch springform pan with parchment paper (optional, but helps with serving), then press the cookie mixture firmly into an even layer.
- Freeze to set: Pop the crust into the freezer for at least 15 minutes while you prep your ice cream layers.
Pro Tip: Use the bottom of a measuring cup to press the crust down evenly—it helps pack it tightly so it holds together well.
Step 2: Add the First Ice Cream Layer (Strawberry or Raspberry)
- Soften the ice cream: Let the strawberry ice cream sit out for 10–15 minutes until it’s soft and spreadable.
- Spread evenly: Scoop the softened ice cream over the chilled crust and gently spread it into an even layer using a spatula or offset spatula.
- Freeze to firm up: Return the pan to the freezer for about 30–40 minutes, or until the layer is firm before adding the next one.
Pro Tip: Don’t rush the freezing between layers—if one layer is too soft, it’ll blend into the next instead of staying distinct.
Step 3: Add the Vanilla Ice Cream Layer
- Soften again: Take your vanilla ice cream out to soften while the first layer chills.
- Layer and smooth: Once soft, scoop and spread over the frozen strawberry layer. Use the spatula to smooth it out as evenly as possible.
- Freeze again: Place the cake back in the freezer for another 30–40 minutes, or until set.
Step 4: Add the Blue Ice Cream Layer
- Repeat the process: Let your blue ice cream (blueberry or blue raspberry) soften, then add it as the final layer.
- Smooth the top: Use a clean spatula to even out the top—this will be the “canvas” for your toppings.
- Final freeze: Freeze for at least 4 hours or overnight for the entire cake to fully set and hold its shape when sliced.
Pro Tip: If you plan to serve the next day, cover the top with plastic wrap or foil to prevent freezer burn.
Step 5: Make the Whipped Cream Topping
- Chill your tools: For best results, chill your mixing bowl and beaters in the freezer for 10–15 minutes before whipping.
- Whip the cream: Add the heavy cream, powdered sugar, and vanilla extract to the bowl. Beat on medium-high until soft peaks form.
- Frost the cake: Once the cake is fully frozen, remove from the springform pan and spread the whipped cream over the top (and sides, if desired).
Pro Tip: Soft peaks mean the cream holds shape but still droops slightly—stop whipping at this stage to avoid overmixing.
Step 6: Decorate and Serve
- Add toppings: Garnish with fresh strawberries, blueberries, and a generous sprinkle of red, white, and blue sprinkles.
- Slice and serve: Use a sharp knife dipped in warm water (and wiped dry) to slice cleanly. Serve immediately!
Pro Tip: If the cake is too hard to slice right away, let it sit at room temperature for 5–10 minutes before cutting.

Tips and Tricks for Success
- Work in layers, not all at once – Freezing each layer individually keeps the colors and textures neat and defined.
- Soften ice cream just right – You want it spreadable, not melty. About 10–15 minutes at room temp usually does the trick.
- Use a springform pan for easy release – It makes removing the cake a breeze and keeps those layers looking sharp.
- Smooth with a warm spatula – Run your spatula under warm water before spreading each ice cream layer for a cleaner finish.
- Decorate just before serving (if using whipped cream) – This keeps the whipped topping fresh and prevents color bleed from sprinkles or berries.
- Freeze overnight if possible – The longer chill time gives it a firm, sliceable texture and helps everything hold together.
Ingredient Substitutions and Variations
- Ice cream flavors – Swap in cherry, raspberry, lemon, or cotton candy for fun patriotic color swaps or unique flavor combos.
- Cookie base – Try graham crackers, vanilla wafers, or shortbread cookies instead of Oreos for a lighter crust.
- Whipped topping – Use store-bought whipped topping (like Cool Whip) if you want to skip making it from scratch.
- Dairy-free version – Use plant-based ice creams and coconut whipped cream to make it vegan-friendly.
- Mix-ins – Add crushed cookies, mini marshmallows, or swirls of jam between layers for extra flavor and texture.
- Shape it differently – No springform pan? Use a loaf pan lined with plastic wrap for easy lifting, or make mini versions in cupcake molds!
Serving Suggestions
- Serve straight from the freezer – This ice cream cake is best enjoyed cold and firm, especially on a hot summer day. Let it sit for just 5–10 minutes before slicing.
- Pair with fresh berries on the side – A small bowl of strawberries, blueberries, or raspberries adds a juicy, refreshing bite.
- Add a drizzle of chocolate or berry sauce – A light swirl of hot fudge or raspberry sauce takes each slice up a notch.
- Make it the grand finale – Serve after a barbecue spread of burgers, grilled corn, and potato salad—it’s the perfect cool-down dessert.
- My favorite way? With a tall glass of lemonade or a sparkling berry drink on the side. It’s light, festive, and totally satisfying!
Storage and Reheating Instructions
- Freezer storage – Keep the cake tightly covered with foil or plastic wrap in the freezer for up to 1 week.
- Store leftovers in slices – Cut into portions and wrap individually for easy grab-and-go treats later.
- Avoid refrigerator storage – It’ll melt and lose its shape; always keep it frozen.
- Let it thaw briefly before serving – If too hard, leave it out for 5–10 minutes to soften just enough for clean slicing.
- Do not reheat – Since it’s a frozen dessert, reheating isn’t needed or recommended. Just thaw slightly and enjoy cold!
Frequently Asked Questions
How far in advance can I make this ice cream cake?
You can make it up to 2–3 days ahead! Just be sure to cover it well to prevent freezer burn and decorate right before serving for the freshest look.
Can I use different colors or themes for other holidays?
Absolutely! Swap in different ice cream flavors and sprinkle colors to match any occasion—pastels for Easter, orange and black for Halloween, or red and green for Christmas.
What if I don’t have a springform pan?
No worries—use a loaf pan or a deep cake pan lined with plastic wrap or parchment paper. It may take a little more care to lift out, but it still works!
How do I slice it cleanly?
Dip a sharp knife in warm water, wipe it dry, then slice. Repeat between cuts for neat, even pieces.
Can I make it dairy-free?
Yes! Use your favorite dairy-free ice cream (like coconut or almond milk-based) and top with coconut whipped cream for a fully vegan version.
Can kids help with this recipe?
Definitely—it’s a great recipe for little hands! Let them help layer, spread, and decorate. It’s fun, messy, and super kid-friendly.
Did you try this recipe? Let me know in the comments how it turned out!
Don’t forget to share your photos on Instagram and tag me @tasiahub_ or use the hashtag #tasiahub. I’d love to see your creations!

No-Bake 4th of July Ice Cream Cake
Equipment
- 9-inch springform pan
- Mixing Bowls
- Hand mixer or stand mixer
- Spatula or offset spatula
- Food processor or zip-top bag + rolling pin
- Parchment paper
- Freezer space
Ingredients
For the Ice Cream Cake Layers
- 1.5 quarts vanilla ice cream softened
- 1.5 quarts strawberry or raspberry ice cream softened
- 1.5 quarts blueberry or blue raspberry ice cream softened
- 1 package 14 oz Oreo cookies or chocolate sandwich cookies (crushed)
- 1/2 cup unsalted butter melted
For the Topping & Decorations
- 2 cups heavy whipping cream
- 1/4 cup powdered sugar
- 1/2 teaspoon vanilla extract
- Fresh strawberries and blueberries for garnish
- Red white, and blue sprinkles
Instructions
- Step 1: Prepare the Cookie Crust
- Crush the cookies: Add your Oreo cookies to a food processor and pulse until finely ground. No processor? Place them in a zip-top bag and crush with a rolling pin.
- Mix with melted butter: In a bowl, stir together the crushed cookies and melted butter until the texture is like wet sand.
- Press into pan: Line the bottom of a 9-inch springform pan with parchment paper (optional, but helps with serving), then press the cookie mixture firmly into an even layer.
- Freeze to set: Pop the crust into the freezer for at least 15 minutes while you prep your ice cream layers.
- Pro Tip: Use the bottom of a measuring cup to press the crust down evenly—it helps pack it tightly so it holds together well.
- Step 2: Add the First Ice Cream Layer (Strawberry or Raspberry)
- Soften the ice cream: Let the strawberry ice cream sit out for 10–15 minutes until it’s soft and spreadable.
- Spread evenly: Scoop the softened ice cream over the chilled crust and gently spread it into an even layer using a spatula or offset spatula.
- Freeze to firm up: Return the pan to the freezer for about 30–40 minutes, or until the layer is firm before adding the next one.
- Pro Tip: Don’t rush the freezing between layers—if one layer is too soft, it’ll blend into the next instead of staying distinct.
- Step 3: Add the Vanilla Ice Cream Layer
- Soften again: Take your vanilla ice cream out to soften while the first layer chills.
- Layer and smooth: Once soft, scoop and spread over the frozen strawberry layer. Use the spatula to smooth it out as evenly as possible.
- Freeze again: Place the cake back in the freezer for another 30–40 minutes, or until set.
- Step 4: Add the Blue Ice Cream Layer
- Repeat the process: Let your blue ice cream (blueberry or blue raspberry) soften, then add it as the final layer.
- Smooth the top: Use a clean spatula to even out the top—this will be the “canvas” for your toppings.
- Final freeze: Freeze for at least 4 hours or overnight for the entire cake to fully set and hold its shape when sliced.
- Pro Tip: If you plan to serve the next day, cover the top with plastic wrap or foil to prevent freezer burn.
- Step 5: Make the Whipped Cream Topping
- Chill your tools: For best results, chill your mixing bowl and beaters in the freezer for 10–15 minutes before whipping.
- Whip the cream: Add the heavy cream, powdered sugar, and vanilla extract to the bowl. Beat on medium-high until soft peaks form.
- Frost the cake: Once the cake is fully frozen, remove from the springform pan and spread the whipped cream over the top (and sides, if desired).
- Pro Tip: Soft peaks mean the cream holds shape but still droops slightly—stop whipping at this stage to avoid overmixing.
- Step 6: Decorate and Serve
- Add toppings: Garnish with fresh strawberries, blueberries, and a generous sprinkle of red, white, and blue sprinkles.
- Slice and serve: Use a sharp knife dipped in warm water (and wiped dry) to slice cleanly. Serve immediately!
- Pro Tip: If the cake is too hard to slice right away, let it sit at room temperature for 5–10 minutes before cutting.
Notes
Nutritional Value Per Serving:
- Calories: 300–400 kcal
- Fat: 15–25g
- Sugar: 25–35g
- Protein: 3–5g