Oreo Dirt Pudding

If you’re in the mood for a no-bake dessert that’s creamy, chocolatey, and guaranteed to make everyone smile, let’s talk about Oreo dirt pudding. It’s one of those nostalgic treats that brings back memories of birthday parties, potlucks, and school celebrations—especially when served in little cups with gummy worms sticking out! But beyond the fun presentation, this dessert is a layered masterpiece of crushed Oreos, silky pudding, and fluffy whipped topping.
What makes dirt pudding so irresistible is the combination of textures and flavors. You get that crunchy Oreo crumb (which acts like the “dirt”), layered over rich chocolate or vanilla pudding that’s been mixed with cream cheese and whipped topping for extra smoothness. It’s indulgent, but not too heavy—sweet, but not overpowering. And the best part? It’s incredibly easy to make with just a handful of ingredients, no oven required.
Whether you’re making it for a holiday, a summer barbecue, or just because you need a little comfort in dessert form, this is one of those recipes that always delivers. You can keep it classic or dress it up with fun additions like gummy worms, mini chocolate chips, or even layers of peanut butter cups for a twist. It’s the kind of recipe that invites creativity and doesn’t take itself too seriously.
So if you’re after something fun, foolproof, and downright delicious, Oreo dirt pudding checks all the boxes. It’s simple enough for a weekday dessert but charming enough to bring to a party. Let’s dig into how to make it, layer by chocolatey layer.
Why You’ll Love It
- No-Bake and Easy to Make – This recipe is as simple as mixing and layering. No oven, no fuss—just a few ingredients and a fridge.
- Kid-Friendly and Fun – Whether you’re making it with kids or serving it to them, the “dirt” and optional gummy worms make this dessert an instant hit.
- Creamy, Crunchy, and So Satisfying – The contrast between the smooth pudding mixture and the crushed Oreo topping is seriously dreamy.
- Perfect for Parties or Make-Ahead Desserts – You can prep it hours (or even a day) in advance, making it ideal for gatherings or busy schedules.
- Totally Customizable – Use chocolate or vanilla pudding, add candy mix-ins, layer in peanut butter—make it your own!
Ingredient List
- 1 package (14.3 oz) Oreo cookies
- 2 cups cold milk
- 1 package (3.9 oz) instant chocolate pudding mix
- 8 oz cream cheese, softened
- 1 cup powdered sugar
- 12 oz whipped topping (like Cool Whip), thawed
- Gummy worms (optional, for topping)
Ingredient Notes
- Oreo cookies – Classic Oreos work best, but feel free to use Double Stuf for extra richness or flavored varieties if you want to switch it up.
- Instant pudding – Chocolate is traditional, but you can also use vanilla or even cookies and cream pudding for a twist.
- Cream cheese – Let it soften at room temperature before mixing—it blends so much better and gives that smooth, creamy base.
- Whipped topping – I usually go with Cool Whip because it holds up well in the fridge and keeps the texture light.
- Powdered sugar – This sweetens the cream cheese layer without making it grainy like granulated sugar would.
Kitchen Equipment Needed
- Food processor or blender – To crush the Oreos into fine crumbs. A rolling pin and zip-top bag work too if you’re old-school.
- Mixing bowls (at least 2) – One for the pudding and one for the cream cheese mixture. I love using clear glass bowls so I can see everything coming together.
- Hand mixer or stand mixer – For whipping the cream cheese and sugar until smooth. A whisk can work, but it takes more effort.
- Rubber spatula – Perfect for folding in the whipped topping without deflating it.
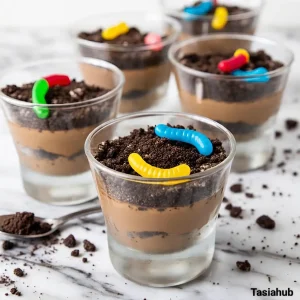
- Trifle dish or 9×13-inch pan – Great for layering everything. You can also use small cups or mason jars for single servings—super cute for parties!
- Spoon or offset spatula – Makes spreading each layer smooth and easy.
Instructions
Step 1: Crush the Oreos
- Add the entire package of Oreo cookies to a food processor or blender.
- Pulse until the cookies are fine crumbs—no big chunks left. You want it to look like crumbly soil.
Pro Tip: If you don’t have a processor, place the cookies in a zip-top bag and crush them with a rolling pin. It’s satisfying and gets the job done!
Step 2: Make the Pudding
- In a medium mixing bowl, pour in 2 cups of cold milk.
- Sprinkle in the chocolate pudding mix.
- Whisk together for about 2 minutes until smooth and thickened.
- Set aside in the fridge while you prep the next layer so it can firm up a bit more.
Pro Tip: Use cold milk straight from the fridge. Warm or room temp milk won’t help the pudding set properly.
Step 3: Blend the Cream Cheese and Sugar
- In a separate large bowl, add the softened cream cheese and powdered sugar.
- Use a hand mixer or stand mixer to blend until smooth, creamy, and lump-free.
- Scrape down the sides of the bowl to make sure everything’s fully incorporated.
Pro Tip: Don’t rush this step! Lumps of cream cheese will mess with the texture, so take the time to get it silky smooth.
Step 4: Fold in the Whipped Topping
- Add the whipped topping to the cream cheese mixture.
- Gently fold it in using a rubber spatula—don’t stir aggressively or you’ll lose the fluffy texture.
- Once combined, you should have a light, mousse-like mixture.
Step 5: Combine with the Pudding
- Take the set pudding from the fridge.
- Spoon it into the cream cheese and whipped topping mixture.
- Gently fold everything together until it’s one even, creamy mixture.
Pro Tip: Folding rather than whisking keeps the mixture airy and light—think pudding cloud.
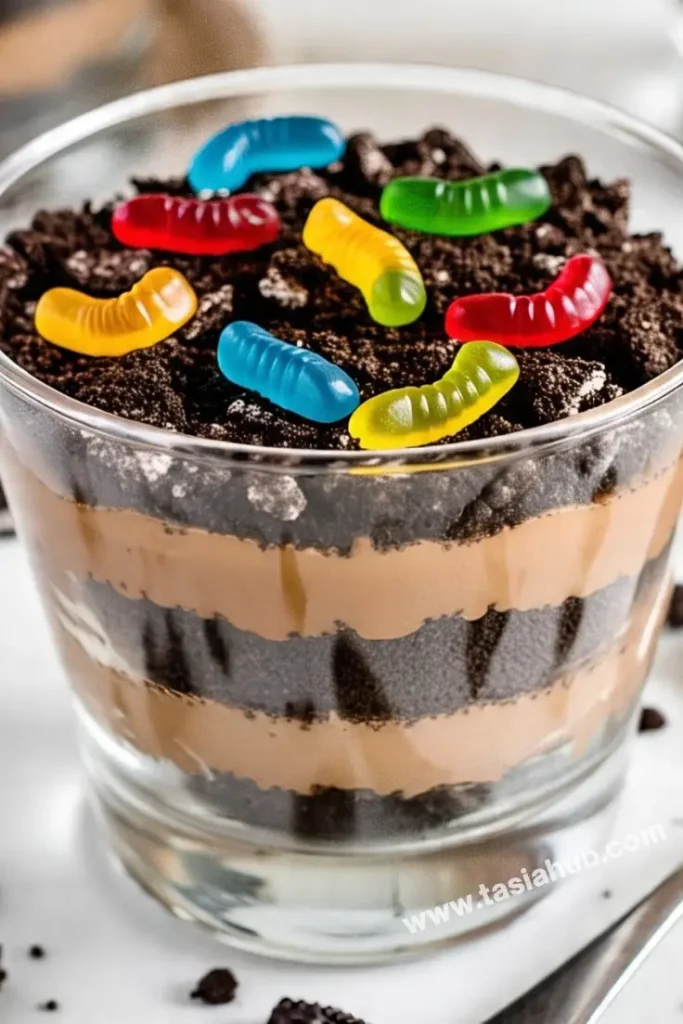
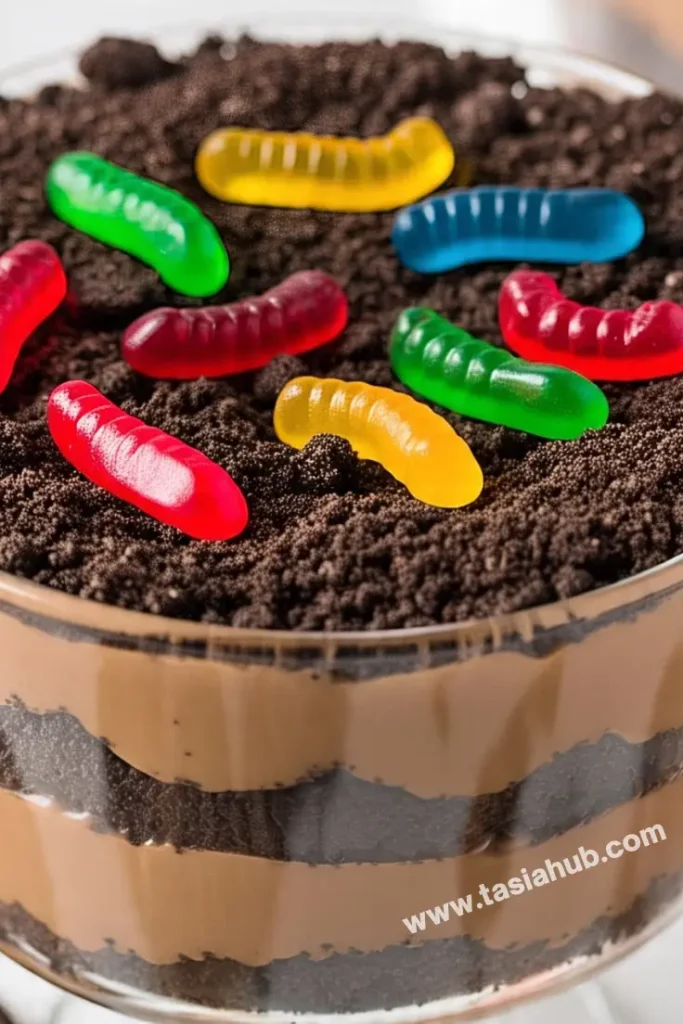
Step 6: Layer It All Together
- In your serving dish (trifle bowl, 9×13-inch pan, or cups), start with a layer of Oreo crumbs.
- Add a thick layer of the creamy pudding mixture on top.
- Repeat the layers until you run out of ingredients, ending with a generous sprinkle of Oreo “dirt” on top.
Step 7: Chill Before Serving
- Cover and refrigerate for at least 1–2 hours to let the layers set and the flavors blend.
- Right before serving, decorate with gummy worms if using—for that classic “dirt” dessert look.
Pro Tip: Make it the night before for the best flavor and texture. It holds up beautifully overnight!
Tips and Tricks for Success
- Soften cream cheese fully – Let it sit at room temp for 30–45 minutes before mixing. Cold cream cheese won’t blend smoothly.
- Use cold milk for the pudding – Room temperature milk can prevent the pudding from setting correctly.
- Fold, don’t mix aggressively – When combining layers, use gentle folding motions to keep the dessert light and fluffy.
- Crush Oreos finely – The finer the crumb, the more “dirt-like” the topping looks and the easier it layers.
- Chill for a few hours – Refrigerating helps the flavors meld together and makes scooping cleaner and prettier.
Ingredient Substitutions and Variations
- Vanilla or white chocolate pudding – A great swap if you want a lighter flavor or color contrast with the Oreos.
- Homemade whipped cream – Substitute Cool Whip with freshly whipped cream (just stabilize it with a bit of powdered sugar).
- Gluten-free Oreos – An easy fix for gluten-free diets without losing that classic Oreo flavor.
- Peanut butter layer – Add a few spoonfuls of peanut butter to the cream cheese mix for a nutty twist.
- Halloween or holiday versions – Top with festive sprinkles or candies to match the season—candy pumpkins, crushed candy canes, or mini eggs work great!
Serving Suggestions
- Scoop into clear cups or mini mason jars – Perfect for parties or kids’ birthdays—everyone gets their own little “dirt cup”!
- Serve with gummy worms or candy bugs on top – A fun and playful touch, especially for kids or themed events.
- Layer in a trifle bowl – Great for potlucks or family dinners—everyone loves scooping into the big, beautiful layers.
- Top with whipped cream and crushed Oreos before serving – Adds extra texture and a little “wow” factor.
- I love sneaking a spoonful straight from the fridge – Cold, creamy, and the perfect late-night treat when no one’s watching!
Storage and Reheating Instructions
- Store in an airtight container – Keep covered in the fridge for up to 4–5 days.
- No reheating needed – This dessert is best served chilled right from the fridge.
- Avoid freezing – The texture of the pudding and whipped topping doesn’t hold up well after thawing.
- Keep toppings separate if prepping ahead – If you’re using gummy worms or candy, add them just before serving so they don’t get soggy.
Frequently Asked Questions
Can I make Oreo dirt pudding ahead of time?
Absolutely! In fact, it’s even better when made a few hours (or a day) in advance. The flavors blend beautifully, and the texture sets up nicely in the fridge.
Can I use homemade whipped cream instead of Cool Whip?
Yes! Just whip up about 2 cups of heavy cream with a few tablespoons of powdered sugar until stiff peaks form. It’ll be richer and a little less sweet than Cool Whip.
What’s the best way to crush the Oreos without a food processor?
A zip-top bag and a rolling pin work great! Just seal the cookies in the bag and roll over them until they’re finely crushed. It’s also a good way to get the kids involved.
Can I use different pudding flavors?
Totally! Chocolate is classic, but vanilla, white chocolate, or even cookies and cream pudding work well. Just make sure it’s instant pudding for easy prep.
How long does it last in the fridge?
It’ll stay fresh for 4 to 5 days if stored in an airtight container. Just be sure to keep it chilled, and wait to add gummy worms or decorations until you’re ready to serve.
Can I make it gluten-free?
Yes! Just swap the regular Oreos for a gluten-free version—most grocery stores carry them now, and they taste surprisingly close to the original.
Did you try this recipe? Let me know in the comments how it turned out!
Don’t forget to share your photos on Instagram and tag me @tasiahub_ or use the hashtag #tasiahub. I’d love to see your creations!
Oreo Dirt Pudding
Equipment
- Food Processor or Blender
- Mixing Bowls (at least 2)
- Hand mixer or stand mixer
- Rubber spatula
- Trifle dish or 9×13-inch pan
- Spoon or offset spatula
Ingredients
- 1 package 14.3 oz Oreo cookies
- 2 cups cold milk
- 1 package 3.9 oz instant chocolate pudding mix
- 8 oz cream cheese softened
- 1 cup powdered sugar
- 12 oz whipped topping like Cool Whip, thawed
- Gummy worms optional, for topping
Instructions
Step 1: Crush the Oreos
- Add the entire package of Oreo cookies to a food processor or blender.
- Pulse until the cookies are fine crumbs—no big chunks left. You want it to look like crumbly soil.
- Pro Tip: If you don’t have a processor, place the cookies in a zip-top bag and crush them with a rolling pin. It’s satisfying and gets the job done!
Step 2: Make the Pudding
- In a medium mixing bowl, pour in 2 cups of cold milk.
- Sprinkle in the chocolate pudding mix.
- Whisk together for about 2 minutes until smooth and thickened.
- Set aside in the fridge while you prep the next layer so it can firm up a bit more.
- Pro Tip: Use cold milk straight from the fridge. Warm or room temp milk won’t help the pudding set properly.
Step 3: Blend the Cream Cheese and Sugar
- In a separate large bowl, add the softened cream cheese and powdered sugar.
- Use a hand mixer or stand mixer to blend until smooth, creamy, and lump-free.
- Scrape down the sides of the bowl to make sure everything’s fully incorporated.
- Pro Tip: Don’t rush this step! Lumps of cream cheese will mess with the texture, so take the time to get it silky smooth.
Step 4: Fold in the Whipped Topping
- Add the whipped topping to the cream cheese mixture.
- Gently fold it in using a rubber spatula—don’t stir aggressively or you’ll lose the fluffy texture.
- Once combined, you should have a light, mousse-like mixture.
Step 5: Combine with the Pudding
- Take the set pudding from the fridge.
- Spoon it into the cream cheese and whipped topping mixture.
- Gently fold everything together until it’s one even, creamy mixture.
- Pro Tip: Folding rather than whisking keeps the mixture airy and light—think pudding cloud.
Step 6: Layer It All Together
- In your serving dish (trifle bowl, 9×13-inch pan, or cups), start with a layer of Oreo crumbs.
- Add a thick layer of the creamy pudding mixture on top.
- Repeat the layers until you run out of ingredients, ending with a generous sprinkle of Oreo “dirt” on top.
Step 7: Chill Before Serving
- Cover and refrigerate for at least 1–2 hours to let the layers set and the flavors blend.
- Right before serving, decorate with gummy worms if using—for that classic “dirt” dessert look.
- Pro Tip: Make it the night before for the best flavor and texture. It holds up beautifully overnight!
Notes
Estimated Nutritional Value (per serving)
- Calories: ~320
- Fat: ~18g
- Saturated Fat: ~8g
- Carbohydrates: ~37g
- Sugar: ~26g
- Protein: ~3g
- Fiber: ~1g
- Sodium: ~270mg