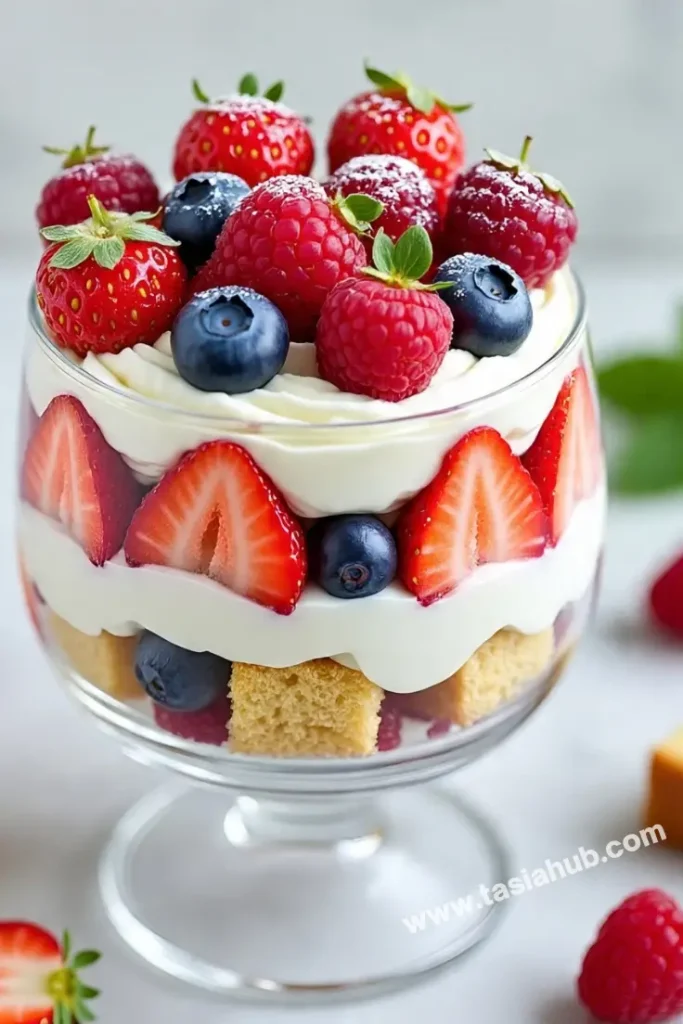
Patriotic Berry Trifle
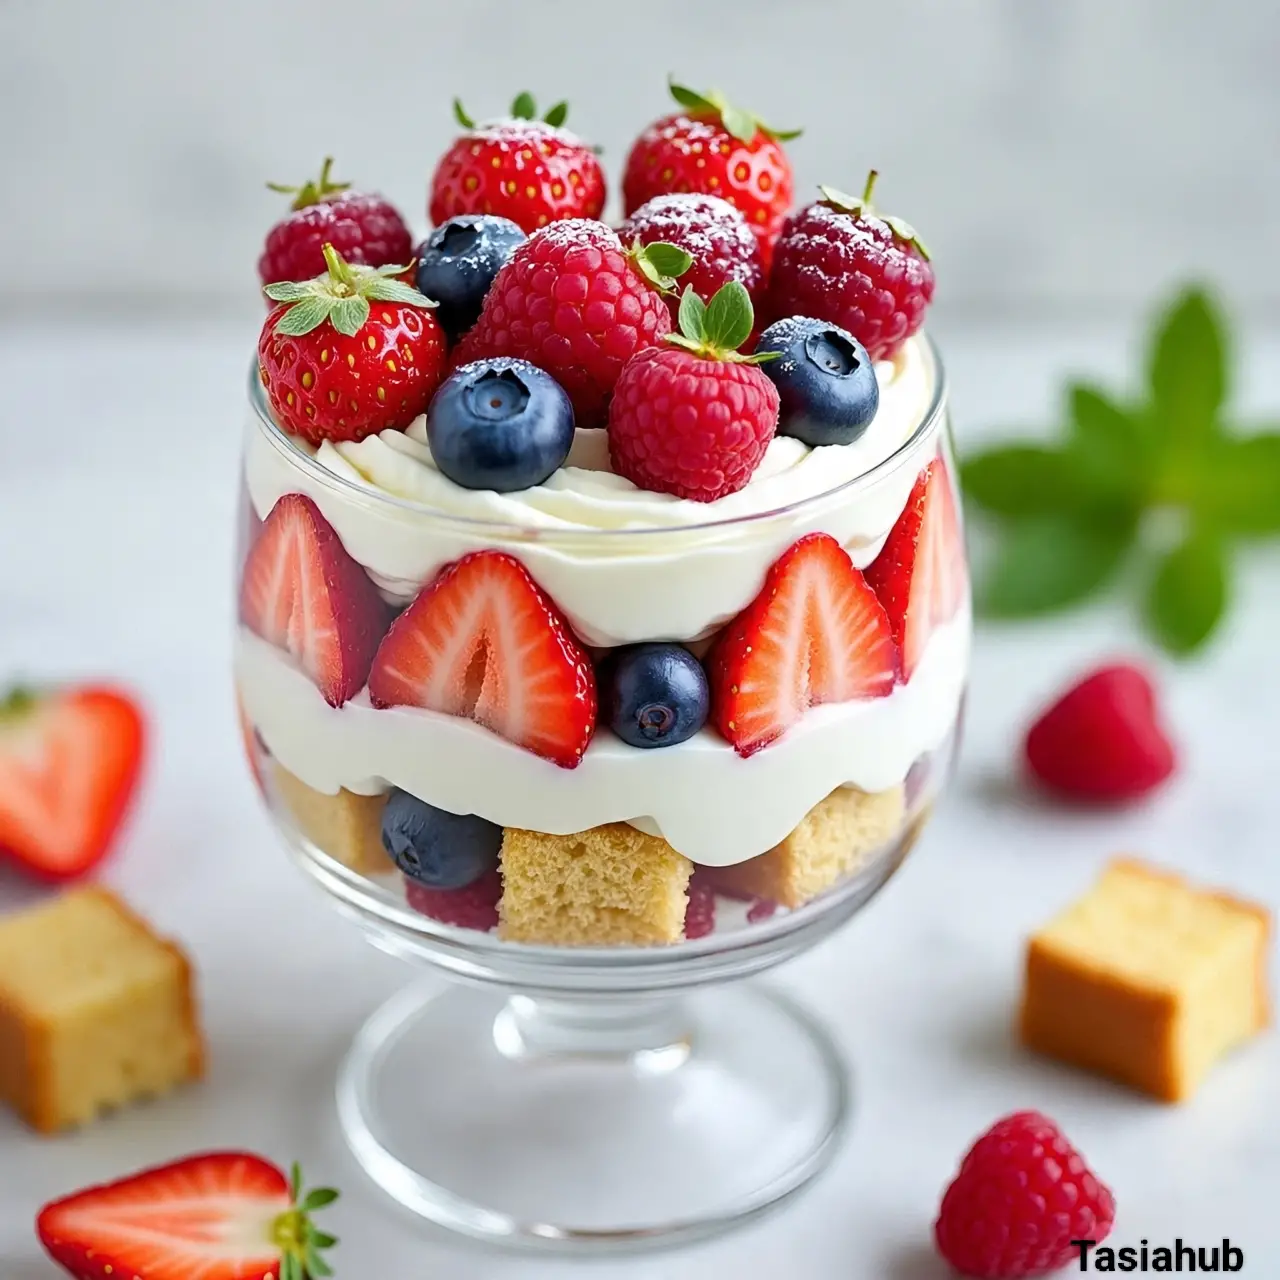
When summer rolls around and celebrations like the Fourth of July are just around the corner, it’s the perfect time to bring out desserts that not only taste amazing but also look stunning on the table. Patriotic Berry Trifle is one of those crowd-pleasers that combines fresh, juicy berries with layers of creamy goodness and fluffy cake — all stacked beautifully to showcase red, white, and blue. It’s a dessert that’s as fun to make as it is to eat, and it instantly lifts the spirit of any party with its vibrant colors.
What makes this trifle so special is how simple ingredients come together to create something truly festive and delicious. Imagine biting into sweet strawberries, tart blueberries, and a cloud of whipped cream, all layered with soft cake pieces that soak up every bit of flavor. It’s a refreshing treat that feels light yet indulgent, perfect for those hot summer days when you want something cool and satisfying. Plus, the best part is you can customize it however you like — use pound cake, angel food cake, or even sponge cake as your base.
Beyond the taste and colors, this dessert is a fantastic way to showcase seasonal fruit. Berries are at their peak in summer, so this is the ideal time to enjoy their natural sweetness and vibrant hues. Whether you’re hosting a barbecue, a family picnic, or just looking for a festive dessert to brighten up your table, this Patriotic Berry Trifle will quickly become a go-to recipe. It’s easy to put together, visually impressive, and a guaranteed hit with kids and adults alike.
I love how this trifle brings everyone together — it’s the kind of dessert that invites people to dig in and share smiles. It’s also forgiving if you want to prep it a day ahead, giving the flavors time to meld and the cake to soak up the delicious berry juices and cream. So, let’s dive into how you can make this show-stopping dessert that’s bursting with patriotic pride and fresh summer flavor.
Why You’ll Love It
- Vibrant and Festive: The bright red strawberries, deep blue blueberries, and fluffy white cream create a stunning dessert that instantly adds a patriotic touch to any celebration or summer gathering.
- Easy to Make: No complicated baking skills needed! This trifle comes together quickly with simple ingredients, making it perfect for both beginners and busy hosts.
- Customizable: You can switch up the cake base or add other fruits like raspberries or blackberries to suit your taste — making it versatile and adaptable to what you have on hand.
- Refreshing and Light: Unlike heavy desserts, this trifle feels fresh and airy, making it ideal for warm weather when you want something sweet but not too rich.
- Make-Ahead Friendly: Prepare it a few hours or even a day in advance, so the flavors meld beautifully and you can spend more time enjoying your party than in the kitchen.
Ingredient List
For the Cake Layer
- 6 cups of pound cake, cubed (store-bought or homemade)
- Optional: 2 tablespoons of berry or vanilla syrup (to drizzle over the cake for extra moisture)
For the Berry Layers
- 2 cups fresh strawberries, hulled and sliced
- 1 ½ cups fresh blueberries
- 1 cup fresh raspberries (optional, for extra color and flavor)
For the Cream Layer
- 2 cups heavy whipping cream
- ¼ cup powdered sugar
- 1 teaspoon vanilla extract
- 8 oz cream cheese, softened (optional, for a richer cream layer)
Ingredient Notes
- I always use fresh, ripe berries — they make all the difference in flavor and texture. Frozen berries tend to be too watery.
- Pound cake works perfectly here because it’s dense enough to soak up the juices but still stays soft. Angel food cake is a great lighter alternative.
- Adding cream cheese to the whipped cream adds a subtle tang and makes the layers extra creamy and stable.
- Don’t skip the vanilla extract in the cream — it enhances the overall flavor beautifully.
- If you want your trifle a little sweeter or juicier, drizzle the cake cubes lightly with berry syrup or fruit juice before layering.
Kitchen Equipment Needed
- Large Glass Trifle Bowl or Clear Glass Dish — To beautifully showcase the layers of the trifle. I love using a wide, deep bowl so you can see all the colors.
- Mixing Bowls — For whipping cream and preparing berries separately.
- Electric Mixer or Stand Mixer — Makes whipping the cream easy and fluffy. Hand whisks work too but take more effort!
- Measuring Cups and Spoons — For accurate ingredient measurements.
- Spatula or Spoon — To gently fold and layer the cream without deflating it.
- Knife and Cutting Board — For slicing strawberries and cutting cake into cubes.
- Serving Spoons — For scooping and serving the trifle. A wide spoon works best to get a bit of every layer.
Instructions
Step 1: Prepare the Cake
- Cut the pound cake into 1-inch cubes. Try to keep the pieces roughly the same size for even layering.
- If you want extra moisture and flavor, drizzle the cubes lightly with berry or vanilla syrup. Set aside.
Pro Tip: Use slightly stale or day-old pound cake if you have it — it soaks up the cream and berry juices better without turning mushy.
Step 2: Prep the Berries
- Rinse the strawberries, blueberries, and raspberries gently under cold water.
- Hull and slice the strawberries into thin pieces. Keep the blueberries and raspberries whole.
- Pat the berries dry with a paper towel to avoid adding extra water to the trifle layers.
Pro Tip: For sweeter berries, toss them with a teaspoon of sugar and let them sit for 10 minutes to macerate. This draws out their juices and adds natural syrupy sweetness.
Step 3: Make the Cream Layer
- In a large mixing bowl, pour in the heavy whipping cream, powdered sugar, and vanilla extract.
- If using, add the softened cream cheese now.
- Using an electric mixer, beat the mixture on medium-high speed until soft peaks form. Stop before it gets too stiff to keep the cream light and fluffy.
Pro Tip: Chill your mixing bowl and beaters in the fridge for 10-15 minutes beforehand — cold equipment helps the cream whip faster and hold better.
Step 4: Assemble the Trifle
- Start by placing a layer of cake cubes evenly at the bottom of your trifle bowl.
- Spoon a layer of mixed berries over the cake cubes, spreading them evenly.
- Add a generous layer of the whipped cream mixture on top of the berries, smoothing it gently with a spatula.
- Repeat the layers (cake, berries, cream) until you reach the top of the bowl, finishing with a cream layer.
Step 5: Garnish and Chill
- Decorate the top with a mix of whole berries for a beautiful, colorful finish.
- Cover the trifle with plastic wrap and refrigerate for at least 3 hours, or overnight for the best flavor. This allows the cake to absorb the cream and berry juices perfectly.
Pro Tip: Avoid assembling the trifle too far in advance if your cake is very soft, or it might become soggy. A few hours ahead is ideal for freshness and flavor melding.
Step 6: Serve and Enjoy
- Use a large spoon to scoop out portions, making sure each serving has layers of cake, berries, and cream.
- Serve chilled, straight from the fridge, and enjoy the refreshing burst of flavors and textures!

Tips and Tricks for Success
- Use fresh, ripe berries for the best flavor and texture — avoid frozen unless you thaw and drain them well.
- Don’t over-whip the cream; stop at soft peaks to keep it light and easy to spread.
- If your cake is very fresh and soft, lightly toast the cubes in the oven for 5 minutes to help them hold up better.
- Layer gently to avoid crushing the berries and keep the dessert visually appealing.
- Chill the trifle for a few hours before serving so the flavors meld and the cake soaks up the delicious juices.
- For easy cleanup, assemble in a disposable clear trifle bowl if serving at picnics or parties.
- Keep the assembled trifle refrigerated and consume within 2 days for the freshest taste and texture.
Ingredient Substitutions and Variations
- Swap pound cake for angel food cake or sponge cake for a lighter texture.
- Use Greek yogurt or mascarpone mixed with whipped cream for a tangier cream layer.
- Substitute berries with other seasonal fruits like peaches, cherries, or mangoes for a different twist.
- Add a splash of liqueur (like Grand Marnier or Chambord) to the berry layer for an adult version.
- For a dairy-free option, use coconut whipped cream and a dairy-free cake alternative.
- Incorporate a layer of lemon curd or berry jam for extra zing and sweetness between layers.
Serving Suggestions
- Serve the Patriotic Berry Trifle chilled with a sprinkle of toasted almonds or chopped pistachios on top for added crunch.
- I love serving this trifle alongside freshly brewed iced tea or lemonade—it makes for a refreshing summer combo!
- Pair it with simple vanilla or berry-flavored cookies on the side for an extra sweet touch.
- For a festive brunch, serve the trifle with scrambled eggs and crispy bacon—it’s a delightful balance of sweet and savory.
- Add a dollop of fresh mint leaves or a light dusting of powdered sugar right before serving for a pretty finishing touch.
Storage and Reheating Instructions
- Store the trifle covered tightly in the refrigerator for up to 2 days to maintain freshness.
- Avoid freezing the trifle, as the cream and fresh berries don’t freeze well and may become watery.
- If preparing ahead, assemble the trifle but hold off on adding the cream layer and fresh berries until just before serving for best texture.
- Use an airtight container or cover with plastic wrap to prevent the dessert from absorbing other fridge odors.
- Serve straight from the fridge — no reheating needed! The trifle is best enjoyed cold.
Frequently Asked Questions
Can I use frozen berries instead of fresh?
Yes, you can! Just make sure to thaw and drain them well to avoid excess liquid making the trifle soggy.
How far in advance can I make this trifle?
It’s best assembled a few hours ahead or the night before. If your cake is very soft, wait to add the cream and berries until closer to serving time.
Can I make this dessert dairy-free?
Absolutely! Use coconut whipped cream and a dairy-free cake alternative to keep it delicious and allergy-friendly.
What’s the best cake to use for this recipe?
Pound cake is classic and holds up well, but angel food or sponge cake works great too for a lighter option.
Can I add other fruits to the trifle?
Yes! Feel free to add peaches, cherries, or even mango to mix up the flavors and colors.
How long will leftovers keep?
Store leftovers in the fridge, covered, and enjoy within 2 days for the best taste and texture.
Did you try this recipe? Let me know in the comments how it turned out!
Don’t forget to share your photos on Instagram and tag me (@tasiahub_) or use the hashtag (#tasiahub). I’d love to see your creations!

Patriotic Berry Trifle
Equipment
- Large Glass Trifle Bowl or Clear Glass Dish
- Mixing Bowls
- Electric mixer or stand mixer
- Measuring cups and spoons
- Spatula or spoon
- Knife and Cutting Board
- Serving Spoons
Ingredients
For the Cake Layer
- 6 cups of pound cake cubed (store-bought or homemade)
- Optional: 2 tablespoons of berry or vanilla syrup to drizzle over the cake for extra moisture
For the Berry Layers
- 2 cups fresh strawberries hulled and sliced
- 1 ½ cups fresh blueberries
- 1 cup fresh raspberries optional, for extra color and flavor
For the Cream Layer
- 2 cups heavy whipping cream
- ¼ cup powdered sugar
- 1 teaspoon vanilla extract
- 8 oz cream cheese softened (optional, for a richer cream layer)
Instructions
Step 1: Prepare the Cake
- Cut the pound cake into 1-inch cubes. Try to keep the pieces roughly the same size for even layering.
- If you want extra moisture and flavor, drizzle the cubes lightly with berry or vanilla syrup. Set aside.
- Pro Tip: Use slightly stale or day-old pound cake if you have it — it soaks up the cream and berry juices better without turning mushy.
Step 2: Prep the Berries
- Rinse the strawberries, blueberries, and raspberries gently under cold water.
- Hull and slice the strawberries into thin pieces. Keep the blueberries and raspberries whole.
- Pat the berries dry with a paper towel to avoid adding extra water to the trifle layers.
- Pro Tip: For sweeter berries, toss them with a teaspoon of sugar and let them sit for 10 minutes to macerate. This draws out their juices and adds natural syrupy sweetness.
Step 3: Make the Cream Layer
- In a large mixing bowl, pour in the heavy whipping cream, powdered sugar, and vanilla extract.
- If using, add the softened cream cheese now.
- Using an electric mixer, beat the mixture on medium-high speed until soft peaks form. Stop before it gets too stiff to keep the cream light and fluffy.
- Pro Tip: Chill your mixing bowl and beaters in the fridge for 10-15 minutes beforehand — cold equipment helps the cream whip faster and hold better.
Step 4: Assemble the Trifle
- Start by placing a layer of cake cubes evenly at the bottom of your trifle bowl.
- Spoon a layer of mixed berries over the cake cubes, spreading them evenly.
- Add a generous layer of the whipped cream mixture on top of the berries, smoothing it gently with a spatula.
- Repeat the layers (cake, berries, cream) until you reach the top of the bowl, finishing with a cream layer.
Step 5: Garnish and Chill
- Decorate the top with a mix of whole berries for a beautiful, colorful finish.
- Cover the trifle with plastic wrap and refrigerate for at least 3 hours, or overnight for the best flavor. This allows the cake to absorb the cream and berry juices perfectly.
- Pro Tip: Avoid assembling the trifle too far in advance if your cake is very soft, or it might become soggy. A few hours ahead is ideal for freshness and flavor melding.
Step 6: Serve and Enjoy
- Use a large spoon to scoop out portions, making sure each serving has layers of cake, berries, and cream.
- Serve chilled, straight from the fridge, and enjoy the refreshing burst of flavors and textures!
Notes
Estimated Nutritional Value (Per Serving)
- Calories: ~320–350 kcal
- Fat: 20g
- Saturated Fat: 12g
- Carbohydrates: 30–35g
- Sugar: 20–25g
- Protein: 3–5g
- Fiber: 2g
- Sodium: 100–150mg