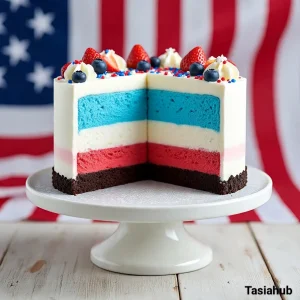
No-Bake 4th of July Ice Cream Cake
The beauty of this 4th of July ice cream cake is that it looks impressive, but it’s surprisingly simple to put together.
Equipment
- 9-inch springform pan
- Mixing Bowls
- Hand mixer or stand mixer
- Spatula or offset spatula
- Food processor or zip-top bag + rolling pin
- Parchment paper
- Freezer space
Ingredients
For the Ice Cream Cake Layers
- 1.5 quarts vanilla ice cream softened
- 1.5 quarts strawberry or raspberry ice cream softened
- 1.5 quarts blueberry or blue raspberry ice cream softened
- 1 package 14 oz Oreo cookies or chocolate sandwich cookies (crushed)
- 1/2 cup unsalted butter melted
For the Topping & Decorations
- 2 cups heavy whipping cream
- 1/4 cup powdered sugar
- 1/2 teaspoon vanilla extract
- Fresh strawberries and blueberries for garnish
- Red white, and blue sprinkles
Instructions
- Step 1: Prepare the Cookie Crust
- Crush the cookies: Add your Oreo cookies to a food processor and pulse until finely ground. No processor? Place them in a zip-top bag and crush with a rolling pin.
- Mix with melted butter: In a bowl, stir together the crushed cookies and melted butter until the texture is like wet sand.
- Press into pan: Line the bottom of a 9-inch springform pan with parchment paper (optional, but helps with serving), then press the cookie mixture firmly into an even layer.
- Freeze to set: Pop the crust into the freezer for at least 15 minutes while you prep your ice cream layers.
- Pro Tip: Use the bottom of a measuring cup to press the crust down evenly—it helps pack it tightly so it holds together well.
- Step 2: Add the First Ice Cream Layer (Strawberry or Raspberry)
- Soften the ice cream: Let the strawberry ice cream sit out for 10–15 minutes until it’s soft and spreadable.
- Spread evenly: Scoop the softened ice cream over the chilled crust and gently spread it into an even layer using a spatula or offset spatula.
- Freeze to firm up: Return the pan to the freezer for about 30–40 minutes, or until the layer is firm before adding the next one.
- Pro Tip: Don’t rush the freezing between layers—if one layer is too soft, it’ll blend into the next instead of staying distinct.
- Step 3: Add the Vanilla Ice Cream Layer
- Soften again: Take your vanilla ice cream out to soften while the first layer chills.
- Layer and smooth: Once soft, scoop and spread over the frozen strawberry layer. Use the spatula to smooth it out as evenly as possible.
- Freeze again: Place the cake back in the freezer for another 30–40 minutes, or until set.
- Step 4: Add the Blue Ice Cream Layer
- Repeat the process: Let your blue ice cream (blueberry or blue raspberry) soften, then add it as the final layer.
- Smooth the top: Use a clean spatula to even out the top—this will be the “canvas” for your toppings.
- Final freeze: Freeze for at least 4 hours or overnight for the entire cake to fully set and hold its shape when sliced.
- Pro Tip: If you plan to serve the next day, cover the top with plastic wrap or foil to prevent freezer burn.
- Step 5: Make the Whipped Cream Topping
- Chill your tools: For best results, chill your mixing bowl and beaters in the freezer for 10–15 minutes before whipping.
- Whip the cream: Add the heavy cream, powdered sugar, and vanilla extract to the bowl. Beat on medium-high until soft peaks form.
- Frost the cake: Once the cake is fully frozen, remove from the springform pan and spread the whipped cream over the top (and sides, if desired).
- Pro Tip: Soft peaks mean the cream holds shape but still droops slightly—stop whipping at this stage to avoid overmixing.
- Step 6: Decorate and Serve
- Add toppings: Garnish with fresh strawberries, blueberries, and a generous sprinkle of red, white, and blue sprinkles.
- Slice and serve: Use a sharp knife dipped in warm water (and wiped dry) to slice cleanly. Serve immediately!
- Pro Tip: If the cake is too hard to slice right away, let it sit at room temperature for 5–10 minutes before cutting.
Notes
Nutritional Value Per Serving:
- Calories: 300–400 kcal
- Fat: 15–25g
- Sugar: 25–35g
- Protein: 3–5g