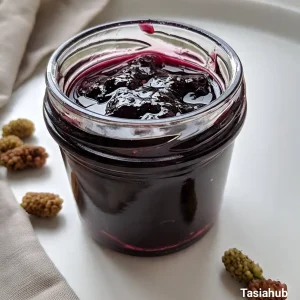
Mulberry Jam
Mulberries have a subtle sweetness with a hint of tartness, making the jam rich in flavor but not overly sugary.
Equipment
- Large heavy-bottomed saucepan
- Wooden Spoon or Silicone Spatula
- Canning jars with lids
- Fine Mesh Strainer (Optional)
- Candy thermometer (optional)
- Ladle
- Jar funnel (optional)
Ingredients
- 4 cups fresh mulberries about 600 grams, washed and stems removed
- 3 cups granulated sugar
- 2 tablespoons fresh lemon juice
- 1/2 cup water
Instructions
Step 1: Prepare the Mulberries
- Rinse the mulberries gently under cold water to remove any dirt or debris.
- Remove any stems or leaves you find.
- Drain the berries well in a colander and set aside.
- Pro tip: Handle mulberries carefully—they bruise easily, which can affect the jam’s texture.
Step 2: Combine Ingredients in the Saucepan
- Place the mulberries, sugar, lemon juice, and water into your large saucepan.
- Stir gently to combine everything evenly.
- Pro tip: Use fresh lemon juice rather than bottled for the best bright flavor.
Step 3: Cook the Mulberries
- Place the saucepan over medium heat and bring the mixture to a gentle boil.
- Stir frequently with your wooden spoon or silicone spatula to prevent the fruit from sticking and burning on the bottom.
- Once boiling, reduce heat slightly to maintain a steady simmer.
- Pro tip: Stir often, especially near the end, to avoid scorching and to help the jam thicken evenly.
Step 4: Simmer and Thicken the Jam
- Let the mixture simmer for about 25-30 minutes.
- You’ll notice it thickening as water evaporates and the fruit breaks down.
- To test if the jam is ready, place a small spoonful on a cold plate and run your finger through it — if it wrinkles and doesn’t flood back, it’s set.
- Pro tip: If you have a candy thermometer, aim for about 220°F (104°C) for the perfect gel stage.
Step 5: Optional – Strain for a Smoother Jam
- If you prefer a seed-free jam, pour the cooked mixture through a fine mesh strainer into a clean bowl.
- Use the back of a spoon to press the mixture gently and extract as much liquid and pulp as possible.
Step 6: Jar and Store the Jam
- While the jam is still hot, ladle it carefully into sterilized jars, leaving about 1/4 inch of headspace.
- Wipe the rims clean with a damp cloth and seal with the lids.
- Let the jars cool completely at room temperature.
- Store in the fridge for up to 3 weeks or process in a water bath for long-term shelf storage.
- Pro tip: Use a jar funnel to avoid spills and keep jar rims clean for better sealing.
Notes
Nutritional Value (per 1 tablespoon serving)
- Calories: ~45 kcal
- Carbohydrates: ~12g
- Sugars: ~11g
- Fat: 0g
- Protein: 0g
- Fiber: ~0.5g
- Vitamin C: ~5% DV
- Iron: ~1% DV