Sous Vide Pork Chops
The Perfect Juicy Pork Chops Every Time
If you’ve ever struggled with dry, overcooked pork chops, you’re not alone! Pork can be tricky to cook because it goes from juicy to tough in just minutes. That’s where sous vide comes in! This French cooking technique ensures perfectly cooked meat every time.
By sealing the pork chops in a bag and cooking them in a water bath at a precise temperature, you get tender, flavorful meat without the guesswork.
What makes this recipe so special? It’s foolproof! Whether you’re cooking for your family or impressing guests, sous vide pork chops turn out perfect every single time. No more poking and cutting to check for doneness—just set it, forget it, and sear for a delicious crust at the end. Plus, it’s a great way to meal prep because you can cook multiple chops at once without drying them out.
I love this recipe because it’s incredibly easy yet feels gourmet. It’s great for a quick weeknight dinner or a fancy weekend meal. The best part? You can infuse the pork with your favorite flavors, whether it’s garlic and herbs, a smoky barbecue rub, or a sweet and savory glaze. Once you try sous vide pork chops, you’ll never go back to traditional cooking methods!
About Sous Vide Pork Chops
Sous vide pork chops are cooked slowly in a temperature-controlled water bath, ensuring they stay juicy and tender. Unlike traditional pan-frying or baking, sous vide eliminates the risk of overcooking, giving you perfectly cooked pork every single time.
What sets this recipe apart from other pork chop recipes? The precision! With sous vide, you don’t have to worry about dry, tough meat. Unlike grilling or pan-searing, where the outer layer cooks faster than the inside, sous vide keeps everything at the exact right temperature from edge to edge. You also get incredible flavor infusion since the chops cook in their juices along with any seasonings you add.
Why You’ll Love It
1. No More Overcooked Pork: Say goodbye to dry, rubbery pork chops. Sous vide keeps them juicy and tender, with restaurant-quality results every time.
2. Super Easy & Hands-Off: Once you set the sous vide temperature, there’s no need to babysit the pan. Just let the water bath do its magic while you prep sides or relax.
3. Perfect for Meal Prep: You can cook multiple pork chops at once and store them in the fridge. When ready to eat, just sear and serve for a quick meal.
4. Customizable Flavors: Want garlicky chops? A smoky barbecue rub? A sweet maple glaze? The sous vide method works with any seasoning or marinade you love.
5. Impress Without Stress: Whether cooking for family or friends, these pork chops look and taste fancy—without the hassle.
Ingredients
For the Pork Chops
- 2 bone-in or boneless pork chops (about 1 inch thick)
- 1 tsp salt
- ½ tsp black pepper
- 1 tsp garlic powder
- 1 tsp smoked paprika (optional)
- 1 tbsp olive oil or butter (for searing)
For Flavor Additions (Optional)
- 2 sprigs fresh rosemary or thyme
- 2 cloves garlic, smashed
- 1 tbsp butter (for extra richness)
- 1 tbsp honey or maple syrup (for a touch of sweetness)
Ingredient Notes
- Pork Chops: Thick-cut (at least 1 inch) works best for sous vide. Thinner chops cook too quickly and may not get the same juicy texture.
- Seasoning: Feel free to switch it up! A simple salt and pepper rub is great, but adding paprika, garlic, or fresh herbs takes it to another level.
- Butter & Herbs: Sealing the pork with butter and herbs before cooking infuses extra flavor. Rosemary and thyme work wonders!
- Searing Oil: Use a high-smoke-point oil like avocado oil for a golden, crispy crust after sous vide cooking.
Kitchen Tools Needed
1. Sous Vide Precision Cooker – This is the key to perfectly cooked pork chops! It maintains the exact water temperature needed for even cooking. Popular brands include Anova and Joule.
2. Large Pot or Sous Vide Container – You’ll need a deep pot or a dedicated sous vide water bath container to hold the water and your sealed pork chops.
3. Vacuum Sealer or Ziplock Bags – A vacuum sealer removes air for the best results, but a high-quality freezer-safe ziplock bag works too (just use the water displacement method to remove air).
4. Cast Iron Skillet or Heavy Pan – After sous vide cooking, a quick sear in a hot pan creates a crispy, golden-brown crust. Cast iron is my go-to for the best sear!
5. Tongs – Helps you flip and handle the pork chops easily when searing.
6. Meat Thermometer (Optional) – Sous vide is precise, but if you want to double-check, a quick-read thermometer ensures the pork is at your preferred doneness.
I love using the Anova Precision Cooker for sous vide because it’s user-friendly and connects to an app for easy monitoring. For searing, a Lodge Cast Iron Skillet gives the perfect crust every time!
Cooking Instructions
Step 1: Preheat the Sous Vide Water Bath
Fill a large pot or sous vide container with water and attach your sous vide precision cooker. Set the temperature to 140°F (60°C) for juicy, medium pork chops or 135°F (57°C) for slightly pink, extra tender pork. If you prefer well-done, go up to 150°F (66°C).
Pro Tip: Start heating the water while you prep the pork chops to save time!
Step 2: Season the Pork Chops
Pat the pork chops dry with paper towels. Season both sides with salt, pepper, garlic powder, and smoked paprika (or your favorite seasonings). If using fresh herbs and butter, place them on top of the chops.
Step 3: Seal the Pork Chops in a Bag
- Vacuum Sealer Method: Place the pork chops in a vacuum-seal bag and seal it tightly.
- Ziplock Bag Method: Place the pork chops in a freezer-safe ziplock bag, lower it into the water slowly to push out air, and then seal it.
Pro Tip: Removing as much air as possible helps the meat cook evenly and prevents floating.
Step 4: Cook the Pork Chops Sous Vide
Submerge the sealed bag in the preheated water bath. Cook for 1 to 1.5 hours. The pork won’t overcook, so feel free to leave it for up to 2 hours if needed.
This is the perfect time to prepare your sides! Mashed potatoes, roasted veggies, or a fresh salad pair beautifully with these chops.
Step 5: Remove and Pat Dry
Once done, take the pork chops out of the bag and pat them dry with paper towels. Drying them ensures the best sear later!
Step 6: Sear for a Crispy Crust
Heat a cast iron skillet over high heat. Add 1 tablespoon of oil or butter and let it get super hot. Sear the pork chops for 30-45 seconds per side until golden brown. If using butter, baste the chops by spooning the melted butter over them while searing.
Pro Tip: Don’t move the chops around too much—let them sit undisturbed for a perfect crust!
Step 7: Rest & Serve
Remove from heat and let the pork chops rest for 5 minutes before serving. This helps the juices redistribute for the most tender bite. Enjoy!

Tips and Tricks for Success
- Choose Thick-Cut Pork Chops – Thin chops cook too fast and don’t get as juicy. Aim for at least 1 inch thick for the best texture.
- Don’t Skip the Pat Dry Step! – Before searing, make sure the pork chops are completely dry. Any moisture will prevent that golden-brown crust from forming.
- Use High Heat for Searing – The hotter the pan, the better the crust! A cast iron skillet works best because it holds heat well.
- Experiment with Flavors – Sous vide locks in seasoning, so don’t be afraid to try different marinades, spice rubs, or herb combinations.
- Meal Prep Like a Pro – Cook a batch of sous vide pork chops in advance, store them in the fridge, and sear them fresh when you’re ready to eat!
Ingredient Substitutions and Variations
- Instead of Pork Chops, Try:
- Chicken Breasts or Thighs – Use the same seasoning but cook at 145°F (63°C) for 1.5-2 hours for juicy chicken.
- Steak – Cook at 130°F (54°C) for medium-rare and sear for a restaurant-quality steak!
- Spice & Herb Variations:
- Swap garlic powder for fresh minced garlic for a stronger flavor.
- Try a Cajun spice mix for a little heat.
- Use Italian seasoning for a Mediterranean twist.
- For a Sweeter Flavor:
- Brush with honey or maple syrup before searing for a caramelized crust.
- Add a splash of apple cider vinegar to the marinade for extra depth.
Want to get creative? Try adding a dash of soy sauce and ginger for an Asian-inspired version, or go smoky with a BBQ dry rub!
Serving Suggestions
- Classic Comfort: Serve with creamy mashed potatoes and roasted green beans for a hearty, comforting meal. The buttery mashed potatoes soak up all the delicious juices!
- Light and Fresh: Pair with a simple arugula salad and balsamic-glazed cherry tomatoes for a lighter option. The acidity balances the rich pork beautifully.
- Southern Style: Go all out with mac and cheese and collard greens for a Southern-inspired feast.
- Low-Carb Option: Serve with garlic butter asparagus and cauliflower mash for a keto-friendly meal that’s just as satisfying.
- Sweet and Savory: Try with grilled peaches and wild rice pilaf for a delicious mix of smoky, sweet, and savory flavors.
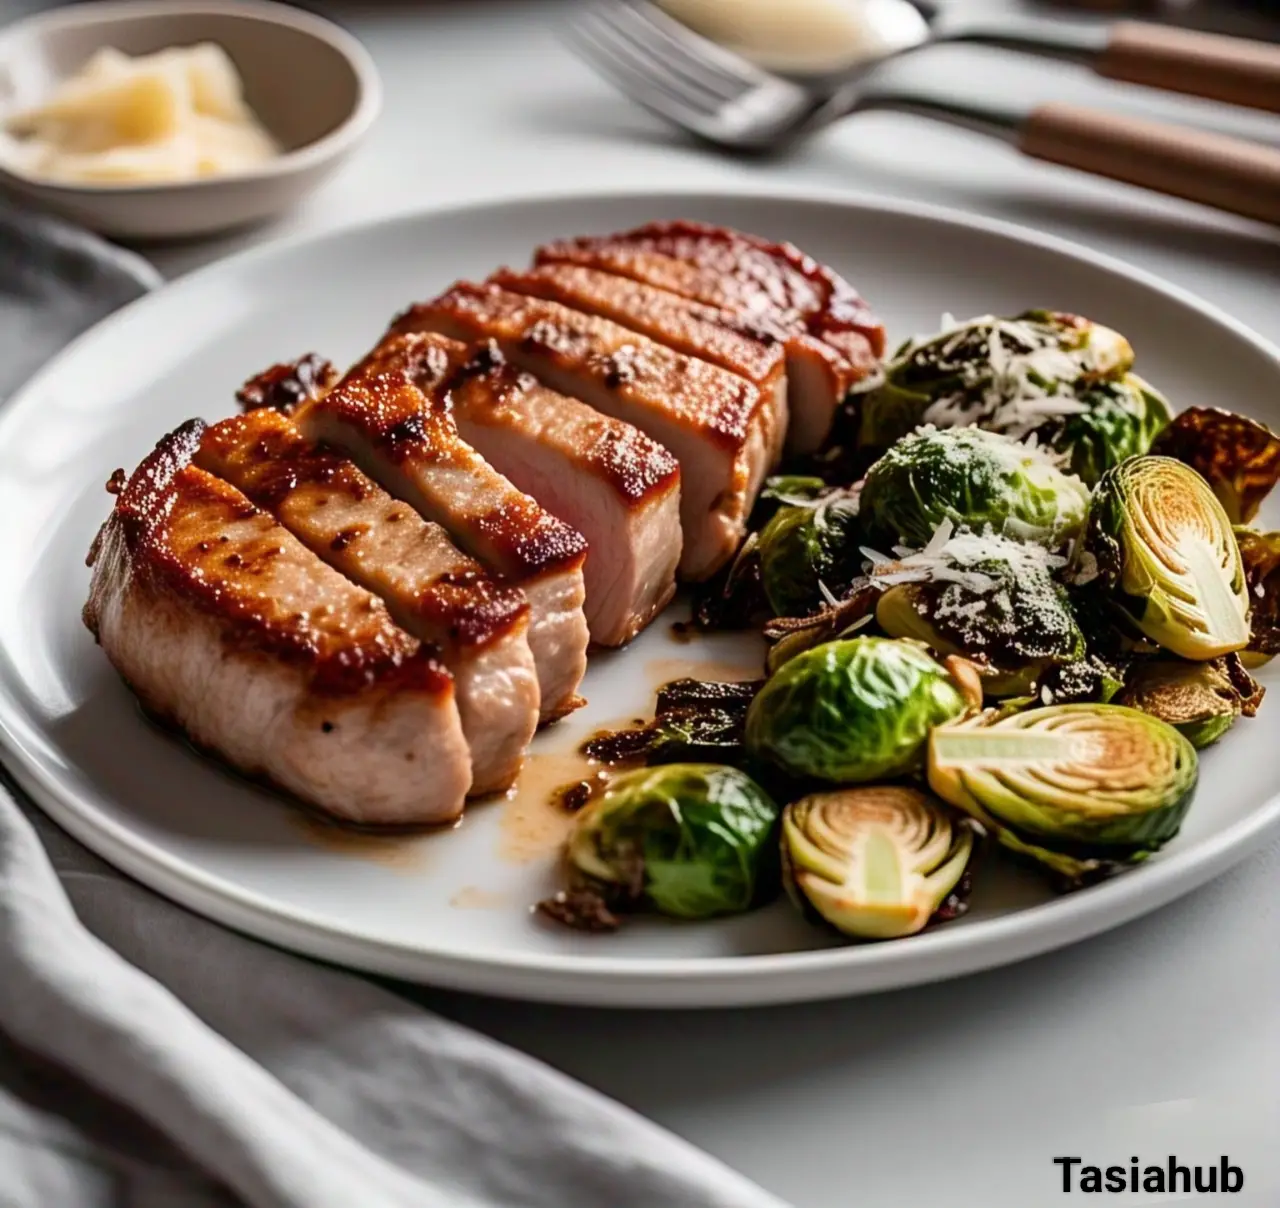
I love serving sous vide pork chops with parmesan-crusted Brussels sprouts and a drizzle of honey mustard sauce—the combo is irresistible!

Storage and Reheating Instructions
Storage
- Fridge: Store leftover pork chops in an airtight container for up to 4 days.
- Freezer: Sous vide pork chops freeze well! Wrap them tightly and store them for up to 3 months. Thaw it overnight in the fridge before reheating.
Reheating
- Sous Vide Method (Best for Maintaining Juiciness): Place the pork chops back in a 130°F (54°C) water bath for about 30 minutes, then re-sear for a fresh taste.
- Skillet Method: Heat a little butter or oil in a pan over medium-low heat and cook the pork chops for 3-5 minutes per side.
- Oven Method: Wrap in foil and bake at 275°F (135°C) for 10-15 minutes until warmed through.
Personal Tip: If reheating in a skillet, I like to add a little butter and a splash of chicken broth to keep the pork extra juicy!
Frequently Asked Questions
1. Can I cook frozen pork chops sous vide?
Yes! No need to thaw—just add 30 extra minutes to the cooking time. The sous vide method ensures even cooking straight from frozen.
2. What’s the best temperature for sous vide pork chops?
- 135°F (57°C) for extra tender, slightly pink chops
- 140°F (60°C) for juicy, medium chops (most popular choice!)
- 150°F (66°C) for well-done, firmer texture
3. How long should I sous vide pork chops?
1 to 1.5 hours is ideal, but you can leave them for up to 2 hours without overcooking. After that, the texture may start to change.
4. Do I have to sear the pork chops after sous vide?
Technically, no—but I highly recommend it! Searing adds a delicious crispy crust and enhances the flavor. Use a hot skillet for the best results.
5. Can I use bone-in pork chops?
Absolutely! Bone-in chops work great with sous vide and can be even more flavorful. Just add 10 extra minutes to the cook time.
6. What if I don’t have a vacuum sealer?
No problem! Use a ziplock bag and the water displacement method—slowly lower the bag into the water to push out the air, then seal it.
I’d love to hear how your sous vide pork chops turn out! Did you try any fun seasoning variations? Let me know in the comments or tag me on social media with your delicious creations! Happy cooking!
Don’t forget to share your photos on Instagram and tag me (@tasiahub_) or use the hashtag (#tasiahub). I’d love to see your creations!

Sous Vide Pork Chops
Equipment
- Sous Vide Precision Cooker
- Large Pot or Sous Vide Container
- Vacuum Sealer or Ziplock Bags
- Cast Iron Skillet or Heavy Pan
- Tongs
- Meat thermometer (optional)
Ingredients
For the Pork Chops
- 2 bone-in or boneless pork chops about 1-inch thick
- 1 tsp salt
- ½ tsp black pepper
- 1 tsp garlic powder
- 1 tsp smoked paprika optional
- 1 tbsp olive oil or butter for searing
For Flavor Additions (Optional)
- 2 sprigs fresh rosemary or thyme
- 2 cloves garlic smashed
- 1 tbsp butter for extra richness
- 1 tbsp honey or maple syrup for a touch of sweetness
Instructions
Step 1: Preheat the Sous Vide Water Bath
- Fill a large pot or sous vide container with water and attach your sous vide precision cooker. Set the temperature to 140°F (60°C) for juicy, medium pork chops or 135°F (57°C) for slightly pink, extra tender pork. If you prefer well-done, go up to 150°F (66°C).
- Pro Tip: Start heating the water while you prep the pork chops to save time!
Step 2: Season the Pork Chops
- Pat the pork chops dry with paper towels. Season both sides with salt, pepper, garlic powder, and smoked paprika (or your favorite seasonings). If using fresh herbs and butter, place them on top of the chops.
Step 3: Seal the Pork Chops in a Bag
- Vacuum Sealer Method: Place the pork chops in a vacuum-seal bag and seal it tightly.
- Ziplock Bag Method: Place the pork chops in a freezer-safe ziplock bag, lower it into the water slowly to push out air, then seal it.
- Pro Tip: Removing as much air as possible helps the meat cook evenly and prevents floating.
Step 4: Cook the Pork Chops Sous Vide
- Submerge the sealed bag in the preheated water bath. Cook for 1 to 1.5 hours. The pork won’t overcook, so feel free to leave it for up to 2 hours if needed.
- This is the perfect time to prepare your sides! Mashed potatoes, roasted veggies, or a fresh salad pair beautifully with these chops.
Step 5: Remove and Pat Dry
- Once done, take the pork chops out of the bag and pat them dry with paper towels. Drying them ensures the best sear later!
Step 6: Sear for a Crispy Crust
- Heat a cast iron skillet over high heat. Add 1 tablespoon of oil or butter and let it get super hot. Sear the pork chops for 30-45 seconds per side until golden brown. If using butter, baste the chops by spooning the melted butter over them while searing.
- Pro Tip: Don’t move the chops around too much—let them sit undisturbed for a perfect crust!
Step 7: Rest & Serve
- Remove from heat and let the pork chops rest for 5 minutes before serving. This helps the juices redistribute for the most tender bite. Enjoy!
Notes
Nutritional Value (Per Serving)
(Based on 6 oz pork chop, without additional butter or sauce)- Calories: ~280-350 kcal
- Protein: ~35g
- Fat: ~16g
- Carbohydrates: ~0g (varies with added ingredients)
- Sodium: ~500mg (depends on seasoning)
The nutritional information on this website is only an estimate and is provided for convenience and as a courtesy only. The accuracy of the nutritional information for any recipe on this site is not guaranteed. It should not be used as a substitute for a professional nutritionist’s advice.