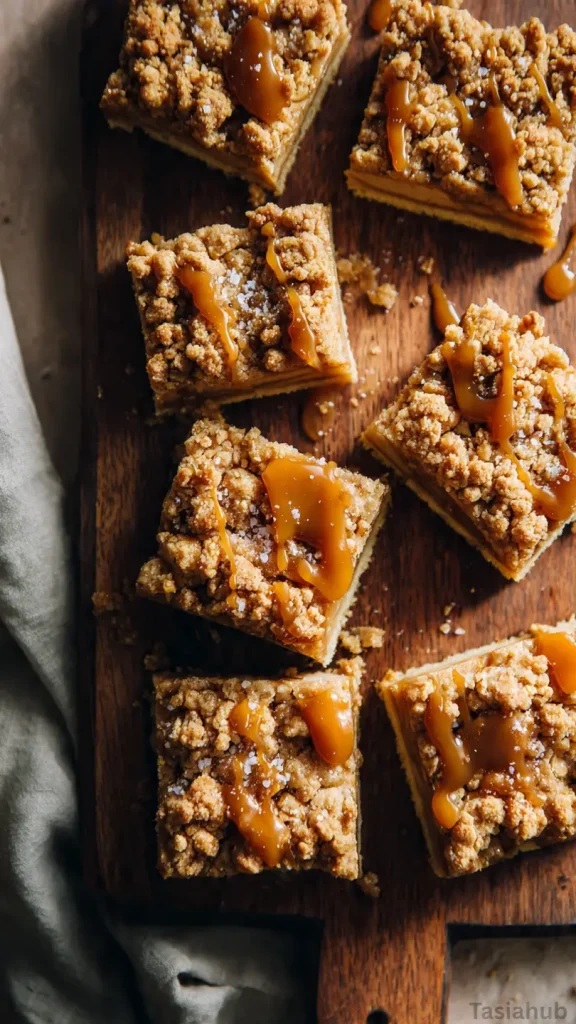
Salted Caramel Apple Pie Bars

Imagine the comfort of apple pie, but in a form that’s easier to slice, share, and enjoy without needing a fork. That’s exactly what these salted caramel apple pie bars bring to the table. They’re cozy, slightly indulgent, and layered with the best parts of fall—spiced apples, buttery crust, and a gooey caramel drizzle on top. The result is a treat that feels both familiar and exciting.
During the holidays, especially around Thanksgiving, I find myself craving desserts that are crowd-pleasing but don’t require hours of complicated baking. Traditional pies are wonderful, of course, but having a dessert bar option makes things so much simpler. These easy apple pie bars come together with a straightforward crust, a cinnamon-scented apple filling, and a sweet crumb topping that bakes up golden and crisp. Add the caramel apple toppings right before serving, and suddenly you’ve got a dessert that looks bakery-worthy without the fuss.
This apple pie bars recipe is also perfect if you love the taste of apple pie but want something you can pick up with your hands. The bars are sturdy enough to slice cleanly but still soft and tender with each bite. I love how the salted caramel cuts through the sweetness of the apples and brings out all those warm spices. It’s one of those treats where everyone will ask, “Can I get the recipe?” after the first bite.
Whether you’re planning a spread of Thanksgiving desserts or just want something sweet to enjoy with coffee or tea on a cool afternoon, these salted caramel apple pie bars hit the mark. They’re the kind of dessert you’ll make once and then keep coming back to every fall, because they’re simple, nostalgic, and absolutely delicious.
Why You’ll Love It
- Pie without the hassle – You get all the cozy flavors of apple pie but in a handheld bar that’s easier to bake, slice, and share. No need to fuss with rolling out dough or perfecting crimped edges.
- The perfect holiday treat – These bars shine on any dessert table, especially when you want a standout option for your lineup of Thanksgiving desserts. They’re festive, warm, and always a crowd favorite.
- That salted caramel drizzle – The sweet-and-salty balance takes these dessert bars from delicious to unforgettable. It melts into the apples and crumb topping for an extra layer of indulgence.
- Customizable and forgiving – Want more spice? Add extra cinnamon. Prefer a thicker crust? Press down a little more dough. This apple pie bars recipe is easy to tweak to your taste.
- Make-ahead friendly – The bars actually taste better the next day, once the flavors have had time to mingle. That means you can prep them before the big dinner and still wow everyone with a stress-free dessert.
Ingredient List
For the Crust & Crumble Topping:
- 1 cup (2 sticks) unsalted butter, melted
- 2/3 cup granulated sugar
- 2 teaspoons vanilla extract
- 1/2 teaspoon salt
- 2 1/2 cups all-purpose flour
For the Apple Filling:
- 4 large apples, peeled, cored, and thinly sliced
- 2 tablespoons all-purpose flour
- 2 tablespoons granulated sugar
- 1 teaspoon ground cinnamon
- 1/4 teaspoon ground nutmeg
For the Topping:
- 1/2 cup salted caramel sauce (store-bought or homemade)
- Flaky sea salt, for sprinkling
Ingredient Notes
- Apples – I always reach for a mix of tart and sweet apples (like Granny Smith + Honeycrisp). The combo keeps the filling from being overly sweet and gives a nice balance of flavor.
- Butter – Use real unsalted butter here (not margarine). It’s what gives the crust its rich, melt-in-your-mouth taste.
- Cinnamon – Don’t skip this! Cinnamon ties the whole filling together and makes your kitchen smell like fall magic while it bakes.
- Salted Caramel Sauce – If you have time, homemade caramel sauce is unbeatable, but a good store-bought brand works perfectly. I love to warm it slightly before drizzling so it sinks into the bars.
- Flaky Sea Salt – A little sprinkle on top makes the caramel pop and keeps the bars from being too sweet.
Kitchen Equipment Needed
- 9×13-inch baking pan – Perfect size for these bars. I love using my glass pan so I can peek at the layers as they bake.
- Mixing bowls – You’ll need a few for the crust, filling, and topping. I keep a set of nesting bowls handy to cut down on clutter.
- Wooden spoon or silicone spatula – Great for mixing the buttery crust and tossing the apple filling evenly with the spices.
- Sharp knife + cutting board – For peeling and slicing the apples thin enough so they bake tender.
- Measuring cups and spoons – Precision matters here, especially for the crust-to-filling ratio.
- Wire rack – Helps the bars cool evenly before slicing (and keeps the caramel from running everywhere).
- Parchment paper – Optional, but lining your pan makes lifting and cutting the bars so much easier.
Instructions
Step 1 — Preheat & prep
- Preheat your oven to 350°F (175°C).
- Line a 9×13-inch baking pan with parchment, leaving a 2–3 inch overhang on the long sides so you can lift the bars out easily when they’re cool. Lightly grease the exposed pan edges or spray the parchment with nonstick spray so it doesn’t shift.
- Arrange your tools (mixing bowls, spatula, measuring cup) so everything is within reach — baking is smoother when you’re not hunting for things mid-recipe.
Pro tip: Leaving a generous parchment overhang is the single easiest trick for removing neat bars — no wrestling the crust out of the pan later.
Step 2 — Make the crust & crumble topping
- In a large bowl, combine the melted unsalted butter, granulated sugar, vanilla extract, and salt. Whisk briefly until combined.
- Add the all-purpose flour and stir until the mixture forms a coarse, sandy crumb. It should hold together slightly when pressed between your fingers.
- Reserve about 1/3 of this crumb mixture in a small bowl — that will be your crumble topping. Press the remaining 2/3 firmly and evenly into the bottom of the prepared pan to form the crust.
Pro tip: Use the bottom of a measuring cup or a small glass to press the crust down evenly and compactly — this helps the bars hold their shape when sliced.
Step 3 — Prepare the apple filling
- In a medium bowl, toss the thinly sliced apples with the 2 tablespoons flour, 2 tablespoons granulated sugar, 1 teaspoon cinnamon, and 1/4 teaspoon nutmeg until every slice is lightly coated.
- Taste one (or sample a tiny bit of the mixture) — if your apples are very tart, add 1 more teaspoon of sugar; if they’re very sweet, skip it.
- Spread the coated apple slices in an even layer over the pressed crust, arranging them so the pan is covered but not heaped.
Pro tip: Slice apples about 1/8 inch thick so they soften through baking without turning mushy. A mandoline or very sharp knife makes this quick and even.
Step 4 — Add the crumble topping and assemble
- Sprinkle the reserved crumb mixture evenly over the apple layer. Leave some slightly larger clumps for texture — you want a mix of fine crumbs and little crunchy clusters.
- If you like extra visual appeal, nestle a few thin apple slices on top of the crumble for a pretty finish before baking.
Pro tip: Don’t press the crumble down; it should remain loose so it bakes into a crisp, golden topping.
Step 5 — Bake until bubbly and golden
- Place the pan on the middle rack and bake for about 30–35 minutes, until the crumble is golden and you can see the apple juices bubbling through in places.
- If the edges are browning faster than the center, tent a piece of foil loosely over the pan for the last 10 minutes. Rotate the pan halfway through baking for even color.
Pro tip: Look for bubbling apple juices as the doneness cue — if the center still looks pale and dry, it likely needs more time.
Step 6 — Cool, drizzle with caramel, and finish
- Remove the pan from the oven and set it on a wire rack. Let it cool 15–20 minutes so it sets enough to lift from the pan without falling apart.
- Use the parchment overhang to lift the whole slab out of the pan and back onto the wire rack. Let the slab cool completely (about 1–2 hours) for clean slicing — or chill in the fridge for 30–45 minutes if you’re in a hurry.
- Warm the salted caramel sauce briefly (10–20 seconds in the microwave, stirring once) until pourable, then drizzle generously over the cooled bars. Finish with a light sprinkle of flaky sea salt.
Pro tip: Letting the bars cool completely before slicing makes the difference between tidy squares and a gooey, sloppy tray of deliciousness. If you must cut warm bars, run your knife under hot water, dry it, and wipe between each cut for cleaner edges.
Step 7 — Slice, store, and serve
- Transfer the slab to a cutting board. Using a sharp chef’s knife, cut into 12–15 bars (3 rows by 4–5 columns) depending on how large you want each piece. Wipe the knife between cuts for clean lines.
- Serve as-is, or add a scoop of vanilla ice cream or a dollop of whipped cream for extra decadence.
- Store leftovers in an airtight container at room temperature for up to 2 days, or in the fridge for up to 5 days. Rewarm briefly before serving if you like them warm.
Pro tip: For super-clean slices, chill the pan in the fridge for 30–45 minutes before cutting — the bars firm up and slice like a dream.
Tips and Tricks for Success
- Mix apple varieties – Combining sweet (like Honeycrisp) and tart (like Granny Smith) gives the filling more depth and keeps it from being one-note.
- Don’t skimp on the crust press – Really compact that base layer so the bars hold together when sliced. Loose crust = crumbly mess.
- Cool completely before slicing – It’s tempting to dig in right away, but cooling ensures clean bars that hold their shape.
- Warm the caramel slightly – Drizzling warm caramel helps it seep into the crumble and apples, rather than just sitting on top.
- Line the pan with parchment – This little step makes lifting the entire slab out of the pan effortless.
Ingredient Substitutions and Variations
- Apples – Swap with pears for a softer, slightly floral filling, or even use peaches in summer.
- Caramel sauce – Try a homemade bourbon caramel or maple caramel for a fun twist.
- Flour – Substitute part of the all-purpose flour with oat flour for a nuttier, chewier crust.
- Spices – Add cardamom or cloves along with cinnamon and nutmeg for a spicier, more festive flavor.
- Crumble topping – Stir in 1/2 cup chopped pecans or walnuts for extra crunch.
- Gluten-free version – Use a 1:1 gluten-free flour blend to keep the texture close to the original.
Serving Suggestions
- I love enjoying these bars slightly warm with a scoop of vanilla ice cream — the cold ice cream melts into the warm apples and caramel, and it’s pure heaven.
- Serve smaller squares alongside a platter of Thanksgiving desserts — they pair beautifully with pumpkin pie and pecan pie for a varied dessert spread.
- For a cozy afternoon treat, cut them into bite-sized bars and serve with hot apple cider or a cinnamon latte.
- Drizzle a little extra caramel and add a dollop of whipped cream for a café-style presentation when hosting friends.
- I sometimes sneak a square for breakfast with my morning coffee — it feels indulgent but not over the top since it’s fruit-filled.
Storage and Reheating Instructions
- Room temperature – Store in an airtight container for up to 2 days. Best if the weather isn’t too hot.
- Refrigerator – Keep in a sealed container for up to 5 days. The bars stay firmer when chilled.
- Freezer – Wrap individual bars in plastic wrap, then store in a freezer bag for up to 3 months. Thaw in the fridge overnight before serving.
- Reheating – Warm individual bars in the microwave for 10–15 seconds to bring back that just-baked flavor.
- Serving from fridge – Let bars sit at room temp for 10–15 minutes before eating for the best texture.
Frequently Asked Questions
How many servings does this recipe make?
This recipe makes about 12–15 bars, depending on how large you slice them. If you want smaller, bite-sized pieces for a dessert table, you can cut up to 20.
Can I make these bars ahead of time?
Yes! These bars are perfect for making ahead. In fact, they taste even better the next day once the flavors have settled. Just bake, cool completely, and store in the fridge until ready to serve.
What’s the best type of apple to use?
A mix of tart and sweet apples works best — I love using Granny Smith for tartness and Honeycrisp or Fuji for sweetness. This gives the filling a great balance of flavor and texture.
Can I use store-bought caramel sauce?
Absolutely. A good quality store-bought sauce works great and saves time. If you want to elevate the flavor, warm it slightly before drizzling so it soaks into the crumble topping.
How do I keep the crust from crumbling?
The key is pressing the crust firmly into the pan before baking. Use the bottom of a measuring cup or glass to compact it evenly so it holds up when sliced.
Can these bars be made gluten-free?
Yes! Simply swap the all-purpose flour for a 1:1 gluten-free baking flour blend. The texture stays close to the original and they’re just as delicious.
Did you try this recipe? Let me know in the comments how it turned out — I’d love to hear how you served your salted caramel apple pie bars!
Salted Caramel Apple Pie Bars
Equipment
- 9×13-inch Baking Pan
- Mixing Bowls
- Wooden Spoon or Silicone Spatula
- Sharp knife & cutting board
- Measuring cups and spoons
- Wire rack
- Parchment paper
Ingredients
For the Crust & Crumble Topping:
- 1 cup 2 sticks unsalted butter, melted
- 2/3 cup granulated sugar
- 2 teaspoons vanilla extract
- 1/2 teaspoon salt
- 2 1/2 cups all-purpose flour
For the Apple Filling:
- 4 large apples peeled, cored, and thinly sliced
- 2 tablespoons all-purpose flour
- 2 tablespoons granulated sugar
- 1 teaspoon ground cinnamon
- 1/4 teaspoon ground nutmeg
For the Topping:
- 1/2 cup salted caramel sauce store-bought or homemade
- Flaky sea salt for sprinkling
Instructions
Step 1 — Preheat & prep
- Preheat your oven to 350°F (175°C).
- Line a 9×13-inch baking pan with parchment, leaving a 2–3 inch overhang on the long sides so you can lift the bars out easily when they’re cool. Lightly grease the exposed pan edges or spray the parchment with nonstick spray so it doesn’t shift.
- Arrange your tools (mixing bowls, spatula, measuring cup) so everything is within reach — baking is smoother when you’re not hunting for things mid-recipe.
- Pro tip: Leaving a generous parchment overhang is the single easiest trick for removing neat bars — no wrestling the crust out of the pan later.
Step 2 — Make the crust & crumble topping
- In a large bowl, combine the melted unsalted butter, granulated sugar, vanilla extract, and salt. Whisk briefly until combined.
- Add the all-purpose flour and stir until the mixture forms a coarse, sandy crumb. It should hold together slightly when pressed between your fingers.
- Reserve about 1/3 of this crumb mixture in a small bowl — that will be your crumble topping. Press the remaining 2/3 firmly and evenly into the bottom of the prepared pan to form the crust.
- Pro tip: Use the bottom of a measuring cup or a small glass to press the crust down evenly and compactly — this helps the bars hold their shape when sliced.
Step 3 — Prepare the apple filling
- In a medium bowl, toss the thinly sliced apples with the 2 tablespoons flour, 2 tablespoons granulated sugar, 1 teaspoon cinnamon, and 1/4 teaspoon nutmeg until every slice is lightly coated.
- Taste one (or sample a tiny bit of the mixture) — if your apples are very tart, add 1 more teaspoon of sugar; if they’re very sweet, skip it.
- Spread the coated apple slices in an even layer over the pressed crust, arranging them so the pan is covered but not heaped.
- Pro tip: Slice apples about 1/8 inch thick so they soften through baking without turning mushy. A mandoline or very sharp knife makes this quick and even.
Step 4 — Add the crumble topping and assemble
- Sprinkle the reserved crumb mixture evenly over the apple layer. Leave some slightly larger clumps for texture — you want a mix of fine crumbs and little crunchy clusters.
- If you like extra visual appeal, nestle a few thin apple slices on top of the crumble for a pretty finish before baking.
- Pro tip: Don’t press the crumble down; it should remain loose so it bakes into a crisp, golden topping.
Step 5 — Bake until bubbly and golden
- Place the pan on the middle rack and bake for about 30–35 minutes, until the crumble is golden and you can see the apple juices bubbling through in places.
- If the edges are browning faster than the center, tent a piece of foil loosely over the pan for the last 10 minutes. Rotate the pan halfway through baking for even color.
- Pro tip: Look for bubbling apple juices as the doneness cue — if the center still looks pale and dry, it likely needs more time.
Step 6 — Cool, drizzle with caramel, and finish
- Remove the pan from the oven and set it on a wire rack. Let it cool 15–20 minutes so it sets enough to lift from the pan without falling apart.
- Use the parchment overhang to lift the whole slab out of the pan and back onto the wire rack. Let the slab cool completely (about 1–2 hours) for clean slicing — or chill in the fridge for 30–45 minutes if you’re in a hurry.
- Warm the salted caramel sauce briefly (10–20 seconds in the microwave, stirring once) until pourable, then drizzle generously over the cooled bars. Finish with a light sprinkle of flaky sea salt.
- Pro tip: Letting the bars cool completely before slicing makes the difference between tidy squares and a gooey, sloppy tray of deliciousness. If you must cut warm bars, run your knife under hot water, dry it, and wipe between each cut for cleaner edges.
Step 7 — Slice, store, and serve
- Transfer the slab to a cutting board. Using a sharp chef’s knife, cut into 12–15 bars (3 rows by 4–5 columns) depending on how large you want each piece. Wipe the knife between cuts for clean lines.
- Serve as-is, or add a scoop of vanilla ice cream or a dollop of whipped cream for extra decadence.
- Store leftovers in an airtight container at room temperature for up to 2 days, or in the fridge for up to 5 days. Rewarm briefly before serving if you like them warm.
- Pro tip: For super-clean slices, chill the pan in the fridge for 30–45 minutes before cutting — the bars firm up and slice like a dream.
Notes
Nutritional Value (per bar, approximate):
- Calories: 320–350 kcal
- Total Fat: 15g
- Saturated Fat: 9g
- Carbohydrates: 45g
- Sugars: 25g
- Protein: 2g
- Fiber: 2g
- Sodium: 120mg