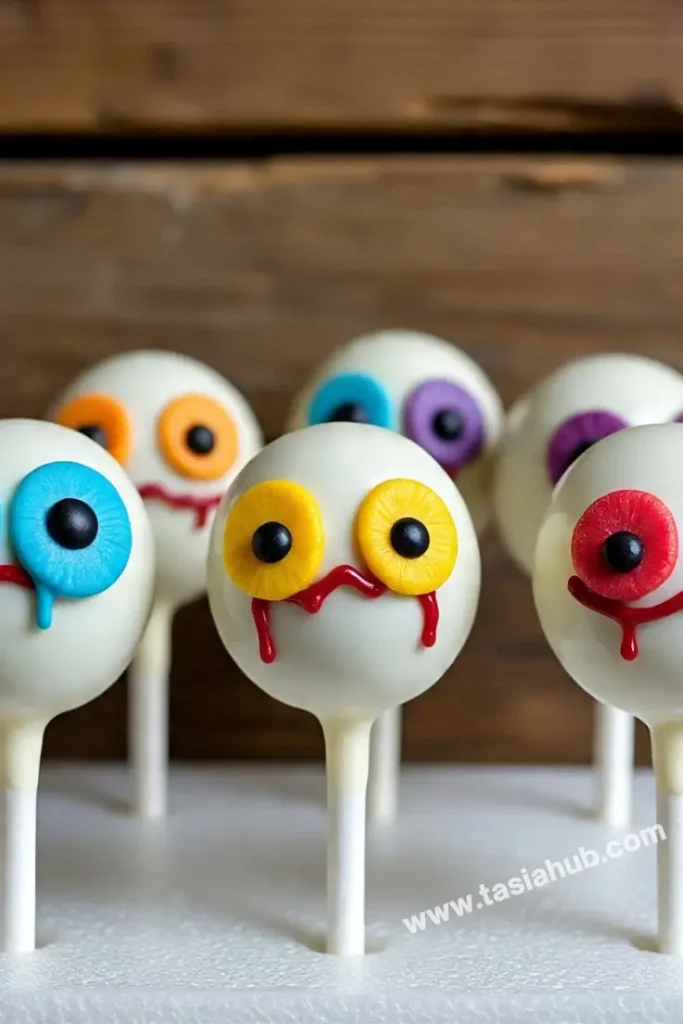
Monster Eyeball Cake Pops

Halloween is the perfect excuse to get a little playful in the kitchen, and these monster eyeball cake pops are just the treat to make your spooky season extra fun. Imagine vibrant, colorful eyeballs staring up at you from a platter—creepy? Yes. Adorable? Absolutely. These little monsters aren’t just for show; they’re a delicious bite of cake and frosting rolled into one perfect pop.
Making Halloween cake pops like these is such a joyful activity, especially with kids. Rolling cake into little balls, dipping them in bright candy melts, and decorating them with quirky eyes and creepy veins turns baking into a full-on fun activity for kids. It’s messy, yes—but the smiles at the end make every sprinkle and smear worth it.
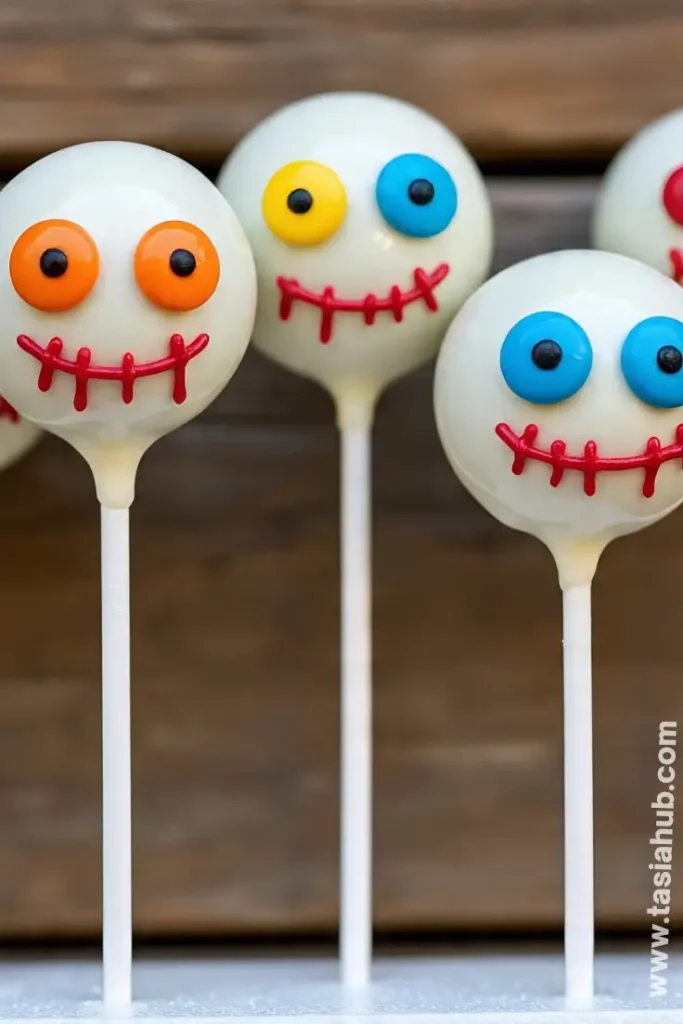
I love that these monster cake pops can be as wild or simple as you like. You can go with classic white eyes with red squiggly lines for a scary effect, or make rainbow-colored eyeballs for a more whimsical vibe. Pairing them with other Halloween desserts like pumpkin cupcakes or ghost meringues makes your dessert table feel like it’s straight out of a Halloween storybook.
Beyond the kitchen, these eyeball cake pops are conversation starters. Guests will be intrigued by the creative designs, and kids will love picking their favorites. They’re not just another sweet treat—they’re a craft, a snack, and a centerpiece all in one. Plus, making fun cake pops is the kind of project that keeps little hands busy and imaginations running wild.
Why You’ll Love It
- Creative and playful: These eyeball cake pops let you channel your inner artist. From crazy-colored irises to squiggly veins, every pop is a tiny canvas—perfect for a fun activity for kids or even adults who love a little Halloween mischief.
- Perfect bite-sized treat: No cutting, no mess—just grab a stick and enjoy. These monster cake pops are the ideal size for snacking, sharing at parties, or tucking into lunchboxes for a seasonal surprise.
- Customizable for any theme: Whether you want spooky, silly, or downright monstrous, these Halloween cake pops can match any vibe. Change the colors, shapes, or expressions to fit your Halloween dessert table perfectly.
- Kid-approved fun: Watching little ones decorate and nibble on their creations is priceless. Turning baking into a fun cake pops project doubles the excitement, making it one of the most memorable Halloween desserts you’ll whip up this season.
- Show-stopping presentation: Plated together, these eyeball cake pops make a dramatic centerpiece. They’re sure to draw ooohs and aaahs from guests while sneaking in a sweet treat for everyone to enjoy.
Ingredient List
For the Cake Pops
- 2 cups (250g) chocolate or vanilla cake, crumbled
- 1/2 cup (120g) cream cheese or buttercream frosting
- 1 tsp vanilla extract
For the Coating
- 2 cups (340g) white candy melts
- Food coloring (red, green, blue, or any fun Halloween colors)
- 1 tsp coconut oil (optional, for smoother coating)
For Decoration
- Edible markers or gel icing (black, red, and other colors)
- Candy eyeballs (optional, for a quick version)
- Sprinkles or edible glitter (optional, for extra fun)
Ingredient Notes
- I always use good-quality cake—homemade or store-bought works! It really makes the pops moist and flavorful.
- Don’t skip the cream cheese or buttercream frosting. It’s what helps the crumbled cake stick together perfectly.
- Candy melts are easier than chocolate for dipping, especially if you’re making fun cake pops with kids.
- A tiny splash of coconut oil makes your candy coating silky and smooth—trust me, it’s worth it.
- Edible markers are lifesavers for drawing veins and pupils. It adds personality to each monster cake pop!
Kitchen Equipment Needed
- Mixing bowls – For combining your cake crumbs and frosting. I love using medium-sized glass bowls; they’re sturdy and easy to see what’s going on.
- Wooden spoon or spatula – To mix the cake and frosting together smoothly. My favorite is a flexible silicone spatula—it scrapes every bit!
- Cake pop sticks – Essential for holding your monster cake pops. Make sure they’re sturdy so the pops don’t fall off.
- Microwave-safe bowl – For melting candy melts. I use a glass bowl so it heats evenly.
- Styrofoam block or cake pop stand – To hold your pops upright while drying. It keeps them from rolling all over the counter!
- Spoon or small ladle – To help dip the cake pops into the candy coating neatly.
- Edible markers or piping bags – For decorating pupils, veins, and fun details. I prefer fine-tipped edible markers for precision.
- Cooling rack (optional) – Helps excess candy melt drip off if you don’t want to use a stand.
Instructions
1. Prepare the Cake Mixture
- Crumble the cake: Start with cooled chocolate or vanilla cake. Break it into fine crumbs using your hands or a fork—no big chunks!
- Mix in frosting: Add 1/2 cup cream cheese or buttercream frosting and 1 tsp vanilla extract.
- Combine thoroughly: Use a spatula to mix until the cake holds together when pressed. It should feel slightly sticky but not wet.
Pro Tip: If the mixture feels too dry, add a tiny bit more frosting, a teaspoon at a time. Too wet? Add a few more crumbs.
2. Shape the Cake Pops
- Roll into balls: Scoop small amounts (about 1–2 tablespoons) and roll into smooth balls between your palms.
- Insert sticks: Gently insert a cake pop stick about halfway into each ball.
Pro Tip: Chill the balls in the fridge for 15–20 minutes before dipping. It helps them stay on the sticks and keeps them from falling apart.
3. Melt the Candy Coating
- Microwave in intervals: Place candy melts and coconut oil in a microwave-safe bowl. Heat in 30-second bursts, stirring in between until smooth.
Pro Tip: Whisk continuously to prevent lumps and keep the candy silky. Add a tiny bit more coconut oil if it’s too thick. - Color your coating: Divide into separate bowls and mix in food coloring for your fun Halloween palette.
4. Dip the Cake Pops
- Dip carefully: Hold the stick and dip each cake pop into the candy melt. Gently tap off excess coating.
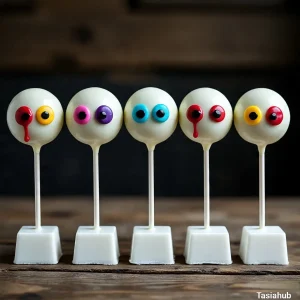
- Set upright: Stick the dipped cake pop into a styrofoam block or cake pop stand to dry completely.
Pro Tip: For a smooth coating, swirl gently in the candy rather than just dunking straight down.
5. Decorate Your Eyeballs
- Draw pupils and veins: Once the coating is set, use edible markers or gel icing to draw the iris, pupil, and spooky veins.
- Add candy eyeballs (optional): Stick a candy eyeball in the center for an extra creepy effect.
Pro Tip: Be playful! No two monster cake pops need to look the same—messy lines and quirky pupils add personality.
6. Serve and Enjoy
- Arrange on a platter or in small cups for a fun display. Kids and adults alike will love picking their favorite colors and monsters.
Tips and Tricks for Success
- Chill the cake balls: Always refrigerate for 15–20 minutes before dipping—this prevents them from falling off the sticks.
- Use thin candy coating: Add a little coconut oil if your candy melts are too thick; it makes dipping smoother.
- Tap gently: After dipping, lightly tap the stick on the edge of the bowl to remove excess coating and avoid lumps.
- Work quickly with decorations: Candy melts set fast! Decorate immediately or keep a small bowl of warm coating handy.
- Keep kids involved: Let them decorate with edible markers or sprinkles—they’ll love the creative control!
Ingredient Substitutions and Variations
- Cake base: Use boxed cake mix, pound cake, or even brownie crumbs for a fudgier pop.
- Frosting: Swap cream cheese frosting with peanut butter, chocolate, or store-bought buttercream.
- Candy coating: Chocolate chips, colored chocolate, or almond bark work if you don’t have candy melts.
- Eyeball designs: Use candy eyeballs, mini M&Ms, or piped icing for fun variations.
- Flavors: Add cocoa powder, pumpkin spice, or peppermint extract for a seasonal twist.
Serving Suggestions
- I love arranging monster eyeball cake pops on a Halloween-themed platter with small spiderweb doilies—it makes them look extra spooky and festive.
- Serve them alongside other Halloween desserts like ghost meringues or pumpkin cupcakes for a fun, colorful dessert table.
- Place a few pops in small cups with shredded paper or tissue for a cute, grab-and-go treat at kids’ parties.
- Use them as a fun activity: let kids pick their favorite pop, then decorate it themselves before enjoying.
- I sometimes pair them with a hot chocolate or warm cider—it’s the perfect combo of sweet, creamy, and cozy for fall evenings.
Storage and Reheating Instructions
- Room temperature: Keep in an airtight container for up to 3 days. Perfect for a quick grab-and-go snack.
- Refrigerator: Store in a covered container for up to 1 week. Let them come to room temperature before serving for the best texture.
- Freezer: Wrap individually in plastic wrap and place in a freezer-safe container for up to 1 month. Thaw in the fridge overnight.
- Avoid heat: Don’t microwave—they can melt or lose shape. Stick to gentle thawing at room temperature.
- Display tips: Keep out of direct sunlight or warm areas to maintain that glossy candy coating.
Frequently Asked Questions
Can I make these cake pops ahead of time?
Absolutely! You can make them a day or two in advance and store in the fridge. Just keep them in an airtight container to maintain freshness.
What if my cake pops fall off the sticks?
Chilling the cake balls before dipping usually fixes this. Also, dip the stick in a little melted candy before inserting—it helps “glue” the cake in place.
Can I use chocolate instead of candy melts?
Yes! Chocolate works, but it can be trickier to get a smooth coating. Adding a tiny bit of coconut oil helps thin it for easy dipping.
How do I make the veins and pupils look realistic?
Use edible markers or thin gel icing. There’s no need to be perfect—quirky lines make your monster cake pops even more fun!
Can I freeze these cake pops?
Yes! Wrap each pop individually in plastic wrap and store in a freezer-safe container for up to a month. Thaw in the fridge before serving.
Any tips for decorating with kids?
Keep it simple—let them choose colors, use sprinkles, or candy eyes. It’s a fun activity for kids and a great way to get everyone involved.
Did you try these monster eyeball cake pops? Let me know in the comments how they turned out! I’d love to see your spooky creations.
Monster Eyeball Cake Pops
Equipment
- Mixing Bowls
- Wooden spoon or spatula
- Cake pop sticks
- Microwave-safe bowl
- Styrofoam block or cake pop stand
- Spoon or small ladle
- Edible markers or piping bags
- Cooling Rack (optional)
Ingredients
For the Cake Pops
- 2 cups 250g chocolate or vanilla cake, crumbled
- 1/2 cup 120g cream cheese or buttercream frosting
- 1 tsp vanilla extract
For the Coating
- 2 cups 340g white candy melts
- Food coloring red, green, blue, or any fun Halloween colors
- 1 tsp coconut oil optional, for smoother coating
For Decoration
- Edible markers or gel icing black, red, and other colors
- Candy eyeballs optional, for a quick version
- Sprinkles or edible glitter optional, for extra fun
Instructions
Prepare the Cake Mixture
- Crumble the cake: Start with cooled chocolate or vanilla cake. Break it into fine crumbs using your hands or a fork—no big chunks!
- Mix in frosting: Add 1/2 cup cream cheese or buttercream frosting and 1 tsp vanilla extract.
- Combine thoroughly: Use a spatula to mix until the cake holds together when pressed. It should feel slightly sticky but not wet.
- Pro Tip: If the mixture feels too dry, add a tiny bit more frosting, a teaspoon at a time. Too wet? Add a few more crumbs.
Shape the Cake Pops
- Roll into balls: Scoop small amounts (about 1–2 tablespoons) and roll into smooth balls between your palms.
- Insert sticks: Gently insert a cake pop stick about halfway into each ball.
- Pro Tip: Chill the balls in the fridge for 15–20 minutes before dipping. It helps them stay on the sticks and keeps them from falling apart.
Melt the Candy Coating
- Microwave in intervals: Place candy melts and coconut oil in a microwave-safe bowl. Heat in 30-second bursts, stirring in between until smooth.
- Pro Tip: Whisk continuously to prevent lumps and keep the candy silky. Add a tiny bit more coconut oil if it’s too thick.
- Color your coating: Divide into separate bowls and mix in food coloring for your fun Halloween palette.
Dip the Cake Pops
- Dip carefully: Hold the stick and dip each cake pop into the candy melt. Gently tap off excess coating.
- Set upright: Stick the dipped cake pop into a styrofoam block or cake pop stand to dry completely.
- Pro Tip: For a smooth coating, swirl gently in the candy rather than just dunking straight down.
Decorate Your Eyeballs
- Draw pupils and veins: Once the coating is set, use edible markers or gel icing to draw the iris, pupil, and spooky veins.
- Add candy eyeballs (optional): Stick a candy eyeball in the center for an extra creepy effect.
- Pro Tip: Be playful! No two monster cake pops need to look the same—messy lines and quirky pupils add personality.
Serve and Enjoy
- Arrange on a platter or in small cups for a fun display. Kids and adults alike will love picking their favorite colors and monsters.
Notes
Nutritional Value (per cake pop, approximate):
- Calories: 180–210 kcal
- Carbohydrates: 25–28g
- Sugar: 18–22g
- Fat: 8–10g
- Protein: 2–3g
- Fiber: <1g
- Sodium: 90–120mg