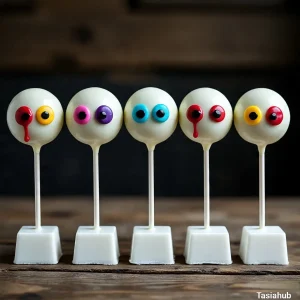
Monster Eyeball Cake Pops
I love that these monster cake pops can be as wild or simple as you like. You can go with classic white eyes with red squiggly lines for a scary effect, or make rainbow-colored eyeballs for a more whimsical vibe.
Equipment
- Mixing Bowls
- Wooden spoon or spatula
- Cake pop sticks
- Microwave-safe bowl
- Styrofoam block or cake pop stand
- Spoon or small ladle
- Edible markers or piping bags
- Cooling Rack (optional)
Ingredients
For the Cake Pops
- 2 cups 250g chocolate or vanilla cake, crumbled
- 1/2 cup 120g cream cheese or buttercream frosting
- 1 tsp vanilla extract
For the Coating
- 2 cups 340g white candy melts
- Food coloring red, green, blue, or any fun Halloween colors
- 1 tsp coconut oil optional, for smoother coating
For Decoration
- Edible markers or gel icing black, red, and other colors
- Candy eyeballs optional, for a quick version
- Sprinkles or edible glitter optional, for extra fun
Instructions
Prepare the Cake Mixture
- Crumble the cake: Start with cooled chocolate or vanilla cake. Break it into fine crumbs using your hands or a fork—no big chunks!
- Mix in frosting: Add 1/2 cup cream cheese or buttercream frosting and 1 tsp vanilla extract.
- Combine thoroughly: Use a spatula to mix until the cake holds together when pressed. It should feel slightly sticky but not wet.
- Pro Tip: If the mixture feels too dry, add a tiny bit more frosting, a teaspoon at a time. Too wet? Add a few more crumbs.
Shape the Cake Pops
- Roll into balls: Scoop small amounts (about 1–2 tablespoons) and roll into smooth balls between your palms.
- Insert sticks: Gently insert a cake pop stick about halfway into each ball.
- Pro Tip: Chill the balls in the fridge for 15–20 minutes before dipping. It helps them stay on the sticks and keeps them from falling apart.
Melt the Candy Coating
- Microwave in intervals: Place candy melts and coconut oil in a microwave-safe bowl. Heat in 30-second bursts, stirring in between until smooth.
- Pro Tip: Whisk continuously to prevent lumps and keep the candy silky. Add a tiny bit more coconut oil if it’s too thick.
- Color your coating: Divide into separate bowls and mix in food coloring for your fun Halloween palette.
Dip the Cake Pops
- Dip carefully: Hold the stick and dip each cake pop into the candy melt. Gently tap off excess coating.
- Set upright: Stick the dipped cake pop into a styrofoam block or cake pop stand to dry completely.
- Pro Tip: For a smooth coating, swirl gently in the candy rather than just dunking straight down.
Decorate Your Eyeballs
- Draw pupils and veins: Once the coating is set, use edible markers or gel icing to draw the iris, pupil, and spooky veins.
- Add candy eyeballs (optional): Stick a candy eyeball in the center for an extra creepy effect.
- Pro Tip: Be playful! No two monster cake pops need to look the same—messy lines and quirky pupils add personality.
Serve and Enjoy
- Arrange on a platter or in small cups for a fun display. Kids and adults alike will love picking their favorite colors and monsters.
Notes
Nutritional Value (per cake pop, approximate):
- Calories: 180–210 kcal
- Carbohydrates: 25–28g
- Sugar: 18–22g
- Fat: 8–10g
- Protein: 2–3g
- Fiber: <1g
- Sodium: 90–120mg