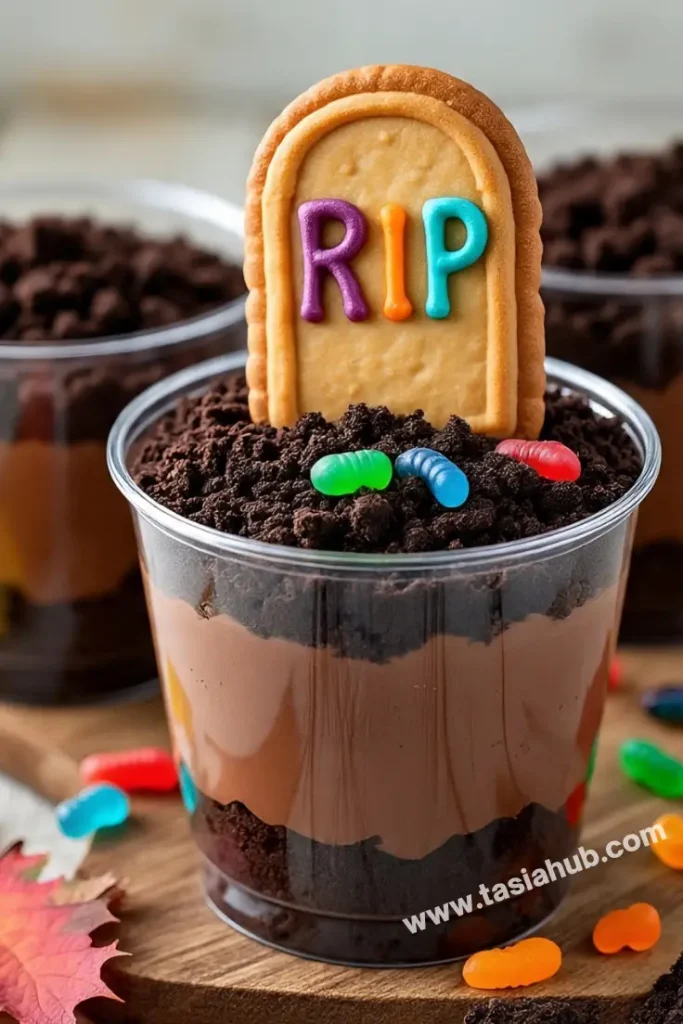
Graveyard Pudding Cups

Halloween is the perfect excuse to get a little spooky in the kitchen, and these graveyard pudding cups are the ultimate treat for both kids and adults. Layers of creamy chocolate pudding, crushed Oreos, and playful candy tombstones come together to create a dessert that’s as fun to look at as it is to eat. I love making these for Halloween parties because they’re individually portioned, mess-free, and absolutely Instagram-worthy.
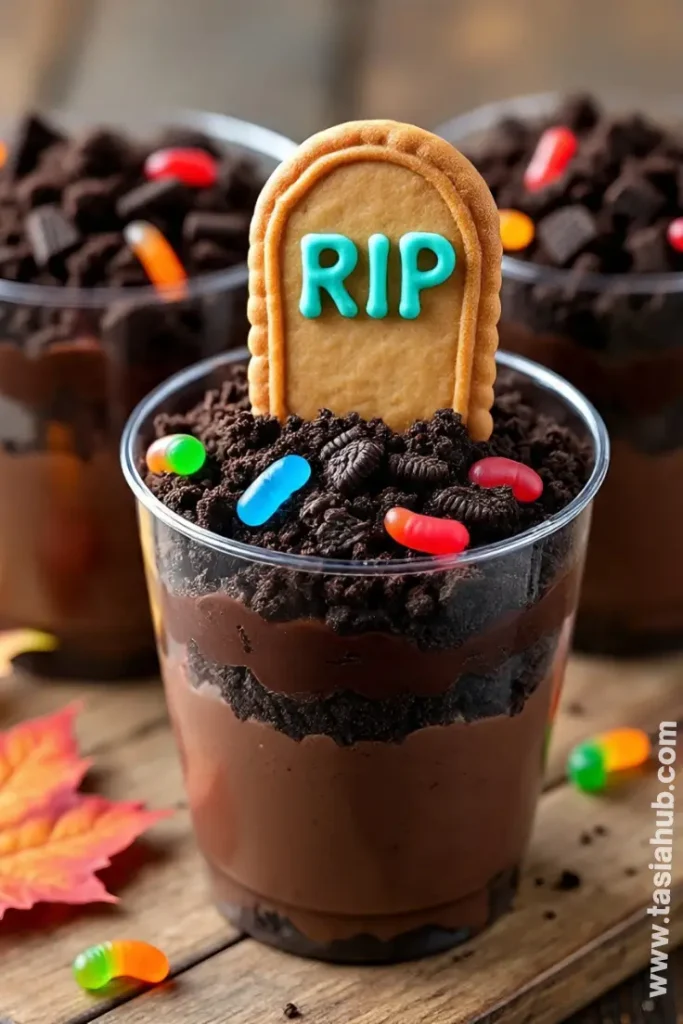
What I adore most about Halloween dirt cups is how versatile they are. You can stick to the classic Oreo “dirt,” or get creative with gummy worms, candy bones, or even edible flowers for a slightly whimsical twist. Each bite delivers that perfect combination of chocolatey richness and crunchy texture, making these dirt pudding cups an instant hit at any gathering.
The best part? They’re surprisingly easy to make. You don’t need fancy equipment or hours of prep—just a few ingredients you probably already have on hand. From the bottom layer of chocolate pudding to the top “graveyard” decoration, assembling these cups feels like building a little edible scene, which makes it almost too fun to eat (though I promise, eating them is inevitable!).
I first made these Halloween trifle desserts a few years ago for a family Halloween party, and they were gone within minutes. Since then, they’ve become a seasonal favorite in my kitchen, and I love experimenting with different candies or even using mini chocolate cupcakes as gravestones. These dirt cups recipe ideas are perfect for anyone who wants to serve something that’s both playful and delicious this spooky season.
Why You’ll Love It
- Super Fun to Make – Layering the chocolate pudding, crushed Oreos, and candy decorations feels like creating a tiny edible graveyard. It’s hands-on, creative, and strangely satisfying—perfect for both adults and kids who love a little Halloween crafting.
- Perfect for Parties – These Halloween dirt cups are individually portioned, so they’re easy to grab and serve. No cutting or messy scooping—just hand one to a guest and watch the smiles appear.
- Customizable and Creative – You can switch up the toppings, add gummy worms, candy bones, or mini chocolate gravestones. The possibilities are endless, which makes every batch a little different and extra special.
- Chocolate Heaven in Every Bite – With layers of creamy chocolate pudding and crunchy Oreo crumbs, each bite is rich, indulgent, and satisfying. It’s the perfect balance of smooth and crunchy, making these dirt pudding cups irresistible.
- Kid-Friendly and Crowd-Pleasing – Little ones love digging through the “dirt” to find gummy worms or candies, while adults appreciate the nostalgia of Oreo dirt cups with a playful, Halloween twist.
Ingredient List
For the Pudding Layer:
- 2 cups cold milk
- 1 package (3.9 oz) instant chocolate pudding mix
For the “Dirt” Layer:
- 20 Oreo cookies, crushed (about 2 cups)
- 1 cup whipped topping (optional, for extra creaminess)
For the Graveyard Toppings:
- Gummy worms (about 10–12)
- Mini chocolate tombstones or candy decorations
- Chocolate sprinkles (optional, for extra spooky effect)
Ingredient Notes
- I always use double-stuffed Oreos for the Oreo dirt pudding—it makes the “dirt” extra rich and chocolatey.
- Don’t skip the whipped topping if you want a lighter, creamier texture in your dirt cups recipe. It makes a noticeable difference.
- Gummy worms are non-negotiable—they bring that fun, creepy-crawly surprise every Halloween dessert needs.
- For a little extra flair, add mini chocolate tombstones or candy bones—they make your Halloween dirt cups look like a real graveyard.
- If you like a touch of shimmer, sprinkle a few chocolate sprinkles on top. It’s optional, but it adds that perfect finishing touch.
Kitchen Equipment Needed
- Mixing bowls – For whipping up the pudding and combining layers. I love using a large glass bowl so you can see the layers forming!
- Whisk or spoon – To mix the pudding smooth and lump-free. I usually grab my sturdy stainless steel whisk—it makes life easier.
- Measuring cups and spoons – For accurate layering. I keep a set of clear plastic ones—they’re easy to read and dishwasher safe.
- Food processor or rolling pin – To crush the Oreos into “dirt.” I personally use a small food processor—it’s quick and mess-free.
- Individual serving cups or small jars – To assemble your graveyard pudding cups. Mason jars work beautifully, but any clear cup will show off the layers.
- Spatula – For smoothing the pudding layers. My silicone spatula is my go-to—it scrapes every last bit cleanly.
Instructions
Step 1: Prepare the Chocolate Pudding
- Pour 2 cups of cold milk into a medium mixing bowl.
- Add the instant chocolate pudding mix.
- Whisk continuously for about 2 minutes until the pudding is smooth and thickened.
- Pro tip: Whisk steadily and don’t stop—this prevents lumps and gives you that silky pudding texture.
- Let the pudding set in the fridge for 5–10 minutes while you prepare the other layers.
Step 2: Crush the Oreos
- Remove the cream from the Oreos if you prefer a less sweet dirt layer, or leave them as-is for extra indulgence.
- Place the cookies in a food processor and pulse until fine crumbs form.
- Pro tip: If you don’t have a food processor, put the Oreos in a zip-top bag and crush with a rolling pin—it works just as well!
- Transfer the crumbs to a small bowl and set aside.
Step 3: Prepare Whipped Topping (Optional)
- If using, fold 1 cup of whipped topping into the chocolate pudding.
- Pro tip: Fold gently with a spatula to keep the pudding light and airy—this makes the dirt pudding cups creamier.
Step 4: Assemble the Dirt Cups
- Spoon a layer of chocolate pudding into the bottom of each serving cup (about 2–3 tablespoons).
- Add a layer of crushed Oreos on top of the pudding.
- Repeat layers until cups are filled, finishing with a top layer of Oreo crumbs to resemble “dirt.”
- Pro tip: Use a spoon to gently tap the cup on the counter to level each layer—this makes the layers look neat and pretty.
Step 5: Decorate the Graveyard
- Place mini chocolate tombstones or candy decorations into the top layer of “dirt.”
- Add gummy worms, letting them peek out of the dirt for a fun, creepy effect.
- Sprinkle chocolate sprinkles or extra Oreo crumbs if desired.
- Pro tip: Arrange the decorations at different angles for a realistic graveyard look—it adds so much charm!
Step 6: Chill and Serve
- Refrigerate the graveyard pudding cups for at least 30 minutes before serving.
- Serve chilled, and watch everyone dig into their spooky little dessert!
Tips and Tricks for Success
- Layer carefully – Take your time with each pudding and Oreo layer. Even spacing makes the cups look professional and fun.
- Use cold ingredients – Cold milk and chilled whipped topping help the pudding set properly and create defined layers.
- Crush Oreos finely – Finer crumbs make the “dirt” look more realistic and easier to dig through with a spoon.
- Decorate creatively – Don’t be afraid to mix gummy worms, candy bones, or mini pumpkins to make each cup unique.
- Chill before serving – Letting the cups sit in the fridge for at least 30 minutes makes them firm and keeps the layers intact.
Ingredient Substitutions and Variations
- Swap Oreos for any chocolate sandwich cookie you like; golden Oreos make a fun twist on traditional dirt.
- Use homemade chocolate pudding instead of instant mix for a richer, creamier flavor.
- Replace whipped topping with mascarpone or cream cheese whipped mixture for an indulgent, tangy variation.
- Try vegan or dairy-free pudding and cookies to make this dessert plant-based.
- Add crushed candy bars or chocolate chips to the dirt layer for extra texture and chocolate goodness.
- Experiment with different candy toppers like candy pumpkins, edible eyes, or mini skeletons to suit your spooky vibe.
Serving Suggestions
- I love serving these graveyard pudding cups at a Halloween party alongside other spooky treats like caramel apples and popcorn balls—it creates a full dessert table that’s festive and fun.
- They’re perfect as an after-dinner treat on Halloween night, paired with a cup of warm hot chocolate to balance the chocolatey richness.
- For a kids’ party, I like setting them out with spoons stuck into each cup—it’s hands-on, playful, and the little ones love digging through the “dirt.”
- They make a cute addition to a potluck or office party; I usually garnish each cup with extra gummy worms and candy tombstones for an eye-catching presentation.
- Personally, I enjoy grabbing one cup for a quiet treat at home with a cozy blanket and a scary movie—it’s my go-to seasonal indulgence!
Storage and Reheating Instructions
- Refrigerate – Keep the cups covered in the fridge for up to 3 days. They’re best eaten chilled.
- Do not freeze – Freezing can change the texture of the pudding and make the Oreos soggy.
- Assemble just before serving – If possible, add gummy worms and decorations right before serving for maximum freshness.
- Transport tips – If bringing to a party, place cups in a tray with a lid or cling wrap to prevent shifting or spilling.
Frequently Asked Questions
Can I make these graveyard pudding cups ahead of time?
Absolutely! You can prepare the pudding and Oreo layers a few hours in advance, but I recommend adding the gummy worms and tombstone decorations just before serving to keep them looking fresh.
Can I use homemade pudding instead of instant?
Yes! Homemade chocolate pudding works beautifully. Just make sure it’s fully chilled before layering, so your dirt cups hold their shape.
Are there any alternatives to Oreos for the “dirt”?
Definitely. Chocolate sandwich cookies, chocolate graham crackers, or even crushed brownies make delicious dirt layers. Each gives a slightly different texture and flavor.
Can I make these dirt pudding cups vegan or dairy-free?
Yes! Use a dairy-free chocolate pudding mix or make a coconut milk pudding, and swap Oreos or cookies for a vegan-friendly version. The results are still rich and creamy.
How long will the cups last in the fridge?
Stored properly, they stay fresh for up to 3 days. For best results, keep them chilled and covered until you’re ready to serve.
Any tips for decorating?
Mix up your candy toppings! Gummy worms, mini chocolate tombstones, candy bones, or even candy pumpkins make each cup look like a mini graveyard scene.
Did you try this recipe? Let me know in the comments how your Halloween dirt cups turned out—I love seeing your spooky creations!

Graveyard Pudding Cups
Equipment
- Mixing Bowls
- Whisk or spoon
- Measuring cups and spoons
- Food processor or rolling pin
- Individual serving cups or small jars
- Spatula
Ingredients
For the Pudding Layer:
- 2 cups cold milk
- 1 package 3.9 oz instant chocolate pudding mix
For the “Dirt” Layer:
- 20 Oreo cookies crushed (about 2 cups)
- 1 cup whipped topping optional, for extra creaminess
For the Graveyard Toppings:
- Gummy worms about 10–12
- Mini chocolate tombstones or candy decorations
- Chocolate sprinkles optional, for extra spooky effect
Instructions
Step 1: Prepare the Chocolate Pudding
- Pour 2 cups of cold milk into a medium mixing bowl.
- Add the instant chocolate pudding mix.
- Whisk continuously for about 2 minutes until the pudding is smooth and thickened.
- Pro tip: Whisk steadily and don’t stop—this prevents lumps and gives you that silky pudding texture.
- Let the pudding set in the fridge for 5–10 minutes while you prepare the other layers.
Step 2: Crush the Oreos
- Remove the cream from the Oreos if you prefer a less sweet dirt layer, or leave them as-is for extra indulgence.
- Place the cookies in a food processor and pulse until fine crumbs form.
- Pro tip: If you don’t have a food processor, put the Oreos in a zip-top bag and crush with a rolling pin—it works just as well!
- Transfer the crumbs to a small bowl and set aside.
Step 3: Prepare Whipped Topping (Optional)
- If using, fold 1 cup of whipped topping into the chocolate pudding.
- Pro tip: Fold gently with a spatula to keep the pudding light and airy—this makes the dirt pudding cups creamier.
Step 4: Assemble the Dirt Cups
- Spoon a layer of chocolate pudding into the bottom of each serving cup (about 2–3 tablespoons).
- Add a layer of crushed Oreos on top of the pudding.
- Repeat layers until cups are filled, finishing with a top layer of Oreo crumbs to resemble “dirt.”
- Pro tip: Use a spoon to gently tap the cup on the counter to level each layer—this makes the layers look neat and pretty.
Step 5: Decorate the Graveyard
- Place mini chocolate tombstones or candy decorations into the top layer of “dirt.”
- Add gummy worms, letting them peek out of the dirt for a fun, creepy effect.
- Sprinkle chocolate sprinkles or extra Oreo crumbs if desired.
- Pro tip: Arrange the decorations at different angles for a realistic graveyard look—it adds so much charm!
Step 6: Chill and Serve
- Refrigerate the graveyard pudding cups for at least 30 minutes before serving.
- Serve chilled, and watch everyone dig into their spooky little dessert!
Notes
Nutritional Value (per serving, approximate):
- Calories: 250–300 kcal
- Fat: 12–15 g
- Saturated Fat: 7–9 g
- Carbohydrates: 35–40 g
- Sugars: 25–28 g
- Protein: 3–4 g
- Fiber: 1–2 g