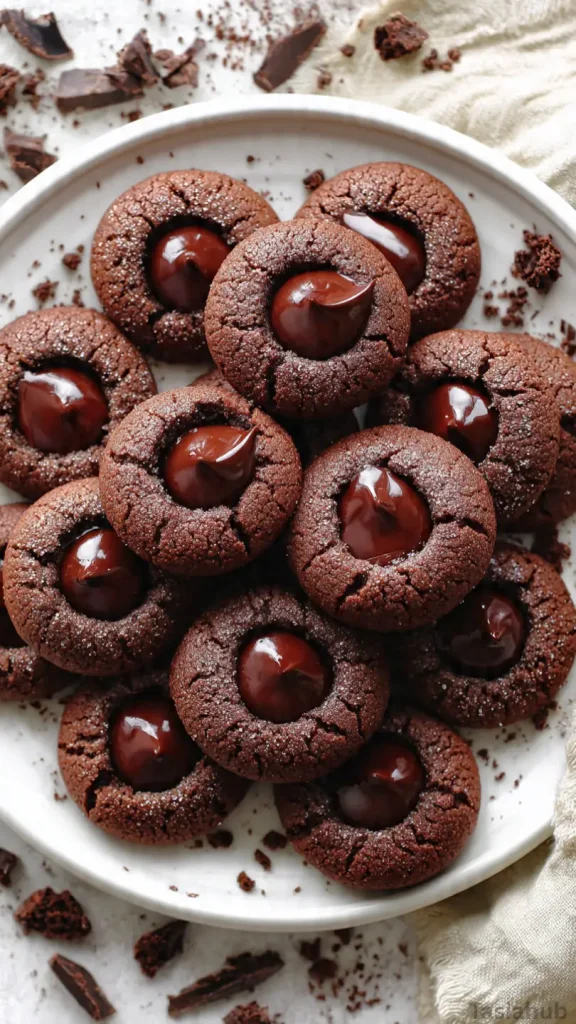
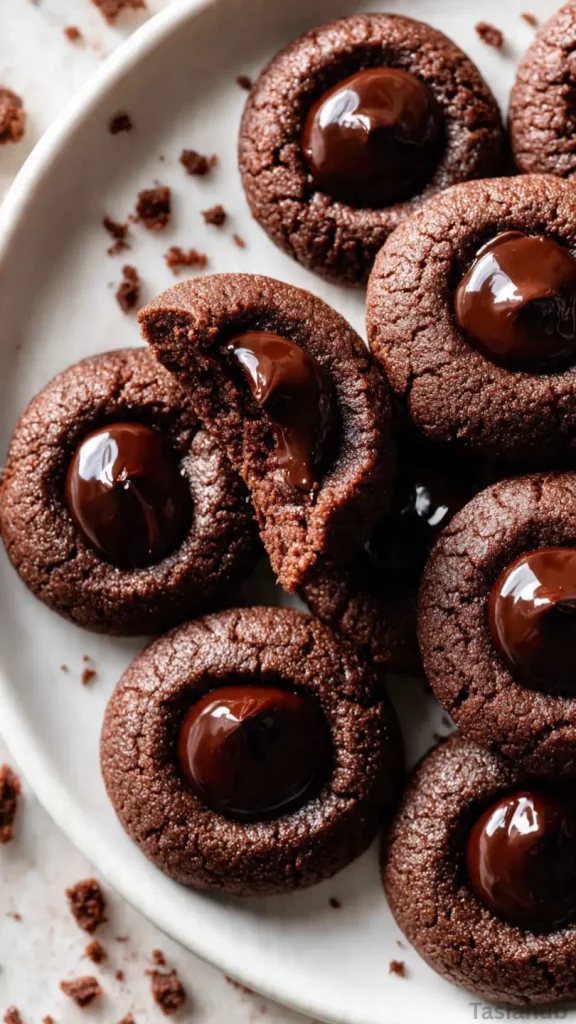
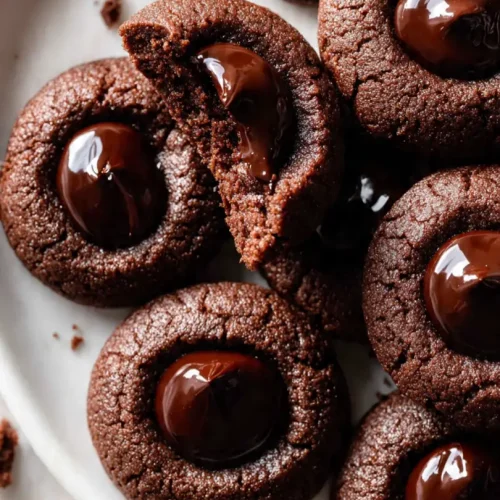
Gluten-Free Chocolate Thumbprint Christmas Cookies
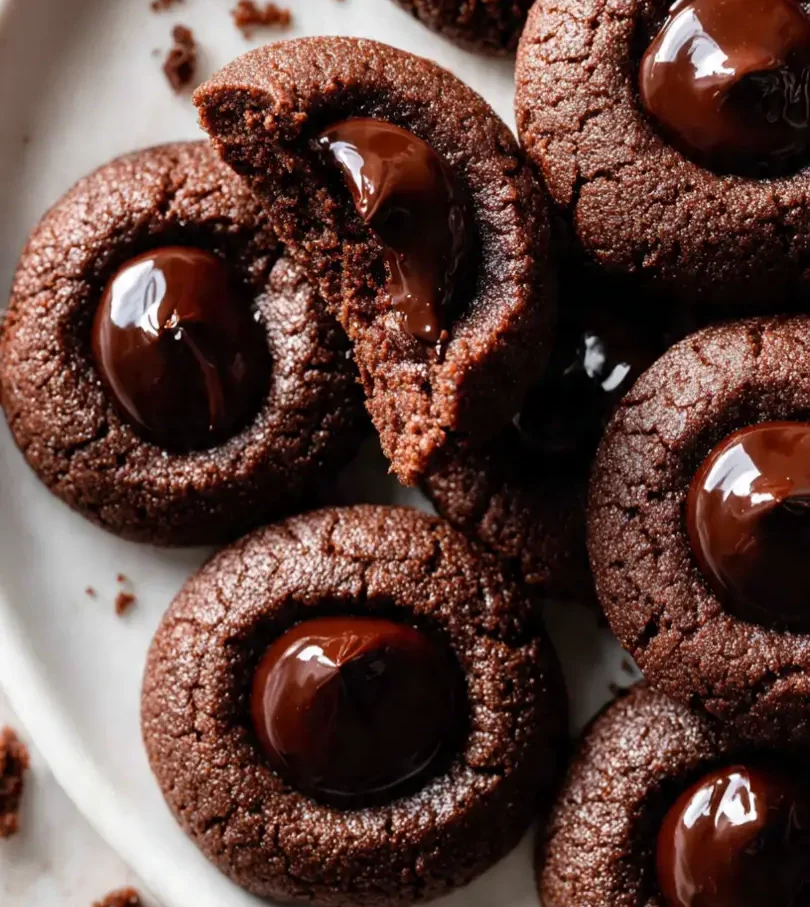
The holiday season is all about joy, laughter, and, of course, cookies. But for anyone avoiding gluten, finding festive treats that are both delicious and worry-free can feel like a challenge. That’s why these gluten-free chocolate thumbprint cookies are such a delightful solution. They bring together rich chocolate, a hint of holiday cheer, and a soft, chewy texture that melts in your mouth—without any gluten in sight.
These cookies are perfect for bakers of any skill level. Even if you’ve never tried gluten-free Christmas baking before, this recipe keeps things simple while delivering the flavors everyone will love. Think of them as easy holiday cookies that you can whip up in an afternoon, yet they’ll impress anyone who takes a bite.
Beyond their festive charm, these cookies are surprisingly versatile. You can fill the centers with your favorite jams, nut butters, or even a dollop of chocolate ganache. They make excellent gifts in a tin, a fun addition to a holiday cookie swap, or simply a treat to enjoy while sipping hot cocoa by the fire.
And the best part? They’re not just indulgent—they can be a lighter, healthier option for the season. Using naturally gluten-free flours and wholesome ingredients, these cookies bring a balance of flavor and comfort. They’re the kind of healthy Christmas cookies that don’t compromise on taste, making them a favorite for both family and friends.
Why You’ll Love It
- Perfectly Soft and Chewy: These cookies have that tender, melt-in-your-mouth texture everyone craves during the holidays, proving gluten-free baking can be just as indulgent.
- Customizable Centers: From raspberry jam to chocolate ganache or peanut butter, you can fill them any way you like—making them a fun canvas for your holiday creativity.
- Simple Ingredients, Big Flavor: You don’t need a pantry full of specialty items. With easy gluten free cookies ingredients, you’ll get rich chocolate flavor and festive sweetness in every bite.
- Quick and Stress-Free: Even if your holiday schedule is packed, this recipe counts as easy holiday cookies you can make in no time—perfect for last-minute cookie trays or gift boxes.
- Crowd-Pleasing and Inclusive: These are among the best gluten free cookies for sharing with friends and family, letting everyone indulge in delicious Christmas cookies without worry.
Ingredients
For the Cookies:
- 1 cup almond flour
- ½ cup gluten-free all-purpose flour
- ¼ cup unsweetened cocoa powder
- ½ tsp baking soda
- ¼ tsp salt
- ⅓ cup coconut sugar or brown sugar
- ¼ cup unsalted butter, softened
- 1 large egg
- 1 tsp pure vanilla extract
For the Filling:
- ¼ cup chocolate chips or chopped chocolate
- 2 tsp coconut oil or butter (for melting)
- Optional: jam of your choice (raspberry or strawberry work beautifully)
Ingredient Notes
- I always use almond flour for that soft, chewy texture—it really elevates gluten free Christmas treats.
- Don’t skip the cocoa powder! It adds depth and makes these cookies feel extra chocolatey.
- Coconut sugar gives a subtle caramel note that complements the chocolate without being overpowering.
- Egg and butter are key for keeping these easy thumbprint cookies tender, so don’t swap them out unless you have a perfect alternative.
- For the filling, I love melting chocolate chips with a bit of coconut oil—it creates a silky smooth center that everyone will swoon over.
Kitchen Equipment Needed
- Mixing Bowls: For combining your dry and wet ingredients separately—I love using glass bowls so I can see everything clearly.
- Hand Mixer or Stand Mixer: Makes creaming butter and sugar a breeze; hand mixer works perfectly for easy gluten free cookies.
- Measuring Cups & Spoons: Accurate measurements are key for the best gluten free cookies.
- Baking Sheet: For baking the cookies evenly; I prefer a heavy-duty, nonstick sheet.
- Parchment Paper or Silicone Baking Mat: Prevents sticking and makes cleanup effortless.
- Spoon or Cookie Scoop: For portioning dough consistently—this keeps your cookies uniform in size.
- Small Spoon or Toothpick: To create the thumbprint indent for the filling.
- Microwave-Safe Bowl: For melting chocolate quickly if you’re adding a chocolate filling.
Instructions
Step 1: Preheat and Prep
- Preheat your oven to 350°F (175°C).
- Line a baking sheet with parchment paper or a silicone baking mat.
- Gather all your ingredients so everything is within reach—this makes the process smoother and more enjoyable.
Pro Tip: Using a silicone mat helps your cookies bake evenly and prevents the bottoms from browning too fast.
Step 2: Mix the Dry Ingredients
- In a medium bowl, whisk together almond flour, gluten-free all-purpose flour, cocoa powder, baking soda, and salt.
- Ensure everything is evenly combined so each cookie has consistent flavor and texture.
Pro Tip: Sifting the cocoa powder can prevent clumps and make the dough smoother.
Step 3: Cream Butter and Sugar
- In a separate large bowl, use a hand mixer or stand mixer to cream the softened butter with the coconut sugar until light and fluffy (about 2–3 minutes).
- Add the egg and vanilla extract, mixing until fully incorporated.
Pro Tip: Make sure your butter is soft but not melted; this helps the cookies hold their shape while staying tender.
Step 4: Combine Wet and Dry Ingredients
- Gradually add the dry ingredients to the wet mixture.
- Mix gently until a soft, slightly sticky dough forms. Avoid overmixing—this keeps the cookies tender.
Step 5: Shape the Cookies
- Use a spoon or cookie scoop to portion out dough (about 1–1.5 tbsp each).
- Roll each portion into a ball and place on the prepared baking sheet.
- Press your thumb or the back of a small spoon into the center of each cookie to create an indent for the filling.
Pro Tip: Chill the dough for 10–15 minutes if it feels too soft—this makes shaping easier.
Step 6: Bake
- Bake in the preheated oven for 10–12 minutes.
- The cookies should be set but still soft in the center.
- Remove from oven and let them cool on the baking sheet for 5 minutes before transferring to a wire rack.
Pro Tip: Don’t overbake! Gluten-free cookies can dry out quickly if left too long.
Step 7: Add the Filling
- Melt chocolate chips with coconut oil in a microwave-safe bowl (30-second intervals, stirring in between).
- Spoon a small amount of melted chocolate into each thumbprint. Alternatively, fill with your favorite jam.
- Let the cookies set at room temperature or refrigerate for 15–20 minutes to firm the filling.
Tips and Tricks for Success
- Measure Carefully: Gluten-free flours can be tricky—use a kitchen scale if possible for the most accurate results.
- Chill Dough if Needed: If your dough feels too soft or sticky, 10–15 minutes in the fridge makes shaping easier.
- Use Fresh Ingredients: Baking soda and cocoa powder lose potency over time, so fresh ingredients make a noticeable difference.
- Don’t Overbake: These cookies should be soft in the center; they’ll continue to firm as they cool.
- Cool Completely Before Filling: This prevents melted chocolate or jam from spreading and keeps your thumbprints neat.
Ingredient Substitutions and Variations
- Flour Swap: Use oat flour or a gluten-free flour blend in place of almond flour for a different texture.
- Butter Alternatives: Coconut oil or dairy-free butter works for a dairy-free version.
- Sugar Options: Maple syrup or agave can replace coconut sugar—reduce slightly to avoid a too-soft dough.
- Filling Fun: Try caramel, Nutella, or almond butter instead of chocolate or jam for a new twist.
- Add Mix-Ins: Mini chocolate chips, chopped nuts, or dried cranberries can be folded into the dough for extra flavor.
Serving Suggestions
- I love serving these chocolate thumbprint cookies with a warm mug of peppermint hot chocolate—it feels like a hug in a cup!
- Arrange them on a festive holiday platter with other gluten free Christmas treats for a beautiful cookie display at parties.
- Pair them with a scoop of vanilla ice cream for a simple yet indulgent dessert.
- Gift them in a holiday tin wrapped with a ribbon—they’re always a hit with friends and family.
- Enjoy one or two cookies with your morning coffee for a sweet start to the day without going overboard.
Storage and Reheating Instructions
- Room Temperature: Store in an airtight container for up to 4 days.
- Refrigerator: Keep for up to 1 week; bring to room temperature before serving for best texture.
- Freezer: Freeze baked cookies (without filling) for up to 3 months; thaw overnight before adding chocolate or jam.
- Reheating: Warm in the microwave for 10–15 seconds or in a 300°F oven for 3–5 minutes to refresh softness.
- Tip: Always store cookies with parchment between layers to prevent sticking, especially if using jam fillings.
Frequently Asked Questions
Can I make these cookies dairy-free?
Absolutely! Swap the butter for coconut oil or a dairy-free butter alternative, and the cookies will still turn out soft and delicious.
Can I use other flours instead of almond flour?
Yes! Oat flour or a gluten-free all-purpose flour blend works well, though the texture may be slightly different—still tasty!
How do I prevent the cookies from spreading too much?
Chilling the dough for 10–15 minutes before baking helps them hold their shape and keeps the thumbprints defined.
Can I use different fillings besides chocolate?
Definitely! Jam, Nutella, caramel, or almond butter all make wonderful alternatives to chocolate, giving each batch a new twist.
How long will these cookies stay fresh?
Stored in an airtight container at room temperature, they last about 4 days. Refrigerated, they keep up to a week, and you can freeze unbaked cookies for 3 months.
Can I make these cookies ahead of time?
Yes! You can shape the dough and freeze the cookies before baking. Bake them straight from the freezer, just add a minute or two to the baking time.
Did you try this recipe? Let me know in the comments how it turned out!
Gluten-Free Chocolate Thumbprint Christmas Cookies
Equipment
- Mixing Bowls
- Hand mixer or stand mixer
- Measuring Cups & Spoons
- Baking Sheet
- Parchment paper or silicone baking mat
- Spoon or cookie scoop
- Small Spoon or Toothpick
- Microwave-safe bowl
Ingredients
For the Cookies:
- 1 cup almond flour
- ½ cup gluten-free all-purpose flour
- ¼ cup unsweetened cocoa powder
- ½ tsp baking soda
- ¼ tsp salt
- ⅓ cup coconut sugar or brown sugar
- ¼ cup unsalted butter softened
- 1 large egg
- 1 tsp pure vanilla extract
For the Filling:
- ¼ cup chocolate chips or chopped chocolate
- 2 tsp coconut oil or butter for melting
- Optional: jam of your choice raspberry or strawberry work beautifully
Instructions
Step 1: Preheat and Prep
- Preheat your oven to 350°F (175°C).
- Line a baking sheet with parchment paper or a silicone baking mat.
- Gather all your ingredients so everything is within reach—this makes the process smoother and more enjoyable.
- Pro Tip: Using a silicone mat helps your cookies bake evenly and prevents the bottoms from browning too fast.
Step 2: Mix the Dry Ingredients
- In a medium bowl, whisk together almond flour, gluten-free all-purpose flour, cocoa powder, baking soda, and salt.
- Ensure everything is evenly combined so each cookie has consistent flavor and texture.
- Pro Tip: Sifting the cocoa powder can prevent clumps and make the dough smoother.
Step 3: Cream Butter and Sugar
- In a separate large bowl, use a hand mixer or stand mixer to cream the softened butter with the coconut sugar until light and fluffy (about 2–3 minutes).
- Add the egg and vanilla extract, mixing until fully incorporated.
- Pro Tip: Make sure your butter is soft but not melted; this helps the cookies hold their shape while staying tender.
Step 4: Combine Wet and Dry Ingredients
- Gradually add the dry ingredients to the wet mixture.
- Mix gently until a soft, slightly sticky dough forms. Avoid overmixing—this keeps the cookies tender.
Step 5: Shape the Cookies
- Use a spoon or cookie scoop to portion out dough (about 1–1.5 tbsp each).
- Roll each portion into a ball and place on the prepared baking sheet.
- Press your thumb or the back of a small spoon into the center of each cookie to create an indent for the filling.
- Pro Tip: Chill the dough for 10–15 minutes if it feels too soft—this makes shaping easier.
Step 6: Bake
- Bake in the preheated oven for 10–12 minutes.
- The cookies should be set but still soft in the center.
- Remove from oven and let them cool on the baking sheet for 5 minutes before transferring to a wire rack.
- Pro Tip: Don’t overbake! Gluten-free cookies can dry out quickly if left too long.
Step 7: Add the Filling
- Melt chocolate chips with coconut oil in a microwave-safe bowl (30-second intervals, stirring in between).
- Spoon a small amount of melted chocolate into each thumbprint. Alternatively, fill with your favorite jam.
- Let the cookies set at room temperature or refrigerate for 15–20 minutes to firm the filling.
Notes
Nutritional Value (per cookie, approximate):
- Calories: 110 kcal
- Carbohydrates: 10 g
- Protein: 2 g
- Fat: 7 g
- Saturated Fat: 3 g
- Fiber: 1.5 g
- Sugar: 5 g
- Sodium: 55 mg