Ghost Meringues
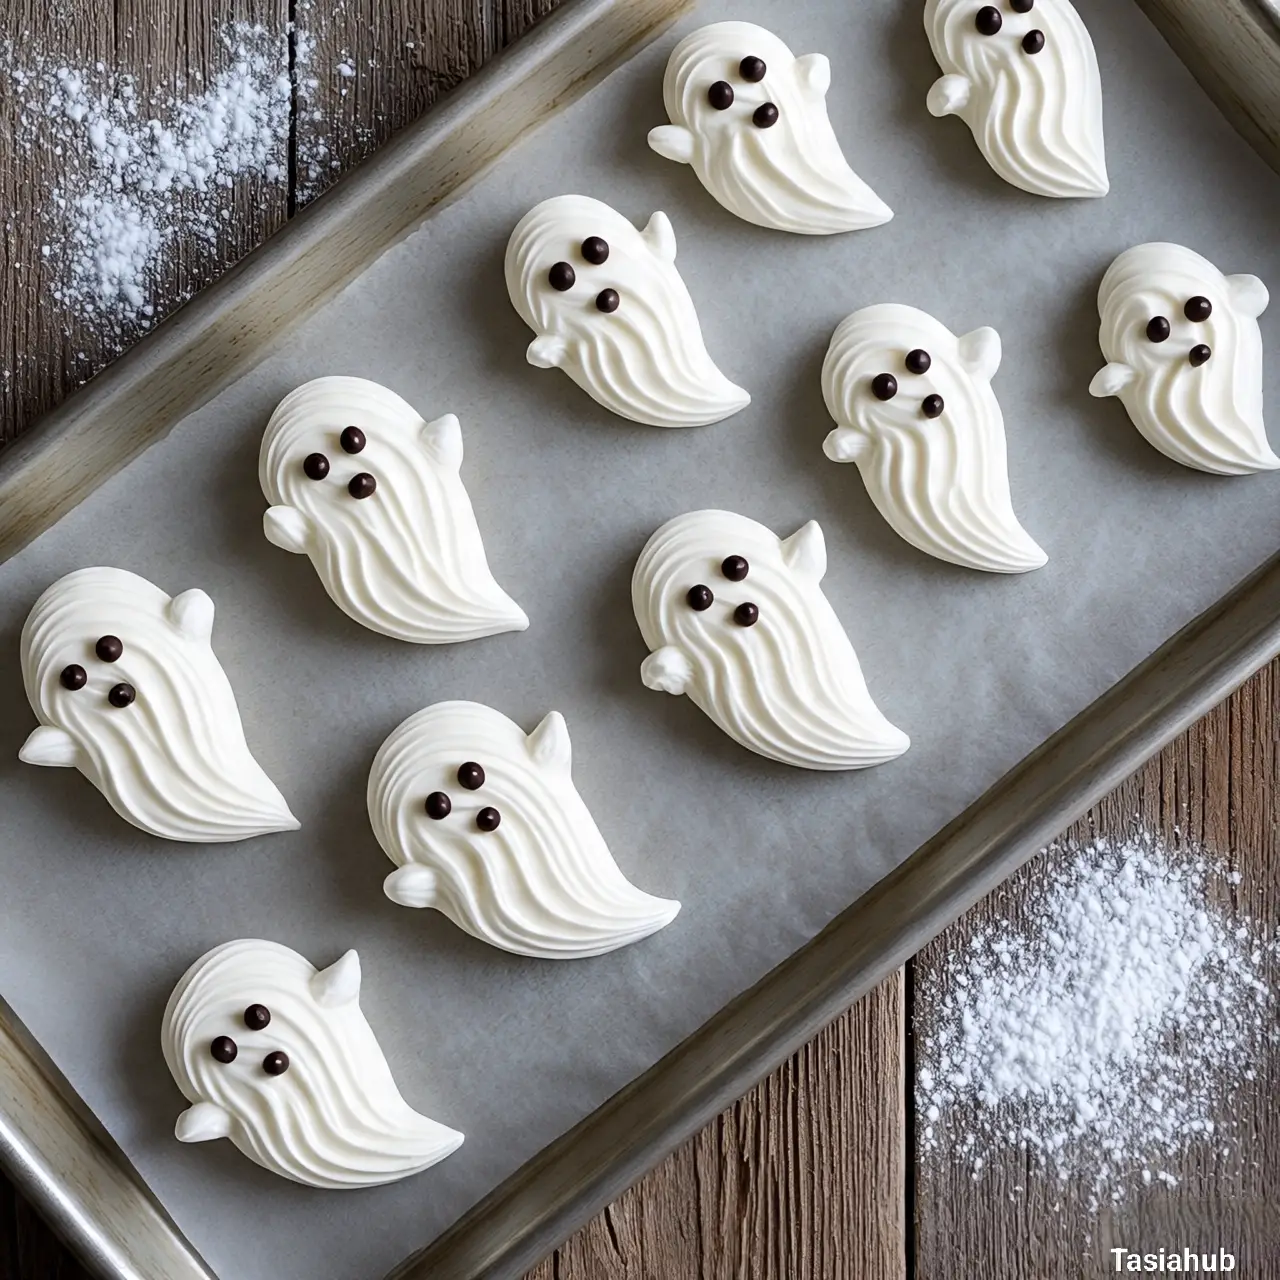
Ghost meringues are one of those little treats that instantly bring a smile to your face. They’re light, sweet, and absolutely adorable—all while being the perfect addition to your spooky season spread. Whether you’re planning a big Halloween party or just want a fun project to do at home, these fluffy little ghosts are a must.
What I love most about Halloween meringues is how surprisingly simple they are to make. With just a few ingredients and a little piping, you can turn a basic meringue into the cutest ghost food that kids and adults alike will love. They may look fancy, but trust me—they’re totally doable, even if you’ve never made meringue before.
The best part? These ghost meringues don’t just look festive—they taste amazing too. Crisp on the outside, with that melt-in-your-mouth sweetness on the inside, they’re the kind of treat you can’t stop snacking on. They also keep really well, which makes them a fantastic make-ahead dessert for any fall gathering.
If you’re looking for easy Halloween food that’s equal parts fun and delicious, ghost meringues check all the boxes. They bring the Halloween spirit to your table without any complicated steps, and they’re just spooky enough to make everyone smile before taking a bite.
Why You’ll Love It
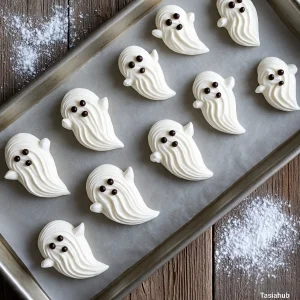
- Adorable and festive – These ghost meringues double as decorations and desserts. Just set them out on a platter, and you’ve instantly got Halloween charm.
- Light and melt-in-your-mouth – Unlike heavier Halloween treats, these are crisp, airy, and sweet without being overwhelming.
- Kid-approved fun – Little ones love the playful ghost shapes, and older kids will enjoy helping pipe the meringues or add chocolate eyes.
- Make-ahead friendly – You can whip these up a day or two before your Halloween celebration, and they’ll stay perfectly crisp until party time.
- Effortless “wow” factor – They look like something straight out of a bakery, but the process is simple enough for beginners.
Ingredient List
- 3 large egg whites, room temperature
- ¾ cup granulated sugar
- ¼ teaspoon cream of tartar
- 1 teaspoon vanilla extract
- Mini chocolate chips (for eyes) or melted chocolate
Ingredient Notes
- Egg whites – Room temperature egg whites whip up much better than cold ones. If you forget to take them out ahead of time, just place the whole eggs in warm water for a few minutes before cracking.
- Cream of tartar – Don’t skip this! It helps stabilize the meringue so your ghosts hold their shape instead of collapsing.
- Sugar – Regular granulated sugar works best. I like to add it gradually to help the meringue turn glossy and stiff.
- Vanilla extract – A tiny bit adds lovely flavor without changing the bright white color. I always go for pure vanilla extract here.
- Chocolate chips or melted chocolate – These are your ghost eyes. Mini chips are easiest, but melted chocolate works too if you want to pipe little spooky expressions.
Kitchen Equipment Needed
- Electric mixer (hand or stand) – For whipping the egg whites to stiff peaks. (I use my stand mixer—it makes the process so much easier.)
- Mixing bowl – A clean, grease-free bowl is essential for getting fluffy meringue.
- Piping bag + round tip – To pipe the cute ghost shapes. If you don’t have a tip, just snip the end of a bag.
- Baking sheet – For baking the meringues. Line it with parchment so they don’t stick.
- Spatula – Handy for scraping down the sides of the bowl and transferring meringue into the piping bag.
- Toothpick (optional) – Great for adjusting little ghost “tails” or fixing chocolate eyes.
Instructions
Step 1 — Preheat and prep your workspace
- Preheat the oven to 200°F (95°C). This low-and-slow temperature dries the meringues without browning them.
- Line a baking sheet with parchment paper and set it on a flat surface.
- Make sure your mixing bowl and beaters are totally clean and dry — even a tiny smear of grease will keep egg whites from whipping.
Pro tip: If your kitchen is very humid, try to work in the driest room of the house — humidity is the enemy of crisp meringues.
Step 2 — Separate the eggs carefully
- Crack each egg and separate the whites into a small bowl first (this prevents yolk contamination).
- Once you’ve confirmed there’s no yolk, add the whites to your large, clean mixing bowl.
- Let the whites sit for a few minutes to come to room temperature if they aren’t already.
Pro tip (key step): Use pasteurized egg whites if you or anyone you’re serving is immunocompromised or if you’re worried about raw eggs.
Step 3 — Start whipping the egg whites to soft peaks
- Add the ¼ teaspoon cream of tartar to the bowl with the egg whites.
- Begin whipping on low speed until the whites are frothy, about 1–2 minutes.
- Increase to medium-high speed and whip until you see soft peaks — the peaks should fold over when you lift the whisk.
Pro tip (key step): Start slow and build speed. That gentle ramp helps form a steady foam instead of big, unstable bubbles.
Step 4 — Add sugar gradually and whip to glossy, stiff peaks
- With the mixer running on medium-high, add the ¾ cup granulated sugar one tablespoon at a time, allowing each tablespoon to dissolve before adding the next.
- After all the sugar is added, continue whipping until the meringue is thick, glossy, and holds stiff peaks — the peak should stand straight up without drooping.
- Rub a tiny bit of the meringue between your fingers to check for grittiness; it should feel completely smooth.
Pro tip (key step): Slow sugar addition is the single most important trick for a glossy, stable meringue. Rushing this step can leave you with grainy, weepy meringues.
Step 5 — Flavor and transfer to a piping bag
- Add the 1 teaspoon vanilla extract and fold it in gently with a spatula — don’t overmix or you’ll deflate the whites.
- Fit a piping bag with a round tip (about ½ inch) or simply snip the tip of a disposable bag for a roughly ½-inch opening.
- Spoon the meringue into the bag, smoothing the top so you have an even flow when piping.
Pro tip: Keep the motion light and steady. Overworking the meringue now will knock out air and make your ghosts flat.
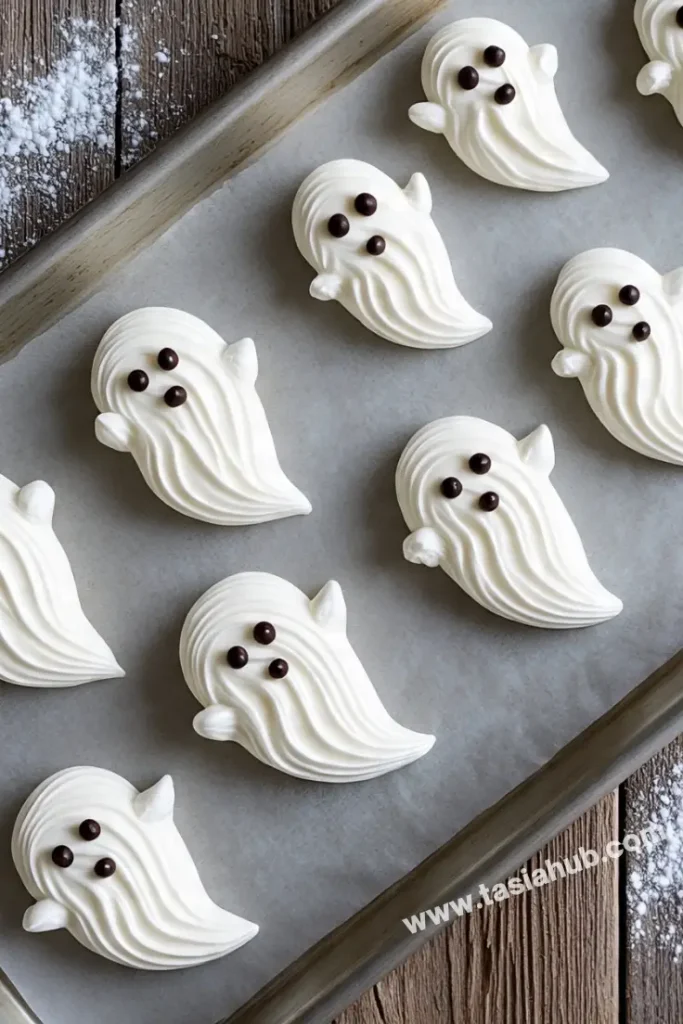
Step 6 — Pipe your ghost shapes
- Hold the piping bag perpendicular to the parchment and squeeze gently to form a small mound (about 1½–2 inches wide).
- To make the classic ghost “tail,” as you finish the mound, lift the bag slightly and give a quick upward flick — it creates a little pointy tail.
- Space ghosts at least 1 inch apart so air can circulate while they bake.
- If you’re using mini chocolate chips for eyes, gently press two chips into each ghost now. If using melted chocolate, you can add eyes after baking.
Pro tip (key step): Practice one or two test ghosts first—you’ll quickly find a piping pressure and lift motion that gives a cute tail without collapsing the shape.
Step 7 — Bake low and slow until dry
- Place the baking sheet on the middle rack and bake at 200°F (95°C) for about 90 minutes, or until each meringue is dry to the touch and easily lifts off the parchment.
- Turn the oven off, crack the door, and let the meringues cool completely in the oven (at least 1 hour). This gentle cooldown prevents cracking and helps them dry fully.
Pro tip (key step): Don’t open the oven while they’re drying — temperature swings can cause cracks or collapse.
Step 8 — Finish the faces and final touches
- If you didn’t press in mini chips before baking, melt a little chocolate and use a toothpick or a small piping bag to dot eyes onto cooled ghosts.
- For playful expressions, draw tiny mouths or eyebrows with the melted chocolate.
- Let the chocolate set completely before moving the ghosts.
Pro tip: If you want to make a bunch ahead (great for easy Halloween food prep), meringues keep well for up to a week in perfect conditions — just keep them sealed and dry.
Tips and Tricks for Success
- Wipe bowls and tools with vinegar or lemon juice before starting — this removes any grease that could ruin your meringue.
- Don’t rush the sugar addition — slow and steady makes glossy, stiff peaks.
- Check for doneness by touch — meringues should feel dry and lift cleanly from parchment, not sticky.
- Cool completely in the oven — this prevents cracks and ensures they stay crisp.
- Work in a low-humidity environment whenever possible — moisture makes meringues chewy instead of crisp.
- Practice piping on a corner of parchment first — you’ll get the hang of the ghost “tail” motion before committing.
Ingredient Substitutions and Variations
- Flavor twist – Swap vanilla extract for almond, peppermint, or even orange extract for a seasonal surprise.
- Chocolate ghosts – Dust with cocoa powder before baking for light brown “shadow” ghosts.
- Colorful ghosts – Add a tiny drop of food coloring gel for pastel or spooky shades (just don’t overmix).
- Candy eyes – Instead of chocolate chips, use candy eyeballs for an extra-cute look.
- Vegan version – Replace egg whites with aquafaba (liquid from canned chickpeas); whip it the same way with cream of tartar and sugar.
- Mini ghosts – Pipe smaller mounds for bite-sized treats that bake faster (around 60–70 minutes).
Serving Suggestions
- On a Halloween dessert table – Arrange the ghost meringues around cupcakes, brownies, or candy bowls for a spooky-cute centerpiece.
- As cupcake toppers – Place one ghost on top of a frosted cupcake for instant Halloween flair.
- With hot cocoa or coffee – I love serving these with a steaming mug of cocoa; they melt slightly and add a sweet touch.
- Party favors – Pack a few into little cellophane bags tied with orange or black ribbon for take-home treats.
- As a playful garnish – Pop a ghost on top of a scoop of chocolate or pumpkin ice cream for a festive finish.

Storage and Reheating Instructions
- Room temperature storage – Keep ghost meringues in an airtight container at room temp for up to 1 week.
- Layering tip – Place parchment paper between layers to prevent sticking.
- Avoid refrigeration – Moisture in the fridge will make them sticky and chewy.
- Re-crisping – If they lose crunch, bake at 200°F (95°C) for 10–15 minutes, then cool in the oven with the door cracked.
- Freezing (not ideal) – Freezing can affect texture, but in a pinch, you can freeze in airtight containers for up to 1 month. Thaw at room temp without opening the container to prevent condensation.
Frequently Asked Questions
Can I make ghost meringues ahead of time?
Yes! These are perfect make-ahead treats. Just store them in an airtight container at room temperature, and they’ll stay fresh and crisp for up to a week.
Why did my meringues turn sticky?
Sticky meringues usually mean too much humidity or not baking long enough. Pop them back in the oven at 200°F (95°C) for 10–15 minutes to re-crisp.
Do I need a piping bag to make these?
Not at all! A zip-top bag with the corner snipped off works just fine. The ghosts might look a little quirky, but that adds to their spooky charm.
Can I add food coloring?
Yes, but use gel coloring and only a tiny bit—liquid coloring can thin out the meringue. I love a hint of pastel purple or green for a fun Halloween twist.
What if I don’t have cream of tartar?
You can swap it for a few drops of lemon juice or white vinegar. The goal is to stabilize the egg whites, and both of these will do the trick.
Can I use aquafaba instead of egg whites?
Yes! Aquafaba (the liquid from canned chickpeas) whips up just like egg whites. It’s a great vegan option for ghost meringues.
Did you try this recipe? Let me know in the comments how your ghost meringues turned out—I’d love to hear how spooky (and tasty!) they were!
Ghost Meringues
Equipment
- Electric mixer (hand or stand)
- Mixing Bowl
- Piping bag + round tip
- Baking Sheet
- Spatula
- Toothpick (optional)
Ingredients
- 3 large egg whites room temperature
- ¾ cup granulated sugar
- ¼ teaspoon cream of tartar
- 1 teaspoon vanilla extract
- Mini chocolate chips for eyes or melted chocolate
Instructions
Step 1 — Preheat and prep your workspace
- Preheat the oven to 200°F (95°C). This low-and-slow temperature dries the meringues without browning them.
- Line a baking sheet with parchment paper and set it on a flat surface.
- Make sure your mixing bowl and beaters are totally clean and dry — even a tiny smear of grease will keep egg whites from whipping.
- Pro tip: If your kitchen is very humid, try to work in the driest room of the house — humidity is the enemy of crisp meringues.
Step 2 — Separate the eggs carefully
- Crack each egg and separate the whites into a small bowl first (this prevents yolk contamination).
- Once you’ve confirmed there’s no yolk, add the whites to your large, clean mixing bowl.
- Let the whites sit for a few minutes to come to room temperature if they aren’t already.
- Pro tip (key step): Use pasteurized egg whites if you or anyone you’re serving is immunocompromised or if you’re worried about raw eggs.
Step 3 — Start whipping the egg whites to soft peaks
- Add the ¼ teaspoon cream of tartar to the bowl with the egg whites.
- Begin whipping on low speed until the whites are frothy, about 1–2 minutes.
- Increase to medium-high speed and whip until you see soft peaks — the peaks should fold over when you lift the whisk.
- Pro tip (key step): Start slow and build speed. That gentle ramp helps form a steady foam instead of big, unstable bubbles.
Step 4 — Add sugar gradually and whip to glossy, stiff peaks
- With the mixer running on medium-high, add the ¾ cup granulated sugar one tablespoon at a time, allowing each tablespoon to dissolve before adding the next.
- After all the sugar is added, continue whipping until the meringue is thick, glossy, and holds stiff peaks — the peak should stand straight up without drooping.
- Rub a tiny bit of the meringue between your fingers to check for grittiness; it should feel completely smooth.
- Pro tip (key step): Slow sugar addition is the single most important trick for a glossy, stable meringue. Rushing this step can leave you with grainy, weepy meringues.
Step 5 — Flavor and transfer to a piping bag
- Add the 1 teaspoon vanilla extract and fold it in gently with a spatula — don’t overmix or you’ll deflate the whites.
- Fit a piping bag with a round tip (about ½ inch) or simply snip the tip of a disposable bag for a roughly ½-inch opening.
- Spoon the meringue into the bag, smoothing the top so you have an even flow when piping.
- Pro tip: Keep the motion light and steady. Overworking the meringue now will knock out air and make your ghosts flat.
Step 6 — Pipe your ghost shapes
- Hold the piping bag perpendicular to the parchment and squeeze gently to form a small mound (about 1½–2 inches wide).
- To make the classic ghost “tail,” as you finish the mound, lift the bag slightly and give a quick upward flick — it creates a little pointy tail.
- Space ghosts at least 1 inch apart so air can circulate while they bake.
- If you’re using mini chocolate chips for eyes, gently press two chips into each ghost now. If using melted chocolate, you can add eyes after baking.
- Pro tip (key step): Practice one or two test ghosts first—you’ll quickly find a piping pressure and lift motion that gives a cute tail without collapsing the shape.
Step 7 — Bake low and slow until dry
- Place the baking sheet on the middle rack and bake at 200°F (95°C) for about 90 minutes, or until each meringue is dry to the touch and easily lifts off the parchment.
- Turn the oven off, crack the door, and let the meringues cool completely in the oven (at least 1 hour). This gentle cooldown prevents cracking and helps them dry fully.
- Pro tip (key step): Don’t open the oven while they’re drying — temperature swings can cause cracks or collapse.
Step 8 — Finish the faces and final touches
- If you didn’t press in mini chips before baking, melt a little chocolate and use a toothpick or a small piping bag to dot eyes onto cooled ghosts.
- For playful expressions, draw tiny mouths or eyebrows with the melted chocolate.
- Let the chocolate set completely before moving the ghosts.
Notes
Nutritional Value (per ghost, approx.)
- Calories: 25
- Carbohydrates: 6 g
- Sugar: 6 g
- Protein: 0 g
- Fat: 0 g
- Fiber: 0 g