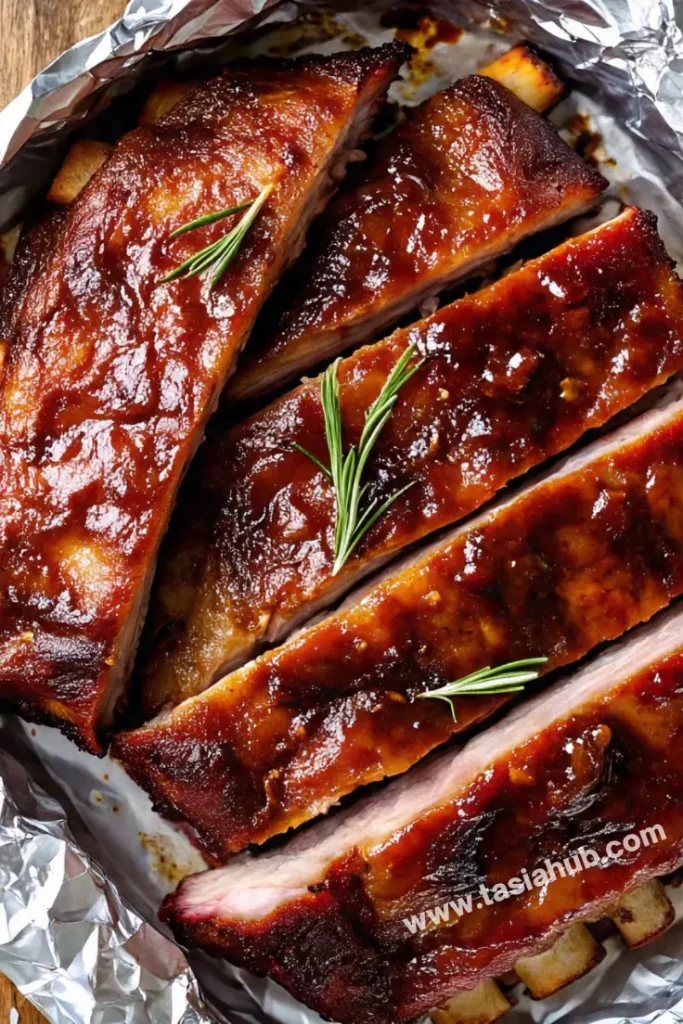
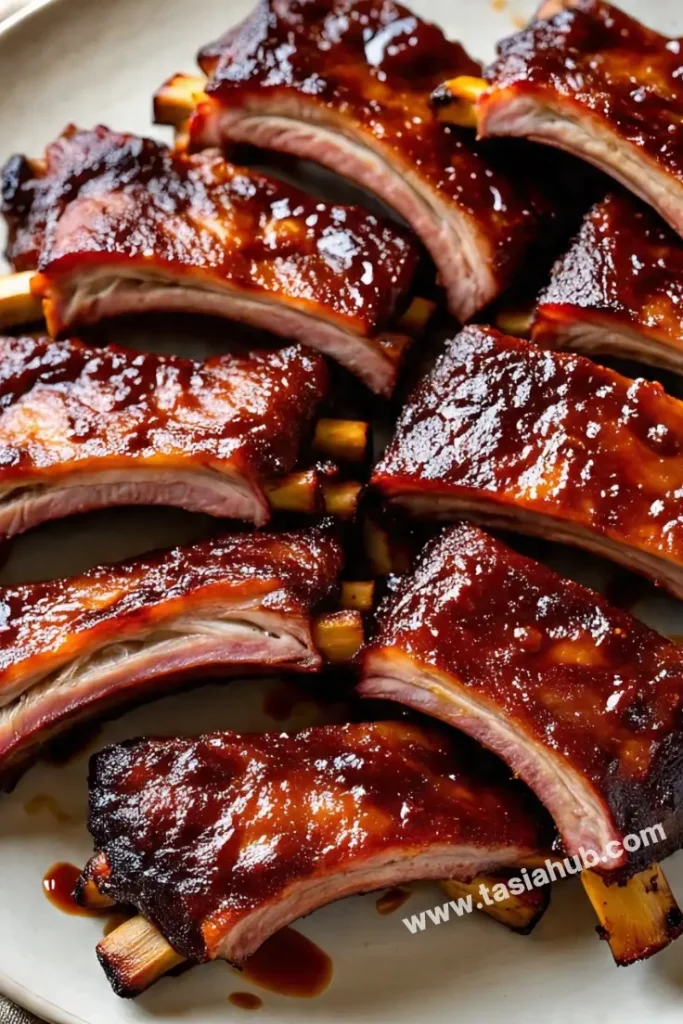
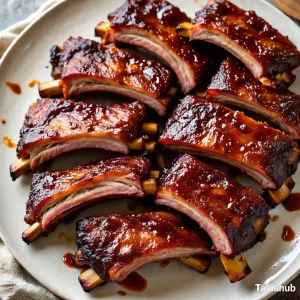
Fall-Off-The-Bone Oven Baked Ribs

There’s just something incredibly satisfying about tender, juicy ribs that practically melt off the bone the moment your fork touches them. But here’s the best part—you don’t need a grill, smoker, or hours of outdoor labor to enjoy them. These oven-baked ribs are proof that all the magic can happen right in your kitchen with just a bit of patience and the right technique.
I remember the first time I tried making ribs in the oven, I was skeptical. Would they be dry? Would they have that deep flavor I love from barbecue spots? But the result completely surprised me. They came out tender, caramelized, and absolutely delicious. The kind of ribs you don’t politely nibble on—you dive in, sauce on your fingers, and maybe even a second round before dessert.
What makes this method so good is the low and slow baking process. It gives the meat time to break down, soak up all those smoky, sweet, and savory flavors, and reach that perfect fall-off-the-bone texture. Plus, it’s super beginner-friendly. No fancy gadgets or tricky techniques—just your oven, a baking sheet, some foil, and a little kitchen love.
Whether you’re planning a cozy weekend dinner, feeding a hungry crowd, or just treating yourself to something indulgent, these oven-baked ribs are always a hit. They’re flavorful, hearty, and honestly? A little addicting. Once you try them, you’ll wonder why you didn’t make them sooner.
Why You’ll Love It
- Incredible Tenderness: These ribs bake low and slow, which means the meat gets irresistibly tender and literally falls off the bone—no knife required.
- No Grill Needed: Perfect for rainy days, apartment living, or whenever you just don’t feel like firing up the grill. The oven does all the work for you.
- Flavor-Packed: From the spice rub to the sticky glaze, every bite is layered with smoky, sweet, and savory flavors that taste like they came straight from a BBQ joint.
- Easy to Prep Ahead: You can season the ribs in advance and let them marinate overnight for even deeper flavor, then just pop them in the oven when you’re ready.
- Great for Feeding a Crowd: Whether it’s game day, a family get-together, or a casual dinner party, these ribs are always a showstopper and super easy to scale up.
Ingredient List
For the Ribs:
- 2 racks of baby back ribs (about 4–5 pounds total)
- 2 tablespoons olive oil
- 2 tablespoons apple cider vinegar
For the Dry Rub:
- 1 tablespoon brown sugar
- 1 tablespoon smoked paprika
- 1 teaspoon garlic powder
- 1 teaspoon onion powder
- 1 teaspoon ground black pepper
- 1 teaspoon salt
- ½ teaspoon cayenne pepper (optional, for heat)
For the BBQ Sauce Glaze:
- 1 cup BBQ sauce (store-bought or homemade)
- 1 tablespoon honey
- 1 tablespoon Worcestershire sauce
- 1 teaspoon Dijon mustard
Ingredient Notes
- Baby back ribs – These are more tender and leaner than spare ribs. I always go for them when baking in the oven.
- Smoked paprika – Adds that essential smoky flavor without needing a grill. Don’t use regular paprika—it’s just not the same.
- Brown sugar – Helps create that sticky, caramelized crust. You can use light or dark, depending on how deep you want the flavor.
- BBQ sauce – Use your favorite brand or a homemade one if you have time. I love Stubb’s or Sweet Baby Ray’s for a classic flavor.
- Honey – A little sweetness balances out the tang and spice; don’t skip it!
- Apple cider vinegar – Helps tenderize the meat and gives a subtle zing to cut through the richness.
Kitchen Equipment Needed
- Baking sheet or roasting pan – To hold the ribs and catch all the delicious juices. I use a rimmed baking sheet lined with foil for easy cleanup.
- Aluminum foil – Essential for wrapping the ribs and keeping them moist while they bake. Heavy-duty foil works best.
- Wire rack – Optional, but helps elevate the ribs for even cooking and caramelization.
- Mixing bowl – For combining the dry rub and glaze ingredients. A small one for the rub, medium for the sauce works great.
- Pastry brush or spoon – To slather on that sticky BBQ glaze at the end. I love using a silicone brush—it’s easy to clean and spreads evenly.
- Sharp knife or kitchen shears – For trimming and separating the ribs, if needed. Shears make quick work of it.
Instructions
Step 1: Prep the Ribs
Remove the membrane
- Flip the ribs bone-side up.
- Slide a butter knife under the thin silver skin (membrane) and gently loosen it.
- Grab it with a paper towel for grip, then peel it off in one piece.
Pro Tip: Don’t skip this! Removing the membrane helps the seasoning absorb better and keeps the ribs tender, not chewy.
Trim excess fat (if needed)
- Use a sharp knife or kitchen shears to cut off any thick chunks of fat on the meat side.
Step 2: Make the Dry Rub
Mix the spices
- In a small bowl, combine brown sugar, smoked paprika, garlic powder, onion powder, salt, pepper, and cayenne (if using).
- Stir until everything’s well blended and no clumps remain.
Pro Tip: Make extra and store it in a jar—this rub works great on chicken and roasted veggies too.
Step 3: Season the Ribs
Coat with oil and vinegar
- Place the ribs on a foil-lined baking sheet or in a roasting pan.
- Rub both sides with olive oil and a light splash of apple cider vinegar.
Apply the dry rub generously
- Sprinkle the rub over both sides of the ribs.
- Use your hands to press it in so it sticks well.
- Let the seasoned ribs rest for 15–30 minutes (or cover and refrigerate for a few hours for deeper flavor).
Step 4: Wrap and Bake
Wrap the ribs tightly in foil
- Place each rack meat-side up on a large piece of foil.
- Fold the foil into a sealed packet, leaving a bit of room for air to circulate.
- Place the foil-wrapped ribs back on the baking sheet or pan.
Bake low and slow
- Preheat your oven to 300°F (150°C).
- Bake the ribs for 2.5 to 3 hours, until they’re fork-tender and the meat pulls away slightly from the bone ends.
Pro Tip: Don’t peek too often! Opening the foil releases steam and slows down the tenderizing process.
Step 5: Glaze and Finish
Make the BBQ glaze
- In a bowl, stir together the BBQ sauce, honey, Worcestershire, and Dijon mustard until smooth.
Unwrap and brush with glaze
- Carefully remove the foil (watch out for hot steam!).
- Drain excess juices if there’s a lot, then brush the top of the ribs with a thick layer of glaze.
Broil or bake uncovered
- Turn the oven to broil (or increase temp to 425°F if you don’t want to broil).
- Broil for 5–8 minutes, just until the glaze bubbles and starts to caramelize.
- Watch closely—sugar burns fast under the broiler!
Pro Tip: For ultra-sticky ribs, brush a second layer of glaze halfway through broiling.
Step 6: Slice and Serve
Rest the ribs briefly
- Let the ribs rest for 5–10 minutes so the juices settle.
Slice between the bones
- Use a sharp knife to cut between each rib.
- Serve warm with extra BBQ sauce on the side if you like things saucy!
Tips and Tricks for Success
- Remove the membrane – It’s a quick step that makes a huge difference in texture. No more chewy backs!
- Let the rub sit – Even 30 minutes of rest after seasoning gives the flavors time to soak in. Overnight is even better.
- Use heavy-duty foil – It holds in steam better and prevents leaks or tearing during cooking.
- Don’t rush the baking – Low and slow is the golden rule for ribs that fall off the bone. Be patient—your taste buds will thank you.
- Watch closely when broiling – Sugar-based glazes can burn quickly under high heat. Stay nearby and check every minute or two.
Ingredient Substitutions and Variations
- Baby back ribs → Spare ribs – Spare ribs work too; they’re a bit meatier and need an extra 30 minutes of bake time.
- Brown sugar → Coconut sugar or maple sugar – A slightly different flavor but still gives that nice caramelized finish.
- Smoked paprika → Chipotle powder – Adds smoky heat if you want a spicy kick.
- BBQ sauce → Homemade version – Mix ketchup, apple cider vinegar, brown sugar, and a dash of hot sauce for a quick DIY option.
- Honey → Maple syrup – A great swap that adds depth and a slightly earthier sweetness.
Serving Suggestions
- Classic BBQ Plate: Pair the ribs with creamy coleslaw, baked beans, and cornbread for a full-on Southern-style feast.
- With Roasted Veggies: I love serving these with a tray of oven-roasted sweet potatoes, carrots, and Brussels sprouts for a balanced, colorful meal.
- Over Mashed Potatoes: The juicy rib meat over buttery mashed potatoes with a drizzle of extra BBQ sauce? So comforting and cozy.
- With Corn on the Cob: Especially in the summer—ribs and grilled or boiled corn are such a simple, unbeatable combo.
- As a Game Day Platter: Cut them into individual ribs, pile them high on a platter, and serve with pickles, chips, and dipping sauce for a crowd-friendly snack.
Storage and Reheating Instructions
- Storing Leftovers: Wrap cooled ribs tightly in foil or place them in an airtight container. Store in the fridge for up to 4 days.
- Freezing: Ribs freeze well! Wrap them tightly in foil, then place in a freezer-safe bag. Freeze for up to 2–3 months.
- Reheating (Oven): Place ribs in a baking dish, cover with foil, and heat at 300°F for 15–20 minutes until warmed through. Add a splash of water or BBQ sauce if they seem dry.
- Reheating (Microwave): Not ideal for a large batch, but works for one or two ribs. Cover with a damp paper towel and heat in 30-second intervals.
- Reheating (Air Fryer): A quick method! Heat ribs at 350°F for about 5–7 minutes. Brush with sauce before reheating for best results.
Frequently Asked Questions
How do I know when the ribs are done?
They’re ready when the meat has pulled back from the bones and you can slide a fork in with little resistance. You can also bend the rack with tongs—if it starts to crack, they’re done!
Can I make these ahead of time?
Absolutely! Bake them, cool, and store in the fridge. When you’re ready to serve, glaze and reheat under the broiler or in the oven.
What if I don’t have apple cider vinegar?
You can swap in white vinegar or even lemon juice—it just adds a little tang to tenderize the ribs and balance the flavors.
Can I cook them at a higher temperature to save time?
It’s best not to. Higher heat risks drying them out. Stick with 300°F for that perfect fall-off-the-bone tenderness.
Do I need to use a wire rack?
Nope! It helps with airflow and caramelization, but baking directly on foil in a pan works just fine.
What BBQ sauce works best?
Totally up to you! I love a smoky-sweet sauce like Sweet Baby Ray’s or Stubb’s. If you like spice, go for a chipotle-style blend.
Did you try this recipe? Let me know in the comments how it turned out!
Don’t forget to share your photos on Instagram and tag me @tasiahub_ or use the hashtag #tasiahub. I’d love to see your creations!
Fall-Off-The-Bone Oven Baked Ribs
Equipment
- Baking sheet or roasting pan
- Aluminum Foil
- Wire rack
- Mixing Bowl
- Pastry brush or spoon
- Sharp Knife or Kitchen Shears
Ingredients
For the Ribs:
- 2 racks of baby back ribs about 4–5 pounds total
- 2 tablespoons olive oil
- 2 tablespoons apple cider vinegar
For the Dry Rub:
- 1 tablespoon brown sugar
- 1 tablespoon smoked paprika
- 1 teaspoon garlic powder
- 1 teaspoon onion powder
- 1 teaspoon ground black pepper
- 1 teaspoon salt
- ½ teaspoon cayenne pepper optional, for heat
For the BBQ Sauce Glaze:
- 1 cup BBQ sauce store-bought or homemade
- 1 tablespoon honey
- 1 tablespoon Worcestershire sauce
- 1 teaspoon Dijon mustard
Instructions
Step 1: Prep the Ribs
- Remove the membrane
- Flip the ribs bone-side up.
- Slide a butter knife under the thin silver skin (membrane) and gently loosen it.
- Grab it with a paper towel for grip, then peel it off in one piece.
- Pro Tip: Don’t skip this! Removing the membrane helps the seasoning absorb better and keeps the ribs tender, not chewy.
- Trim excess fat (if needed)
- Use a sharp knife or kitchen shears to cut off any thick chunks of fat on the meat side.
Step 2: Make the Dry Rub
- Mix the spices
- In a small bowl, combine brown sugar, smoked paprika, garlic powder, onion powder, salt, pepper, and cayenne (if using).
- Stir until everything’s well blended and no clumps remain.
- Pro Tip: Make extra and store it in a jar—this rub works great on chicken and roasted veggies too.
Step 3: Season the Ribs
- Coat with oil and vinegar
- Place the ribs on a foil-lined baking sheet or in a roasting pan.
- Rub both sides with olive oil and a light splash of apple cider vinegar.
- Apply the dry rub generously
- Sprinkle the rub over both sides of the ribs.
- Use your hands to press it in so it sticks well.
- Let the seasoned ribs rest for 15–30 minutes (or cover and refrigerate for a few hours for deeper flavor).
Step 4: Wrap and Bake
- Wrap the ribs tightly in foil
- Place each rack meat-side up on a large piece of foil.
- Fold the foil into a sealed packet, leaving a bit of room for air to circulate.
- Place the foil-wrapped ribs back on the baking sheet or pan.
- Bake low and slow
- Preheat your oven to 300°F (150°C).
- Bake the ribs for 2.5 to 3 hours, until they’re fork-tender and the meat pulls away slightly from the bone ends.
- Pro Tip: Don’t peek too often! Opening the foil releases steam and slows down the tenderizing process.
Step 5: Glaze and Finish
- Make the BBQ glaze
- In a bowl, stir together the BBQ sauce, honey, Worcestershire, and Dijon mustard until smooth.
- Unwrap and brush with glaze
- Carefully remove the foil (watch out for hot steam!).
- Drain excess juices if there’s a lot, then brush the top of the ribs with a thick layer of glaze.
- Broil or bake uncovered
- Turn the oven to broil (or increase temp to 425°F if you don’t want to broil).
- Broil for 5–8 minutes, just until the glaze bubbles and starts to caramelize.
- Watch closely—sugar burns fast under the broiler!
- Pro Tip: For ultra-sticky ribs, brush a second layer of glaze halfway through broiling.
Step 6: Slice and Serve
- Rest the ribs briefly
- Let the ribs rest for 5–10 minutes so the juices settle.
- Slice between the bones
- Use a sharp knife to cut between each rib.
- Serve warm with extra BBQ sauce on the side if you like things saucy!
Notes
Nutritional Value (approximate per serving):
- Calories: 450–600 kcal
- Protein: 40–50 grams
- Fat: 25–35 grams
- Carbohydrates: 10–20 grams
- Fiber: Less than 1 gram
- Sugars: 8–15 grams