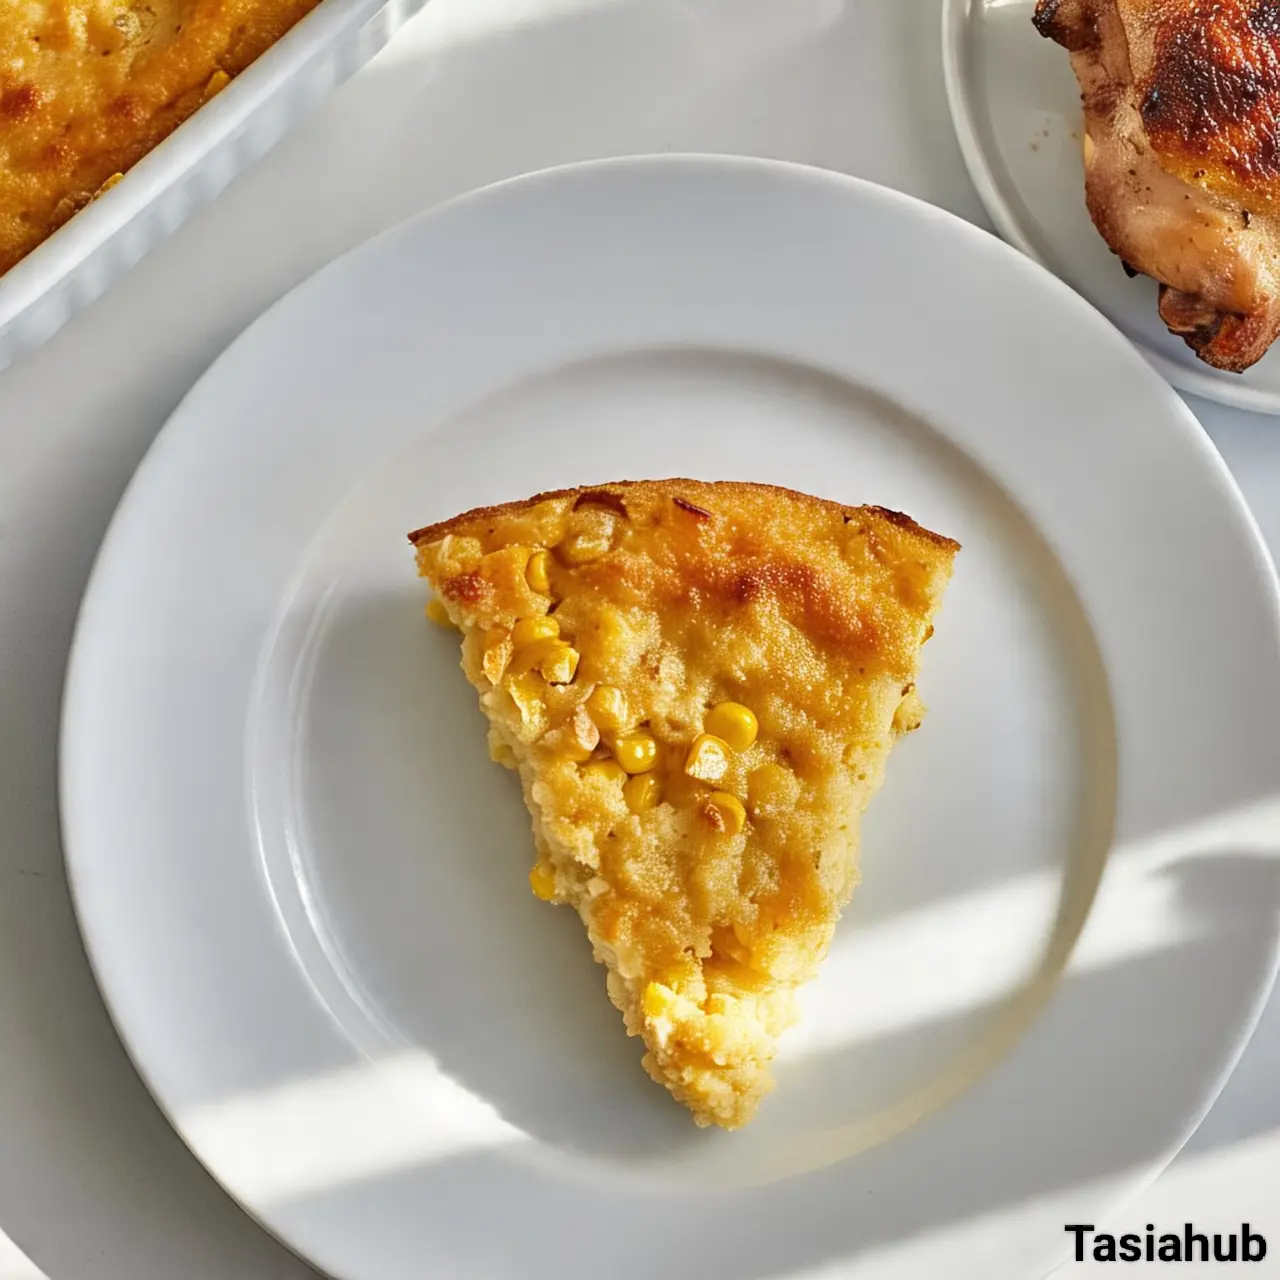
Creamy Southern Corn Pudding
If there’s one dish that brings comfort and warmth to the table with minimal effort, it’s good old-fashioned corn pudding. I still remember the first time I tried it at a potluck—slightly sweet, perfectly creamy, and with just enough corn kernels to give it that satisfying bite. It was love at first forkful. I had to hunt down the recipe from the auntie who made it, and ever since then, it’s become a go-to in my kitchen for holidays, Sunday dinners, or when I’m just craving something cozy.
What I love about corn pudding is how deceptively simple it is. You’d think something this creamy and rich must require hours of prep or a laundry list of ingredients, but nope—it’s basically pantry staples, a couple of eggs, and corn. That’s it! And somehow, it still manages to taste like a warm hug in a casserole dish. It’s also one of those side dishes that bridges the gap between sweet and savory, which makes it a crowd-pleaser no matter who’s at your table.
Now, I know corn pudding might sound like something you’d find in an old Southern cookbook—and honestly, you probably would—but don’t let the “old-fashioned” tag fool you. It’s timeless. Whether you’re serving it with roasted chicken, glazed ham, barbecue, or even just a big leafy salad, it holds its own and brings balance to the plate. Plus, it’s one of those dishes that feels fancy enough for the holidays but is easy enough to whip up on a Wednesday night.
So if you’ve never made corn pudding before—or maybe you have, but it’s been a while—I’m here to walk you through my favorite version. It’s got the perfect blend of creamy and fluffy, with whole kernel corn for texture and just the right hint of sweetness. Let’s dive in!
Why You’ll Love It
- Simple Ingredients, Big Flavor: This corn pudding comes together with pantry staples like canned corn, eggs, butter, and milk—but the end result tastes like you spent hours in the kitchen.
- Perfectly Creamy Texture: It’s soft, custardy, and melt-in-your-mouth delicious with just enough structure to scoop easily. Think of it as the lovechild of cornbread and soufflé.
- Sweet and Savory Balance: It has a hint of sweetness that pairs beautifully with savory mains like ham, roast chicken, or pulled pork.
- Crowd-Pleaser for Any Occasion: Whether it’s Thanksgiving dinner, a family BBQ, or a potluck at church, this dish always gets rave reviews and empty plates.
- Make-Ahead Friendly: You can prep it in advance and simply reheat before serving—it’s just as delicious the next day (if there are any leftovers!).
Ingredient List
- 1 can (15 oz) whole kernel corn, drained
- 1 can (15 oz) cream-style corn
- ½ cup (1 stick) unsalted butter, melted
- 1 cup sour cream
- 2 large eggs
- 1 box (8.5 oz) Jiffy corn muffin mix
- ¼ cup granulated sugar (optional, for a slightly sweeter version)
- ½ teaspoon salt
- ¼ teaspoon ground black pepper
Ingredient Notes
- Jiffy Corn Muffin Mix: This is the classic choice—it gives the pudding that signature flavor and slight fluffiness.
- Cream-Style Corn: Don’t substitute this with more whole kernel corn! It’s key for the creamy consistency.
- Sour Cream: Adds tang and richness—Greek yogurt works in a pinch, but sour cream gives the best flavor.
- Butter: Real unsalted butter brings depth and moisture. Margarine won’t quite cut it here.
- Sugar (Optional): If you like your corn pudding slightly sweet (like many Southern versions), don’t skip this small addition—it balances the dish beautifully.
Kitchen Equipment Needed
- Mixing Bowl – For combining all the ingredients easily. I like using a large glass one so I can see everything coming together.
- Whisk or Hand Mixer – A whisk works just fine, but a hand mixer makes the batter extra smooth with minimal effort.
- Rubber Spatula – Perfect for scraping every last bit of the batter into your baking dish.
- 8×8 or 9×9 Baking Dish – This size gives you a nice, thick pudding with a golden top. A ceramic or glass dish bakes it evenly.
- Measuring Cups & Spoons – Accuracy matters here, especially with the wet-to-dry ratio.
- Oven Mitts – For safely handling your hot dish when it’s time to pull out that bubbling, golden goodness.
Instructions
Step 1: Preheat the Oven
- Set your oven to 350°F (175°C) so it’s ready to go once your mixture is prepared.
- Lightly grease an 8×8 or 9×9-inch baking dish with butter or nonstick spray. This helps prevent sticking and gives you a cleaner slice later.
Pro Tip: Greasing the dish generously gives the pudding a slightly golden, crisp edge—so good!
Step 2: Mix the Wet Ingredients
- In a large mixing bowl, add the melted butter, sour cream, and eggs.
- Whisk until the eggs are fully incorporated and the mixture looks smooth and creamy.
- Add in both the whole kernel corn (drained) and the cream-style corn. Stir well to combine.
Pro Tip: Whisk the eggs separately first if you’re worried about clumps—they blend in more easily that way.
Step 3: Add the Dry Ingredients
- Pour in the corn muffin mix, followed by salt, pepper, and sugar (if using).
- Use a rubber spatula or large spoon to fold everything together. The batter should look thick but well-blended.
Pro Tip: Don’t overmix! Gently fold until there are no dry streaks. Overmixing can make the pudding dense.
Step 4: Pour and Smooth the Batter
- Transfer the batter into your greased baking dish.
- Use your spatula to smooth out the top evenly, especially into the corners so it bakes uniformly.
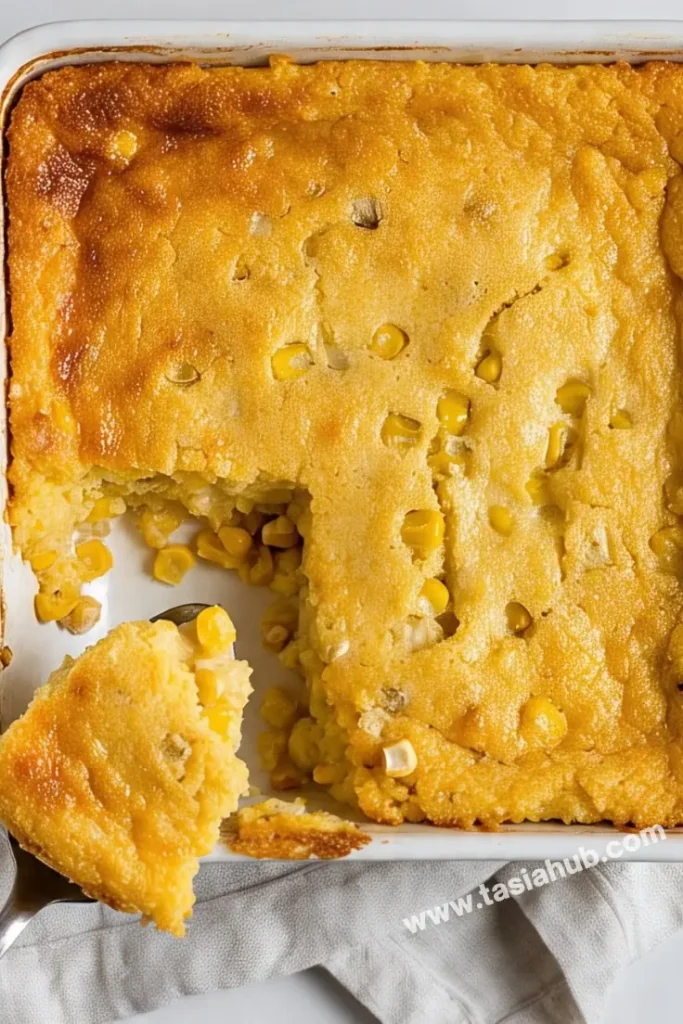
Step 5: Bake to Golden Perfection
- Place the dish on the center rack and bake for 45–50 minutes.
- You’ll know it’s ready when the top is golden brown and the center is just set (it may jiggle slightly but shouldn’t look wet).
Pro Tip: If the top starts browning too quickly, loosely cover with foil around the 35-minute mark.
Step 6: Cool and Serve
- Let it rest for at least 10–15 minutes before serving. This helps it firm up and makes it easier to slice or scoop.
- Serve warm as a side dish—or sneak a spoonful cold the next day. Still delicious!
Pro Tip: Leftovers reheat beautifully in the microwave or oven. A little pat of butter on top never hurts!
Tips and Tricks for Success
- Let the melted butter cool slightly before mixing it with the eggs to avoid accidentally scrambling them.
- Drain the whole kernel corn well—too much liquid can make the pudding soggy.
- Bake in the center of the oven for even cooking and a perfectly set middle.
- Check doneness with a toothpick: it should come out clean or with just a few moist crumbs, not wet batter.
- Rest before slicing—it sets up as it cools, so don’t skip this step even if it smells amazing straight out of the oven.
Ingredient Substitutions and Variations
- No sour cream? Swap it with plain Greek yogurt for a similar tangy creaminess.
- Make it cheesier: Add 1 cup of shredded cheddar or a cheese blend for a savory twist.
- Spice it up: Stir in a pinch of cayenne or chopped jalapeños for a little heat.
- Gluten-free option: Use a gluten-free cornbread mix instead of Jiffy—just check the ingredient label for any flour-based additives.
- Add herbs: Fresh chopped chives, parsley, or even a little thyme can elevate the flavor if you want a herby touch.
Serving Suggestions
- With roasted meats: Corn pudding pairs beautifully with roasted chicken, glazed ham, or pot roast—it adds a soft, creamy contrast to the savory main.
- At holiday dinners: This is a staple at Thanksgiving or Christmas in my house, alongside stuffing, green beans, and cranberry sauce.
- With BBQ or grilled dishes: Serve it next to ribs, pulled pork, or grilled sausages for a cozy, Southern-inspired plate.
- Brunch-worthy side: Believe it or not, this goes great with eggs and bacon for a hearty weekend brunch.
- My favorite combo: I love serving this with a crisp green salad and sweet tea—it lightens up the plate and balances the richness perfectly!

Storage and Reheating Instructions
- To store: Let the corn pudding cool completely, then cover tightly with foil or transfer to an airtight container. Store in the fridge for up to 4 days.
- To freeze: Wrap tightly in plastic wrap and then foil, or place in a freezer-safe container. Freeze for up to 2 months.
- To reheat (oven): Cover with foil and warm in a 300°F oven for 15–20 minutes until heated through.
- To reheat (microwave): Heat individual servings in 30-second intervals until warm.
- Tip: Add a small pat of butter on top before reheating for extra moisture and flavor.
Frequently Asked Questions
Can I make corn pudding ahead of time?
Yes! You can prep it the night before, cover tightly, and refrigerate. When ready to bake, let it sit at room temperature for about 20–30 minutes, then bake as directed.
Can I use frozen corn instead of canned?
Absolutely. Just make sure to thaw and drain it well before using. It gives a slightly fresher taste and more texture.
Is corn pudding the same as cornbread?
Not quite! Corn pudding is softer, creamier, and more custard-like than traditional cornbread. Think of it as a cross between spoonbread and savory corn casserole.
Can I make this dairy-free?
Yes, with a few swaps: use dairy-free butter, unsweetened plant-based yogurt instead of sour cream, and check that your cornbread mix is dairy-free. The texture may vary slightly, but it still works!
How do I know when it’s done baking?
The center should be set and not jiggly, and the top will be golden brown. A toothpick inserted in the center should come out clean or with a few moist crumbs.
What can I serve with corn pudding?
It’s incredibly versatile! Try it with BBQ, roasted meats, holiday spreads, or even as part of a cozy brunch.
Did you try this recipe? Let me know in the comments how it turned out!
Don’t forget to share your photos on Instagram and tag me @tasiahub_ or use the hashtag #tasiahub. I’d love to see your creations!

Creamy Southern Corn Pudding
Equipment
- Mixing Bowl
- Whisk or hand mixer
- Rubber spatula
- 8×8 or 9×9 Baking Dish
- Measuring Cups & Spoons
- Oven Mitts
Ingredients
- 1 can 15 oz whole kernel corn, drained
- 1 can 15 oz cream-style corn
- ½ cup 1 stick unsalted butter, melted
- 1 cup sour cream
- 2 large eggs
- 1 box 8.5 oz Jiffy corn muffin mix
- ¼ cup granulated sugar optional, for a slightly sweeter version
- ½ teaspoon salt
- ¼ teaspoon ground black pepper
Instructions
Step 1: Preheat the Oven
- Set your oven to 350°F (175°C) so it’s ready to go once your mixture is prepared.
- Lightly grease an 8×8 or 9×9-inch baking dish with butter or nonstick spray. This helps prevent sticking and gives you a cleaner slice later.
- Pro Tip: Greasing the dish generously gives the pudding a slightly golden, crisp edge—so good!
Step 2: Mix the Wet Ingredients
- In a large mixing bowl, add the melted butter, sour cream, and eggs.
- Whisk until the eggs are fully incorporated and the mixture looks smooth and creamy.
- Add in both the whole kernel corn (drained) and the cream-style corn. Stir well to combine.
- Pro Tip: Whisk the eggs separately first if you’re worried about clumps—they blend in more easily that way.
Step 3: Add the Dry Ingredients
- Pour in the corn muffin mix, followed by salt, pepper, and sugar (if using).
- Use a rubber spatula or large spoon to fold everything together. The batter should look thick but well-blended.
- Pro Tip: Don’t overmix! Gently fold until there are no dry streaks. Overmixing can make the pudding dense.
Step 4: Pour and Smooth the Batter
- Transfer the batter into your greased baking dish.
- Use your spatula to smooth out the top evenly, especially into the corners so it bakes uniformly.
Step 5: Bake to Golden Perfection
- Place the dish on the center rack and bake for 45–50 minutes.
- You’ll know it’s ready when the top is golden brown and the center is just set (it may jiggle slightly but shouldn’t look wet).
- Pro Tip: If the top starts browning too quickly, loosely cover with foil around the 35-minute mark.
Step 6: Cool and Serve
- Let it rest for at least 10–15 minutes before serving. This helps it firm up and makes it easier to slice or scoop.
- Serve warm as a side dish—or sneak a spoonful cold the next day. Still delicious!
Notes
Nutritional Value (per serving, approximate)
- Calories: 230–270 kcal
- Carbohydrates: 30–35g
- Protein: 4–5g
- Fat: 12–15g
- Saturated Fat: 7–9g
- Cholesterol: 60–80mg
- Sodium: 300–400mg
- Fiber: 2–3g
- Sugar: 6–8g
The nutritional information provided on this website is an estimate only and is intended for general guidance. We cannot guarantee its accuracy and recommend consulting a qualified healthcare professional or registered dietitian for personalized nutrition advice.