Chocolate Raspberry Thumbprint Cookies
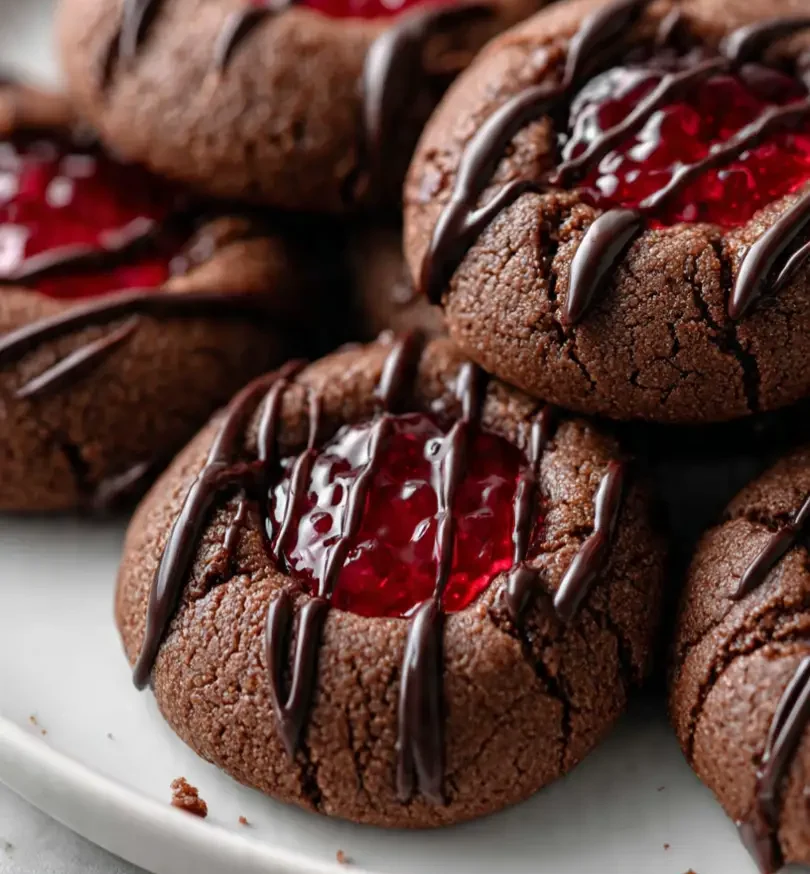
If you love a cookie that perfectly balances rich chocolate and tangy raspberry, these chocolate raspberry thumbprint cookies are bound to become your new favorite treat. They’re soft, fudgy, and filled with a sweet raspberry jam center that adds just the right amount of fruity brightness. Each bite feels like a little piece of chocolatey heaven with a pop of festive color—ideal for any holiday cookie tray or cozy afternoon snack.
What I adore about these cookies is how effortless they are to make yet how beautiful they turn out. The chocolate dough comes together quickly, with simple ingredients you probably already have on hand, and the raspberry jam filling adds that irresistible touch of flavor and color. They look like something from a bakery, but you can whip them up in under an hour from start to finish.
These are honestly some of the best thumbprint cookies to bake around the holidays. Whether you’re gifting them, bringing them to a cookie exchange, or just enjoying them with a cup of hot cocoa by the Christmas lights, they never disappoint. They’re rich and elegant but also have that comforting homemade feel that makes Christmas cookies so special.
And the best part? They’re incredibly versatile. You can swap raspberry jam for strawberry, cherry, or even orange marmalade if you’d like to experiment—but the chocolate and raspberry combo is a true classic. It’s one of those raspberry cookies recipes that always stands out, especially among all the traditional holiday bakes. These easy thumbprint cookies will quickly become a go-to in your festive baking rotation—and once you try them, you’ll see why they’re a favorite among raspberry chocolate desserts.
Why You’ll Love It
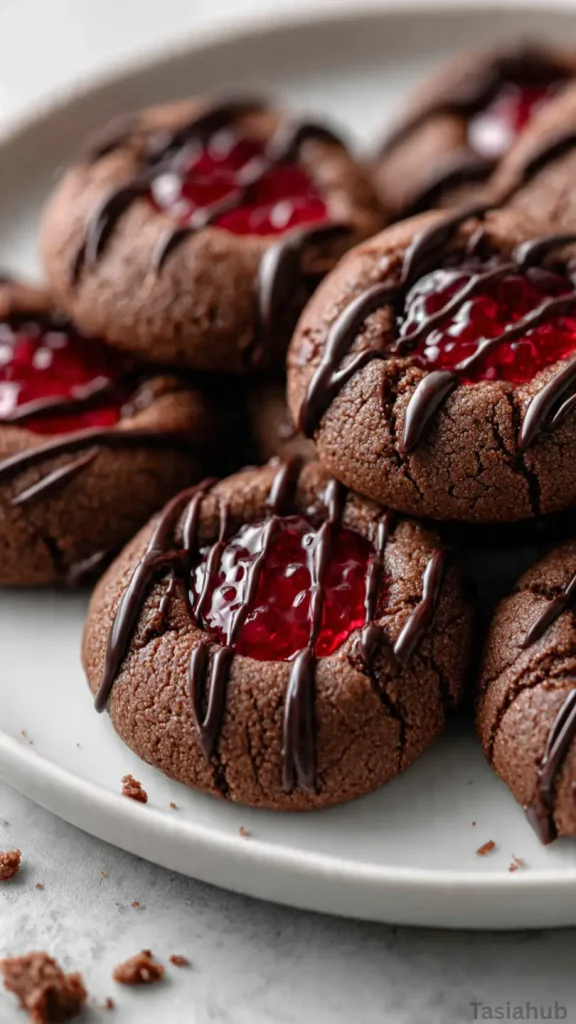
- Rich, fudgy chocolate base: These cookies have that perfect brownie-like texture—soft in the center, slightly crisp at the edges, and full of deep chocolate flavor.
- Bright raspberry filling: The tangy raspberry jam cuts through the richness of the chocolate, creating a beautiful balance of flavors in every bite.
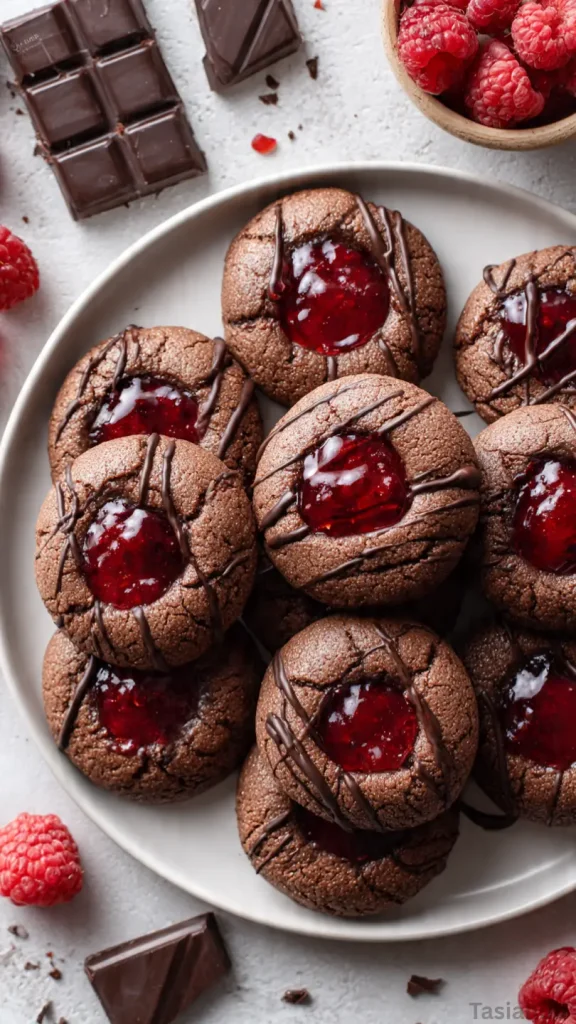
- Festive and eye-catching: With their glossy jam centers and cocoa-rich color, they look gorgeous on a Christmas cookie platter or dessert table.
- Simple yet impressive: Even though they look bakery-worthy, these easy thumbprint cookies come together with minimal effort and no special tools required.
- Perfect for gifting: They hold their shape beautifully, pack well in tins, and make a thoughtful, homemade treat for friends, neighbors, or coworkers during the holidays.
Ingredient List
For the Cookies:
- 1 cup (2 sticks) unsalted butter, softened
- ¾ cup granulated sugar
- 1 large egg yolk
- 1 teaspoon pure vanilla extract
- 1 ¾ cups all-purpose flour
- ½ cup unsweetened cocoa powder
- ¼ teaspoon salt
For the Filling:
- ½ cup raspberry jam (seedless or with seeds—your choice)
- 2 oz semi-sweet or dark chocolate, finely chopped (optional for drizzle)
Ingredient Notes
- Butter: Use unsalted butter so you can control the saltiness. I always use real butter (not margarine)—it gives these cookies that rich, creamy flavor and perfect texture.
- Cocoa powder: Go for a high-quality unsweetened cocoa like Ghirardelli or Hershey’s Special Dark. It gives the cookies their deep, chocolatey flavor that pairs beautifully with raspberry.
- Raspberry jam: Choose a good-quality jam with a bold, fruity taste. I love using Bonne Maman raspberry jam because it’s vibrant and not overly sweet—it makes the filling shine.
- Egg yolk: Don’t skip it! The yolk helps bind the dough and adds richness, giving your cookies that melt-in-your-mouth texture.
- Chocolate drizzle: Totally optional, but a light drizzle of melted dark chocolate over the top makes these thumbprint cookies extra indulgent and elegant.
Kitchen Equipment Needed
- Mixing bowls: You’ll need one large bowl for the dough and a smaller one for melting chocolate or stirring the jam.
- Hand or stand mixer: For creaming the butter and sugar until light and fluffy. I use my KitchenAid hand mixer—it makes the job quick and easy.
- Measuring cups and spoons: Precision matters when baking, especially for cocoa and flour.
- Rubber spatula: Perfect for scraping down the sides of the bowl and mixing in the dry ingredients evenly.
- Baking sheet: Line it with parchment paper to prevent sticking and ensure even baking.
- Small spoon or thumb: For making that signature thumbprint indent in the center of each cookie.
- Cooling rack: Helps the cookies cool evenly and keeps their texture crisp on the outside, soft inside.
Instructions
Step 1 — Prep everything first
- Preheat the oven to 350°F (175°C).
- Line two baking sheets with parchment paper or silicone baking mats.
- Measure your ingredients (spoon & level the flour) and sift the cocoa into the dry-ingredient bowl so there are no lumps.
- Have your jam measured and ready in a small bowl and the chopped chocolate ready if you plan to drizzle.
Pro tip: Spoon the flour into the measuring cup and level with the back of a knife — packed flour = dense cookies.
Step 2 — Cream the butter and sugar
- Put the softened unsalted butter and granulated sugar in a large mixing bowl.
- Beat on medium speed with a hand or stand mixer until the mixture is pale and fluffy, about 2–3 minutes.
- Scrape down the sides and beat again briefly so everything is uniform.
- Add the egg yolk and vanilla extract and beat until just combined.
Pro tip: Cream until the mixture lifts and looks lighter in color — that air is what helps the cookies have a tender, fudgy interior.
Step 3 — Combine dry and wet ingredients
- In a separate bowl whisk (or sift) together the all-purpose flour, unsweetened cocoa powder, and salt.
- With the mixer on low, add the dry ingredients to the butter mixture a little at a time until just combined.
- Use a rubber spatula to finish folding the last streaks of flour in by hand.
Pro tip: Stop mixing as soon as the dough comes together — overmixing develops gluten and makes cookies tough.
Step 4 — Chill & portion the dough
- Cover the dough and chill in the refrigerator for 20–30 minutes so it firms up and’s easier to handle. If you’re short on time, freeze for 10–15 minutes instead.
- Use a tablespoon or small cookie scoop to portion the dough (about 1 Tbsp per cookie). Roll each portion into a smooth ball. Place them 2 inches apart on the prepared baking sheets.
Pro tip: Chilling reduces spreading in the oven, which helps you get a neat, deep thumbprint for the jam.
Step 5 — Make the thumbprints & fill
- Use your thumb, the back of a small spoon, or the end of a melon baller to press a gentle well in the center of each dough ball — about ½ inch deep.
- Place about ½ teaspoon of raspberry jam into each well. Don’t overfill; the jam should sit like a glossy button.
- If your dough puffs up too much in the oven, you can gently press the centers again with the back of a spoon about 1–2 minutes into baking (careful — the tray will be hot).
Pro tip: Use a slightly thicker jam or a seedless preserve so the filling holds its shape and doesn’t run.
Step 6 — Bake
- Bake on the middle rack for 10–12 minutes, rotating the sheet once halfway through if your oven runs unevenly.
- Look for set edges and centers that still look a touch soft — they’ll firm as they cool.
- Remove the baking sheet from the oven and let cookies sit for 3–5 minutes before transferring to a cooling rack.
Pro tip: Don’t wait for the centers to look fully set — pulling them a touch early keeps the centers fudgy and soft.
Step 7 — Optional chocolate drizzle & finishing touches
- If using, melt the chopped semi-sweet/dark chocolate in a microwave in 20-second bursts, stirring between each burst until smooth, or melt gently over a double boiler.
- Spoon or drizzle the chocolate over cooled cookies using a fork or a small piping bag. Let the chocolate set completely before storing or stacking.
Pro tip: Chop the chocolate finely before melting — it melts faster and more evenly.
Tips and Tricks for Success
- Chill the dough: Even a short 20–30 minute chill helps control spreading and gives you perfectly defined thumbprints.
- Use room temperature butter: Soft (not melted) butter creams better and creates that light, velvety texture in the dough.
- Don’t overbake: The cookies should still look a bit soft in the center when you pull them out. They’ll firm up as they cool.
- Warm your jam slightly: A few seconds in the microwave makes it easier to spoon into the centers neatly.
- Drizzle with finesse: Let the cookies cool completely before adding any chocolate drizzle so it doesn’t slide off.
- Bake one tray at a time: It ensures even baking and helps you keep a consistent eye on them.
Ingredient Substitutions and Variations
- Jam flavors: Try strawberry, cherry, or blackberry jam instead of raspberry for a fun twist.
- Chocolate base: Swap the cocoa powder for white chocolate chips melted into the dough for a lighter version.
- Add a crunch: Roll the cookie dough balls in crushed nuts (like almonds or hazelnuts) before baking for texture and flavor.
- Gluten-free option: Substitute the all-purpose flour with a 1:1 gluten-free baking flour—it works beautifully here.
- Vegan-friendly: Replace the butter with plant-based butter and the egg yolk with 1 tablespoon of plant-based milk or applesauce.
- Extra indulgent: After baking, fill the thumbprints with raspberry ganache (melted chocolate + raspberry jam) for a richer dessert.
- Holiday sparkle: Dust the tops with powdered sugar or edible glitter for a festive touch on your Christmas cookies.
Serving Suggestions
- Perfect holiday treat: Arrange them on a festive platter with other Christmas cookies for a colorful, crowd-pleasing dessert spread.
- Afternoon pick-me-up: Enjoy one (or two!) with a cup of hot cocoa, coffee, or raspberry tea—it’s the ultimate cozy combo.
- Gift idea: Place them in a decorative tin with parchment paper layers—they make such a thoughtful homemade gift during the holidays.
- Dessert board favorite: Add them to a dessert charcuterie board with chocolate truffles, pretzels, and berries for a mix of textures and flavors.
- My favorite way: I love pairing these rich chocolate thumbprint cookies with a glass of cold milk or warm mocha—it’s pure comfort in every bite!
Storage and Reheating Instructions
- Room temperature: Store in an airtight container for up to 4–5 days. Separate layers with parchment paper to prevent sticking.
- Refrigeration: If your kitchen is warm, keep them refrigerated for up to 1 week—just let them come to room temp before serving.
- Freezing (baked): Freeze completely cooled cookies in a freezer-safe container for up to 3 months. Thaw overnight at room temperature.
- Freezing (unbaked): Shape and freeze dough balls, then bake from frozen—just add 1–2 extra minutes to the baking time.
- Reheating: For that fresh-baked warmth, microwave a cookie for 5–8 seconds or pop in a 300°F oven for 3–4 minutes until slightly warm.
Frequently Asked Questions
Can I use a different type of jam for the filling?
Absolutely! Raspberry is classic, but strawberry, cherry, or even apricot jam all work beautifully. Just choose one that’s thick enough so it doesn’t run while baking.
Why did my cookies spread too much?
That usually happens if the dough wasn’t chilled long enough or the butter was too soft. Try chilling the dough for at least 30 minutes before baking for better shape and texture.
Can I make the dough ahead of time?
Yes! You can refrigerate the dough (covered) for up to 2 days before baking. Just let it sit at room temperature for 10–15 minutes to soften slightly before shaping.
Do I need to use seedless raspberry jam?
Nope! Both seedless and regular jam work fine—it’s all about personal preference. Seedless gives a smoother look, while the one with seeds adds a little texture.
How can I make these look more festive for Christmas?
Drizzle with white chocolate, sprinkle with edible glitter, or dust lightly with powdered sugar. The contrast against the raspberry filling looks so cheerful on a Christmas dessert table!
Can I double the recipe?
Definitely! These cookies double beautifully. Just make sure to chill the dough in two portions so it cools evenly and doesn’t get too firm to scoop.
Did you try these chocolate raspberry thumbprint cookies?
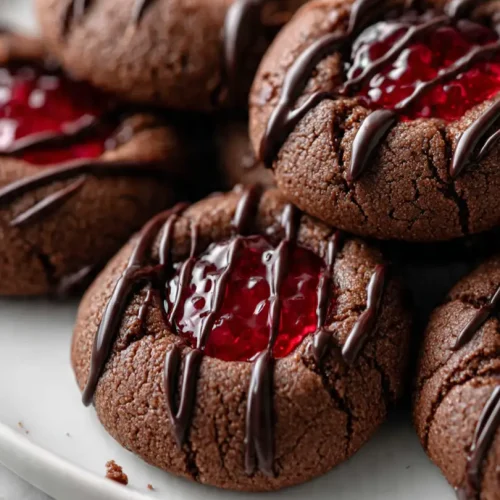
I’d love to hear how they turned out for you! Drop a comment and let me know if you added your own twist—or tag your bake so we can all admire those gorgeous jam-filled centers!
Chocolate Raspberry Thumbprint Cookies
Equipment
- Mixing Bowls
- Hand or Stand Mixer
- Measuring cups and spoons
- Rubber spatula
- Baking Sheet
- Small spoon or thumb
- Cooling Rack
Ingredients
For the Cookies:
- 1 cup 2 sticks unsalted butter, softened
- ¾ cup granulated sugar
- 1 large egg yolk
- 1 teaspoon pure vanilla extract
- 1 ¾ cups all-purpose flour
- ½ cup unsweetened cocoa powder
- ¼ teaspoon salt
For the Filling:
- ½ cup raspberry jam seedless or with seeds—your choice
- 2 oz semi-sweet or dark chocolate finely chopped (optional for drizzle)
Instructions
Step 1 — Prep everything first
- Preheat the oven to 350°F (175°C).
- Line two baking sheets with parchment paper or silicone baking mats.
- Measure your ingredients (spoon & level the flour) and sift the cocoa into the dry-ingredient bowl so there are no lumps.
- Have your jam measured and ready in a small bowl and the chopped chocolate ready if you plan to drizzle.
- Pro tip: Spoon the flour into the measuring cup and level with the back of a knife — packed flour = dense cookies.
Step 2 — Cream the butter and sugar
- Put the softened unsalted butter and granulated sugar in a large mixing bowl.
- Beat on medium speed with a hand or stand mixer until the mixture is pale and fluffy, about 2–3 minutes.
- Scrape down the sides and beat again briefly so everything is uniform.
- Add the egg yolk and vanilla extract and beat until just combined.
- Pro tip: Cream until the mixture lifts and looks lighter in color — that air is what helps the cookies have a tender, fudgy interior.
Step 3 — Combine dry and wet ingredients
- In a separate bowl whisk (or sift) together the all-purpose flour, unsweetened cocoa powder, and salt.
- With the mixer on low, add the dry ingredients to the butter mixture a little at a time until just combined.
- Use a rubber spatula to finish folding the last streaks of flour in by hand.
- Pro tip: Stop mixing as soon as the dough comes together — overmixing develops gluten and makes cookies tough.
Step 4 — Chill & portion the dough
- Cover the dough and chill in the refrigerator for 20–30 minutes so it firms up and’s easier to handle. If you’re short on time, freeze for 10–15 minutes instead.
- Use a tablespoon or small cookie scoop to portion the dough (about 1 Tbsp per cookie). Roll each portion into a smooth ball. Place them 2 inches apart on the prepared baking sheets.
- Pro tip: Chilling reduces spreading in the oven, which helps you get a neat, deep thumbprint for the jam.
Step 5 — Make the thumbprints & fill
- Use your thumb, the back of a small spoon, or the end of a melon baller to press a gentle well in the center of each dough ball — about ½ inch deep.
- Place about ½ teaspoon of raspberry jam into each well. Don’t overfill; the jam should sit like a glossy button.
- If your dough puffs up too much in the oven, you can gently press the centers again with the back of a spoon about 1–2 minutes into baking (careful — the tray will be hot).
- Pro tip: Use a slightly thicker jam or a seedless preserve so the filling holds its shape and doesn’t run.
Step 6 — Bake
- Bake on the middle rack for 10–12 minutes, rotating the sheet once halfway through if your oven runs unevenly.
- Look for set edges and centers that still look a touch soft — they’ll firm as they cool.
- Remove the baking sheet from the oven and let cookies sit for 3–5 minutes before transferring to a cooling rack.
- Pro tip: Don’t wait for the centers to look fully set — pulling them a touch early keeps the centers fudgy and soft.
Step 7 — Optional chocolate drizzle & finishing touches
- If using, melt the chopped semi-sweet/dark chocolate in a microwave in 20-second bursts, stirring between each burst until smooth, or melt gently over a double boiler.
- Spoon or drizzle the chocolate over cooled cookies using a fork or a small piping bag. Let the chocolate set completely before storing or stacking.
- Pro tip: Chop the chocolate finely before melting — it melts faster and more evenly.
Step 8 — Storage & make-ahead tips
- Store cooled cookies in an airtight container at room temperature for up to 4–5 days. Place a sheet of parchment between layers so they don’t stick.
- To freeze: arrange unbaked dough balls on a tray and flash-freeze, then transfer to a freezer bag for up to 3 months. Bake from frozen, adding 1–2 minutes to the bake time. You can also freeze baked cookies (cool completely first) for up to 3 months; thaw at room temperature.
Notes
Nutritional Value (per cookie, approximate)
- Calories: 140 kcal
- Total fat: 7 g
- Saturated fat: 4 g
- Cholesterol: 20 mg
- Sodium: 50 mg
- Total carbohydrates: 18 g
- Dietary fiber: 1 g
- Sugars: 10 g
- Protein: 2 g
The nutritional information provided on this website is an estimate only and is intended for general guidance. We cannot guarantee its accuracy and recommend consulting a qualified healthcare professional or registered dietitian for personalized nutrition advice.