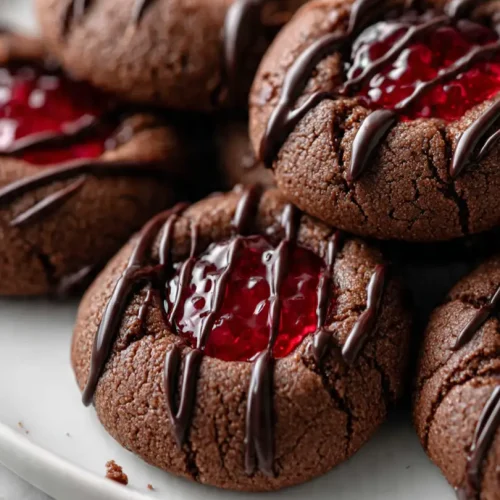
Chocolate Raspberry Thumbprint Cookies
If you love a cookie that perfectly balances rich chocolate and tangy raspberry, these chocolate raspberry thumbprint cookies are bound to become your new favorite treat.
Equipment
- Mixing Bowls
- Hand or Stand Mixer
- Measuring cups and spoons
- Rubber spatula
- Baking Sheet
- Small spoon or thumb
- Cooling Rack
Ingredients
For the Cookies:
- 1 cup 2 sticks unsalted butter, softened
- ¾ cup granulated sugar
- 1 large egg yolk
- 1 teaspoon pure vanilla extract
- 1 ¾ cups all-purpose flour
- ½ cup unsweetened cocoa powder
- ¼ teaspoon salt
For the Filling:
- ½ cup raspberry jam seedless or with seeds—your choice
- 2 oz semi-sweet or dark chocolate finely chopped (optional for drizzle)
Instructions
Step 1 — Prep everything first
- Preheat the oven to 350°F (175°C).
- Line two baking sheets with parchment paper or silicone baking mats.
- Measure your ingredients (spoon & level the flour) and sift the cocoa into the dry-ingredient bowl so there are no lumps.
- Have your jam measured and ready in a small bowl and the chopped chocolate ready if you plan to drizzle.
- Pro tip: Spoon the flour into the measuring cup and level with the back of a knife — packed flour = dense cookies.
Step 2 — Cream the butter and sugar
- Put the softened unsalted butter and granulated sugar in a large mixing bowl.
- Beat on medium speed with a hand or stand mixer until the mixture is pale and fluffy, about 2–3 minutes.
- Scrape down the sides and beat again briefly so everything is uniform.
- Add the egg yolk and vanilla extract and beat until just combined.
- Pro tip: Cream until the mixture lifts and looks lighter in color — that air is what helps the cookies have a tender, fudgy interior.
Step 3 — Combine dry and wet ingredients
- In a separate bowl whisk (or sift) together the all-purpose flour, unsweetened cocoa powder, and salt.
- With the mixer on low, add the dry ingredients to the butter mixture a little at a time until just combined.
- Use a rubber spatula to finish folding the last streaks of flour in by hand.
- Pro tip: Stop mixing as soon as the dough comes together — overmixing develops gluten and makes cookies tough.
Step 4 — Chill & portion the dough
- Cover the dough and chill in the refrigerator for 20–30 minutes so it firms up and’s easier to handle. If you’re short on time, freeze for 10–15 minutes instead.
- Use a tablespoon or small cookie scoop to portion the dough (about 1 Tbsp per cookie). Roll each portion into a smooth ball. Place them 2 inches apart on the prepared baking sheets.
- Pro tip: Chilling reduces spreading in the oven, which helps you get a neat, deep thumbprint for the jam.
Step 5 — Make the thumbprints & fill
- Use your thumb, the back of a small spoon, or the end of a melon baller to press a gentle well in the center of each dough ball — about ½ inch deep.
- Place about ½ teaspoon of raspberry jam into each well. Don’t overfill; the jam should sit like a glossy button.
- If your dough puffs up too much in the oven, you can gently press the centers again with the back of a spoon about 1–2 minutes into baking (careful — the tray will be hot).
- Pro tip: Use a slightly thicker jam or a seedless preserve so the filling holds its shape and doesn't run.
Step 6 — Bake
- Bake on the middle rack for 10–12 minutes, rotating the sheet once halfway through if your oven runs unevenly.
- Look for set edges and centers that still look a touch soft — they’ll firm as they cool.
- Remove the baking sheet from the oven and let cookies sit for 3–5 minutes before transferring to a cooling rack.
- Pro tip: Don’t wait for the centers to look fully set — pulling them a touch early keeps the centers fudgy and soft.
Step 7 — Optional chocolate drizzle & finishing touches
- If using, melt the chopped semi-sweet/dark chocolate in a microwave in 20-second bursts, stirring between each burst until smooth, or melt gently over a double boiler.
- Spoon or drizzle the chocolate over cooled cookies using a fork or a small piping bag. Let the chocolate set completely before storing or stacking.
- Pro tip: Chop the chocolate finely before melting — it melts faster and more evenly.
Step 8 — Storage & make-ahead tips
- Store cooled cookies in an airtight container at room temperature for up to 4–5 days. Place a sheet of parchment between layers so they don’t stick.
- To freeze: arrange unbaked dough balls on a tray and flash-freeze, then transfer to a freezer bag for up to 3 months. Bake from frozen, adding 1–2 minutes to the bake time. You can also freeze baked cookies (cool completely first) for up to 3 months; thaw at room temperature.
Notes
Nutritional Value (per cookie, approximate)
- Calories: 140 kcal
- Total fat: 7 g
- Saturated fat: 4 g
- Cholesterol: 20 mg
- Sodium: 50 mg
- Total carbohydrates: 18 g
- Dietary fiber: 1 g
- Sugars: 10 g
- Protein: 2 g
The nutritional information provided on this website is an estimate only and is intended for general guidance. We cannot guarantee its accuracy and recommend consulting a qualified healthcare professional or registered dietitian for personalized nutrition advice.