Chocolate Mint Thumbprint Cookies
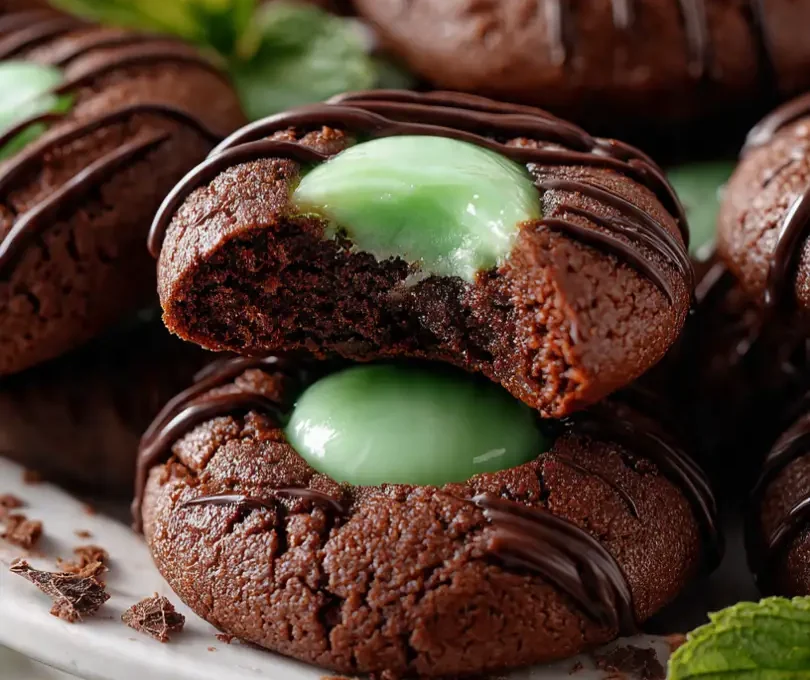
If you love the combination of rich chocolate and refreshing mint, these chocolate mint thumbprint cookies will easily become one of your favorite holiday treats. They’re soft, chewy, and filled with a creamy mint center that melts beautifully in your mouth. The balance of deep cocoa flavor with a cool hint of mint gives them that irresistible after-dinner quality—perfect for anyone who enjoys indulgent mint chocolate desserts.
The best part? These cookies are just as easy to make as they are to devour. You don’t need fancy tools or complicated techniques. The dough comes together quickly, and the thumbprint filling adds a pretty, festive touch that makes them stand out on any dessert tray. Whether you’re baking for a cookie exchange, family gathering, or simply stocking your kitchen with sweet treats, these easy thumbprint cookies fit the bill.
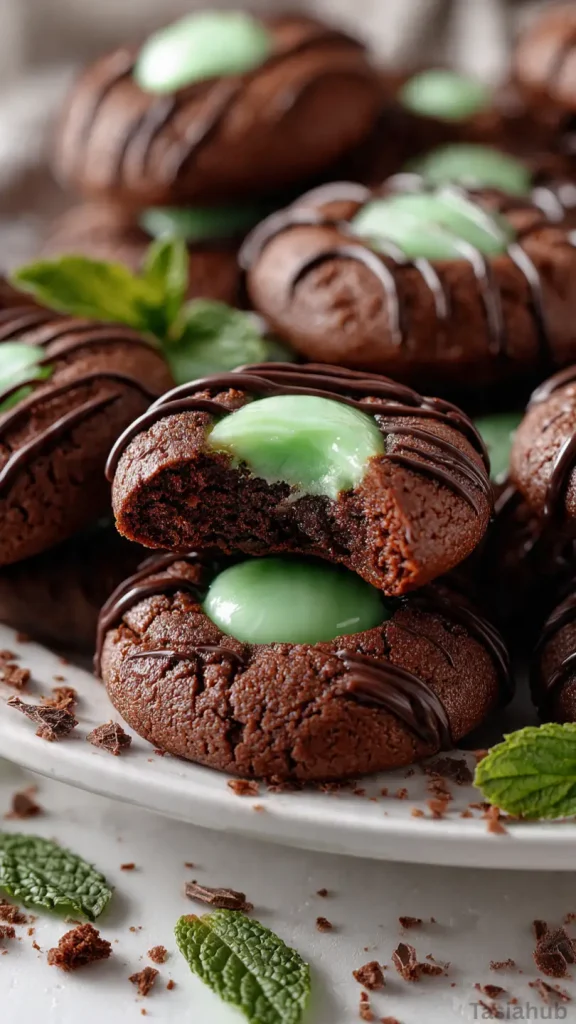
During the holiday season, it’s almost impossible to resist the charm of Christmas cookies that feel both classic and slightly elevated. These chocolate thumbprint cookies deliver just that. The glossy mint filling gives them a wintry glow, while the cocoa base adds that nostalgic flavor that pairs perfectly with a cup of hot cocoa or peppermint mocha. If you’ve been searching for mint cookie recipes that are both fun to make and incredibly satisfying, you’ll fall in love with this one.
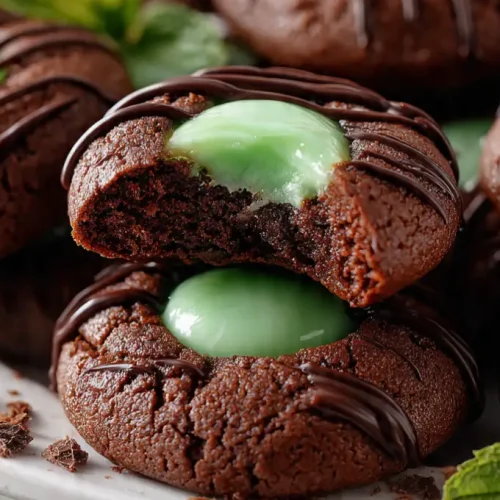
They’re delightful straight out of the oven or chilled for a few minutes in the fridge to let the mint filling set perfectly. Either way, these chocolate mint thumbprint cookies bring together the best of both worlds—rich chocolate indulgence and refreshing mint bliss—all in one bite-sized masterpiece.
Why You’ll Love It
- Perfect flavor balance: The rich cocoa base and cool mint filling complement each other beautifully, creating a treat that’s indulgent without being too sweet.
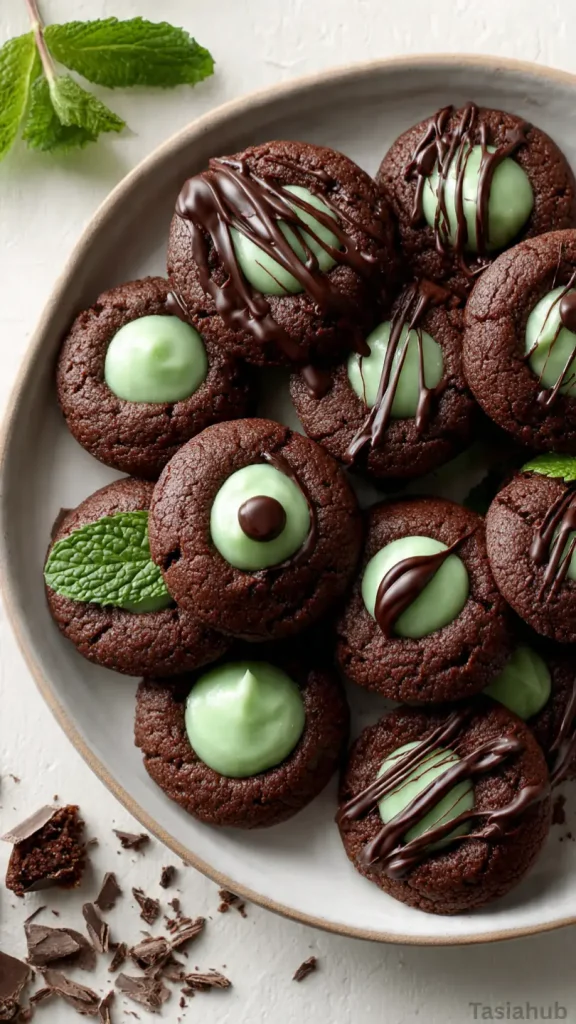
- Holiday-ready presentation: With their glossy green centers, these cookies look like they belong on a Christmas dessert table—festive, eye-catching, and totally giftable.
- Soft, chewy texture: Each bite delivers that satisfying mix of a tender chocolate cookie and smooth minty filling that melts in your mouth.
- Simple and foolproof: Even if you’re new to baking, these easy thumbprint cookies come together quickly with no complicated steps.
- Versatile for any occasion: While they’re perfect as Christmas thumbprint cookies, they’re equally delicious year-round for mint lovers or anyone who craves a fun twist on chocolate thumbprint cookies.
Ingredient List
For the Cookies:
- 1 cup unsalted butter, softened
- ¾ cup granulated sugar
- 1 large egg yolk
- 1 teaspoon vanilla extract
- 1 ¾ cups all-purpose flour
- ½ cup unsweetened cocoa powder
- ¼ teaspoon salt
For the Mint Filling:
- 1 cup powdered sugar
- 1 tablespoon unsalted butter, softened
- 1–2 tablespoons heavy cream or milk
- ½ teaspoon peppermint extract
- Green food coloring (optional)
- ½ cup semi-sweet chocolate chips (for drizzling or topping)
Ingredient Notes
- Butter: Use real unsalted butter—not margarine. It gives the cookies that rich, bakery-style flavor and keeps the dough tender.
- Cocoa powder: I always use Dutch-processed cocoa—it adds a deeper, smoother chocolate flavor that pairs perfectly with the mint filling.
- Peppermint extract: Don’t skip this! It’s the key to that classic mint choco cookie flavor. A little goes a long way, so measure carefully.
- Powdered sugar: This helps create a silky, creamy mint filling that sets nicely once cooled.
- Green food coloring: Totally optional, but I love adding a drop or two for that festive Christmas cookie look.
- Chocolate chips: A drizzle or small chocolate center takes these from simple to stunning—perfect for when you want your mint chocolate desserts to look as good as they taste!
Kitchen Equipment Needed
- Mixing bowls: For combining the dough and whisking up the mint filling. I love using glass bowls so I can easily see when everything’s well mixed.
- Hand mixer or stand mixer: Makes creaming the butter and sugar a breeze and ensures a smooth, fluffy dough.
- Measuring cups and spoons: Accuracy matters, especially for baking—level off the flour for best results.
- Baking sheet: Line it with parchment paper to prevent sticking and make cleanup effortless.
- Small cookie scoop: Helps portion out even-sized cookies so they bake evenly every time.
- Teaspoon or thumb: For pressing that classic “thumbprint” into the center before baking.
- Small saucepan or microwave-safe bowl: For melting the chocolate if you’re drizzling or topping your cookies.
- Wire cooling rack: Lets the cookies cool completely before adding the mint filling—so it sets just right!
Instructions
Step 1 — Prep & preheat
- Preheat your oven to 350°F (175°C). If you’re using a convection oven, drop the temp to 325°F (163°C).
- Line two baking sheets with parchment paper or a silicone mat.
- Measure out your ingredients so everything is within reach (baking is easier when you’re organized).
Pro tip: Let butter sit at room temperature until slightly soft but not greasy — it should give a little when you press it. If it’s melted, chill for 10–15 minutes.
Step 2 — Make the cookie dough
- In a large bowl, cream 1 cup softened unsalted butter and ¾ cup granulated sugar with a hand mixer or stand mixer on medium speed for 2–3 minutes, until light and fluffy.
- Add 1 egg yolk and 1 tsp vanilla extract; beat just until combined (20–30 seconds). Scrape the bowl once.
- In a separate bowl, whisk together 1 ¾ cups all-purpose flour, ½ cup unsweetened cocoa powder, and ¼ tsp salt.
- With the mixer on low, add the dry ingredients to the butter mixture in two additions, mixing just until the dough comes together. Stop as soon as you see no dry streaks. If the dough seems overly dry, add 1 tsp heavy cream at a time until it holds.
Pro tip: Measure flour by spooning it into the cup and leveling with the back of a knife (or better yet, weigh it). Overpacked flour makes dense cookies.
Step 3 — Shape and make thumbprints
- Use a small cookie scoop (about 1 tablespoon) to portion dough into even balls — you should get roughly 24–30 cookies, depending on how big you make them.
- Roll each portion into a smooth ball and place on the prepared sheets about 1½–2 inches apart.
- Using your thumb, the back of a teaspoon, or the end of a wooden spoon handle, press a shallow ½-inch indentation into the center of each ball. If the dough starts to crack, gently press the edges together to smooth them.
Pro tip: If your thumb sticks, lightly dust it with powdered sugar or use the back of a dampened teaspoon for a clean indent.
Step 4 — Bake the cookies
- Bake one sheet at a time in the center of the oven for 9–11 minutes — you want the edges to look set but the centers still slightly soft.
- Rotate the pan front-to-back halfway through baking for even color.
- When done, remove the sheet from the oven and let cookies rest 5 minutes on the pan (they’ll continue to set). Transfer to a wire rack to cool completely.
Pro tip: Don’t wait for the center to look fully baked — these cookies finish cooking as they cool and staying soft is the goal.
Step 5 — Make the mint filling
- In a medium bowl, beat 1 cup powdered sugar with 1 tbsp softened unsalted butter until combined.
- Add ½ tsp peppermint extract and 1–2 tbsp heavy cream or milk, beating to reach a thick, pipeable consistency. Add more powdered sugar if it’s too thin, or more cream if it’s too stiff.
- If you like, stir in a drop or two of green food coloring for that classic mint look. Transfer the filling to a piping bag or a small zip-top bag with a corner snipped.
Pro tip: Start with less liquid than you think you need — it’s easy to thin a filling but hard to fix one that’s too runny.
Step 6 — Fill the cookies
- Once cookies are completely cool, pipe or spoon about ½ to 1 teaspoon of mint filling into each thumbprint until shallowly filled (don’t mound it).
- If any indentations rose up while baking, gently press them down again before filling so the mint sits neatly.
Pro tip: Fill cookies on a wire rack over parchment so any stray filling drops are easy to tidy up.
Step 7 — Add the chocolate finish
- Melt ½ cup semi-sweet chocolate chips in a microwave-safe bowl in 20–30 second bursts, stirring between each burst until smooth. (Or melt gently in a double boiler.)
- Drizzle melted chocolate over the filled centers with a spoon or pipe a tiny dot in the middle of each cookie for extra chocolate contrast.
Pro tip: If your chocolate looks grainy or seizes, stir in a tiny bit of neutral oil (½ tsp) and keep stirring—this usually brings it back.
Step 8 — Chill, set, and serve
- Place the cookies in the fridge for 10–15 minutes to let the filling and chocolate set, or let them sit at room temperature for 30–60 minutes if your kitchen is cool and dry.
- Serve once the filling is firm to the touch.
Tips and Tricks for Success
- Chill the dough if it feels sticky: Even 15 minutes in the fridge helps the cookies hold their shape and makes them easier to roll.
- Indent before and after baking: If your thumbprints puff up a bit in the oven, just re-press them gently right after baking while they’re still warm.
- Use quality cocoa powder: The better the cocoa, the richer your cookies will taste—this small upgrade makes a big difference in flavor.
- Let cookies cool completely before filling: Warm cookies can melt the mint filling and make it runny, so patience pays off here.
- Pipe for neatness: A small piping bag (or zip-top bag with the corner snipped) helps you fill each cookie cleanly and evenly.
- Drizzle smartly: Use a fork or a small spoon to get those elegant chocolate lines—it’s the easiest way to make them look bakery-perfect.
Ingredient Substitutions and Variations
- Mint extract: If peppermint isn’t your thing, try vanilla or almond extract for a new twist on these easy thumbprint cookies.
- Food coloring: Skip it entirely or use white chocolate filling instead of tinted green for a more classic look.
- Flour alternatives: Use a 1:1 gluten-free baking blend if you want to make these gluten-free—texture stays soft and chewy.
- Filling flavor: Swap the mint for raspberry jam or caramel for a different kind of Christmas thumbprint cookie.
- Chocolate drizzle: Try dark chocolate for extra richness or white chocolate for a pretty contrast against the cocoa base.
- Holiday version: Top each cookie with crushed candy cane pieces before the drizzle sets for a festive, crunchy finish—perfect for Christmas cookies or edible gifts.
Serving Suggestions
- With hot cocoa or coffee: The cool mint and rich chocolate pair beautifully with a warm drink—especially on chilly evenings.
- As part of a cookie platter: I love adding these to a festive Christmas cookie spread alongside shortbread, gingerbread, and sugar cookies—they add that touch of minty freshness.
- Gift-ready treat: Package a few in a clear bag with a ribbon for an easy homemade holiday gift. They look fancy but are incredibly simple to make.
- After-dinner dessert: These make a wonderful bite-sized treat to serve after a meal—refreshing, rich, and not too heavy.
- My personal favorite: I chill mine for 10 minutes before eating so the filling firms up slightly—the minty coolness is perfection!
Storage and Reheating Instructions
- Room temperature: Store cookies in an airtight container for up to 3 days. Keep them layered with parchment to prevent sticking.
- Refrigerator: They’ll stay fresh for about a week in the fridge—just let them come to room temp before serving for the best texture.
- Freezer (baked): Freeze filled cookies in a single layer, then transfer to a freezer bag for up to 2 months. Thaw at room temperature.
- Freezer (unbaked): Freeze dough balls with the thumbprint already pressed in; bake straight from frozen, adding 2–3 minutes to the bake time.
- Reheating (optional): While these cookies are best served at room temp, you can warm them slightly in the microwave for 5–7 seconds if you want that soft, just-baked feel again.
Frequently Asked Questions
Can I use regular mint extract instead of peppermint?
Yes! Regular mint extract works fine—it just has a slightly different, more spearmint-like flavor. Peppermint gives that sharper, cool bite most people expect in mint chocolate desserts.
Why did my thumbprints lose their shape in the oven?
That usually happens when the dough is too soft or warm. Try chilling it for 15–20 minutes before baking. You can also re-press the centers gently right after they come out of the oven.
Can I make these cookies ahead of time?
Absolutely! You can make the dough up to three days in advance, refrigerate it, and bake when ready. The filled cookies also store well in the fridge or freezer for easy holiday prep.
Do I have to color the mint filling green?
Not at all! The food coloring is purely for presentation. You can leave it white for a classic look, or even tint it pink for Valentine’s Day—these mint cookie recipes are easy to customize.
Can I double the recipe for a cookie exchange or holiday gift boxes?
Definitely! This recipe doubles beautifully. Just mix in batches to avoid overworking the dough, and bake in separate rounds for consistent results.
What kind of cocoa powder works best?
Dutch-processed cocoa powder gives a smoother, richer chocolate flavor, but you can also use natural unsweetened cocoa if that’s what you have on hand.
Did you try these chocolate mint thumbprint cookies? I’d love to hear how they turned out for you—share your thoughts in the comments or tag me when you bake them!
Chocolate Mint Thumbprint Cookies
Equipment
- Mixing Bowls
- Hand mixer or stand mixer
- Measuring cups and spoons
- Baking Sheet
- Small cookie scoop
- Teaspoon or thumb
- Small saucepan or microwave-safe bowl
- Wire Cooling Rack
Ingredients
For the Cookies:
- 1 cup unsalted butter softened
- ¾ cup granulated sugar
- 1 large egg yolk
- 1 teaspoon vanilla extract
- 1 ¾ cups all-purpose flour
- ½ cup unsweetened cocoa powder
- ¼ teaspoon salt
For the Mint Filling:
- 1 cup powdered sugar
- 1 tablespoon unsalted butter softened
- 1 –2 tablespoons heavy cream or milk
- ½ teaspoon peppermint extract
- Green food coloring optional
- ½ cup semi-sweet chocolate chips for drizzling or topping
Instructions
Step 1 — Prep & preheat
- Preheat your oven to 350°F (175°C). If you’re using a convection oven, drop the temp to 325°F (163°C).
- Line two baking sheets with parchment paper or a silicone mat.
- Measure out your ingredients so everything is within reach (baking is easier when you’re organized).
- Pro tip: Let butter sit at room temperature until slightly soft but not greasy — it should give a little when you press it. If it’s melted, chill for 10–15 minutes.
Step 2 — Make the cookie dough
- In a large bowl, cream 1 cup softened unsalted butter and ¾ cup granulated sugar with a hand mixer or stand mixer on medium speed for 2–3 minutes, until light and fluffy.
- Add 1 egg yolk and 1 tsp vanilla extract; beat just until combined (20–30 seconds). Scrape the bowl once.
- In a separate bowl, whisk together 1 ¾ cups all-purpose flour, ½ cup unsweetened cocoa powder, and ¼ tsp salt.
- With the mixer on low, add the dry ingredients to the butter mixture in two additions, mixing just until the dough comes together. Stop as soon as you see no dry streaks. If the dough seems overly dry, add 1 tsp heavy cream at a time until it holds.
- Pro tip: Measure flour by spooning it into the cup and leveling with the back of a knife (or better yet, weigh it). Overpacked flour makes dense cookies.
Step 3 — Shape and make thumbprints
- Use a small cookie scoop (about 1 tablespoon) to portion dough into even balls — you should get roughly 24–30 cookies, depending on how big you make them.
- Roll each portion into a smooth ball and place on the prepared sheets about 1½–2 inches apart.
- Using your thumb, the back of a teaspoon, or the end of a wooden spoon handle, press a shallow ½-inch indentation into the center of each ball. If the dough starts to crack, gently press the edges together to smooth them.
- Pro tip: If your thumb sticks, lightly dust it with powdered sugar or use the back of a dampened teaspoon for a clean indent.
Step 4 — Bake the cookies
- Bake one sheet at a time in the center of the oven for 9–11 minutes — you want the edges to look set but the centers still slightly soft.
- Rotate the pan front-to-back halfway through baking for even color.
- When done, remove the sheet from the oven and let cookies rest 5 minutes on the pan (they’ll continue to set). Transfer to a wire rack to cool completely.
- Pro tip: Don’t wait for the center to look fully baked — these cookies finish cooking as they cool and staying soft is the goal.
Step 5 — Make the mint filling
- In a medium bowl, beat 1 cup powdered sugar with 1 tbsp softened unsalted butter until combined.
- Add ½ tsp peppermint extract and 1–2 tbsp heavy cream or milk, beating to reach a thick, pipeable consistency. Add more powdered sugar if it’s too thin, or more cream if it’s too stiff.
- If you like, stir in a drop or two of green food coloring for that classic mint look. Transfer the filling to a piping bag or a small zip-top bag with a corner snipped.
- Pro tip: Start with less liquid than you think you need — it’s easy to thin a filling but hard to fix one that’s too runny.
Step 6 — Fill the cookies
- Once cookies are completely cool, pipe or spoon about ½ to 1 teaspoon of mint filling into each thumbprint until shallowly filled (don’t mound it).
- If any indentations rose up while baking, gently press them down again before filling so the mint sits neatly.
- Pro tip: Fill cookies on a wire rack over parchment so any stray filling drops are easy to tidy up.
Step 7 — Add the chocolate finish
- Melt ½ cup semi-sweet chocolate chips in a microwave-safe bowl in 20–30 second bursts, stirring between each burst until smooth. (Or melt gently in a double boiler.)
- Drizzle melted chocolate over the filled centers with a spoon or pipe a tiny dot in the middle of each cookie for extra chocolate contrast.
- Pro tip: If your chocolate looks grainy or seizes, stir in a tiny bit of neutral oil (½ tsp) and keep stirring—this usually brings it back.
Step 8 — Chill, set, and serve
- Place the cookies in the fridge for 10–15 minutes to let the filling and chocolate set, or let them sit at room temperature for 30–60 minutes if your kitchen is cool and dry.
- Serve once the filling is firm to the touch.
Step 9 — Storage & make-ahead tips
- Room temp: Store in an airtight container layered with parchment for up to 3 days. Let come to room temperature before serving if refrigerated.
- Refrigerator: Keep in an airtight container for up to 1 week.
- Freezing: The dough balls freeze beautifully — freeze scooped dough on a sheet, then transfer to a freezer bag for up to 3 months. Bake from frozen, adding 2–3 minutes to the bake time. You can also freeze baked, unfilled cookies and fill after thawing.
- Make filling ahead: Mint filling keeps in the fridge for several days; give it a quick stir before piping.
Notes
Nutritional Value (per cookie, approximate):
- Calories: 120–140 kcal
- Carbohydrates: 18 g
- Sugars: 11 g
- Fat: 6 g
- Saturated Fat: 3.5 g
- Protein: 1 g
- Fiber: 1 g
- Sodium: 45 mg