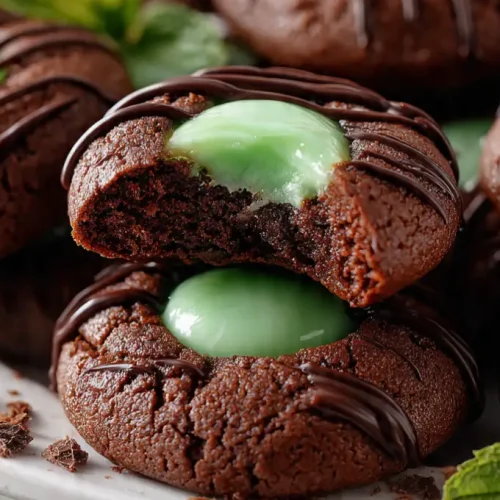
Chocolate Mint Thumbprint Cookies
During the holiday season, it’s almost impossible to resist the charm of Christmas cookies that feel both classic and slightly elevated. These chocolate thumbprint cookies deliver just that.
Equipment
- Mixing Bowls
- Hand mixer or stand mixer
- Measuring cups and spoons
- Baking Sheet
- Small cookie scoop
- Teaspoon or thumb
- Small saucepan or microwave-safe bowl
- Wire Cooling Rack
Ingredients
For the Cookies:
- 1 cup unsalted butter softened
- ¾ cup granulated sugar
- 1 large egg yolk
- 1 teaspoon vanilla extract
- 1 ¾ cups all-purpose flour
- ½ cup unsweetened cocoa powder
- ¼ teaspoon salt
For the Mint Filling:
- 1 cup powdered sugar
- 1 tablespoon unsalted butter softened
- 1 –2 tablespoons heavy cream or milk
- ½ teaspoon peppermint extract
- Green food coloring optional
- ½ cup semi-sweet chocolate chips for drizzling or topping
Instructions
Step 1 — Prep & preheat
- Preheat your oven to 350°F (175°C). If you’re using a convection oven, drop the temp to 325°F (163°C).
- Line two baking sheets with parchment paper or a silicone mat.
- Measure out your ingredients so everything is within reach (baking is easier when you’re organized).
- Pro tip: Let butter sit at room temperature until slightly soft but not greasy — it should give a little when you press it. If it’s melted, chill for 10–15 minutes.
Step 2 — Make the cookie dough
- In a large bowl, cream 1 cup softened unsalted butter and ¾ cup granulated sugar with a hand mixer or stand mixer on medium speed for 2–3 minutes, until light and fluffy.
- Add 1 egg yolk and 1 tsp vanilla extract; beat just until combined (20–30 seconds). Scrape the bowl once.
- In a separate bowl, whisk together 1 ¾ cups all-purpose flour, ½ cup unsweetened cocoa powder, and ¼ tsp salt.
- With the mixer on low, add the dry ingredients to the butter mixture in two additions, mixing just until the dough comes together. Stop as soon as you see no dry streaks. If the dough seems overly dry, add 1 tsp heavy cream at a time until it holds.
- Pro tip: Measure flour by spooning it into the cup and leveling with the back of a knife (or better yet, weigh it). Overpacked flour makes dense cookies.
Step 3 — Shape and make thumbprints
- Use a small cookie scoop (about 1 tablespoon) to portion dough into even balls — you should get roughly 24–30 cookies, depending on how big you make them.
- Roll each portion into a smooth ball and place on the prepared sheets about 1½–2 inches apart.
- Using your thumb, the back of a teaspoon, or the end of a wooden spoon handle, press a shallow ½-inch indentation into the center of each ball. If the dough starts to crack, gently press the edges together to smooth them.
- Pro tip: If your thumb sticks, lightly dust it with powdered sugar or use the back of a dampened teaspoon for a clean indent.
Step 4 — Bake the cookies
- Bake one sheet at a time in the center of the oven for 9–11 minutes — you want the edges to look set but the centers still slightly soft.
- Rotate the pan front-to-back halfway through baking for even color.
- When done, remove the sheet from the oven and let cookies rest 5 minutes on the pan (they’ll continue to set). Transfer to a wire rack to cool completely.
- Pro tip: Don’t wait for the center to look fully baked — these cookies finish cooking as they cool and staying soft is the goal.
Step 5 — Make the mint filling
- In a medium bowl, beat 1 cup powdered sugar with 1 tbsp softened unsalted butter until combined.
- Add ½ tsp peppermint extract and 1–2 tbsp heavy cream or milk, beating to reach a thick, pipeable consistency. Add more powdered sugar if it’s too thin, or more cream if it’s too stiff.
- If you like, stir in a drop or two of green food coloring for that classic mint look. Transfer the filling to a piping bag or a small zip-top bag with a corner snipped.
- Pro tip: Start with less liquid than you think you need — it’s easy to thin a filling but hard to fix one that’s too runny.
Step 6 — Fill the cookies
- Once cookies are completely cool, pipe or spoon about ½ to 1 teaspoon of mint filling into each thumbprint until shallowly filled (don’t mound it).
- If any indentations rose up while baking, gently press them down again before filling so the mint sits neatly.
- Pro tip: Fill cookies on a wire rack over parchment so any stray filling drops are easy to tidy up.
Step 7 — Add the chocolate finish
- Melt ½ cup semi-sweet chocolate chips in a microwave-safe bowl in 20–30 second bursts, stirring between each burst until smooth. (Or melt gently in a double boiler.)
- Drizzle melted chocolate over the filled centers with a spoon or pipe a tiny dot in the middle of each cookie for extra chocolate contrast.
- Pro tip: If your chocolate looks grainy or seizes, stir in a tiny bit of neutral oil (½ tsp) and keep stirring—this usually brings it back.
Step 8 — Chill, set, and serve
- Place the cookies in the fridge for 10–15 minutes to let the filling and chocolate set, or let them sit at room temperature for 30–60 minutes if your kitchen is cool and dry.
- Serve once the filling is firm to the touch.
Step 9 — Storage & make-ahead tips
- Room temp: Store in an airtight container layered with parchment for up to 3 days. Let come to room temperature before serving if refrigerated.
- Refrigerator: Keep in an airtight container for up to 1 week.
- Freezing: The dough balls freeze beautifully — freeze scooped dough on a sheet, then transfer to a freezer bag for up to 3 months. Bake from frozen, adding 2–3 minutes to the bake time. You can also freeze baked, unfilled cookies and fill after thawing.
- Make filling ahead: Mint filling keeps in the fridge for several days; give it a quick stir before piping.
Notes
Nutritional Value (per cookie, approximate):
- Calories: 120–140 kcal
- Carbohydrates: 18 g
- Sugars: 11 g
- Fat: 6 g
- Saturated Fat: 3.5 g
- Protein: 1 g
- Fiber: 1 g
- Sodium: 45 mg