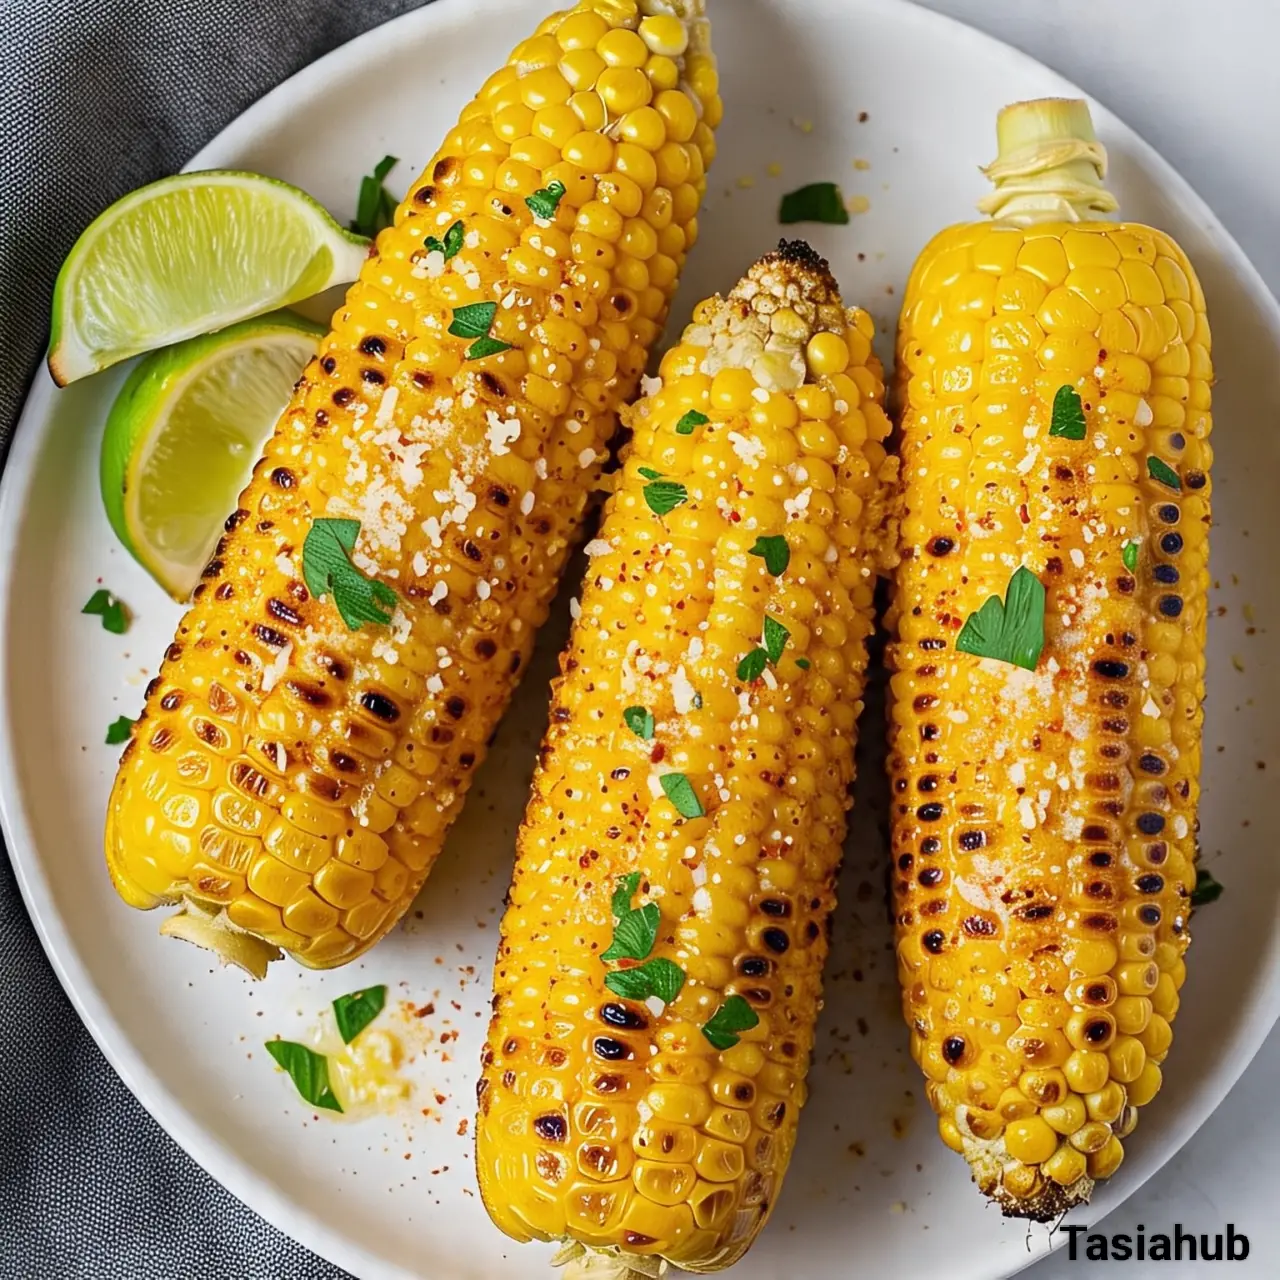
Air Fryer Corn on the Cob
Whether it’s a summer barbecue staple or a quick weeknight side, corn on the cob never fails to hit the spot. But if you’re like me, sometimes the thought of boiling a huge pot of water or firing up the grill feels like too much effort for a simple snack. That’s where the air fryer comes in — it’s become my secret weapon for making perfectly cooked corn on the cob, fast and fuss-free.
If you haven’t tried air frying corn yet, you’re seriously missing out. It’s like the best of both worlds: you get that slightly crisp, roasted flavor you’d expect from grilling, but without the mess or the wait. Plus, air fryers are so quick that you can have dinner on the table in under 20 minutes.
I love how it locks in the natural sweetness of the corn kernels while giving a little caramelized edge to the outside. The result is tender, juicy, and just begging for a pat of butter or a sprinkle of your favorite seasoning.
Another reason I’m obsessed with air fryer corn on the cob? It’s super versatile. Whether you like it plain, slathered with garlic herb butter, or dusted with chili powder and lime, the air fryer gives you a perfect base every time.
It’s also great for those days when you don’t want to heat up the whole kitchen — the air fryer doesn’t crank the heat like an oven or stove. So it’s a win-win, especially in warmer months or when you’re craving something quick and delicious.
Why You’ll Love It
- Super Quick and Easy: No boiling water or waiting for the grill to heat up. Pop the corn in the air fryer, set the timer, and you’re free to do other things while it cooks.
- Perfectly Roasted Flavor: The air fryer gives the corn a slight char and caramelization that enhances its natural sweetness, similar to grilling but without the outdoor mess.
- Healthier Option: You can enjoy delicious corn on the cob without drowning it in butter or oil. The air fryer uses little to no added fat, so it’s a lighter way to enjoy this classic treat.
- Consistent Results Every Time: Because of the circulating hot air, the corn cooks evenly on all sides, so you don’t get those unevenly cooked spots that sometimes happen with boiling or microwaving.
- Versatile and Customizable: Whether you want it simple with just salt and pepper or jazz it up with spices, cheese, or herbs, the air fryer corn is the perfect canvas for your favorite flavors.
Ingredient List
- 2 ears of fresh corn on the cob (with husks removed)
- 1 tablespoon olive oil or melted butter
- ½ teaspoon salt
- ¼ teaspoon black pepper
Optional Toppings:
- 1 teaspoon chili powder or smoked paprika
- 2 tablespoons grated Parmesan cheese
- Fresh chopped cilantro or parsley
- Lime wedges for serving
Ingredient Notes
- I always use fresh, sweet corn for the best flavor and texture — frozen or canned won’t give the same result.
- Olive oil or butter helps the seasoning stick and adds a nice richness, but you can skip or reduce it for a lighter option.
- Don’t skip the salt! It really brings out the natural sweetness of the corn.
- Adding a squeeze of lime or a sprinkle of chili powder at the end gives it a fresh, zesty kick that takes it to the next level.
Kitchen Equipment Needed
- Air Fryer — The star of the show for quick, even cooking with a crispy finish. I use a 5.8-quart model, which fits two ears of corn comfortably.
- Tongs — For safely turning and removing the hot corn without burning your fingers.
- Basting Brush — To evenly coat the corn with oil or butter before air frying.
- Kitchen Knife — To trim the ends of the corn and remove husks if needed.
- Small Bowl — For mixing butter or oil with seasonings before brushing onto the corn.
- Plate or Serving Tray — To hold the corn once it’s cooked and ready to serve.
Instructions
Step 1: Prepare the Corn
- Remove the husks and silk from each ear of corn.
- Rinse the corn under cold water to wash away any leftover silk strands.
- Pat dry with a clean towel to ensure the oil sticks well during cooking.
Pro Tip: If you want extra flavor, soak the corn in cold water for 10 minutes before drying — this can help keep the kernels juicy during cooking.
Step 2: Season the Corn
- Place the ears of corn on a clean plate or tray.
- In a small bowl, mix the olive oil or melted butter with salt and pepper until combined.
- Using a basting brush, evenly coat each ear of corn with the seasoned oil or butter mixture, making sure to cover all sides.
Pro Tip: Don’t rush this step — a good, even coating ensures the corn roasts beautifully and the seasoning sticks well.
Step 3: Preheat the Air Fryer
- Set your air fryer to 400°F (200°C).
- Preheat for about 3-5 minutes to get the basket hot and ready.
Step 4: Cook the Corn
- Place the seasoned corn ears in the air fryer basket in a single layer, making sure they don’t overlap.
- Cook for 10 minutes at 400°F, then carefully flip the corn using tongs.
- Continue cooking for another 8-10 minutes until the corn is tender and lightly browned in spots.
Pro Tip: Keep an eye on the corn after flipping; cooking times can vary slightly based on the size of the ears and your air fryer model.
Step 5: Add Final Touches and Serve
- Once cooked, carefully remove the corn from the air fryer and place it on a serving tray.
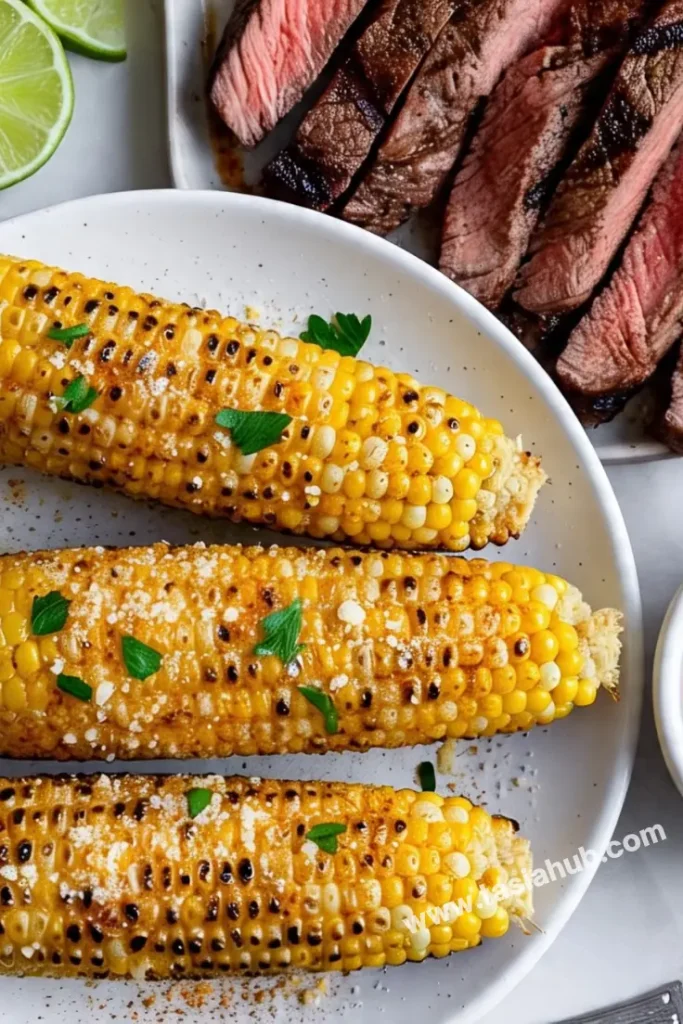
- If you want, sprinkle with additional toppings like chili powder, Parmesan cheese, or fresh herbs.
- Serve immediately with lime wedges on the side for squeezing over.
Enjoy your perfectly roasted air fryer corn on the cob!

Tips and Tricks for Success
- Always preheat your air fryer for best results—this helps the corn cook evenly and get that nice roasted finish.
- Don’t overcrowd the basket; give each ear enough space for the hot air to circulate.
- Use tongs to carefully flip the corn halfway through cooking to ensure even browning on all sides.
- If your corn is larger or thicker, add a couple of extra minutes to the cooking time.
- For extra flavor, brush the corn with garlic butter or sprinkle with your favorite spice blend right after cooking while it’s still hot.
- Let the corn rest for a minute or two after cooking to allow the flavors to settle.
Ingredient Substitutions and Variations
- Butter substitute: Use coconut oil or avocado oil for a dairy-free option.
- Seasonings: Swap salt and pepper for Cajun seasoning, smoked paprika, or taco seasoning for a flavor twist.
- Cheese topping: Try crumbled feta or cotija cheese instead of Parmesan for a Mexican-inspired flavor.
- Herbs: Fresh basil, thyme, or dill can be used instead of cilantro or parsley to change up the taste.
- Corn type: Frozen corn on the cob can be used in a pinch—just increase air frying time by a few minutes.
- Vegan option: Skip butter altogether or use vegan butter to keep it plant-based.
Serving Suggestions
- Serve your air fryer corn on the cob alongside grilled chicken or steak for a classic, crowd-pleasing meal.
- I love pairing it with a fresh summer salad, like tomato, cucumber, and avocado, to add a refreshing crunch.
- Top with a sprinkle of chili powder and a squeeze of lime for a zesty Mexican street corn vibe.
- Serve with baked potatoes and a dollop of sour cream for a comforting, hearty dinner.
- For a fun twist, chop the cooked corn kernels off the cob and mix them into a salsa or salad for a delicious side dish.
Storage and Reheating Instructions
- Store leftover corn in an airtight container in the refrigerator for up to 2 days.
- To reheat, place the corn back in the air fryer at 350°F (175°C) for 3-4 minutes until warmed through.
- Alternatively, you can microwave the corn wrapped in a damp paper towel for about 1-2 minutes.
- Avoid reheating multiple times to maintain the best texture and flavor.
- For the best taste, enjoy corn on the cob fresh whenever possible!
Frequently Asked Questions
Can I cook frozen corn on the cob in the air fryer?
Yes! Just add a few extra minutes to the cooking time—usually about 12-15 minutes total—and flip halfway through. It won’t be quite as sweet as fresh corn, but still tasty and convenient.
Do I need to peel the husks off before air frying?
For this recipe, yes. Removing the husks helps the corn roast evenly and get that nice caramelized flavor. You can keep the husks on if you want to steam the corn, but cooking times will be longer.
How do I know when the corn is done?
The kernels should be tender when pierced with a fork and have light browned spots on the surface. If you want extra crispiness, leave it in the air fryer for a couple more minutes, but watch closely to avoid burning.
Can I add seasoning before or after cooking?
You can do both! Coating the corn with oil and seasoning before air frying helps the flavors stick. Adding extra toppings like cheese, chili powder, or fresh herbs after cooking boosts flavor even more.
Is air fryer corn on the cob healthier than boiled or grilled?
It can be! Since the air fryer uses little to no added fat and still gives you great flavor, it’s a lighter way to enjoy corn compared to slathering it in butter or cooking with lots of oil.
Can I cook more than two ears at once?
Depends on your air fryer size. If your basket is big enough and you don’t overcrowd, you can do 3-4 ears, but make sure there’s enough space for air to circulate for even cooking.
Did you try this recipe? Let me know in the comments how it turned out!
Don’t forget to share your photos on Instagram and tag me (@tasiahub_) or use the hashtag (#tasiahub). I’d love to see your creations!

Air Fryer Corn on the Cob
Equipment
- Air fryer
- Tongs
- Basting Brush
- Kitchen Knife
- Small bowl
- Plate or Serving Tray
Ingredients
- 2 ears of fresh corn on the cob with husks removed
- 1 tablespoon olive oil or melted butter
- ½ teaspoon salt
- ¼ teaspoon black pepper
Optional Toppings:
- 1 teaspoon chili powder or smoked paprika
- 2 tablespoons grated Parmesan cheese
- Fresh chopped cilantro or parsley
- Lime wedges for serving
Instructions
Step 1: Prepare the Corn
- Remove the husks and silk from each ear of corn.
- Rinse the corn under cold water to wash away any leftover silk strands.
- Pat dry with a clean towel to ensure the oil sticks well during cooking.
- Pro Tip: If you want extra flavor, soak the corn in cold water for 10 minutes before drying — this can help keep the kernels juicy during cooking.
Step 2: Season the Corn
- Place the ears of corn on a clean plate or tray.
- In a small bowl, mix the olive oil or melted butter with salt and pepper until combined.
- Using a basting brush, evenly coat each ear of corn with the seasoned oil or butter mixture, making sure to cover all sides.
- Pro Tip: Don’t rush this step — a good, even coating ensures the corn roasts beautifully and the seasoning sticks well.
Step 3: Preheat the Air Fryer
- Set your air fryer to 400°F (200°C).
- Preheat for about 3-5 minutes to get the basket hot and ready.
Step 4: Cook the Corn
- Place the seasoned corn ears in the air fryer basket in a single layer, making sure they don’t overlap.
- Cook for 10 minutes at 400°F, then carefully flip the corn using tongs.
- Continue cooking for another 8-10 minutes until the corn is tender and lightly browned in spots.
- Pro Tip: Keep an eye on the corn after flipping; cooking times can vary slightly based on the size of the ears and your air fryer model.
Step 5: Add Final Touches and Serve
- Once cooked, carefully remove the corn from the air fryer and place on a serving tray.
- If you want, sprinkle with additional toppings like chili powder, Parmesan cheese, or fresh herbs.
- Serve immediately with lime wedges on the side for squeezing over.
Notes
Nutritional Value (Per Serving)
- Calories: ~140 kcal
- Carbohydrates: ~19g
- Protein: ~3g
- Fat: ~7g
- Fiber: ~2g
- Sugar: ~6g
- Sodium: ~250mg (depending on salt used)