10 Easy DIY Sugar Scrub Recipes at Home
If you’ve ever wanted softer, smoother skin without spending a fortune on fancy spa treatments, sugar scrubs are the perfect solution. These simple, natural exfoliators are easy to make at home and can work wonders for your skin.
A sugar scrub is exactly what it sounds like—a mix of sugar and other nourishing ingredients that gently buffs away dead skin cells. Whether you’re dealing with rough patches on your body, dull skin on your face, or dry lips, a sugar scrub can help reveal fresh, glowing skin underneath.
In this post, we’ll walk you through the benefits of sugar scrubs, easy DIY sugar scrub recipes, and tips on how to use them effectively. By the end, you’ll know how to make your sugar scrubs and feel confident incorporating them into your routine for healthier, happier skin. Let’s get started!
This post contains affiliate links and I may earn a small commission when you click on the link at no additional cost to you. As an Amazon Affiliate, I earn from qualifying purchases, thank you.
Why You’ll Love Sugar Scrubs
What Makes Sugar Scrubs Great for Your Skin?
Sugar scrubs are an easy and natural way to keep your skin smooth and glowing. They’re made by combining sugar with moisturizing ingredients like oils or honey to create a gentle paste. When you rub this scrub on your skin, the tiny sugar crystals act like a natural exfoliant, helping to remove dead skin cells.
Think of it like this: your skin naturally sheds old cells, but sometimes they don’t fall off on their own. This can leave your skin feeling rough, dry, or looking dull. A sugar scrub helps sweep those away, revealing the fresh, healthy skin underneath.
Another great thing about sugar scrubs is that they’re gentle. Unlike harsher exfoliants, sugar naturally dissolves as you use it, so it’s less likely to irritate your skin. Plus, the added oils or ingredients in the scrub help keep your skin hydrated and soft after exfoliating.
Using a sugar scrub regularly can make your skin feel smoother, look brighter, and even help your other skincare products work better since they absorb more easily on freshly exfoliated skin. It’s a simple, spa-like treatment you can enjoy right at home.
Benefits of Adding Sugar Scrubs to Your Routine
Adding sugar scrubs to your routine is a simple way to keep your skin looking and feeling its best. Regular use can improve your skin’s texture, making it feel soft and smooth by gently removing dead skin cells. The natural oils in sugar scrubs also help lock in moisture, keeping your skin hydrated and preventing dryness.
On top of that, the massaging motion you use while applying a sugar scrub can boost circulation, giving your skin a healthy, radiant glow. It’s an easy, spa-like treat that helps your skin stay soft, hydrated, and refreshed.
Are Sugar Scrubs Suitable for All Skin Types?
One of the great things about sugar scrubs is how customizable they are, making them perfect for different skin types. Whether you have sensitive, oily, or dry skin, you can tweak the ingredients to suit your needs.
For Sensitive Skin
If your skin tends to react easily or feels irritated, it’s best to keep the scrub gentle. Use fine-grain sugar (like powdered or caster sugar) to avoid harsh exfoliation, and mix it with soothing ingredients like aloe vera gel or coconut oil. Adding a few drops of calming essential oils like chamomile or lavender can also help. Avoid strong fragrances or citrus ingredients, as they may irritate sensitive skin.
For Oily Skin
Oily skin can benefit from ingredients that help balance oil production without stripping the skin. Start with regular granulated sugar and mix it with lightweight oils like grapeseed oil or jojoba oil—these won’t clog your pores. Adding a bit of lemon juice or green tea extract can help tone the skin and control excess shine, while ingredients like tea tree oil can target breakouts.
For Dry Skin
Dry skin craves moisture, so choose ingredients that deeply hydrate. Combine brown sugar, which is softer on the skin, with rich, nourishing oils like olive oil, sweet almond oil, or avocado oil. Adding a spoonful of honey can help lock in moisture, while ingredients like oatmeal powder or a few drops of rosehip oil can soothe and repair flaky or irritated areas.
By adjusting your sugar scrub recipe to match your skin’s needs, you can create a personalized treatment that leaves your skin healthy and glowing.
Everything You Need to Know About Sugar Scrubs
What Is a Sugar Scrub?
Sugar scrubs are a simple yet effective skincare product made by combining three key ingredients: exfoliants, oils, and scents. The exfoliants, like sugar, gently buff away dead skin cells, leaving your skin smoother and more refreshed.
Oils, such as coconut, almond, or jojoba oil, provide hydration and nourishment, helping to lock in moisture. Finally, scents—often from essential oils like lavender, citrus, or peppermint add a relaxing, spa-like touch.
Together, these elements create a rejuvenating treatment that not only improves skin texture but also enhances circulation and leaves you with soft, glowing skin. Sugar scrubs are easy to customize, making them perfect for all skin types and concerns.
Where Can You Apply Sugar Scrubs?
Common Areas to Use Sugar Scrubs and Tips for Application
1. Face
- How to Apply: Use a gentle touch and fine-grain sugar to avoid irritating delicate facial skin. Massage the scrub in small, circular motions, focusing on areas prone to dryness or dullness, like the cheeks and forehead. Rinse with lukewarm water.
- Tip: Limit use to 1-2 times per week to avoid over-exfoliating.
2. Body
- How to Apply: Use a coarser sugar and apply the scrub with a bit more pressure on areas like arms, legs, and back. Massage in circular motions, paying extra attention to rough areas like elbows and knees. Rinse thoroughly in the shower.
- Tip: Follow up with a hydrating lotion or body oil for silky-soft skin.
3. Lips
- How to Apply: Use a small amount of scrub and gently rub it onto your lips with your fingertip. Let it sit for a minute, then wipe off with a damp cloth or rinse with water.
- Tip: Use a sugar scrub for your lips once or twice a week to keep them smooth and flake-free, especially in colder months.
4. Feet
- How to Apply: Use a coarse scrub and massage it onto the heels, toes, and soles of your feet. Spend extra time on calloused areas, then rinse with warm water.
- Tip: For a spa-like experience, soak your feet in warm water before applying the scrub, and follow up with a thick foot cream or balm.
Sugar scrubs are versatile and can be tailored to each area, leaving your skin soft, smooth, and refreshed from head to toe.
When Should You Avoid Using Sugar Scrubs?
When Not to Use a Sugar Scrub
While sugar scrubs are generally safe and gentle, there are certain situations where it’s best to avoid them to protect your skin:
- Active Skin Conditions:
Avoid using sugar scrubs if you have conditions like eczema, psoriasis, or acne flare-ups, as the exfoliation can worsen irritation and inflammation. - Open Wounds or Cuts:
Never apply a scrub to areas with cuts, scrapes, or any broken skin. The sugar particles and added ingredients can cause pain, irritation, or even infection. - Very Sensitive Skin:
If your skin is highly reactive or prone to redness and discomfort, sugar scrubs might be too harsh. Opt for milder exfoliation methods, like a soft washcloth or enzyme-based products. - Sunburned Skin:
Exfoliating sunburned areas can further irritate the skin and delay healing. Wait until your skin has fully recovered before using a scrub. - After Strong Treatments:
Avoid scrubs after chemical peels, laser treatments, or any professional skin procedure. These treatments often leave the skin sensitive and vulnerable.
If you’re unsure whether a sugar scrub is suitable for you, patch-test it on a small area first or consult with a dermatologist. Always listen to your skin and prioritize gentle care when needed.
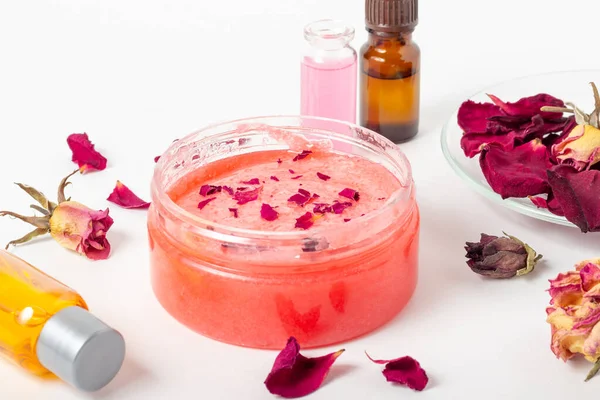
Our Best Pick Sugar Scrub on Amazon
- Tree Hut Vitamin C Shea Butter Sugar Scrub
- Dr Teal’s Shea Butter, Rose and Citrus Sugar Scrub
- Brooklyn Botany Brown Sugar Body Scrub
- Dove Brown Sugar & Coconut Butter Scrub for sensitive skin
- More amazing sugar scrub
DIY Sugar Scrub Recipes You’ll Love
Soothing Aloe Vera Sugar Scrub
This gentle sugar scrub is perfect for calming sensitive or sunburned skin while leaving it smooth and hydrated. Aloe vera is the star ingredient, known for its soothing and anti-inflammatory properties. It helps to cool irritated skin and lock in moisture, making this scrub both refreshing and nourishing.
How to Make It:
- Mix 1/2 cup of fine sugar with 1/4 cup of aloe vera gel (fresh or store-bought).
- Add 1 tablespoon of coconut oil or olive oil for added hydration.
- Optional: A few drops of lavender essential oil for a calming scent.
How to Use It:
Gently massage the scrub onto clean, damp skin in circular motions. Focus on areas that feel dry or irritated, then rinse with lukewarm water. Use once a week to keep your skin soft, calm, and glowing.
Refreshing Lemon and Honey Scrub
This sugar scrub combines the brightening power of lemon with the antibacterial benefits of honey to leave your skin refreshed and glowing. Lemon works as a natural exfoliant and skin brightener, helping to fade dark spots and even out your complexion. Honey, on the other hand, is a natural humectant, locking in moisture while its antibacterial properties help keep your skin clean and healthy.
How to Make It:
- Mix 1/2 cup of sugar with the juice of half a lemon.
- Add 2 tablespoons of raw honey and stir until well combined.
- Optional: Include a few drops of lemon essential oil for an extra citrusy boost.
How to Use It:
Apply the scrub to clean, damp skin in gentle circular motions, avoiding sensitive areas like cuts or active blemishes. Focus on dull or uneven areas, then rinse with warm water. Use 1-2 times a week for a brighter, smoother complexion.
Coconut and Lime Body Scrub
This tropical-inspired scrub brings a vacation vibe to your skincare routine while deeply nourishing your skin. Coconut oil is rich in fatty acids, making it an excellent moisturizer that leaves your skin soft and supple. Lime adds a zesty touch with its natural astringent properties, helping to refresh and tone the skin. Together, they create a rejuvenating scrub with a delightful scent that transports you straight to paradise.
How to Make It:
- Combine 1/2 cup of sugar with 1/4 cup of melted coconut oil.
- Add the zest and juice of one lime for a fresh, citrusy kick.
- Optional: A few drops of lime or coconut essential oil to enhance the fragrance.
How to Use It:
Massage the scrub onto damp skin in circular motions, focusing on areas like elbows, knees, and heels. Rinse thoroughly with warm water and enjoy your soft, moisturized skin. Use once or twice a week for the ultimate tropical glow.
Hydrating Brown Sugar Face Scrub
Brown sugar is the perfect exfoliant for your face, it’s softer and less abrasive than white sugar, making it gentle enough for delicate facial skin. Its natural humectant properties help to attract moisture, keeping your skin hydrated while buffing away dead skin cells. Paired with hydrating ingredients, this scrub leaves your face smooth, soft, and radiant without feeling stripped.
How to Make It:
- Mix 1/4 cup of brown sugar with 1 tablespoon of honey.
- Add 1 tablespoon of olive oil or jojoba oil for extra hydration.
- Optional: A drop or two of vanilla extract for a warm, comforting scent.
How to Use It:
Gently massage the scrub onto clean, damp skin using light circular motions, avoiding the eye area. Rinse with lukewarm water and pat your face dry. Use once a week to maintain smooth and moisturized skin without over-exfoliating.
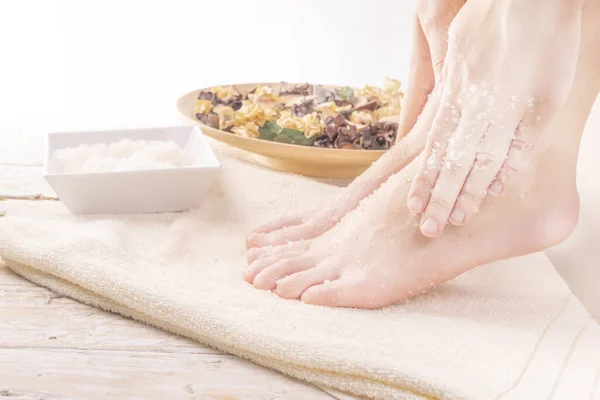
Exfoliating Green Tea Sugar Scrub
This scrub combines the exfoliating power of sugar with the antioxidant-rich benefits of green tea, making it a fantastic choice for those looking to nourish and protect their skin. Green tea is packed with antioxidants, which help fight free radicals and prevent signs of aging, such as fine lines and wrinkles. Its anti-inflammatory properties also soothe and calm the skin, while the sugar gently removes dead skin cells, revealing a fresher, more youthful complexion.
How to Make It:
- Brew a cup of green tea and let it cool.
- Mix 1/2 cup of sugar with 2 tablespoons of the cooled tea.
- Add 1 tablespoon of coconut oil for extra hydration.
- Optional: A few drops of tea tree or lavender essential oil for added benefits and fragrance.
How to Use It:
Gently massage the scrub onto clean, damp skin, focusing on areas with signs of aging or dryness. Rinse with warm water and follow up with a moisturizer. Use once a week to boost your skin’s radiance while reaping the anti-aging benefits of green tea.
Nourishing Almond Oil Sugar Scrub
Almond oil is a powerhouse ingredient for nourishing dry skin, making it the perfect addition to a sugar scrub. Rich in vitamins E and A, almond oil helps to deeply hydrate and soften the skin, leaving it feeling smooth and replenished. Its lightweight texture absorbs easily into the skin, providing moisture without feeling greasy. This scrub not only exfoliates but also locks in essential hydration, making it ideal for those with dry, rough skin.
How to Make It:
- Mix 1/2 cup of sugar with 2 tablespoons of almond oil.
- Add 1 tablespoon of honey for extra moisture and its soothing properties.
- Optional: A few drops of lavender or rose essential oil for a calming scent.
How to Use It:
Massage the scrub onto damp skin in circular motions, paying attention to dry patches like elbows and knees. Rinse with warm water, and enjoy soft, hydrated skin. Use 1-2 times a week for the best results in moisturizing and replenishing dry skin.
DIY Sugar Lip Scrub
A sugar lip scrub is a quick and easy way to keep your lips soft and smooth, especially when they’re feeling dry or chapped. The sugar gently exfoliates, while ingredients like honey and coconut oil hydrate and nourish, leaving your lips feeling plump and soft.
How to Make It:
- Combine 1 tablespoon of sugar (white or brown) with 1 tablespoon of honey.
- Add 1 teaspoon of coconut oil or olive oil for extra hydration.
- Optional: A few drops of vanilla extract or peppermint oil for a soothing scent and taste.
How to Use It:
Gently rub the scrub onto your lips with your fingertip in small circular motions for about 1-2 minutes. Rinse off with warm water or wipe it away with a damp cloth. Use this scrub 1-2 times a week to keep your lips smooth, moisturized, and kissable.
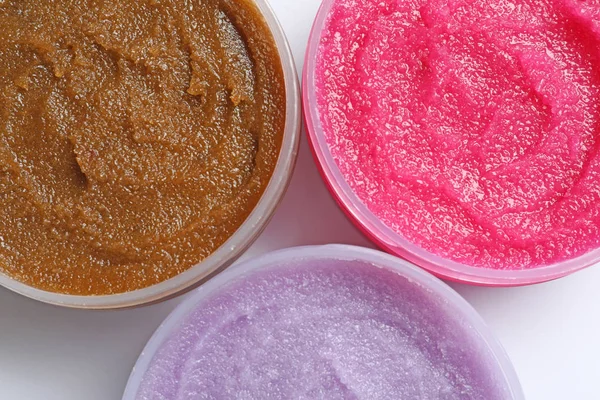
Sugar Scrub Cubes for Easy Use
Sugar scrub cubes are a convenient, mess-free way to enjoy the benefits of exfoliation without the hassle of measuring or spilling. These pre-measured cubes provide the perfect amount of scrub for each use, making them ideal for busy mornings or travel.
Simply grab a cube, massage it onto damp skin, and enjoy a gentle exfoliation. Plus, because they’re compact and easy to store, you can keep them organized and ready to use anytime.
How to Make Them:
- Combine 1 cup of sugar with 1/4 cup of coconut oil or almond oil.
- Melt the coconut oil if necessary, then mix in a few drops of essential oil (like lavender or lemon) for added fragrance.
- Add a tablespoon of honey for moisture, and mix well.
- Spoon the mixture into an ice cube tray or silicone mold, pressing it down firmly.
- Let the cubes harden in the refrigerator for a few hours.
How to Use Them:
Pop out a cube, rub it between your hands to soften it, and gently massage it onto damp skin. Rinse off with warm water for smooth, refreshed skin. Store the cubes in an airtight container to keep them fresh for a few weeks. Enjoy exfoliation without any of the mess.
See also >>>>> How To Make Sugar Scrub For Face
Crafting the Perfect Sugar Scrub
Best Oils for DIY Sugar Scrubs
The oils you choose for your DIY sugar scrubs play a crucial role in nourishing and moisturizing your skin. Here are some of the best oils to consider, each with its unique benefits:
- Coconut Oil
Coconut oil is a popular choice due to its deeply moisturizing properties. Rich in fatty acids, it helps to lock in moisture while providing antibacterial benefits, making it great for soothing dry or irritated skin. It also has a natural, pleasant scent that adds a tropical touch to your scrub. - Almond Oil
Almond oil is known for its ability to hydrate and soften the skin without feeling greasy. It’s packed with vitamins E and A, which help to protect the skin from dryness and improve its overall texture. This oil is especially beneficial for sensitive or dry skin, as it’s gentle and soothing. - Olive Oil
Olive oil is rich in antioxidants, such as vitamins E and K, which help to protect the skin from environmental damage. It’s a great option for dry or mature skin, as it provides deep hydration and helps to improve skin elasticity. Olive oil is also naturally anti-inflammatory, making it ideal for soothing irritated skin. - Grapeseed Oil
Grapeseed oil is a lightweight, non-greasy option that’s perfect for those with oily or acne-prone skin. It’s high in linoleic acid, which helps to balance oil production and maintain a healthy skin barrier. Grapeseed oil is also rich in antioxidants, which help protect the skin from aging and environmental stressors.
Each of these oils brings a unique set of benefits to your DIY sugar scrub, allowing you to customize the scrub to your skin’s needs. Whether you’re looking for intense moisture, a gentle touch, or a light, non-greasy option, these oils have you covered.
Optional Add-Ins for Custom Scents and Benefits
Personalizing your DIY sugar scrub with essential oils and other natural additives can elevate the experience and target specific skincare needs. Here are some great options to enhance your scrub’s scent and benefits:
- Essential Oils
- Lavender Oil: Known for its calming and soothing properties, lavender oil is perfect for relaxing and reducing stress. It also helps to balance the skin, making it suitable for all skin types, including sensitive skin.
- Peppermint Oil: With its cooling and refreshing properties, peppermint oil can invigorate your skin and stimulate circulation. It’s also great for providing a refreshing sensation, making it ideal for morning routines.
- Citrus Oils (Lemon, Orange, Grapefruit): Citrus essential oils are known for their uplifting, brightening, and energizing effects. Lemon and orange oils, in particular, have astringent properties that can help tone and tighten the skin while reducing blemishes and dark spots.
- Tea Tree Oil: This oil is excellent for acne-prone skin due to its antibacterial and antifungal properties, helping to clear up breakouts and prevent new ones.
- Additives
- Coffee Grounds: Coffee is an excellent natural exfoliant that helps improve circulation, reduce puffiness, and target areas of cellulite. It also has a rich, energizing scent that blends well with many other oils.
- Dried Herbs (Rosemary, Chamomile, Lavender): Dried herbs can infuse your scrub with additional benefits and scents. Rosemary is great for stimulating circulation, while chamomile is calming and perfect for sensitive skin. Lavender herbs can enhance the relaxing effect of your scrub.
- Honey: Known for its moisturizing and antibacterial properties, honey can help lock in moisture and provide soothing benefits to the skin. It also adds a subtle sweetness to your scrub.
- Vitamin E Oil: This antioxidant-rich oil is great for protecting your skin from environmental damage and promoting skin healing. It’s especially helpful in treating dry or aging skin.
By mixing and matching these essential oils and additives, you can create a custom sugar scrub that not only smells amazing but also addresses your specific skincare concerns, whether that’s relaxation, hydration, or a refreshing boost.
Step-by-Step Guide to Making Your Sugar Scrub
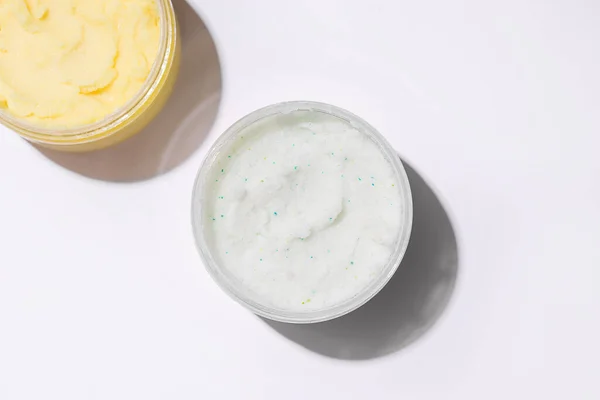
Creating your DIY sugar scrub is simple and fun, and you can tailor it to your skin’s needs and preferences. Here’s a step-by-step guide to help you make your sugar scrub from start to finish:
1. Gather Your Ingredients
First, decide on the type of scrub you want to make. Here are the basic ingredients you’ll need:
- Sugar: White or brown sugar works well. Brown sugar is gentler and great for sensitive skin, while white sugar has a coarser texture for more exfoliation.
- Oil: Choose an oil like coconut oil, olive oil, almond oil, or grapeseed oil depending on your skin type.
- Essential Oils (optional): For fragrance and added skin benefits, pick essential oils like lavender, peppermint, or citrus.
- Additives (optional): You can add honey, coffee grounds, or dried herbs for extra benefits.
2. Measure the Ingredients
Start by measuring the sugar and oil. A typical ratio is:
- 2 parts sugar (e.g., 1 cup)
- 1 part oil (e.g., 1/2 cup)
Adjust based on the consistency you prefer. For a thicker scrub, use more sugar, and for a more moisturizing scrub, add a bit more oil.
3. Mix the Ingredients
- In a bowl, combine the sugar and oil. Stir them together until well mixed.
- Add your essential oils or other additives, if desired. Typically, 10-15 drops of essential oil is enough for one batch.
- Mix everything thoroughly, making sure the sugar is evenly coated with the oil.
4. Check the Consistency
If the scrub feels too thick, add a little more oil. If it’s too runny, add more sugar to get your desired consistency. You want it to be thick enough to stay on the skin but not too dry that it doesn’t spread easily.
5. Store Your Sugar Scrub
Once your scrub is mixed, it’s time to store it:
- Transfer the scrub into an airtight container (a glass jar or plastic tub works well).
- Label the jar with the ingredients and the date you made it, so you know how fresh it is.
6. How to Use It
To use, simply scoop out a small amount of the scrub and gently massage it onto damp skin in circular motions. Rinse with warm water and follow up with a moisturizer to lock in hydration.
7. Storage Tips
- Store your sugar scrub in a cool, dry place. It should last for up to 3-4 weeks, depending on the ingredients used.
- If you added fresh ingredients like honey or herbs, be sure to refrigerate the scrub to extend its shelf life.
Enjoy your homemade sugar scrub! It’s a great way to pamper your skin and keep it smooth and hydrated.
How to Use and Store Your Sugar Scrub
How Often Should You Exfoliate?
Exfoliating your skin with a sugar scrub can provide many benefits, but it’s important to exfoliate the right amount for your skin type. Over-exfoliating can irritate the skin, while under-exfoliating may not provide the desired results. Here’s a guide to help you determine how often you should exfoliate based on your skin type:
1. Sensitive Skin
For sensitive skin, less is more. Over-exfoliating can lead to irritation, redness, or dryness. It’s best to exfoliate once a week or even once every two weeks. Choose a gentler scrub, like one with brown sugar or oatmeal, to avoid aggravating the skin. Always do a patch test first to ensure it doesn’t cause any adverse reactions.
2. Dry Skin
Dry skin can benefit from regular exfoliation to remove flaky, dead skin cells and allow moisture to absorb better. Exfoliate 1-2 times a week, but make sure to follow up with a rich moisturizer or body butter to keep your skin hydrated. Look for sugar scrubs with oils like coconut or almond oil for added moisture.
3. Oily Skin
Oily skin can handle more frequent exfoliation since it tends to have a thicker buildup of dead skin cells and clogged pores. Exfoliating 2-3 times a week can help prevent acne and blackheads by keeping the pores clean. A scrub with a more granular texture or ingredients like tea tree oil can help with oil control and skin clarity.
4. Combination Skin
If you have combination skin (oily in some areas and dry in others), exfoliating 1-2 times a week is generally sufficient. Focus more on exfoliating areas that are oilier, like the T-zone, while being gentler on drier areas. You can use a sugar scrub with balanced ingredients like olive oil, which provides moisture without being too heavy for oily areas.
5. Normal Skin
For normal skin, exfoliating 1-2 times a week is usually enough to maintain smooth and radiant skin. You can experiment with different types of scrubs, as your skin can typically handle both gentle and moderate exfoliants without irritation.
6. Mature Skin
As we age, skin turnover slows down, so exfoliation can be very beneficial for keeping the skin looking youthful. For mature skin, exfoliate 1-2 times a week, using a gentler scrub to avoid irritation. Look for scrubs with added antioxidants (like green tea) to fight free radical damage and keep your skin glowing.
Tips for Exfoliating:
- Always apply your sugar scrub to damp skin to prevent irritation.
- Never scrub too hard—let the sugar do the work without pressing too firmly.
- Follow exfoliation with a hydrating moisturizer to lock in moisture and protect the skin barrier.
- Avoid exfoliating areas with active breakouts, sunburn, or open wounds.
By tailoring your exfoliation routine to your skin type, you can achieve smoother, healthier skin without overdoing it.

Tips for Adding Sugar Scrubs to Your Skincare Routine
Incorporating sugar scrubs into your skincare routine can enhance your skin’s smoothness, hydration, and overall health. To get the best results and avoid irritation, here are some helpful tips on how and when to use your scrub:
1. Exfoliate After a Shower
The best time to use a sugar scrub is after a shower when your skin is damp. The warm water helps to open up your pores, allowing the scrub to exfoliate more effectively and absorb better. Gently pat your skin dry with a towel before applying the scrub to avoid over-drying it.
2. Use Gentle, Circular Motions
When applying your sugar scrub, use gentle, circular motions to avoid irritating your skin. Don’t scrub too hard, let the sugar do the work. Focus on rough patches like elbows, knees, and feet, but avoid sensitive areas like broken skin, rashes, or active acne.
3. Focus on Areas That Need Extra Care
Sugar scrubs are perfect for areas of your body that experience more friction or buildup, such as:
- Feet: Apply the scrub to remove rough, dry skin.
- Hands and elbows: These areas can become dry and flaky, so exfoliating them helps keep the skin soft.
- Knees: Use a scrub to smooth rough patches.
- Face: Use a gentler scrub for your face, especially if you have sensitive skin.
4. Avoid Over-Exfoliating
As tempting as it may be to exfoliate frequently, avoid over-exfoliating as it can damage your skin’s barrier and lead to irritation. Stick to exfoliating 1-3 times a week depending on your skin type. If you notice redness, dryness, or irritation, scale back the frequency.
5. Hydrate After Exfoliating
After exfoliating, always apply a hydrating moisturizer to lock in moisture and prevent your skin from becoming dry. Exfoliation can remove dead skin cells, but it’s important to replenish the skin’s moisture afterward to keep it soft and smooth.
6. Use a Sugar Scrub Before Shaving
Exfoliating before shaving can help reduce ingrown hairs and provide a closer shave. Sugar scrubs remove dead skin cells and soften hair, making shaving easier and less irritating. Just make sure to use a gentle scrub and avoid applying too much pressure.
7. Be Mindful of Active Skin Conditions
If you have conditions like eczema, psoriasis, or active acne, avoid using sugar scrubs on affected areas to prevent irritation or further inflammation. Always patch-test a small area before using a new scrub to ensure it’s safe for your skin.
8. Choose the Right Sugar Scrub for Your Skin
If you have sensitive skin, opt for a gentler scrub like one with brown sugar or oatmeal. For oily skin, choose a scrub with tea tree oil or citrus for its antibacterial properties. Make sure the ingredients align with your skin’s needs.
By following these tips, you can easily integrate sugar scrubs into your skincare routine to achieve smooth, glowing skin while avoiding irritation.
Should You Refrigerate Your Sugar Scrub?
Refrigerating your sugar scrub can be a helpful way to extend its shelf life and maintain its freshness, but it’s not always necessary. Here’s when you should refrigerate your scrub and how it impacts its texture:
When to Refrigerate:
- When Using Fresh Ingredients:
If your sugar scrub contains fresh ingredients like fruit, herbs, or milk, refrigeration is essential. These ingredients can spoil quickly, so storing the scrub in the fridge helps keep it fresh and prevents any bacterial growth. - For Extended Shelf Life:
If you make a large batch of scrub and won’t be using it within a few weeks, refrigeration can help preserve the scrub for a longer period, especially if you’re using natural preservatives. A cool environment slows down the degradation of ingredients like oils and prevents the growth of bacteria. - For Custom Additives:
If you’ve added any custom additives, such as coffee grounds or essential oils, refrigerating the scrub may help keep those ingredients fresh for longer. In particular, items like citrus or essential oils can lose potency if exposed to heat and light, so refrigeration preserves their benefits.
How Refrigeration Impacts Texture:
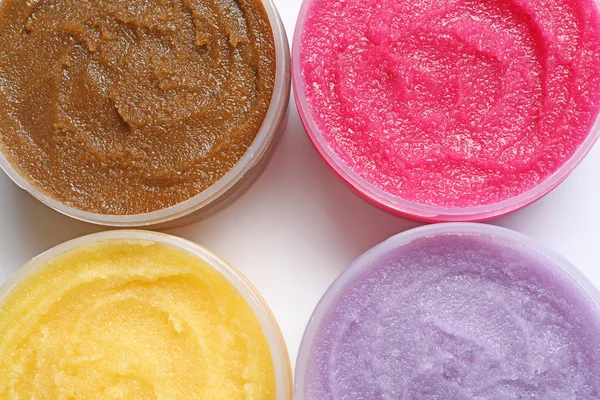
- Hardening: When you refrigerate your sugar scrub, the oils in the scrub (like coconut oil) can solidify, causing the texture to become harder. This can make the scrub a bit more difficult to scoop out, but you can simply let it warm up a little at room temperature before using it.
- Preservation of Consistency: For scrubs with whipped textures or lighter consistencies, refrigeration helps maintain their fluffiness and prevents them from separating or becoming too runny. However, you might need to give the scrub a good stir after refrigerating to restore its original texture.
When Refrigeration Is Not Necessary:
- No Fresh Ingredients:
If your scrub contains only dry ingredients like sugar and oils, refrigeration isn’t necessary. These ingredients have a long shelf life and are generally stable at room temperature. - If You Use It Regularly:
If you plan to use your sugar scrub regularly within a couple of weeks, refrigeration is optional. Store it in a cool, dry place away from direct sunlight to keep it fresh. - For Store-Bought Scrubs:
Most commercially made sugar scrubs have preservatives that don’t require refrigeration. Check the product label for any storage recommendations, but typically, these scrubs are fine at room temperature.
In general, refrigerating your sugar scrub can be a good idea for maintaining freshness and extending shelf life, but it’s not necessary unless you’ve used perishable ingredients. If you do refrigerate it, be mindful of how the texture changes and adjust accordingly before use.
Packaging Sugar Scrubs in Mason Jars for Gifting
Packaging homemade sugar scrubs in mason jars is a great way to give them a personal touch and create beautiful gifts. Here’s how you can package your scrubs and make them look professional and appealing for gifting:
1. Choose the Right Mason Jars
Select mason jars that suit the amount of scrub you’ve made. Small 4 oz or 8 oz jars are perfect for individual gifts, while larger jars (16 oz) can work if you’re making bulk gifts. Make sure the jars are clean and dry before filling them with your scrub to prevent any moisture from causing mold or spoilage.
2. Fill the Mason Jars
Carefully scoop your sugar scrub into the jars, filling them up but leaving a little space at the top (about half an inch). To avoid air bubbles, you can use a small spoon or spatula to gently pack the scrub into the jar. Make sure to wipe the rims of the jar clean of any scrub that may have spilled for a neat, polished look.
3. Add Decorative Labels
Create or buy labels that you can stick on the front of the mason jar. The label can include the following information:
- Product Name: For example, “Coconut-Lime Body Scrub” or “Lavender & Honey Lip Scrub.”
- Ingredients: List key ingredients or a simple “Made with natural ingredients” if you want a cleaner look.
- Directions: Briefly explain how to use the scrub (e.g., “Gently massage onto damp skin and rinse”).
- Personal Touch: Add a fun message like “Handmade with love” or “Perfect for soft, glowing skin.”
If you’re crafting labels at home, you can print them out using design software (like Canva) or handwrite them on rustic paper tags for a more personal touch. Ensure that the labels are clear and legible and affix them securely to the jars.
4. Tie with Ribbons or Twine
Once your mason jar is filled and labeled, take some decorative ribbon or twine and tie it around the lid or neck of the jar. You can use a simple jute twine for a rustic, natural look, or a satin ribbon for a more elegant finish. If you’re using twine, you can tie a small decorative tag with a message, like “Enjoy your pampering!” or “Sweet treat for your skin.”
5. Add Additional Decorative Elements
For extra flair, consider adding some additional decorative touches, like:
- Dried Flowers: Attach a small sprig of dried lavender, eucalyptus, or rosemary to the ribbon for a nature-inspired look.
- Fabric Lid Covers: Cut a square piece of fabric (like gingham or burlap) and place it over the jar lid before securing the lid with twine or a ribbon. This adds an extra charming touch, especially if you’re giving the scrub as a gift during holidays or special events.
- Gift Tags: Use a small gift tag to write the recipient’s name or a special note. You could also include the scrub’s benefits or usage instructions on this tag.
6. Presentation for Gifting
To complete the gift, place the mason jar in a small gift box, gift bag, or tie it to a wooden crate with additional ribbon. Adding a sprig of greenery or a small holiday decoration can enhance the gift’s visual appeal.
With these simple steps, your homemade sugar scrubs will look as delightful as they are practical, making them perfect for gifting on any occasion.

Our Favourite Sugar Scrub on Amazon
FAQ About DIY Sugar Scrub
Is Sugar or Salt Scrub Better for Your Skin?
When choosing between sugar and salt scrubs, it really depends on your skin type and the kind of exfoliation you’re seeking. Both have unique benefits, and understanding their properties can help you pick the right one for your skin’s needs.
Sugar Scrubs
Sugar scrubs are known for their gentle exfoliation and are generally considered more skin-friendly for sensitive or delicate skin types.
- Gentle Exfoliation: Sugar has naturally smooth edges, which makes it less abrasive compared to salt. This makes sugar scrubs perfect for sensitive skin, including the face and lips, where a milder exfoliant is needed.
- Moisturizing: Sugar is a humectant, which means it attracts moisture from the environment and helps hydrate the skin. This makes sugar scrubs a great choice for dry or dehydrated skin, as they not only exfoliate but also help lock in moisture, leaving the skin feeling soft and smooth.
- Non-Drying: Since sugar is less abrasive and helps retain moisture, it’s ideal for use on the face, arms, and other areas that need gentle exfoliation without stripping the skin of its natural oils.
Salt Scrubs
Salt scrubs, on the other hand, are known for their coarser texture and deep exfoliation. These scrubs are often used for a more intense scrubbing experience, making them suitable for tougher areas of the body.
- Deep Exfoliation: The larger, rougher grains of salt provide more intense exfoliation, which is great for areas with thicker skin or more calluses, like the feet, elbows, and knees. If you’re looking for a scrub to tackle stubborn, rough patches, salt is a great choice.
- Detoxifying Properties: Salt, especially Epsom salt or sea salt, has natural detoxifying properties that can help draw out impurities from the skin. It can be especially useful for oily skin or those prone to acne, as it may help clear pores and prevent breakouts.
- Stimulating Circulation: Salt scrubs can improve circulation due to their coarser texture, which can leave your skin feeling invigorated and energized. This makes them a good choice for use after a workout or when you need a pick-me-up.
Which One Should You Choose?
- For Sensitive or Dry Skin: Sugar scrubs are the better choice because they provide gentle exfoliation and help retain moisture. They’re ideal for your face, lips, and any other sensitive areas of the body.
- For Oily or Rough Skin: Salt scrubs work well for oilier skin types or areas with thicker skin. They’re especially effective for detoxifying and exfoliating rough, calloused skin on the feet, elbows, and knees.
- For a More Intense Scrub: If you want a scrub with more grit and deeper exfoliation, go for a salt scrub. It’s perfect for areas that need a little more attention and for those who prefer a more abrasive exfoliation.
In conclusion, sugar scrubs are better for gentle, hydrating exfoliation, especially for sensitive skin, while salt scrubs provide a deeper exfoliation that can be more invigorating and effective on rougher skin. The choice ultimately depends on your skin type and the area you intend to treat.
How Long Does Homemade Sugar Scrub Last?
The shelf life of homemade sugar scrubs depends on the ingredients used and how they’re stored. Typically, most homemade sugar scrubs last for 2 to 3 months when stored properly. However, there are steps you can take to extend the shelf life and ensure your scrub stays fresh for as long as possible.
Tips for Extending the Shelf Life
- Store in an Airtight Container
The best way to keep your sugar scrub fresh is by storing it in an airtight container (like a mason jar or plastic container with a secure lid). This helps prevent air exposure, which can cause the scrub to dry out or degrade over time. - Keep in a Cool, Dry Place
Store your scrub away from direct sunlight and heat sources, which can cause the oils in the scrub to break down. A cool, dry place like a bathroom cabinet or a closet is ideal. - Avoid Water Contamination
When using your scrub, avoid letting water get into the jar. Water can introduce bacteria and mold, which can cause the scrub to spoil quickly. You might want to use a small spatula or scoop to remove the scrub from the jar instead of your fingers. - Use Preservative-Free Ingredients
Homemade sugar scrubs are usually free from preservatives, which means they are more prone to spoiling. To extend the shelf life, use natural preservatives such as vitamin E oil or grapefruit seed extract. These can help protect the oils in the scrub from oxidizing and turning rancid. - Refrigerate (Optional)
If your scrub contains fresh ingredients like fruit or citrus, refrigeration can help extend its shelf life. However, keep in mind that refrigeration can change the texture of the scrub, making it harder or less creamy. For most basic sugar scrubs, refrigeration isn’t necessary.
Signs Your Sugar Scrub Has Gone Bad
Even with proper storage, there will come a time when your scrub may no longer be safe to use. Here are a few signs that your homemade sugar scrub has gone bad:
- Change in Smell
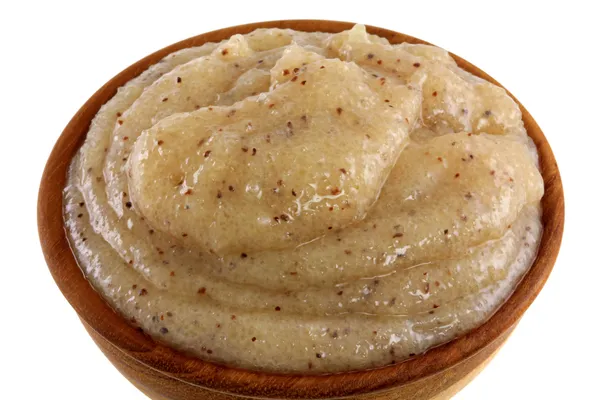
One of the first signs that a sugar scrub has gone bad is a change in smell. If your scrub starts to smell sour, rancid, or off in any way, it’s time to toss it. This typically happens when the oils have oxidized or gone rancid. - Mold or Discoloration
If you see any mold growth or notice discoloration in the scrub, this means bacteria or fungus has started to grow. It’s best to throw the scrub away in this case, as mold can be harmful to your skin. - Separation of Ingredients
If the oils in your scrub begin to separate from the sugar or other ingredients, it might be a sign that the scrub is no longer stable. While separation doesn’t always mean it’s bad, if combined with other signs (such as a change in smell or texture), it’s better to discard it. - Dry or Crumbly Texture
If your scrub becomes overly dry, crumbly, or loses its smooth texture, it may have been exposed to air or moisture and is no longer effective. A dried-out scrub won’t exfoliate as well and can be harsh on your skin.
To make sure your homemade sugar scrub lasts as long as possible, store it in an airtight container, keep it in a cool, dry place, and avoid introducing water into the jar. If your scrub starts to smell off, show signs of mold, or feel dry and crumbly, it’s time to say goodbye and make a fresh batch.
Taking care with storage and ingredients can help extend your scrub’s shelf life and keep it working its best for you.
Can I Customize My Sugar Scrub Recipes?
Absolutely! One of the best things about making your own sugar scrub is the endless customization options. You can easily tailor your scrub to suit your skin’s needs, personal preferences, and even your favorite scents. Here’s how you can get creative and design a scrub that’s uniquely yours:
1. Experiment with Scents
Essential oils are a wonderful way to add a personal touch to your scrub, both for fragrance and skincare benefits. Some ideas include:
- Lavender: Known for its calming properties, lavender is perfect for a relaxing scrub, especially after a long day.
- Peppermint: A refreshing and invigorating scent, peppermint can give your scrub a cooling sensation and is great for boosting circulation.
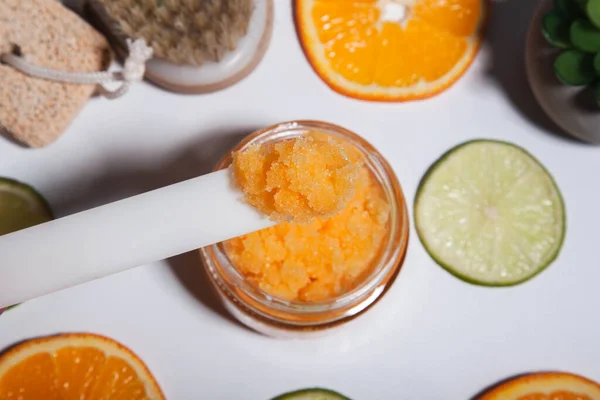
- Citrus (Lemon, Orange, or Grapefruit): Citrus oils not only smell bright and energizing but also have natural astringent properties, which are great for oily or acne-prone skin.
- Eucalyptus: With its fresh, crisp scent, eucalyptus is perfect for a scrub that’s soothing and helps with congestion.
You can mix and match oils to create your perfect fragrance, whether you prefer something light and floral or warm and woodsy. Just make sure to use essential oils in moderation, as they’re potent and a little goes a long way.
2. Choose Your Oils
Different oils bring different benefits to your sugar scrub, so experiment with different options to find what works best for your skin:
- Coconut Oil: Moisturizing and antimicrobial, coconut oil is perfect for dry skin and helps your scrub glide on smoothly.
- Olive Oil: Rich in antioxidants, olive oil is deeply nourishing and works well for sensitive skin.
- Sweet Almond Oil: Known for its gentle, non-greasy nature, almond oil is a great choice for all skin types and helps soften the skin.
- Jojoba Oil: Mimics the skin’s natural oils, making it perfect for balancing oily or acne-prone skin.
Feel free to mix oils as well! For example, combining coconut oil with a bit of jojoba oil can give you the perfect balance of moisture and skin-loving nutrients.
3. Pick Your Exfoliant
While sugar is the most common exfoliant, you can experiment with other exfoliating agents for different results:
- Brown Sugar: Gentler than white sugar, brown sugar is perfect for sensitive or facial skin.
- Sea Salt: For a deeper exfoliation, try using sea salt, especially on rough areas like elbows or feet.
- Coffee Grounds: Not only do coffee grounds exfoliate, but they also contain antioxidants that may help improve circulation and firm the skin.
- Oatmeal: For a very gentle scrub, you can grind up oatmeal, which is soothing and perfect for sensitive skin.
Mixing different exfoliants can add variety and texture to your scrub, allowing you to target specific skin concerns.
4. Customize for Your Skin Type
Tailoring your scrub to your skin’s needs can enhance its effectiveness. Here are some ideas:
- For Dry Skin: Focus on moisturizing oils like coconut oil and almond oil, and consider adding a rich exfoliant like brown sugar.
- For Oily or Acne-Prone Skin: Opt for lighter oils like jojoba and add tea tree oil or citrus essential oils to help control oil and reduce breakouts.
- For Sensitive Skin: Choose gentler exfoliants like brown sugar or oatmeal, and use calming essential oils like lavender or chamomile.
By experimenting with different oils, exfoliants, and scents, you can create a scrub that feels uniquely tailored to your skin’s needs and your personal style.
5. Create Scrubs for Different Purposes
You can also create scrubs with specific goals in mind, like:
- Relaxation: Add lavender and chamomile oils to a sugar scrub for a calming, spa-like experience.
- Energizing: For a morning pick-me-up, use citrus oils and coffee grounds for a scrub that wakes you up and exfoliates at the same time.
- Anti-Aging: Mix in ingredients like green tea or rosehip oil for a scrub that targets fine lines and helps with skin rejuvenation.
The beauty of homemade sugar scrubs is that you can personalize every ingredient to fit your skin’s needs and your scent preferences. Don’t be afraid to experiment with different oils, exfoliants, and fragrances to find the perfect scrub that works for you. The more you customize, the more you’ll enjoy creating a scrub that’s as unique as your skin.
Conclusion: Make Your DIY Sugar Scrub Today!
Creating your sugar scrub is a fun, rewarding, and incredibly easy way to elevate your skincare routine. With just a few simple ingredients, sugar, oils, and your favorite scents, you can craft a scrub that is not only gentle and exfoliating but also tailored to your skin’s unique needs. Whether you’re looking for hydration, improved texture, or a burst of freshness, a homemade sugar scrub offers numerous benefits with minimal effort.
The best part? You can experiment with different oils, exfoliants, and fragrances to customize your scrub, making it as unique as you are. From soothing aloe vera to invigorating citrus blends, the possibilities are endless. Plus, making your own scrub at home means you’re in control of the ingredients, ensuring they’re fresh and suitable for your skin type.
So why wait? Try your first DIY sugar scrub recipe today! Choose one of the easy recipes, follow the simple steps, and experience the joy of creating a product that nourishes and exfoliates your skin. Once you try it, you’ll never want to go back to store-bought scrubs again. Let your creativity flow and pamper your skin with a homemade sugar scrub that’s as effective as it is delightful.
Save this image to your favourite Pinterest board.

Bookmarking this post! Great recipes. I’ve always wanted to create sugar scrubs because I know they have less chemicals when I make them at home. Thanks for sharing these tips.
That is the beauty of making your skincare products at home! I’m glad you found this post helpful.
Love these! This would be so fun to make with a group of friends on a Spa themed girls night!
Yes! 🙂 that would be fun!
I love using sugar scrubs. I usually buy mine. Thank you for these recipes I can make at home and also save money.
You’re welcme! making yours at home is a cost-effective way to get things done.
I love how easy it is to make sugar scrubs. I remember making some years ago and really enjoyed them but then never made more. I will be giving some of these a try soon. Plus they make great gifts.
Yes they do! It’s kind of theraupeutic making one yourself.