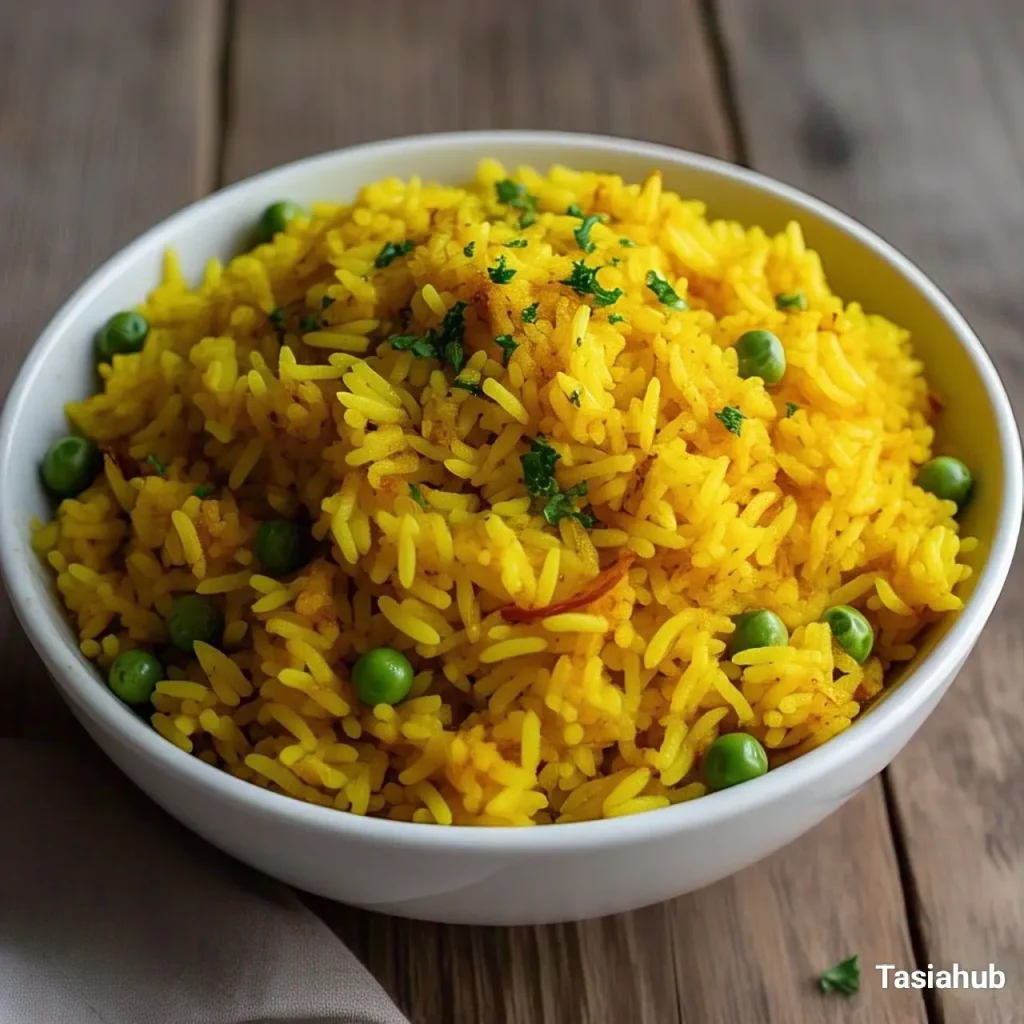
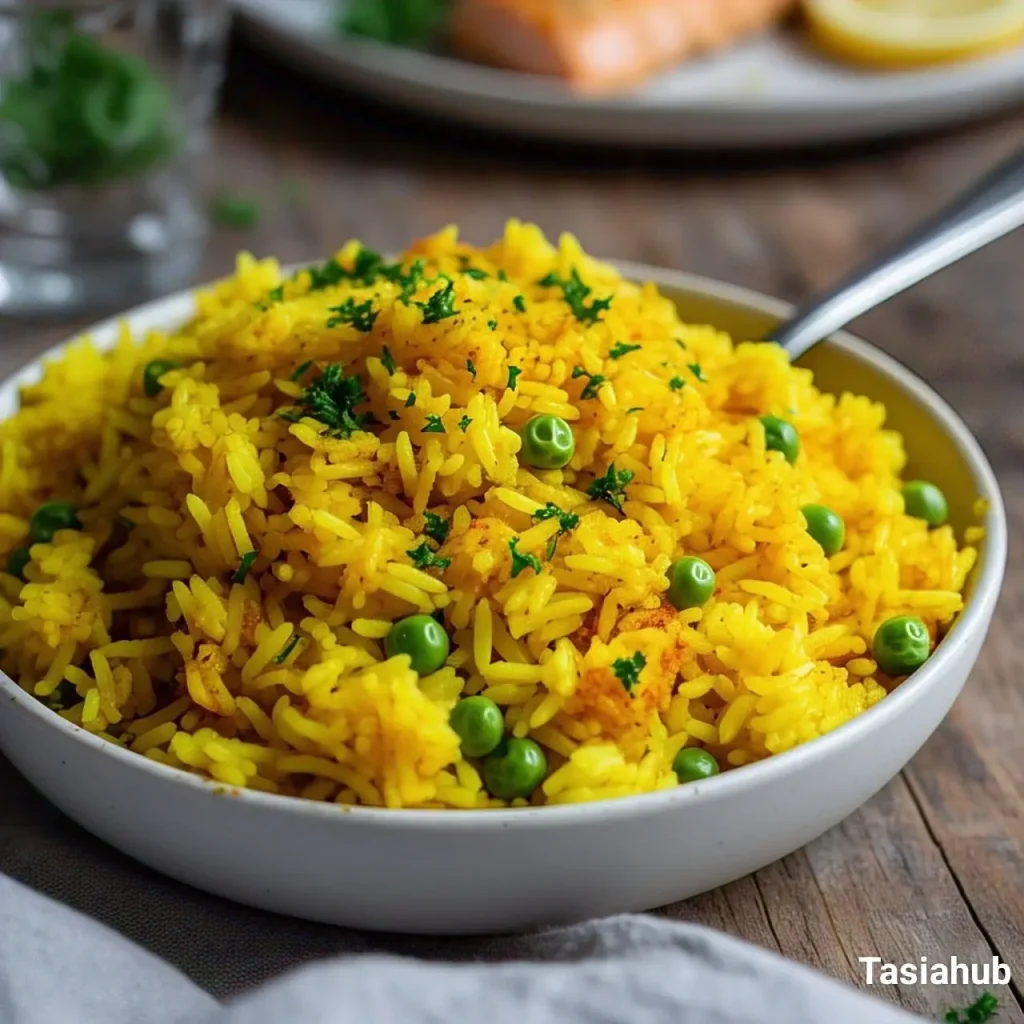
Yellow Rice Recipe

There’s something about yellow rice that makes a meal feel extra special. With its vibrant color and warm, comforting flavor, this dish is not just a side—it’s a star on the plate. Whether you’re serving it with grilled chicken, seafood, or a hearty stew, yellow rice adds a beautiful touch to any meal.
What makes this recipe stand out is its simplicity and versatility. You don’t need any fancy ingredients, just rice, a few spices, and a bit of patience while it cooks.
It’s budget-friendly, easy to make, and can be enjoyed by the whole family. Plus, the golden color comes from turmeric, a spice known for its health benefits, including anti-inflammatory properties.
This recipe is great for busy weeknights when I need a quick and satisfying side, but it’s also impressive enough to serve for special gatherings. The best part? You can customize it by adding vegetables, beans, or even shredded chicken to turn it into a complete meal. Whether you’re new to cooking or a seasoned home chef, this yellow rice recipe is one you’ll want to keep in your collection.
About Yellow Rice
Yellow rice is a flavorful rice dish commonly found in many cuisines, from Latin American and Caribbean kitchens to South Asian and Middle Eastern tables. The rich yellow color comes from turmeric or saffron, giving the rice not only its beautiful golden hue but also a mild, earthy flavor.
Unlike Spanish saffron rice, which often uses saffron threads for its deep yellow color, this version relies on turmeric, a more affordable and accessible spice. Compared to seasoned rice blends, homemade yellow rice lets you control the ingredients, ensuring a healthier and fresher taste.
Why You’ll Love It
- Super Easy to Make – With just a few simple ingredients and one pot, this dish is practically foolproof. No fancy cooking skills are required!
- Budget-Friendly – Rice and spices are pantry staples, making this a great option for affordable, delicious meals.
- Packed with Flavor – A little turmeric, garlic, and seasoning go a long way in turning plain rice into something exciting.
- Pairs with Everything – Whether you’re serving chicken, seafood, or veggies, yellow rice makes a fantastic side dish.
- Customizable – Add peas, carrots, beans, or protein like shrimp or chicken to make it a complete meal.
Ingredients
For the Rice:
- 2 cups long-grain white rice
- 3 ½ cups water or chicken broth
- 1 tablespoon olive oil or butter
- 1 teaspoon salt
For the Seasoning:
- 1 teaspoon turmeric powder
- ½ teaspoon garlic powder
- ½ teaspoon onion powder
- ½ teaspoon paprika (optional, for extra depth)
- ¼ teaspoon black pepper
Optional Add-ins:
- ½ cup frozen peas or diced carrots
- ¼ teaspoon saffron threads (for a richer, more aromatic version)
- 1 small onion, finely chopped
Ingredient Notes
- Turmeric is the key – It gives the rice its golden color and mild earthy flavor. If you love a stronger taste, you can add a pinch more!
- Use broth instead of water – Swapping water for chicken or vegetable broth makes the rice extra flavorful.
- Don’t skip the oil or butter – It helps coat the rice, giving it a slightly glossy finish and preventing it from clumping.
- Saffron for a gourmet touch – If you have saffron on hand, steep a few threads in warm water before adding them to the rice for a more delicate, floral aroma.
- Add veggies for more texture – Peas, carrots, or bell peppers make this dish heartier and add a pop of color.
Kitchen Tools Needed
- Medium or Large Pot with Lid – A good-quality pot ensures even cooking and prevents the rice from burning at the bottom. I love using a non-stick or heavy-bottomed pot for the best results.
- Measuring Cups and Spoons – Accurate measurements help maintain the perfect rice-to-liquid ratio for fluffy rice.
- Wooden Spoon or Spatula – Ideal for stirring the rice without breaking the grains. A silicone spatula works well too!
- Fine Mesh Strainer – If you rinse your rice before cooking, this helps remove excess starch and prevents clumping.
- Cutting Board & Knife – Needed if you’re adding onions, garlic, or vegetables to your yellow rice.
If you cook rice often, a rice cooker can be a game changer! It takes the guesswork out of cooking and ensures perfectly fluffy rice every time. I also love using a cast iron pot because it holds heat well and gives the rice a slightly crispy bottom layer—so good!
Cooking Instructions
Step 1: Rinse the Rice (Optional but Recommended!)
- Place the rice in a fine-mesh strainer and rinse under cold water until the water runs clear.
- This removes excess starch and helps the grains stay separate. If you like a slightly stickier texture, you can skip this step.
Step 2: Sauté the Spices (2 minutes)
- In a medium or large pot, heat the olive oil or butter over medium heat.
- Add the turmeric, garlic powder, onion powder, paprika, and black pepper. Stir for about 30 seconds until fragrant—this helps release the flavors!
Pro Tip: Toasting the spices in oil enhances their depth and richness, making the rice extra flavorful.
Step 3: Add the Rice & Coat It (1 minute)
- Add the rinsed rice to the pot and stir well, making sure each grain is coated in the flavorful spice mixture.
- This step helps toasting the rice slightly, which gives it a nuttier aroma.
Step 4: Add Liquid & Cook (18-20 minutes)
- Pour in the water or broth and add salt. Stir once to combine.
- Bring the mixture to a boil over medium-high heat.
- Once boiling, reduce the heat to low, cover the pot, and let it simmer for 18-20 minutes.
Pro Tip: Don’t stir the rice while it’s cooking—it can break the grains and make them mushy.
Step 5: Let It Rest & Fluff (5 minutes)
- After the cooking time is up, turn off the heat but leave the lid on. Let the rice sit for 5 minutes—this allows the steam to finish cooking the rice without making it soggy.
- Fluff the rice gently with a fork to separate the grains.
Step 6: Add Optional Mix-ins & Serve
- If using peas, carrots, or other add-ins, stir them in now. The heat from the rice will warm them up nicely.
- Serve warm as a side dish or as a base for your favorite protein!
Enjoy your homemade yellow rice—it’s fluffy, flavorful, and perfect for any meal!
Tips and Tricks for Success
- Use the Right Rice – Long-grain white rice, like basmati or jasmine, works best because it stays fluffy and separate. Short-grain rice tends to be stickier, which changes the texture.
- Don’t Rush the Resting Time – Letting the rice sit covered after cooking makes a huge difference! It absorbs any remaining moisture and fluffs up perfectly.
- Customize the Flavor – Want a more aromatic version? Add a bay leaf or coconut milk for a rich, slightly sweet taste.
- Watch the Heat – Cooking on low heat once the water starts boiling prevents the rice from burning at the bottom. If you’re using a gas stove, a heat diffuser can help.
- Double the Batch – This rice stores well, so make extra! It reheats beautifully for meal prep and works great for fried rice the next day.
Ingredient Substitutions and Variations
- Swap White Rice for Brown Rice – Use the same seasoning, but increase the cooking time to 35-40 minutes and add about ½ cup more liquid since brown rice takes longer to cook.
- Use Saffron Instead of Turmeric – If you want a more delicate, slightly floral flavor, dissolve a few saffron threads in warm water before adding them to the rice.
- Make It Spicy – Add ¼ teaspoon cayenne pepper or ½ teaspoon chili flakes for a little kick.
- Turn It Into a One-Pot Meal – Stir in cooked chicken, shrimp, or beans for a complete, protein-packed dish.
- Go Vegan – Use vegetable broth instead of chicken broth and coconut oil or vegan butter for a plant-based version.
Serving Suggestions
- With Grilled Chicken or Fish – The mild, flavorful rice pairs perfectly with juicy grilled chicken, shrimp, or salmon. I love serving it with lemon-garlic salmon for a fresh and zesty combo!
- As a Base for Stir-Fries – Use it as a flavorful alternative to plain rice in stir-fries with sautéed veggies and tofu or beef strips.
- Alongside Beans and Plantains – For a Caribbean-inspired meal, serve it with black beans, fried plantains, and a side of avocado. So good!
- Stuffed Peppers or Burritos – Mix yellow rice with black beans, cheese, and spices to fill bell peppers or burritos for a fun, hearty meal.
- With a Fried Egg on Top – For a quick and easy meal, top a warm bowl of yellow rice with a fried or poached egg. The runny yolk makes it extra delicious!
Storage and Reheating Instructions
Storage for Yellow Rice:
- Let the rice cool completely before storing it to prevent excess moisture and sogginess.
- Store in an airtight container in the fridge for up to 4 days.
- For longer storage, freeze in a freezer-safe container or zip-top bag for up to 3 months.
Reheating Yellow Rice:
- Microwave: Add a splash of water or broth to the rice and microwave in 30-second intervals, fluffing with a fork between each round.
- Stovetop: Heat in a pan over low heat with a bit of water or butter, stirring occasionally until warmed through.
- Steaming Trick: If the rice feels dry, place a damp paper towel over it in the microwave or steam it in a covered pot for a few minutes.
I love reheating leftover yellow rice on the stovetop with a little butter; it brings back the richness and prevents it from drying out!
Frequently Asked Questions
Can I make yellow rice in a rice cooker?
Yes! Just add all the ingredients to your rice cooker, stir, and cook as you normally would. Using broth instead of water makes it extra flavorful.
Do I have to rinse the rice before cooking?
It’s optional! Rinsing removes excess starch, making the rice fluffier. But if you prefer a slightly stickier texture, you can skip this step.
Can I use brown rice instead of white rice?
Absolutely! Just remember that brown rice takes longer to cook—about 35-40 minutes—and needs a bit more liquid (around ½ cup extra).
What can I do if my rice turns out too dry?
No worries! Just sprinkle in a little water or broth, cover the pot, and let it steam for a few minutes on low heat. It’ll soften right up!
Is yellow rice spicy?
No, it’s mild and kid-friendly. If you want some heat, add a pinch of cayenne pepper or red pepper flakes.
Can I freeze yellow rice?
Yes! Let it cool completely, then store it in an airtight container or freezer bag for up to 3 months. Reheat with a little water or broth to bring back its fluffy texture.
I’d love to hear how this turns out for you! Did you try any fun variations? Let me know in the comments, and don’t forget to share your favorite way to serve yellow rice! Happy cooking!
Don’t forget to share your photos on Instagram and tag me (@tasiahub_) or use the hashtag (#tasiahub). I’d love to see your creations!

Yellow Rice Recipe
Equipment
- Medium or Large Pot with Lid
- Measuring cups and spoons
- Wooden spoon or spatula
- Fine-Mesh Strainer
- Cutting Board & Knife
Ingredients
For the Rice:
- 2 cups long-grain white rice
- 3 ½ cups water or chicken broth
- 1 tablespoon olive oil or butter
- 1 teaspoon salt
- For the Seasoning:
- 1 teaspoon turmeric powder
- ½ teaspoon garlic powder
- ½ teaspoon onion powder
- ½ teaspoon paprika optional, for extra depth
- ¼ teaspoon black pepper
Optional Add-ins:
- ½ cup frozen peas or diced carrots
- ¼ teaspoon saffron threads for a richer, more aromatic version
- 1 small onion finely chopped
Instructions
Step 1: Rinse the Rice (Optional but Recommended!)
- Place the rice in a fine-mesh strainer and rinse under cold water until the water runs clear.
- This removes excess starch and helps the grains stay separate. If you like a slightly stickier texture, you can skip this step.
Step 2: Sauté the Spices (2 minutes)
- In a medium or large pot, heat the olive oil or butter over medium heat.
- Add the turmeric, garlic powder, onion powder, paprika, and black pepper. Stir for about 30 seconds until fragrant—this helps release the flavors!
- Pro Tip: Toasting the spices in oil enhances their depth and richness, making the rice extra flavorful.
Step 3: Add the Rice & Coat It (1 minute)
- Add the rinsed rice to the pot and stir well, making sure each grain is coated in the flavorful spice mixture.
- This step helps toasting the rice slightly, which gives it a nuttier aroma.
Step 4: Add Liquid & Cook (18-20 minutes)
- Pour in the water or broth and add salt. Stir once to combine.
- Bring the mixture to a boil over medium-high heat.
- Once boiling, reduce the heat to low, cover the pot, and let it simmer for 18-20 minutes.
- Pro Tip: Don’t stir the rice while it’s cooking—it can break the grains and make them mushy.
Step 5: Let It Rest & Fluff (5 minutes)
- After the cooking time is up, turn off the heat but leave the lid on. Let the rice sit for 5 minutes—this allows the steam to finish cooking the rice without making it soggy.
- Fluff the rice gently with a fork to separate the grains.
Step 6: Add Optional Mix-ins & Serve
- If using peas, carrots, or other add-ins, stir them in now. The heat from the rice will warm them up nicely.
- Serve warm as a side dish or as a base for your favorite protein!
Notes
Nutritional Value (Per Serving – Approximate)
- Calories: ~200-250
- Carbohydrates: ~45g
- Protein: ~4g
- Fat: ~3g (depending on butter/oil used)
- Fiber: ~1g
- Sodium: ~400mg (varies based on broth and salt amount)
The nutritional information on this website is only an estimate and is provided for convenience and as a courtesy only. The accuracy of the nutritional information for any recipe on this site is not guaranteed. It should not be used as a substitute for a professional nutritionist’s advice.
Looks and sounds delicious. Thanks for sharing your recipe!
This looks delicious I like that you can add meat or veggies to it and make a complete meal from it. I will have to give this a try, we eat a lot of rice so having different versions of it will be nice.
I always just cook plain rice. Might want to change it up! Looks good!
Such an easy recipe- thanks for sharing!
Wow! This recipe, like all your other recipes, looks like a winner! I cannot wait to try it!