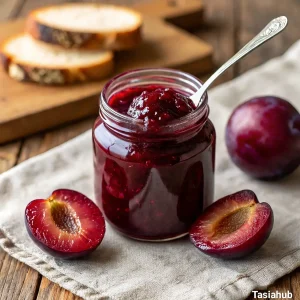
Plum Jam Recipe
Whether you’ve got a tree full of ripe plums in your backyard or you grabbed a few baskets from the farmer’s market, this recipe is a simple, satisfying way to preserve their sweet-tart flavor.
Equipment
- Large heavy-bottomed pot
- Wooden Spoon or Silicone Spatula
- Ladle
- Clean glass jars with lids
- Jar funnel (optional but helpful)
- Kitchen scale (optional)
Ingredients
- 2 lbs 900g ripe plums, pitted and chopped
- 1 ½ cups 300g granulated sugar
- 2 tbsp fresh lemon juice
- ½ tsp lemon zest optional
Instructions
Step 1: Prep the Plums
- Wash the plums thoroughly under running water to remove any dirt or residue.
- Cut each plum in half, remove the pit, and chop them into small chunks. No need to peel them—the skins soften and dissolve beautifully as the jam cooks.
- Pro Tip: If your plums are extra juicy, place a cutting board inside a rimmed tray to catch the juices. You’ll want to keep that flavor in the pot!
Step 2: Combine Ingredients in the Pot
- Transfer the chopped plums into a large heavy-bottomed pot.
- Add the sugar, lemon juice, and optional lemon zest.
- Stir everything together so the plums are evenly coated with the sugar.
- Pro Tip: Let the mixture sit for about 15–20 minutes before turning on the heat. This maceration helps the fruit release its juices, giving you a juicier, more flavorful jam base.
Step 3: Cook the Jam
- Turn the heat to medium and begin cooking, stirring frequently.
- As the plums break down and the mixture starts bubbling, reduce the heat to medium-low to prevent scorching.
- Continue to stir every few minutes, especially near the bottom of the pot where it can stick.
- Let it simmer for 35–45 minutes, or until thickened.
- Pro Tip: To check if your jam is ready, spoon a small amount onto a chilled plate and run your finger through it. If it leaves a clear line and doesn’t run back together, it’s done!
Step 4: Blend (Optional for Smoother Jam)
- If you prefer a smooth jam, use an immersion blender right in the pot once it’s off the heat.
- Blend to your desired texture—either completely smooth or just a few pulses to break up larger chunks.
- Pro Tip: Let the jam cool slightly before blending to avoid splatters and burns.
Step 5: Jar It Up
- Carefully ladle the hot jam into clean jars, leaving about ¼ inch of space at the top.
- Wipe the rims clean with a damp cloth to ensure a tight seal.
- Seal with lids and let them cool at room temperature.
- Pro Tip: If you’re planning to store them long-term, you can process the jars in a water bath for 10 minutes. Otherwise, once cooled, just refrigerate or freeze them.
Step 6: Cool and Store
- Once cooled, check that the lids are sealed (they should not flex when pressed).
- Store in the fridge for up to 3 weeks, freeze for several months, or keep sealed jars in a cool, dark place for up to a year.
Notes
Estimated Nutritional Value (Per Tablespoon Serving)
- Calories: 45–50 kcal
- Carbohydrates: 12g
- Sugars: 11g
- Fiber: 0.3g
- Protein: 0g
- Fat: 0g
- Vitamin C: Small amount