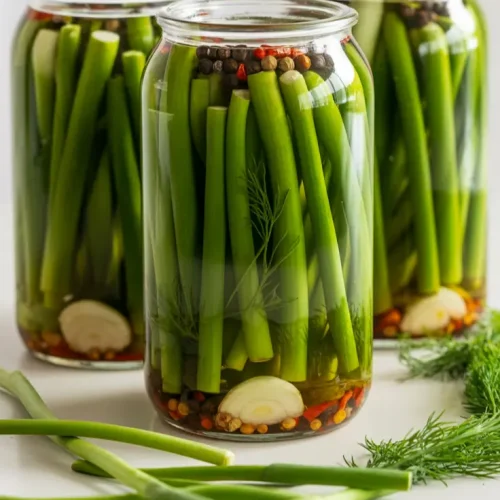
Pickled Garlic Scapes
If you enjoy experimenting in the kitchen or just want a new way to enjoy garlic’s fresh side, pickled garlic scapes are definitely worth trying.
Equipment
- Mason jars or any glass jars with lids
- Saucepan
- Tongs or a Fork
- Measuring cups and spoons
- Knife and Cutting Board
- Funnel (optional)
Ingredients
For the Pickled Garlic Scapes:
- 1 pound garlic scapes trimmed and cut into pieces
- 1 cup white vinegar or apple cider vinegar for a milder taste
- 1 cup water
- 1 tablespoon kosher salt
- 1 tablespoon sugar
For the Flavor Boosters:
- 3-4 garlic cloves sliced (optional, for extra garlic punch)
- 1 teaspoon black peppercorns
- 1 teaspoon red pepper flakes optional, for a little heat
- 2-3 sprigs fresh dill or 1 teaspoon dried dill optional, for a fresh herbal note
Instructions
Step 1: Prepare the Garlic Scapes
- Rinse the garlic scapes thoroughly under cold running water to remove any dirt or debris.
- Trim off the tough ends (usually about 1 inch from the bottom).
- Cut the scapes into pieces, making them easy to pack into jars and bite-sized for snacking.
- Pro tip: If your scapes are very curly, gently straighten them out before cutting — it helps pack them more efficiently into the jar.
Step 2: Sterilize Your Jars
- Wash your glass jars and lids with hot, soapy water.
- Rinse well and place the jars in a pot of boiling water for about 10 minutes to sterilize.
- Remove carefully and let them air dry on a clean towel.
- Pro tip: Sterilizing jars prevents unwanted bacteria and ensures your pickles stay fresh longer.
Step 3: Make the Pickling Brine
- In a saucepan, combine the vinegar, water, kosher salt, and sugar.
- Heat the mixture over medium heat, stirring occasionally until the salt and sugar are fully dissolved.
- Once dissolved, remove the brine from heat and let it cool slightly.
- Pro tip: Don’t let the brine boil vigorously — a gentle simmer is enough to dissolve ingredients without evaporating too much liquid.
Step 4: Pack the Jars
- Place sliced garlic cloves, peppercorns, red pepper flakes, and dill sprigs (if using) at the bottom of each jar.
- Tightly pack the cut garlic scapes into the jars, leaving about ½ inch of headspace at the top.
- Pro tip: Use tongs or a fork to avoid bruising the scapes and to pack them firmly for a better crunch.
Step 5: Add the Brine and Seal
- Using a funnel if needed, pour the warm (not hot) brine over the garlic scapes until they are fully submerged.
- Tap the jar gently on the counter to release any air bubbles. Add more brine if needed to cover everything.
- Wipe the jar rims clean and seal with lids tightly.
Step 6: Cool and Store
- Let the jars cool completely at room temperature.
- Once cooled, place the jars in the refrigerator.
- For best flavor, wait at least 3-5 days before eating, allowing the scapes to soak up all the tangy goodness.
- Pickled garlic scapes will keep in the fridge for up to 2 months.
Notes
Nutritional Value (per ~2-tablespoon serving)
- Calories: ~10 kcal
- Carbohydrates: ~2g
- Sugars: ~1g
- Fat: 0g
- Protein: 0g
- Sodium: ~180mg
- Fiber: <1g