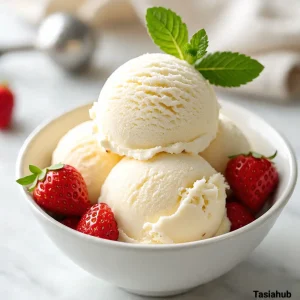
Homemade Vanilla Ice Cream
What makes homemade vanilla ice cream so special is the quality of the vanilla itself. Using real vanilla extract—or better yet, vanilla bean—brings depth and a fragrant warmth that artificial versions can’t replicate.
Equipment
- Medium saucepan
- Whisk
- Mixing Bowls
- Fine-Mesh Strainer
- Ice Cream Maker
- Spatula
- Storage container with lid
Ingredients
- 2 cups heavy cream
- 1 cup whole milk
- ¾ cup granulated sugar
- 1 tablespoon pure vanilla extract or 1 vanilla bean, split and scraped
- 4 large egg yolks
- Pinch of salt
Instructions
Step 1: Heat the Milk, Cream, and Sugar
- In a medium saucepan, combine the 2 cups of heavy cream, 1 cup of whole milk, and ¾ cup of granulated sugar.
- Place over medium heat and stir occasionally until the mixture is hot and the sugar has fully dissolved—do not let it boil.
- If using a vanilla bean, add the split bean and scraped seeds now. Let it steep for a few minutes to infuse the flavor.
- Pro Tip:
- Keep the heat moderate—too high and you risk scalding the milk.
Step 2: Temper the Egg Yolks
- In a medium mixing bowl, whisk together the 4 large egg yolks until smooth and slightly pale.
- Slowly ladle about ½ cup of the hot milk mixture into the yolks while whisking constantly—this gently warms them up without scrambling.
- Add another ½ cup, still whisking, then slowly pour the tempered yolk mixture back into the saucepan.
- Pro Tip:
- Whisk continuously during tempering to prevent lumps or cooked egg bits.
Step 3: Cook the Custard Base
- Return the saucepan to the stove over low to medium-low heat.
- Stir the mixture constantly with a spatula or wooden spoon, making sure to scrape the bottom and sides.
- Cook until it thickens slightly and coats the back of a spoon—this usually takes 5–8 minutes.
- Pro Tip:
- Don’t walk away! Stir gently and steadily so it cooks evenly and doesn't curdle.
Step 4: Strain and Chill
- Once thickened, immediately remove the custard from heat.
- Pour it through a fine mesh strainer into a clean bowl to remove any solids or lumps (and the vanilla pod if used).
- Stir in the vanilla extract if you didn’t use a bean.
- Let it cool slightly at room temperature, then cover and refrigerate for at least 4 hours or overnight until completely cold.
- Pro Tip:
- Chilling the base well ensures the ice cream churns better and freezes with a smooth texture.
Step 5: Churn the Ice Cream
- Once chilled, pour the custard into your ice cream maker following the manufacturer’s instructions.
- Churn until it reaches a soft-serve consistency—this usually takes 20–25 minutes.
- Pro Tip:
- Don’t overfill the machine; the mixture needs room to expand as it freezes.
Step 6: Freeze Until Firm
- Transfer the churned ice cream into a freezer-safe container.
- Smooth the top with a spatula and press a piece of parchment paper or plastic wrap directly onto the surface (to prevent ice crystals).
- Cover with a lid and freeze for at least 4 hours, or until firm and scoopable.
Notes
Estimated Nutritional Value (Per Serving):
- Calories: ~320
- Total Fat: 24g
- Saturated Fat: 14g
- Cholesterol: 175mg
- Sodium: 45mg
- Carbohydrates: 22g
- Sugars: 20g
- Protein: 4g
- Calcium: ~10% DV