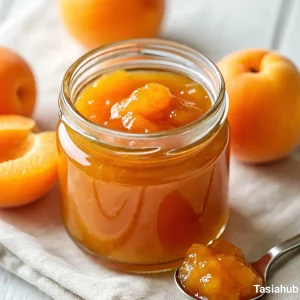
Apricot Jam
If you’ve never made jam before, don’t worry. This apricot jam is a great beginner-friendly recipe — no complicated steps, no fancy equipment.
Equipment
- Sharp knife & cutting board
- Large saucepan or jam pot
- Wooden Spoon or Silicone Spatula
- Ladle
- Sterilized jars with lids
- Jar funnel (optional)
Ingredients
- 2 pounds fresh ripe apricots about 16–18 medium apricots
- 1 ½ cups granulated sugar
- 2 tablespoons lemon juice
- 1 teaspoon lemon zest optional
- ¼ cup water only if needed to help soften fruit
Instructions
Step 1: Prepare the Apricots
- Wash the apricots thoroughly under cool water and pat them dry with a towel.
- Slice each apricot in half, remove the pit, and cut the fruit into quarters (or smaller chunks if you want a smoother jam).
- Pro Tip: If you want a smoother texture, you can lightly mash the apricot pieces with a fork or potato masher before cooking.
Step 2: Combine Ingredients in the Pot
- Place the chopped apricots into your large saucepan or jam pot.
- Add the granulated sugar, lemon juice, and lemon zest (if using).
- Stir everything together gently to coat the apricots.
- Pro Tip: Let the mixture sit for about 15–30 minutes before cooking. This helps draw out the fruit's natural juices and jumpstarts the jam process.
Step 3: Cook the Jam
- Set the pot over medium heat and bring the mixture to a gentle simmer.
- Stir frequently to prevent sticking or burning — the sugar will begin to dissolve and the apricots will soften.
- As it simmers, use the back of your spoon or spatula to break down larger fruit chunks if you prefer a smoother consistency.
- Pro Tip: Keep a close eye once it starts bubbling — jam can easily scorch at the bottom if the heat is too high.
Step 4: Reduce and Thicken
- Continue cooking for 20–30 minutes, stirring often.
- You’ll notice the mixture start to thicken and take on a glossy, jam-like texture.
- To test doneness: place a small spoonful on a cold plate, let it sit for 30 seconds, then drag your finger through it. If it wrinkles slightly or holds the line, it’s ready.
- Pro Tip: If your jam still seems thin after 30 minutes, keep cooking in 5-minute increments. It will also thicken a bit more as it cools.
Step 5: Fill the Jars
- Carefully ladle the hot jam into your sterilized jars, leaving about ¼ inch of space at the top.
- Wipe the rims clean with a damp cloth, then seal tightly with lids.
- Pro Tip: Use a jar funnel for cleaner filling and to avoid touching the rim — it helps maintain a better seal.
Step 6: Let It Cool & Store
- Let the jars cool at room temperature. You should hear a little "pop" sound if you're using lids that seal with heat.
- Once cooled, store your jam in the fridge for up to 3 weeks, or process the jars in a water bath if you want to keep them shelf-stable for longer.
- Pro Tip: Label your jars with the date — it’s easy to forget when you made them, especially if you start gifting them to friends!
Notes
Nutritional Value Per 1 Tablespoon
- Calories: 40 kcal
- Carbohydrates: 10g
- Sugar: 9g
- Fiber: 0.3g
- Fat: 0g
- Protein: 0.1g
- Vitamin C: ~2% DV
- Potassium: ~2% DV