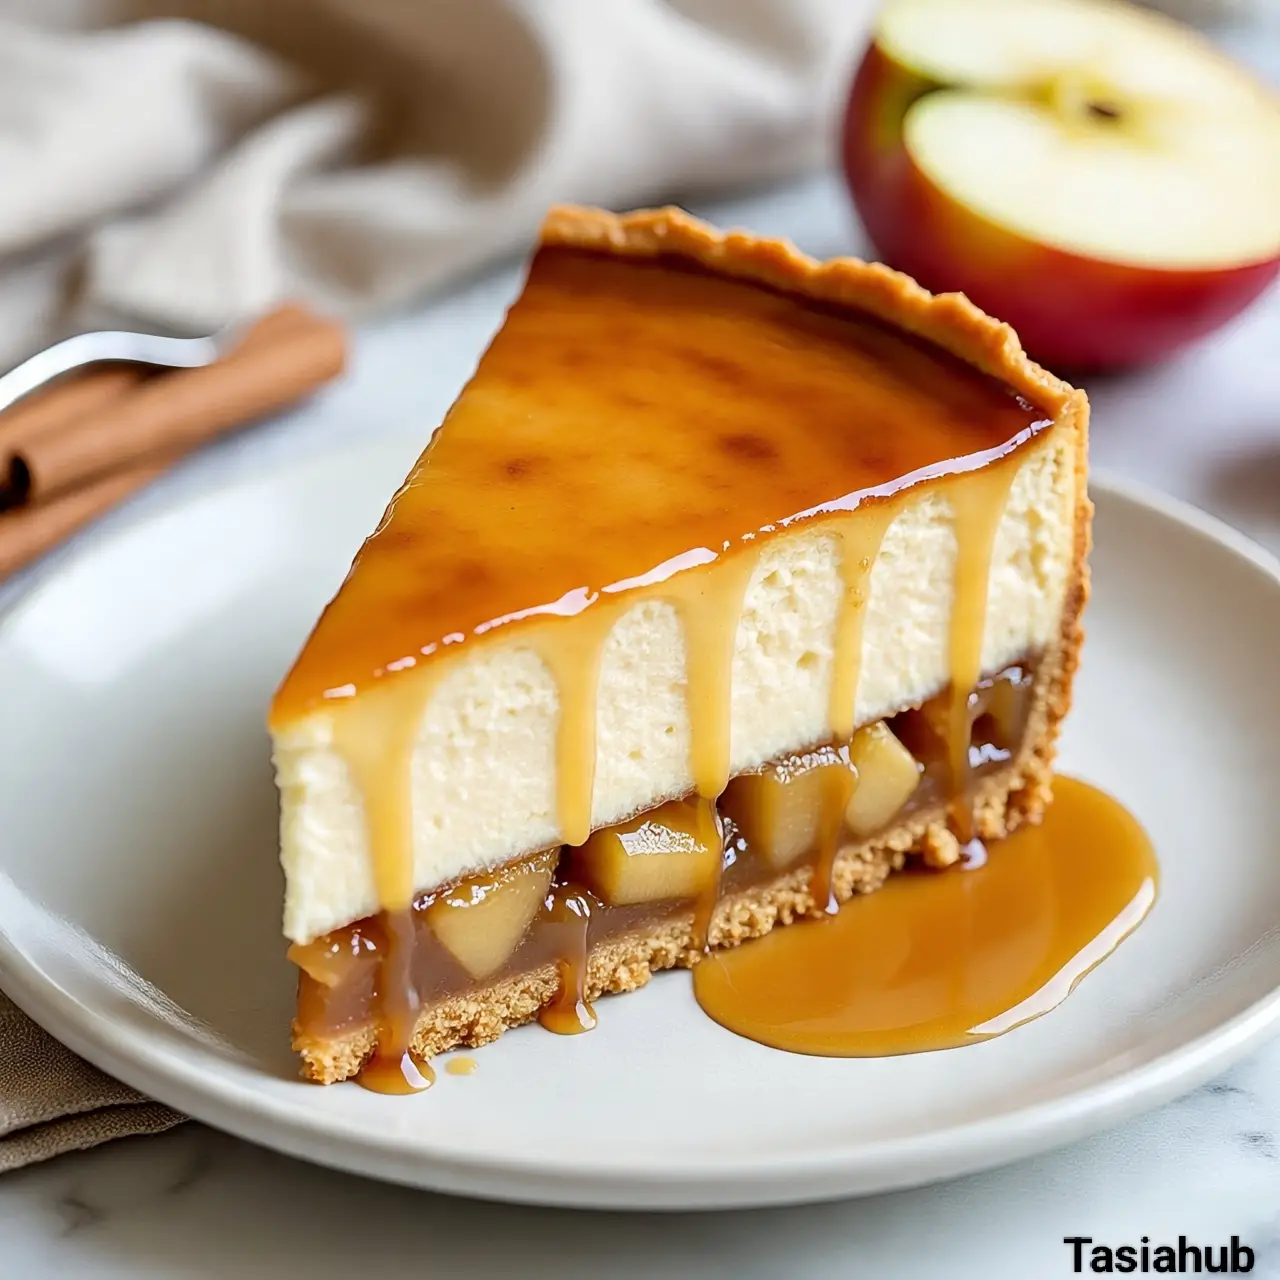
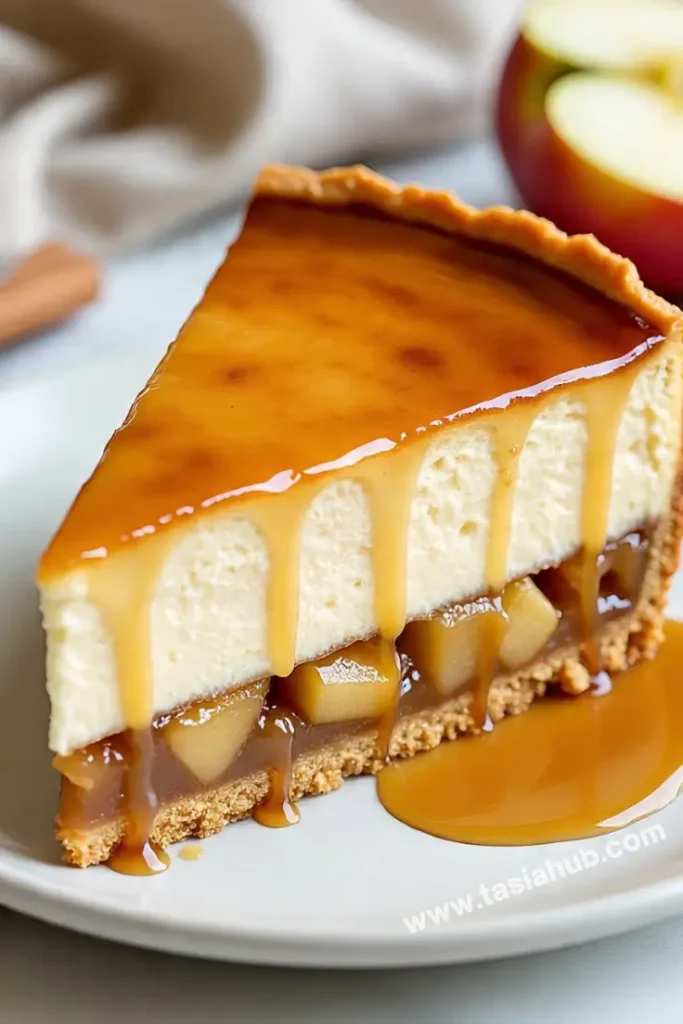
Salted Caramel Apple Pie Cheesecake
Let’s talk about a dessert that combines three incredible treats in one: salted caramel, apple pie, and cheesecake. If that sounds a little over-the-top, that’s because it is—in the absolute best way. This Salted Caramel Apple Pie Cheesecake is rich, creamy, sweet, and salty with a buttery crust, spiced apple filling, smooth cheesecake layer, and a glossy drizzle of homemade salted caramel on top. It’s the kind of dessert that turns heads at any gathering and has people sneaking back for seconds (or thirds) when they think no one’s looking.
This isn’t your average cheesecake—it’s a dessert mash-up that feels like fall comfort food with a hint of elegance. Picture this: a cinnamon-graham cracker crust as the base, then a layer of apple pie filling spiced just right with cinnamon and nutmeg. On top of that, a thick, velvety cheesecake layer that bakes up perfectly creamy. And as if that’s not enough, once it’s cooled and chilled, the whole thing gets drenched in a shiny layer of salted caramel and finished with a sprinkle of flaky sea salt. It’s indulgent without being too fussy.
What makes this recipe so special is how each layer complements the others. The apples add texture and warmth, the cheesecake brings that signature tangy richness, and the salted caramel ties it all together with that perfect sweet-salty balance. You’re not just making a dessert—you’re creating a full experience in every bite. It’s a pie, a cheesecake, and a caramel dream all in one.
Whether you’re prepping for a holiday, celebrating a birthday, or just want a dessert that feels a little extra (in the best way), this Salted Caramel Apple Pie Cheesecake is a serious showstopper. And even though it might look like something from a bakery window, I promise it’s totally doable at home—with simple ingredients, step-by-step layering, and a little patience for chilling time. Let’s dive in and make some dessert magic.
Why You’ll Love It
- Triple dessert combo: You’re getting the best of all worlds—cheesecake, apple pie, and salted caramel—in one unforgettable dessert. It’s rich, flavorful, and incredibly satisfying.
- Perfect balance of flavors: The sweetness of the apples and caramel is beautifully balanced by the tangy cheesecake and a touch of sea salt. Every bite hits that sweet-salty-spiced note just right.
- Texture heaven: Creamy cheesecake, tender spiced apples, buttery crust, and sticky caramel—this dessert has layers of texture that make it extra special.
- Great for any occasion: Whether it’s a holiday dinner, a potluck, or just a weekend treat, this cheesecake is guaranteed to impress without needing fancy techniques.
- Make-ahead friendly: It needs to chill before serving, which makes it perfect for prepping a day in advance and having one less thing to worry about when hosting.
Ingredient List
For the Crust
- 1 ½ cups graham cracker crumbs
- ¼ cup granulated sugar
- ½ teaspoon ground cinnamon
- 6 tablespoons unsalted butter, melted
For the Apple Pie Filling
- 3 medium apples, peeled and diced
- 2 tablespoons unsalted butter
- 2 tablespoons brown sugar
- 1 teaspoon ground cinnamon
- ¼ teaspoon ground nutmeg
- 1 teaspoon cornstarch
- 1 tablespoon water
For the Cheesecake Layer
- 3 (8 oz) blocks cream cheese, softened
- 1 cup granulated sugar
- 3 large eggs
- 1 teaspoon vanilla extract
- ½ cup sour cream
For the Salted Caramel Topping
- 1 cup granulated sugar
- 6 tablespoons unsalted butter, cubed
- ½ cup heavy cream
- 1 teaspoon sea salt (adjust to taste)
Ingredient Notes
- Graham cracker crumbs: I usually go with honey graham crackers and pulse them in a food processor—way more flavorful than store-bought crumbs.
- Apples: Go for firm, tart apples like Granny Smith or Honeycrisp—they hold their shape and give a nice contrast to the sweet cheesecake.
- Cornstarch: Helps thicken the apple mixture so it doesn’t get watery inside the cheesecake.
- Cream cheese: Use full-fat, brick-style cream cheese. The whipped tub versions won’t give you the same creamy, stable texture.
- Sour cream: Adds a slight tang and smooths out the cheesecake batter. Don’t skip it—it really balances the richness.
- Caramel: Homemade is worth it here! It’s buttery, smooth, and the salt cuts through all the sweetness beautifully. You can adjust the salt to your taste.
Kitchen Equipment Needed
- 9-inch springform pan – Essential for easy cheesecake release without damaging the sides. I swear by the non-stick ones with tight seals to avoid leaks.
- Mixing bowls – You’ll need a few for prepping each layer separately. I like using glass bowls so I can keep an eye on textures.
- Electric hand mixer or stand mixer – For beating the cheesecake filling until smooth and creamy without lumps.
- Medium saucepan – Perfect for cooking the apple pie filling and later making the caramel sauce.
- Rubber spatula – Great for scraping every bit of batter and smoothing out layers evenly.
- Aluminum foil – Wrapping the bottom of your springform pan helps prevent water from seeping in during the water bath.
- Roasting pan (for water bath) – Creates a moist baking environment that helps the cheesecake bake evenly and prevents cracks.
- Wire cooling rack – Helps the cheesecake cool gradually before chilling.
- Sharp knife – Makes clean slices through all the layers once it’s fully set. I run mine under hot water for neat cuts!
Instructions
Step 1: Prepare the Crust
- Preheat your oven to 325°F (163°C).
- In a medium bowl, combine the graham cracker crumbs, sugar, and cinnamon. Stir in the melted butter until the mixture resembles wet sand.
- Press the mixture firmly into the bottom of a 9-inch springform pan. Use the bottom of a measuring cup or glass to press it down evenly and tightly.
Pro Tip: Bake the crust for 8–10 minutes before adding the filling. This gives it a head start and helps prevent sogginess later. Let it cool while you prep the apples.
Step 2: Make the Apple Pie Filling
- In a medium saucepan, melt the butter over medium heat.
- Add the diced apples, brown sugar, cinnamon, and nutmeg. Cook for 5–7 minutes, stirring occasionally, until the apples start to soften.
- In a small bowl, mix the cornstarch and water until smooth, then stir it into the apple mixture.
- Cook for another 2–3 minutes until the filling thickens slightly. Remove from heat and let it cool to room temperature.
Pro Tip: Don’t overcook the apples—you want them tender but not mushy, so they hold their texture after baking.
Step 3: Make the Cheesecake Filling
- In a large mixing bowl, beat the softened cream cheese on medium speed until smooth and creamy (about 2 minutes).
- Add the granulated sugar and beat until well combined and fluffy.
- Add eggs one at a time, mixing just until combined after each addition.
- Mix in the vanilla extract and sour cream. Scrape down the sides of the bowl to make sure everything is well incorporated.
Pro Tip: Don’t overmix once the eggs are in—overmixing can introduce air bubbles, which cause cracks during baking.
Step 4: Assemble the Cheesecake
- Spread the cooked apple pie filling evenly over the pre-baked crust.
- Pour the cheesecake filling over the apples and gently smooth the top with a spatula.
- Tap the pan gently on the counter to release any trapped air bubbles.
Step 5: Bake the Cheesecake
- Wrap the outside of your springform pan with two layers of aluminum foil to prevent leaks.
- Place the wrapped pan in a large roasting pan and pour hot water into the roasting pan until it reaches halfway up the sides of the springform.
- Carefully transfer to the oven and bake for 60–70 minutes, or until the edges are set but the center still has a slight jiggle.
Pro Tip: Avoid opening the oven door during baking! It can drop the temperature and cause the cheesecake to crack.
Step 6: Cool and Chill
- Turn off the oven and crack the door slightly. Let the cheesecake sit inside for 1 hour to cool gradually.
- Remove from the water bath and foil, then place the pan on a wire rack to cool completely at room temperature.
- Once fully cooled, cover and refrigerate for at least 6 hours (preferably overnight) to set.
Pro Tip: Don’t rush the chilling time—letting it set overnight gives the best texture and flavor.
Step 7: Make the Salted Caramel
- In a clean, dry saucepan, heat the sugar over medium heat. Stir constantly with a heat-safe spatula or whisk. The sugar will clump, then melt into a deep amber liquid.
- Once fully melted, carefully stir in the butter—it will bubble up quickly, so be cautious.
- Slowly pour in the heavy cream while stirring. Let the mixture boil for 1 minute, then remove from heat.
- Stir in the sea salt. Let the caramel cool for 15–20 minutes before using.
Pro Tip: Whisk continuously while making caramel to prevent burning or separation. Keep a close eye—it can go from golden to burnt fast!
Step 8: Finish and Serve
- Once the cheesecake is fully chilled, run a thin knife around the edges and release it from the springform pan.
- Pour the cooled salted caramel over the top, letting some drip down the sides for that gorgeous “bakery-style” look.
- Sprinkle a little extra flaky sea salt on top for a fancy finish.
- Slice and serve chilled or slightly room temp—up to you!

Tips and Tricks for Success
- Use room temperature ingredients: Let your cream cheese, eggs, and sour cream sit out before mixing. This helps everything blend smoothly and prevents lumps.
- Double-wrap the pan: Even if your springform pan says it’s leakproof, wrapping it with foil keeps your cheesecake safe during the water bath.
- Don’t skip the water bath: It may seem extra, but it creates a gentle, steamy baking environment that helps the cheesecake bake evenly and without cracks.
- Cool gradually: Sudden temperature changes can cause cracks, so let the cheesecake cool slowly in the oven before transferring to the fridge.
- Wipe the knife between slices: For picture-perfect slices, dip your knife in hot water and wipe it clean between each cut.
Ingredient Substitutions and Variations
- Crust alternative: Swap graham crackers for crushed digestive biscuits, Biscoff cookies, or even crushed vanilla wafers for a different twist.
- Apple options: Use your favorite baking apples—Granny Smith for tartness, Honeycrisp for sweetness, or a combo for balance.
- Flavor twist: Add a splash of bourbon or apple brandy to the apple filling or caramel for a richer flavor profile.
- Nutty topping: Sprinkle chopped pecans or walnuts over the caramel for extra crunch and a nutty finish.
- Shortcut caramel: If you’re short on time, use a high-quality store-bought caramel sauce—just warm it slightly before pouring.
Serving Suggestions
- Serve chilled with extra caramel drizzle: A little warmed-up caramel on the side takes each slice to the next level—great for guests who want more of that gooey topping.
- Add a dollop of whipped cream: A swirl of lightly sweetened whipped cream adds an airy contrast to the dense, creamy cheesecake.
- Top with vanilla ice cream: Especially if you’re serving this at room temp—cold, melty vanilla ice cream over salted caramel? Absolute magic.
- Garnish with apple slices or pecans: Thinly sliced fresh apples or toasted nuts make it feel extra fancy, especially for dinner parties or holiday tables.
- My go-to: I love serving this cheesecake with a mug of chai or a cinnamon-spiced latte—it’s warm, cozy, and balances the sweetness beautifully.
Storage and Reheating Instructions
- Store in the fridge: Keep leftover cheesecake covered in the fridge for up to 5 days. A cake carrier or loosely wrapped plastic wrap over the springform base works great.
- Freeze for later: To freeze, wrap slices (or the whole cheesecake) tightly in plastic wrap, then foil. Freeze for up to 2 months. Thaw overnight in the fridge.
- Reheat caramel only: If the caramel topping firms up in the fridge, microwave it in 10-second bursts or warm it on the stovetop before serving.
- Avoid microwaving slices: It can mess with the texture. Let slices sit at room temperature for 20–30 minutes if you prefer a softer bite.
Frequently Asked Questions
Can I make this cheesecake ahead of time?
Absolutely! This dessert is perfect for making ahead. I recommend baking it the day before and letting it chill overnight. Just add the caramel topping before serving for the freshest look.
What kind of apples work best?
Go for firm, tart apples like Granny Smith—they hold up well during baking and balance out the sweetness. Honeycrisp or Fuji work too if you prefer something a bit sweeter.
Do I have to use a water bath?
Technically, no—but it really helps. The water bath ensures even baking and prevents cracks. If you skip it, keep an eye on your oven and cool the cheesecake slowly to reduce cracking risk.
Can I use store-bought caramel sauce?
Yes! If you’re short on time, a high-quality store-bought salted caramel sauce works just fine. Warm it slightly before drizzling so it flows nicely over the cheesecake.
How do I know when the cheesecake is done?
The edges should be set, but the center should still jiggle slightly when you gently shake the pan. It’ll finish setting up as it cools and chills.
What if my cheesecake cracks?
Don’t worry! The salted caramel covers everything beautifully. Even if it’s not picture-perfect underneath, no one will know once that glossy layer goes on.
Did you try this recipe? Let me know in the comments how it turned out!
Don’t forget to share your photos on Instagram and tag me @tasiahub_ or use the hashtag #tasiahub. I’d love to see your creations and share your kitchen wins!

Salted Caramel Apple Pie Cheesecake
Equipment
- 9-inch springform pan
- Mixing Bowls
- Electric hand mixer or stand mixer
- Medium saucepan
- Rubber spatula
- Aluminum Foil
- Roasting pan (for water bath)
- Wire Cooling Rack
- Sharp Knife
Ingredients
For the Crust
- 1 ½ cups graham cracker crumbs
- ¼ cup granulated sugar
- ½ teaspoon ground cinnamon
- 6 tablespoons unsalted butter melted
For the Apple Pie Filling
- 3 medium apples peeled and diced
- 2 tablespoons unsalted butter
- 2 tablespoons brown sugar
- 1 teaspoon ground cinnamon
- ¼ teaspoon ground nutmeg
- 1 teaspoon cornstarch
- 1 tablespoon water
For the Cheesecake Layer
- 3 8 oz blocks cream cheese, softened
- 1 cup granulated sugar
- 3 large eggs
- 1 teaspoon vanilla extract
- ½ cup sour cream
For the Salted Caramel Topping
- 1 cup granulated sugar
- 6 tablespoons unsalted butter cubed
- ½ cup heavy cream
- 1 teaspoon sea salt adjust to taste
Instructions
Step 1: Prepare the Crust
- Preheat your oven to 325°F (163°C).
- In a medium bowl, combine the graham cracker crumbs, sugar, and cinnamon. Stir in the melted butter until the mixture resembles wet sand.
- Press the mixture firmly into the bottom of a 9-inch springform pan. Use the bottom of a measuring cup or glass to press it down evenly and tightly.
- Pro Tip: Bake the crust for 8–10 minutes before adding the filling. This gives it a head start and helps prevent sogginess later. Let it cool while you prep the apples.
Step 2: Make the Apple Pie Filling
- In a medium saucepan, melt the butter over medium heat.
- Add the diced apples, brown sugar, cinnamon, and nutmeg. Cook for 5–7 minutes, stirring occasionally, until the apples start to soften.
- In a small bowl, mix the cornstarch and water until smooth, then stir it into the apple mixture.
- Cook for another 2–3 minutes until the filling thickens slightly. Remove from heat and let it cool to room temperature.
- Pro Tip: Don’t overcook the apples—you want them tender but not mushy, so they hold their texture after baking.
Step 3: Make the Cheesecake Filling
- In a large mixing bowl, beat the softened cream cheese on medium speed until smooth and creamy (about 2 minutes).
- Add the granulated sugar and beat until well combined and fluffy.
- Add eggs one at a time, mixing just until combined after each addition.
- Mix in the vanilla extract and sour cream. Scrape down the sides of the bowl to make sure everything is well incorporated.
- Pro Tip: Don’t overmix once the eggs are in—overmixing can introduce air bubbles, which cause cracks during baking.
Step 4: Assemble the Cheesecake
- Spread the cooked apple pie filling evenly over the pre-baked crust.
- Pour the cheesecake filling over the apples and gently smooth the top with a spatula.
- Tap the pan gently on the counter to release any trapped air bubbles.
Step 5: Bake the Cheesecake
- Wrap the outside of your springform pan with two layers of aluminum foil to prevent leaks.
- Place the wrapped pan in a large roasting pan and pour hot water into the roasting pan until it reaches halfway up the sides of the springform.
- Carefully transfer to the oven and bake for 60–70 minutes, or until the edges are set but the center still has a slight jiggle.
- Pro Tip: Avoid opening the oven door during baking! It can drop the temperature and cause the cheesecake to crack.
Step 6: Cool and Chill
- Turn off the oven and crack the door slightly. Let the cheesecake sit inside for 1 hour to cool gradually.
- Remove from the water bath and foil, then place the pan on a wire rack to cool completely at room temperature.
- Once fully cooled, cover and refrigerate for at least 6 hours (preferably overnight) to set.
- Pro Tip: Don’t rush the chilling time—letting it set overnight gives the best texture and flavor.
Step 7: Make the Salted Caramel
- In a clean, dry saucepan, heat the sugar over medium heat. Stir constantly with a heat-safe spatula or whisk. The sugar will clump, then melt into a deep amber liquid.
- Once fully melted, carefully stir in the butter—it will bubble up quickly, so be cautious.
- Slowly pour in the heavy cream while stirring. Let the mixture boil for 1 minute, then remove from heat.
- Stir in the sea salt. Let the caramel cool for 15–20 minutes before using.
- Pro Tip: Whisk continuously while making caramel to prevent burning or separation. Keep a close eye—it can go from golden to burnt fast!
Step 8: Finish and Serve
- Once the cheesecake is fully chilled, run a thin knife around the edges and release it from the springform pan.
- Pour the cooled salted caramel over the top, letting some drip down the sides for that gorgeous “bakery-style” look.
- Sprinkle a little extra flaky sea salt on top for a fancy finish.
- Slice and serve chilled or slightly room temp—up to you!
Notes
Estimated Nutritional Value (Per Slice)
- Calories: ~520
- Fat: 33g
- Saturated Fat: 19g
- Carbohydrates: 50g
- Sugar: 38g
- Protein: 6g
- Fiber: 1g
- Sodium: 320mg