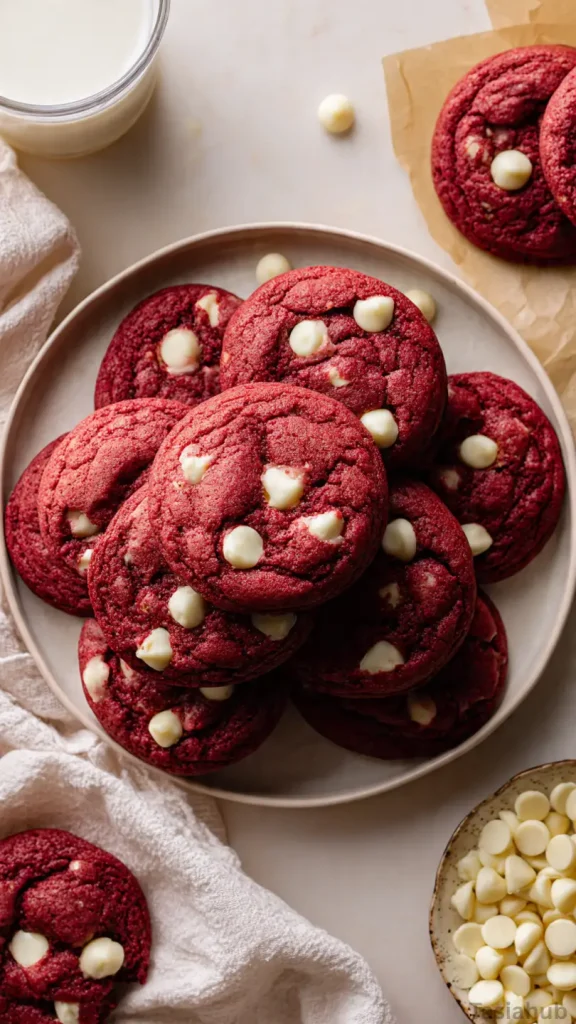
Red Velvet White Chocolate Chip Cookies

Red velvet cookies are a treat that manages to feel both classic and a little indulgent at the same time. Soft, chewy, and rich with that signature cocoa flavor, these cookies get a lovely pop of sweetness from white chocolate chips that melt in every bite. They’re perfect for sharing during the holidays or just keeping a batch on hand for when a cozy snack is needed.
Making red velvet cookies from scratch is easier than it seems. With just a handful of ingredients, you can mix up a batch that tastes like it came from a bakery but is entirely homemade. The process is simple, and the payoff is well worth it — soft centers, slightly crisp edges, and that irresistible hint of cocoa and vanilla that makes red velvet so beloved.
What makes this red velvet cookies recipe even better is how adaptable it is. You can add festive touches like sprinkles for Christmas cookies, drizzle them with white chocolate, or sandwich them with a cream cheese filling. They’re a hit with kids and adults alike, and they hold up beautifully if you want to bake ahead for holiday gatherings.
I love whipping up a batch of easy red velvet cookies on a quiet evening and pairing them with a warm mug of cocoa. The smell of baking cookies filling the kitchen is pure comfort, and watching the white chocolate chips melt slightly on the warm cookies is a little moment of joy that always makes me smile. Whether you’re baking for the holidays or simply because it’s Tuesday, these cookies never disappoint.
Why You’ll Love It
- Soft, Chewy, and Irresistible – Each bite melts in your mouth, with a perfect balance between tender centers and slightly crisp edges. You’ll find it hard to stop at just one.
- Festive and Fun – The bright red color paired with white chocolate chips makes these cookies perfect for Christmas cookies, holiday parties, or even a cheerful snack any time of year.
- Easy to Make from Scratch – This red velvet cookies recipe keeps things simple, so even beginners can bake like pros without feeling overwhelmed.
- Customizable for Every Occasion – Add sprinkles, drizzle chocolate, or sandwich them with cream cheese frosting for a special twist. These cookies can be as simple or as fancy as you like.
- Perfect for Gifting or Sharing – They look beautiful on a cookie platter, in a gift box, or simply stacked on your kitchen counter for friends and family to enjoy.
Ingredient List
For the Cookies
- 2 ½ cups all-purpose flour
- 2 tablespoons unsweetened cocoa powder
- 1 teaspoon baking soda
- ½ teaspoon salt
- 1 cup unsalted butter, softened
- 1 ½ cups granulated sugar
- 1 large egg
- 1 large egg yolk
- 2 teaspoons vanilla extract
- 2 tablespoons red food coloring
- 1 cup white chocolate chips
Ingredient Notes
- I always use Duncan Hines red food coloring for that vibrant red without any weird aftertaste—it really makes these cookies pop.
- Don’t skip the cocoa powder! It’s subtle but essential for that classic red velvet flavor.
- White chocolate chips melt beautifully, adding gooey sweetness in every bite—trust me, it’s worth using good-quality chocolate.
- Use room temperature butter for a soft, chewy texture; cold butter will make the cookies denser.
- Vanilla extract isn’t optional here! It layers in that warm, comforting flavor that makes these cookies unforgettable.
Kitchen Equipment Needed
- Mixing bowls – For combining dry and wet ingredients separately. I love using glass bowls because they’re easy to see and clean.
- Electric mixer or hand mixer – Makes creaming butter and sugar effortless; I always reach for my stand mixer for a smooth, fluffy batter.
- Measuring cups and spoons – Accurate measurements make all the difference for consistent cookies.
- Rubber spatula – Perfect for folding in white chocolate chips without breaking them.
- Baking sheets – I prefer heavy-duty, nonstick sheets so cookies bake evenly without sticking.
- Parchment paper or silicone baking mat – Prevents sticking and makes cleanup a breeze.
- Cooling rack – Lets cookies cool evenly and keeps edges from getting soggy.
Instructions
1. Preheat and Prep
- Preheat your oven to 350°F (175°C).
- Line two baking sheets with parchment paper or a silicone baking mat.
- This prevents sticking and ensures your cookies bake evenly.
2. Mix Dry Ingredients
- In a medium bowl, whisk together:
- 2 ½ cups all-purpose flour
- 2 tablespoons cocoa powder
- 1 teaspoon baking soda
- ½ teaspoon salt
- Pro Tip: Whisk continuously to break up any lumps in the cocoa powder—it ensures smooth, evenly flavored cookies.
3. Cream Butter and Sugar
- In a large bowl, use a mixer to cream together:
- 1 cup softened unsalted butter
- 1 ½ cups granulated sugar
- Beat for 2–3 minutes until light and fluffy.
- Add:
- 1 large egg
- 1 large egg yolk
- 2 teaspoons vanilla extract
- Mix until fully incorporated.
4. Add Red Food Coloring
- Slowly mix in 2 tablespoons red food coloring until the dough is evenly colored.
- The batter will look vibrant and slightly glossy.
- Pro Tip: Start with half the food coloring and add more as needed—you can always adjust for your preferred shade.
5. Combine Wet and Dry Ingredients
- Gradually add the dry ingredient mixture to the wet ingredients.
- Mix on low speed until just combined. Avoid overmixing to keep cookies soft and tender.
6. Fold in White Chocolate Chips
- Use a rubber spatula to gently fold in 1 cup white chocolate chips.
- Make sure they’re evenly distributed without smashing them into the dough.
7. Scoop the Cookies
- Use a cookie scoop or tablespoon to portion dough onto the prepared baking sheets.
- Leave 2 inches between each cookie to allow for spreading.
8. Bake
- Bake for 10–12 minutes, or until edges are set but centers are still soft.
- Rotate baking sheets halfway through for even baking.
- Pro Tip: Don’t overbake! Cookies continue to set as they cool and stay soft and chewy.
9. Cool and Enjoy
- Let cookies cool on the baking sheet for 5 minutes, then transfer to a cooling rack.
- Enjoy warm, or store in an airtight container for up to a week.
Tips and Tricks for Success
- Use room temperature butter and eggs – This ensures the dough mixes evenly and produces soft, chewy cookies.
- Don’t overmix the dough – Overmixing can make cookies tough instead of tender. Fold ingredients gently.
- Chill the dough (optional) – For thicker cookies, refrigerate the dough for 30 minutes before baking.
- Check cookies early – Baking times can vary by oven; start checking at 10 minutes to avoid overbaking.
- Rotate baking sheets – Ensures cookies bake evenly if your oven has hot spots.
Ingredient Substitutions and Variations
- Butter substitute: Use margarine or coconut oil for a dairy-free option.
- Flour alternative: Swap all-purpose flour with gluten-free flour for gluten-free red velvet cookies.
- Sweetener swap: Replace granulated sugar with coconut sugar for a slightly caramel-like flavor.
- Chocolate chips: Try dark chocolate or milk chocolate chips instead of white chocolate for a different twist.
- Festive twist: Add holiday sprinkles or crushed candy canes to make them extra special for Christmas cookies.
Serving Suggestions
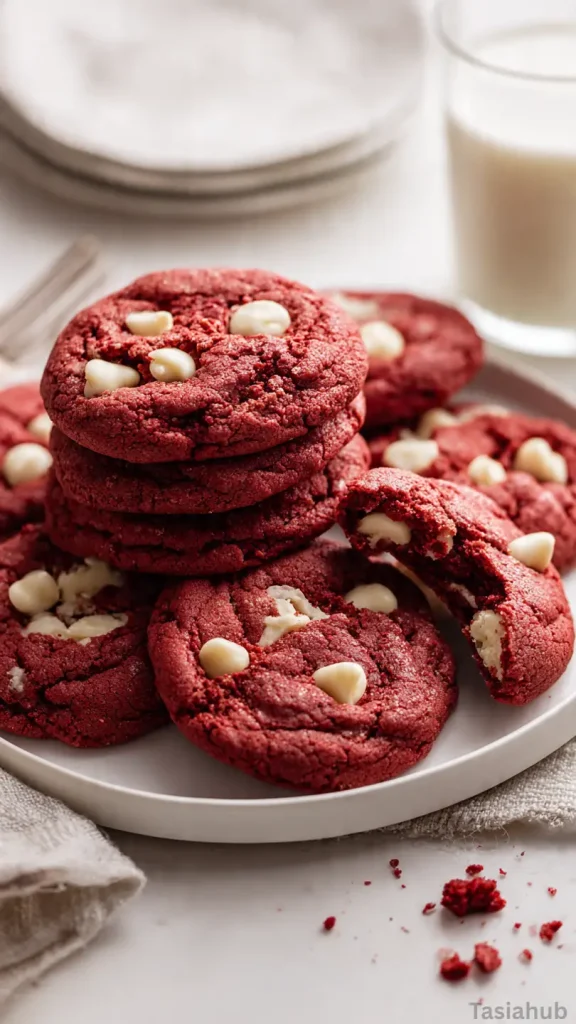
- I love enjoying a warm red velvet white chocolate chip cookie with a glass of cold milk—it’s the ultimate cozy treat.
- Serve them as a festive platter for Christmas cookies at holiday parties; they always disappear fast!
- Pair with vanilla ice cream for a quick and indulgent dessert sandwich.
- Include them in a cookie gift box for friends and family—they’re colorful, soft, and irresistible.
- Crumble a cookie over whipped cream-topped hot cocoa for a fun, chocolatey twist.
Storage and Reheating Instructions
- Room temperature: Store cookies in an airtight container for up to 5 days.
- Freezer: Freeze baked cookies for up to 3 months; thaw at room temperature before serving.
- Dough storage: You can freeze unbaked cookie dough for up to 2 months; scoop and bake straight from the freezer, adding a few extra minutes to the baking time.
- Reheating: Warm cookies in the microwave for 10–15 seconds or in a preheated oven at 300°F for 5 minutes for that fresh-baked feel.
- Tips: Always store cookies separate from other strong-smelling foods to keep the flavors pure and vibrant.
Frequently Asked Questions
Can I make these cookies gluten-free?
Yes! Simply swap the all-purpose flour for a gluten-free flour blend. The texture may be slightly different, but they’ll still be soft and delicious.
Can I use milk chocolate instead of white chocolate?
Absolutely! Milk or dark chocolate chips work well and give a slightly richer flavor.
How do I get thicker cookies?
Chill the dough in the fridge for 30–60 minutes before baking. This helps prevent spreading and gives you a thicker, chewier cookie.
Can I make the dough ahead of time?
Yes, you can prepare the dough and refrigerate or freeze it. Just scoop and bake when ready—add a couple of extra minutes to the baking time if baking from frozen.
Why are my cookies flat?
Flat cookies can happen if the butter is too soft or if the dough is overmixed. Use room temperature butter and fold ingredients gently to keep them tender and chewy.
Can I add festive toppings?
Definitely! Sprinkles, crushed candy canes, or a drizzle of melted chocolate make these perfect for Christmas cookies or special occasions.
Did you try this recipe? Let me know in the comments how it turned out!
Red Velvet White Chocolate Chip Cookies
Equipment
- Mixing Bowls
- Electric mixer or hand mixer
- Measuring cups and spoons
- Rubber spatula
- Baking sheets
- Parchment paper or silicone baking mat
- Cooling Rack
Ingredients
- 2 ½ cups all-purpose flour
- 2 tablespoons unsweetened cocoa powder
- 1 teaspoon baking soda
- ½ teaspoon salt
- 1 cup unsalted butter softened
- 1 ½ cups granulated sugar
- 1 large egg
- 1 large egg yolk
- 2 teaspoons vanilla extract
- 2 tablespoons red food coloring
- 1 cup white chocolate chips
Instructions
Preheat and Prep
- Preheat your oven to 350°F (175°C).
- Line two baking sheets with parchment paper or a silicone baking mat.
- This prevents sticking and ensures your cookies bake evenly.
Mix Dry Ingredients
- In a medium bowl, whisk together:
- 2 ½ cups all-purpose flour
- 2 tablespoons cocoa powder
- 1 teaspoon baking soda
- ½ teaspoon salt
- Pro Tip: Whisk continuously to break up any lumps in the cocoa powder—it ensures smooth, evenly flavored cookies.
Cream Butter and Sugar
- In a large bowl, use a mixer to cream together:
- 1 cup softened unsalted butter
- 1 ½ cups granulated sugar
- Beat for 2–3 minutes until light and fluffy.
Add:
- 1 large egg
- 1 large egg yolk
- 2 teaspoons vanilla extract
- Mix until fully incorporated.
Add Red Food Coloring
- Slowly mix in 2 tablespoons red food coloring until the dough is evenly colored.
- The batter will look vibrant and slightly glossy.
- Pro Tip: Start with half the food coloring and add more as needed—you can always adjust for your preferred shade.
Combine Wet and Dry Ingredients
- Gradually add the dry ingredient mixture to the wet ingredients.
- Mix on low speed until just combined. Avoid overmixing to keep cookies soft and tender.
Fold in White Chocolate Chips
- Use a rubber spatula to gently fold in 1 cup white chocolate chips.
- Make sure they’re evenly distributed without smashing them into the dough.
Scoop the Cookies
- Use a cookie scoop or tablespoon to portion dough onto the prepared baking sheets.
- Leave 2 inches between each cookie to allow for spreading.
Bake
- Bake for 10–12 minutes, or until edges are set but centers are still soft.
- Rotate baking sheets halfway through for even baking.
- Pro Tip: Don’t overbake! Cookies continue to set as they cool and stay soft and chewy.
Cool and Enjoy
- Let cookies cool on the baking sheet for 5 minutes, then transfer to a cooling rack.
- Enjoy warm, or store in an airtight container for up to a week.
Notes
Nutritional Value (Per cookie, approximate)
- Calories: 210
- Total Fat: 10g
- Saturated Fat: 6g
- Cholesterol: 35mg
- Sodium: 110mg
- Carbohydrates: 28g
- Fiber: 1g
- Sugars: 18g
- Protein: 2g