Red Velvet Oreo Cookies
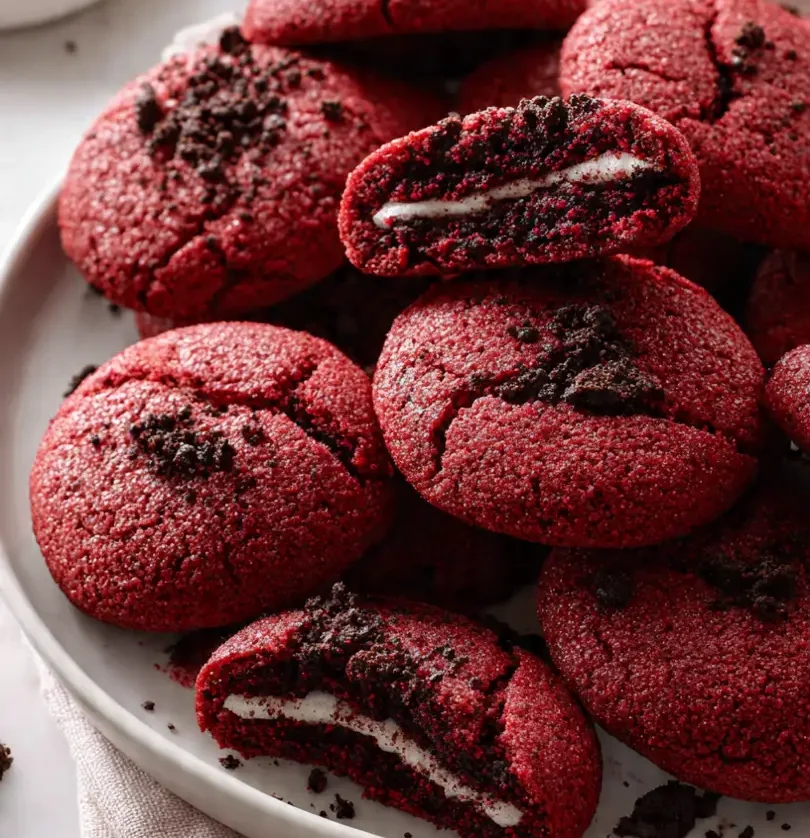
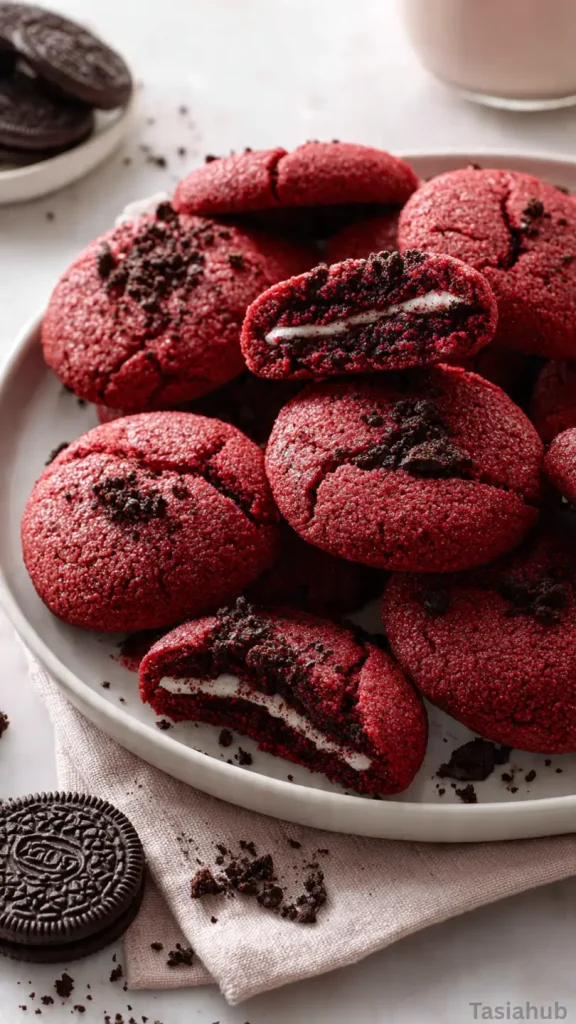
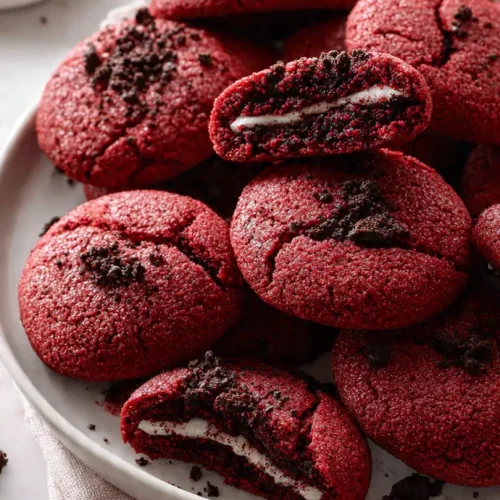
Red velvet and Oreo fans, unite! These Red Velvet Oreo Cookies are the ultimate treat for anyone who loves the perfect balance of soft, sweet, and chocolatey. The rich, velvety red dough hugs a classic Oreo center, creating a cookie that’s as fun to look at as it is to eat. They’re the kind of Christmas cookies that instantly bring smiles to the table.
Making these cookies is surprisingly simple. With a few basic ingredients and a little time, you can whip up a batch that feels both decadent and homemade. One bite reveals a soft, chewy red velvet exterior with the iconic crunch of an Oreo tucked inside—a combination that’s impossible to resist.
Even if you’ve never baked red velvet cookies before, this recipe walks you through it step by step. From creaming the butter to folding in the cocoa and red food coloring, you’ll see how easy red velvet cookies can be to make. And the best part? You don’t need any fancy equipment, just a mixer, a baking sheet, and a little patience.
These cookies are perfect for holiday baking because they’re festive, eye-catching, and absolutely shareable. Whether you’re making a batch for a Christmas cookie swap, gifting to friends, or keeping them all for yourself (no judgment!), they’re guaranteed to impress. Plus, learning how to make red velvet cookies like these will give you a go-to recipe for any season, not just the holidays.
Why You’ll Love It
- Perfectly chewy with a chocolatey twist – Each bite gives you the soft, velvety texture of red velvet with the satisfying crunch of an Oreo center. It’s a cookie experience in every bite.
- Festive and fun – The vibrant red color makes these cookies ideal for Christmas cookies trays, holiday parties, or even just a cheerful weeknight treat.
- Simple to make – You don’t need to be a seasoned baker. This recipe shows how to make red velvet cookies easily, with straightforward steps that anyone can follow.
- Crowd-pleasing flavor combo – Who doesn’t love red velvet and Oreos together? It’s a sweet, slightly chocolatey pairing that always impresses friends and family.
- Great for gifting – Wrapped up in a festive box or bag, these cookies make a thoughtful and delicious homemade gift for coworkers, neighbors, or loved ones.
Ingredient List
For the Red Velvet Cookie Dough
- 1 cup (230g) unsalted butter, softened
- 1 ½ cups (300g) granulated sugar
- 2 large eggs
- 2 teaspoons vanilla extract
- 2 ½ cups (315g) all-purpose flour
- 2 tablespoons unsweetened cocoa powder
- 1 teaspoon baking soda
- ½ teaspoon salt
- 2 tablespoons red food coloring
For the Filling
- 12–15 Oreo cookies (or your favorite sandwich cookies)
Ingredient Notes
- I always use Duncan Hines red food coloring—it gives the brightest, most vibrant red without affecting the flavor.
- Don’t skip the unsweetened cocoa powder! It adds just the right hint of chocolate that makes red velvet cookies taste authentic.
- Butter should be softened, not melted—this keeps the cookies perfectly soft and chewy.
- Oreos: Classic flavor works best here; double-stuffed is fun if you want an extra creamy center.
- Vanilla extract really enhances the sweetness and richness—don’t skip it, it makes a big difference!
Kitchen Equipment Needed
- Mixing bowls – For combining dry and wet ingredients; I love using glass bowls so you can see everything clearly.
- Electric mixer or stand mixer – Makes creaming butter and sugar a breeze; my hand mixer works perfectly for small batches.
- Measuring cups and spoons – Accurate measurements make all the difference in baking.
- Spatula – For folding ingredients gently; I always reach for my silicone spatula.
- Baking sheets – For evenly baked cookies; I prefer nonstick ones so cookies slide right off.
- Parchment paper or silicone baking mat – Prevents sticking and makes cleanup easy.
- Cooling rack – Essential for letting cookies cool completely without getting soggy.
Instructions
1. Preheat and Prep
- Preheat your oven to 350°F (175°C).
- Line two baking sheets with parchment paper or silicone baking mats.
- Pro tip: Make sure your oven is fully preheated before baking—this helps cookies bake evenly and hold their shape.
2. Cream Butter and Sugar
- In a large mixing bowl, combine the softened butter and granulated sugar.
- Beat with an electric mixer on medium speed for 2–3 minutes until light and fluffy.
- Pro tip: Scrape down the sides of the bowl halfway through to ensure everything is evenly mixed.
3. Add Eggs, Vanilla, and Food Coloring
- Beat in the eggs, one at a time, until fully incorporated.
- Add the vanilla extract and red food coloring, mixing until the dough is smooth and evenly colored.
- Pro tip: Use gel food coloring for a vibrant red without altering the cookie’s texture.
4. Mix Dry Ingredients
- In a separate bowl, whisk together flour, cocoa powder, baking soda, and salt.
- Gradually add the dry mixture to the wet ingredients, mixing on low speed until just combined.
- Pro tip: Avoid overmixing here; overworked dough can make cookies dense.
5. Assemble Cookies with Oreos
- Scoop about 2 tablespoons of red velvet dough and flatten slightly in your hand.
- Place an Oreo in the center and wrap the dough around it, sealing completely.
- Place each cookie on the prepared baking sheet, leaving 2 inches between cookies for spreading.
- Pro tip: If the dough sticks to your hands, lightly flour them to make rolling easier.
6. Bake and Cool
- Bake in the preheated oven for 12–14 minutes, or until the edges are set but the center is still soft.
- Allow cookies to cool on the baking sheet for 5 minutes before transferring to a cooling rack.
- Pro tip: Don’t overbake—these cookies stay soft and chewy as they cool.

Tips and Tricks for Success
- Chill the dough for 15–20 minutes if it feels too soft—this helps the cookies hold their shape around the Oreo.
- Use room temperature eggs and butter for a smoother, more consistent dough.
- Rotate your baking sheet halfway through baking for even cooking.
- Don’t overfill the cookie dough around the Oreo; a thin, even layer bakes best.
- Let cookies cool completely before storing to maintain their soft, chewy texture.
Ingredient Substitutions and Variations
- Swap all-purpose flour for a 1:1 gluten-free flour blend for a gluten-free version.
- Use chocolate sandwich cookies instead of Oreos for a slightly different flavor.
- Replace unsalted butter with coconut oil for a subtle, unique twist.
- Add white chocolate chips or crushed candy canes to the dough for extra festive flair.
- For a richer red velvet flavor, replace 1 tablespoon of cocoa powder with melted chocolate.
Serving Suggestions
- I love serving these Red Velvet Oreo Cookies with a cold glass of milk—it’s the ultimate classic combo that never fails.
- Pair them with hot cocoa or coffee during a cozy winter afternoon; the warmth complements the chewy cookies perfectly.
- Arrange them on a festive holiday cookie platter for Christmas cookies swaps—they always disappear first!
- Wrap a few in a cute holiday bag and give them as gifts; they’re a sweet way to share the joy.
- Crumble one over a scoop of vanilla ice cream for an indulgent dessert twist that’s sure to impress.
Storage and Reheating Instructions
- Room temperature: Store in an airtight container for up to 5 days.
- Freezer: Place in a freezer-safe bag or container for up to 3 months; thaw at room temperature before serving.
- Reheating: Warm in the microwave for 10–15 seconds to bring back soft, chewy perfection.
- Avoid overstacking: Keep cookies in a single layer or with parchment paper in between to prevent sticking.
- Transporting: For gifting, line a tin or box with wax paper to keep cookies intact and fresh.
Frequently Asked Questions
Can I use double-stuffed Oreos?
Absolutely! Double-stuffed Oreos make the cookie extra creamy, but you may need a slightly larger dough portion to wrap around them completely.
Can I make these cookies ahead of time?
Yes! You can assemble the cookies and refrigerate them for up to 24 hours before baking. This also helps maintain their shape while baking.
Can I freeze the cookie dough?
Definitely. Roll the dough around Oreos and freeze on a baking sheet for 1–2 hours, then transfer to a freezer-safe bag. Bake directly from frozen, adding 1–2 extra minutes to the baking time.
Can I use a different food coloring?
Yes, gel or liquid food coloring works fine. I recommend gel for the brightest red without affecting the dough texture.
How do I keep the cookies soft and chewy?
Avoid overbaking and allow the cookies to cool slightly on the baking sheet before moving them to a cooling rack. Store in an airtight container for maximum softness.
Can I make these cookies gluten-free?
Yes! Substitute the all-purpose flour with a 1:1 gluten-free flour blend. The texture will be slightly different but still delicious.
Did you try this recipe? Let me know in the comments how it turned out!
Red Velvet Oreo Cookies
Equipment
- Mixing Bowls
- Electric mixer or stand mixer
- Measuring cups and spoons
- Spatula
- Baking sheets
- Parchment paper or silicone baking mat
- Cooling Rack
Ingredients
For the Red Velvet Cookie Dough
- 1 cup 230g unsalted butter, softened
- 1 ½ cups 300g granulated sugar
- 2 large eggs
- 2 teaspoons vanilla extract
- 2 ½ cups 315g all-purpose flour
- 2 tablespoons unsweetened cocoa powder
- 1 teaspoon baking soda
- ½ teaspoon salt
- 2 tablespoons red food coloring
For the Filling
- 12 –15 Oreo cookies or your favorite sandwich cookies
Instructions
Preheat and Prep
- Preheat your oven to 350°F (175°C).
- Line two baking sheets with parchment paper or silicone baking mats.
- Pro tip: Make sure your oven is fully preheated before baking—this helps cookies bake evenly and hold their shape.
Cream Butter and Sugar
- In a large mixing bowl, combine the softened butter and granulated sugar.
- Beat with an electric mixer on medium speed for 2–3 minutes until light and fluffy.
- Pro tip: Scrape down the sides of the bowl halfway through to ensure everything is evenly mixed.
Add Eggs, Vanilla, and Food Coloring
- Beat in the eggs, one at a time, until fully incorporated.
- Add the vanilla extract and red food coloring, mixing until the dough is smooth and evenly colored.
- Pro tip: Use gel food coloring for a vibrant red without altering the cookie’s texture.
Mix Dry Ingredients
- In a separate bowl, whisk together flour, cocoa powder, baking soda, and salt.
- Gradually add the dry mixture to the wet ingredients, mixing on low speed until just combined.
- Pro tip: Avoid overmixing here; overworked dough can make cookies dense.
Assemble Cookies with Oreos
- Scoop about 2 tablespoons of red velvet dough and flatten slightly in your hand.
- Place an Oreo in the center and wrap the dough around it, sealing completely.
- Place each cookie on the prepared baking sheet, leaving 2 inches between cookies for spreading.
- Pro tip: If the dough sticks to your hands, lightly flour them to make rolling easier.
Bake and Cool
- Bake in the preheated oven for 12–14 minutes, or until the edges are set but the center is still soft.
- Allow cookies to cool on the baking sheet for 5 minutes before transferring to a cooling rack.
- Pro tip: Don’t overbake—these cookies stay soft and chewy as they cool.
Notes
Nutritional Value (Per Cookie – Approximate)
- Calories: 280
- Carbohydrates: 36g
- Protein: 3g
- Fat: 14g
- Saturated Fat: 8g
- Cholesterol: 55mg
- Sodium: 210mg
- Sugar: 23g
- Fiber: 1g