Red Velvet Cookies with Cream Cheese Filling
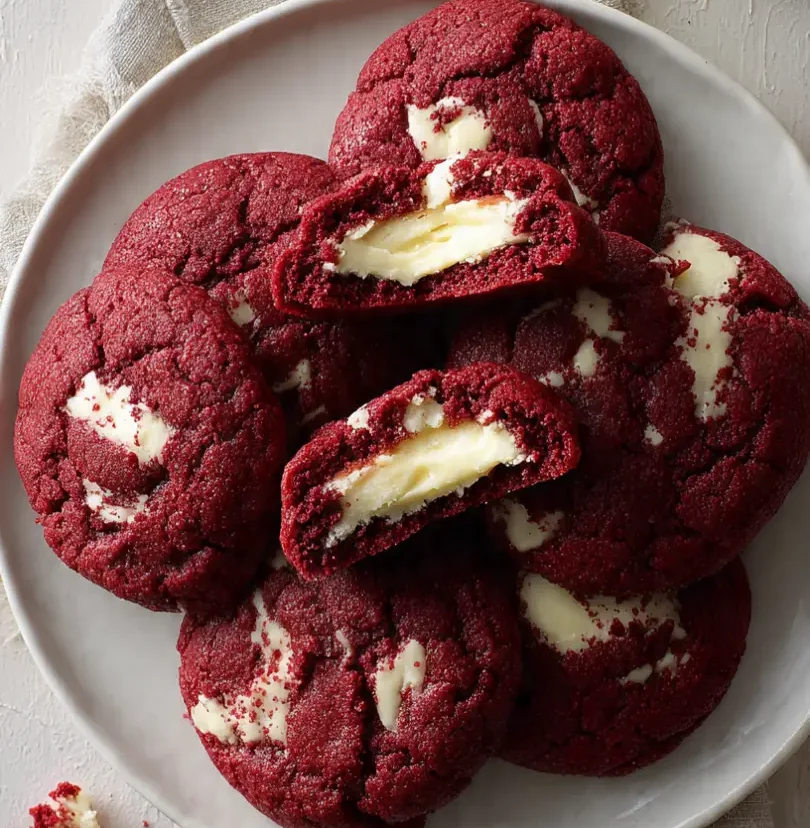
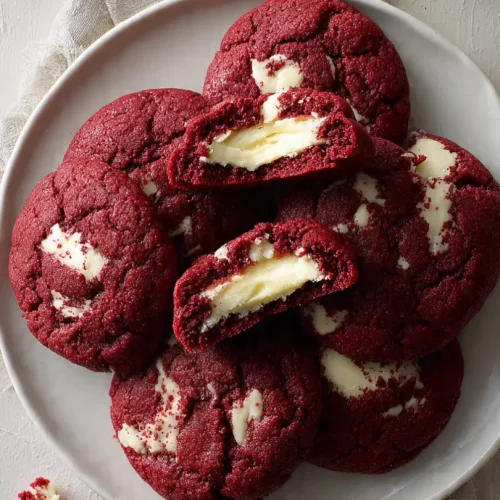
If you’re a fan of red velvet desserts, then you’re in for a real treat! These red velvet cookies with cream cheese filling are everything you love about classic red velvet cake, but in a fun, handheld cookie form. Imagine biting into a soft, chewy red velvet cookie that oozes sweet, tangy cream cheese with every bite—it’s pure indulgence.
What makes these cookies extra special is the luscious cream cheese center. Unlike traditional cookies that are just soft or chewy on the outside, these cookies have a little surprise waiting in the middle. The combination of the rich, cocoa-infused red dough and the smooth cream cheese filling makes every bite utterly irresistible. Whether you’re serving them at a holiday party or just treating yourself, they’re sure to disappear fast.
These cookies are surprisingly easy to make, even if you’re not a seasoned baker. This red velvet cookies recipe is perfect for cozy afternoons when you want to bake something festive but don’t want a complicated project. You can whip up the dough in no time, and once baked, you’ll have a batch of soft red velvet cookies that are perfect for sharing—or not!
They’re also incredibly versatile. Think about making them for Christmas cookies or Valentine’s day cookies—they’re festive, colorful, and packed with flavor. The bright red dough and creamy filling make them a showstopper for any occasion, and the chewy texture ensures they’ll be a favorite among kids and adults alike.
Why You’ll Love It
- Decadent Cream Cheese Surprise: Each bite hides a creamy, tangy center that perfectly balances the sweetness of the red velvet dough—like a mini dessert inside a dessert.
- Soft and Chewy Texture: These cookies are perfectly soft with just the right chewiness, giving you that melt-in-your-mouth experience you can’t get from ordinary cookies.
- Perfect for Any Occasion: From Christmas cookies to Valentine’s day cookies, these treats are festive, vibrant, and guaranteed to impress friends and family.
- Easy to Make at Home: Even if you’re new to baking, this red velvet cookies recipe is straightforward and beginner-friendly, so you can enjoy homemade treats without stress.
- A Crowd-Pleaser: With rich cocoa flavor, sweet red velvet dough, and creamy filling, these cookies are a surefire hit for kids, adults, and anyone with a sweet tooth.
Ingredients
For the Red Velvet Cookies:
- 1 ½ cups all-purpose flour
- 2 tablespoons cocoa powder
- ½ teaspoon baking soda
- ¼ teaspoon salt
- ½ cup unsalted butter, softened
- ¾ cup granulated sugar
- 1 large egg
- 1 teaspoon vanilla extract
- 1 teaspoon red food coloring
For the Cream Cheese Filling:
- 4 oz cream cheese, softened
- 2 tablespoons powdered sugar
- ½ teaspoon vanilla extract
Ingredient Notes
- I always use Duncan Hines cocoa powder for a rich chocolatey flavor—it really makes the red velvet taste pop.
- Don’t skip the red food coloring! It’s what gives these cookies that iconic red velvet charm.
- Cream cheese should be softened to room temperature; it spreads easily and keeps the filling smooth.
- Use unsalted butter so you can control the sweetness perfectly.
- Quick tip: mix the powdered sugar gradually into the cream cheese so it doesn’t get grainy—it keeps the filling silky smooth.
Kitchen Equipment Needed
- Mixing Bowls: For combining your dough and cream cheese filling—I love using glass bowls because they’re easy to see into.
- Electric Mixer or Hand Mixer: Makes creaming butter and sugar effortless—my go-to for smooth dough.
- Measuring Cups & Spoons: For accurate measurements; baking is all about precision!
- Baking Sheet: To bake the cookies evenly; I always line mine with parchment paper for easy cleanup.
- Parchment Paper or Silicone Baking Mat: Prevents sticking and helps cookies bake evenly.
- Spatula: For folding ingredients gently without deflating the dough.
- Spoon or Cookie Scoop: Perfect for portioning dough consistently—I swear by a medium cookie scoop for uniform cookies.
- Cooling Rack: So your cookies cool perfectly and stay soft instead of getting soggy.
Instructions
Step 1: Prepare Your Ingredients
- Take the butter and cream cheese out of the fridge to soften—they should be room temperature for the best texture.
- Measure out all your dry ingredients: flour, cocoa powder, baking soda, and salt.
- Preheat your oven to 350°F (175°C) and line a baking sheet with parchment paper or a silicone baking mat.
Pro Tip: Softened butter is key for soft red velvet cookies. If it’s too cold, your cookies will be dense.
Step 2: Make the Cream Cheese Filling
- In a small bowl, combine the softened cream cheese, powdered sugar, and vanilla extract.
- Use a hand mixer or spoon to mix until smooth and creamy.
- Set aside in the fridge while you prepare the cookie dough.
Pro Tip: Make sure the cream cheese is fully softened to avoid lumps in the filling.
Step 3: Mix the Dry Ingredients
- In a medium bowl, sift together the flour, cocoa powder, baking soda, and salt.
- Stir gently to combine evenly.
Step 4: Cream the Butter and Sugar
- In a large bowl, beat the softened butter and granulated sugar together until light and fluffy (about 2–3 minutes).
- Add the egg, vanilla extract, and red food coloring. Mix until fully combined.
Pro Tip: Scrape down the sides of the bowl to make sure all the butter and sugar are fully incorporated.
Step 5: Combine Wet and Dry Ingredients
- Gradually add the dry ingredients to the wet mixture, mixing on low speed or folding gently with a spatula.
- Stop as soon as the flour is incorporated—overmixing can make the cookies tough.
Step 6: Assemble the Cookies
- Scoop about 1 tablespoon of dough and flatten slightly in your hand.
- Place about ½ teaspoon of cream cheese filling in the center.
- Cover the filling with another small piece of dough or fold the dough around it, sealing the edges.
- Roll gently into a ball and place on the prepared baking sheet, leaving about 2 inches between cookies.
Pro Tip: Make sure the cream cheese is completely enclosed in the dough to prevent it from leaking during baking.
Step 7: Bake the Cookies
- Bake in the preheated oven for 10–12 minutes, until the edges are set but the center is still soft.
- Remove from oven and let the cookies sit on the baking sheet for 5 minutes before transferring to a cooling rack.
Pro Tip: The cookies will continue to firm up as they cool, so don’t overbake.
Tips and Tricks for Success
- Don’t overmix the dough: Gently fold in the dry ingredients to keep the cookies soft and tender.
- Use room temperature butter and cream cheese: Ensures smooth, creamy dough and filling.
- Chill the filling if needed: Keeps it from melting too quickly while baking.
- Even cookie sizes: Use a cookie scoop for uniform baking and consistent cream cheese filling.
- Watch the baking time: Soft red velvet cookies can go from perfect to overbaked in a minute—take them out when edges are set but centers are slightly soft.
- Let cookies rest before moving: Cooling on the sheet for a few minutes prevents them from breaking apart.
Ingredient Substitutions and Variations
- Butter: Can substitute with margarine or coconut oil, but the flavor may be slightly different.
- Cream Cheese: For a lighter option, try mascarpone or ricotta cheese.
- Red Food Coloring: Beet juice powder or natural red dye works if you prefer natural coloring.
- Sugar: Brown sugar can be used for a richer, caramel-like flavor.
- Flour: Gluten-free all-purpose flour works for a gluten-free version.
- Add-ins: Mini chocolate chips or white chocolate chunks make these cookies extra indulgent.
- Flavor Twist: Add a teaspoon of espresso powder to the dough to enhance the cocoa flavor.
Serving Suggestions
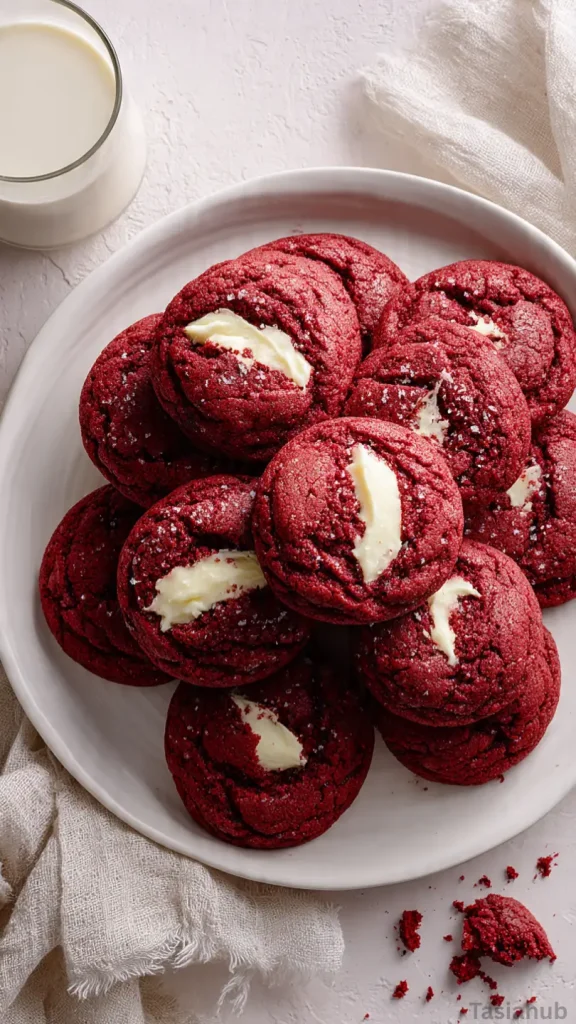
- I love enjoying these cookies warm with a glass of cold milk—it’s the ultimate cozy treat!
- They make a perfect addition to a holiday dessert platter, paired with Christmas cookies of other flavors.
- For Valentine’s day cookies, serve them with a drizzle of chocolate or a few fresh berries for an extra-special touch.
- Sandwich a few together with extra cream cheese filling for an indulgent red velvet cookie sandwich.
- They’re also amazing slightly chilled, straight from the fridge, with a cup of coffee or hot cocoa.

Storage and Reheating Instructions
- Room Temperature: Store cookies in an airtight container for up to 3 days.
- Refrigerator: Keep in an airtight container for up to 1 week; filling stays creamier when chilled.
- Freezer: Freeze unbaked cookie balls for up to 2 months; bake directly from frozen with an extra 1–2 minutes.
- Reheating: Warm baked cookies in the microwave for 10–15 seconds for that just-out-of-the-oven feel.
- Tip: Let refrigerated or frozen cookies come to room temperature for a few minutes before serving for the best texture.
Frequently Asked Questions
Can I make these cookies ahead of time?
Absolutely! You can prepare the cookie dough and cream cheese filling in advance. Store them in the fridge for up to 2 days before baking.
Can I use a different type of filling?
Yes! Nutella, peanut butter, or even a flavored cream cheese work beautifully if you want to switch things up.
Why are my cookies spreading too much?
This usually happens if the butter is too soft or the dough is overmixed. Chill the dough for 10–15 minutes before baking to help maintain their shape.
Can I make these gluten-free?
Definitely! Swap the all-purpose flour for a gluten-free blend. The texture will stay soft and chewy.
How do I get that perfect chewy texture?
The key is not to overbake. Take the cookies out when the edges are set but the centers are still slightly soft—they’ll firm up as they cool.
Can I freeze these cookies?
Yes! You can freeze either unbaked cookie balls or fully baked cookies. Bake straight from frozen with a minute or two extra if needed.
Did you try this recipe? Let me know in the comments how it turned out—I love hearing about your cookie adventures!
Red Velvet Cookies with Cream Cheese Filling
Equipment
- Mixing Bowls
- Electric mixer or hand mixer
- Measuring Cups & Spoons
- Baking Sheet
- Parchment paper or silicone baking mat
- Spatula
- Spoon or cookie scoop
- Cooling Rack
Ingredients
For the Red Velvet Cookies:
- 1 ½ cups all-purpose flour
- 2 tablespoons cocoa powder
- ½ teaspoon baking soda
- ¼ teaspoon salt
- ½ cup unsalted butter softened
- ¾ cup granulated sugar
- 1 large egg
- 1 teaspoon vanilla extract
- 1 teaspoon red food coloring
For the Cream Cheese Filling:
- 4 oz cream cheese softened
- 2 tablespoons powdered sugar
- ½ teaspoon vanilla extract
Instructions
Step 1: Prepare Your Ingredients
- Take the butter and cream cheese out of the fridge to soften—they should be room temperature for the best texture.
- Measure out all your dry ingredients: flour, cocoa powder, baking soda, and salt.
- Preheat your oven to 350°F (175°C) and line a baking sheet with parchment paper or a silicone baking mat.
- Pro Tip: Softened butter is key for soft red velvet cookies. If it’s too cold, your cookies will be dense.
Step 2: Make the Cream Cheese Filling
- In a small bowl, combine the softened cream cheese, powdered sugar, and vanilla extract.
- Use a hand mixer or spoon to mix until smooth and creamy.
- Set aside in the fridge while you prepare the cookie dough.
- Pro Tip: Make sure the cream cheese is fully softened to avoid lumps in the filling.
Step 3: Mix the Dry Ingredients
- In a medium bowl, sift together the flour, cocoa powder, baking soda, and salt.
- Stir gently to combine evenly.
Step 4: Cream the Butter and Sugar
- In a large bowl, beat the softened butter and granulated sugar together until light and fluffy (about 2–3 minutes).
- Add the egg, vanilla extract, and red food coloring. Mix until fully combined.
- Pro Tip: Scrape down the sides of the bowl to make sure all the butter and sugar are fully incorporated.
Step 5: Combine Wet and Dry Ingredients
- Gradually add the dry ingredients to the wet mixture, mixing on low speed or folding gently with a spatula.
- Stop as soon as the flour is incorporated—overmixing can make the cookies tough.
Step 6: Assemble the Cookies
- Scoop about 1 tablespoon of dough and flatten slightly in your hand.
- Place about ½ teaspoon of cream cheese filling in the center.
- Cover the filling with another small piece of dough or fold the dough around it, sealing the edges.
- Roll gently into a ball and place on the prepared baking sheet, leaving about 2 inches between cookies.
- Pro Tip: Make sure the cream cheese is completely enclosed in the dough to prevent it from leaking during baking.
Step 7: Bake the Cookies
- Bake in the preheated oven for 10–12 minutes, until the edges are set but the center is still soft.
- Remove from oven and let the cookies sit on the baking sheet for 5 minutes before transferring to a cooling rack.
- Pro Tip: The cookies will continue to firm up as they cool, so don’t overbake.
Notes
Nutritional Value (per cookie, approximate):
- Calories: 180–200 kcal
- Fat: 9–10 g
- Saturated Fat: 5–6 g
- Carbohydrates: 24–26 g
- Sugars: 14–16 g
- Protein: 2–3 g
- Fiber: 1 g
- Sodium: 110–130 mg