Red Velvet Cheesecake Cookies
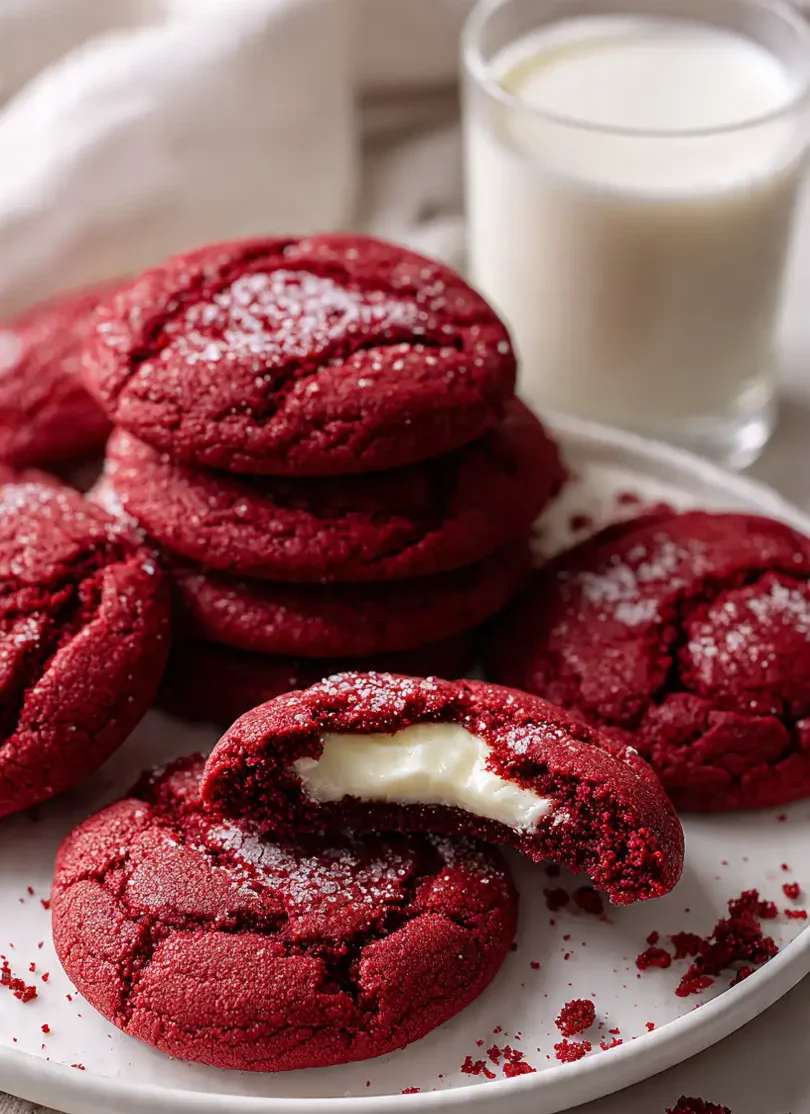
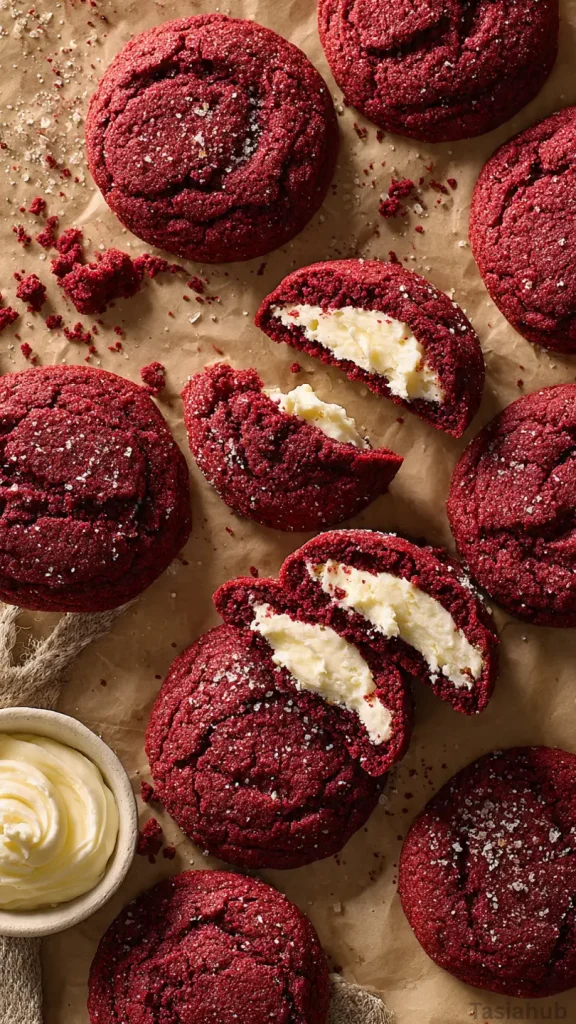
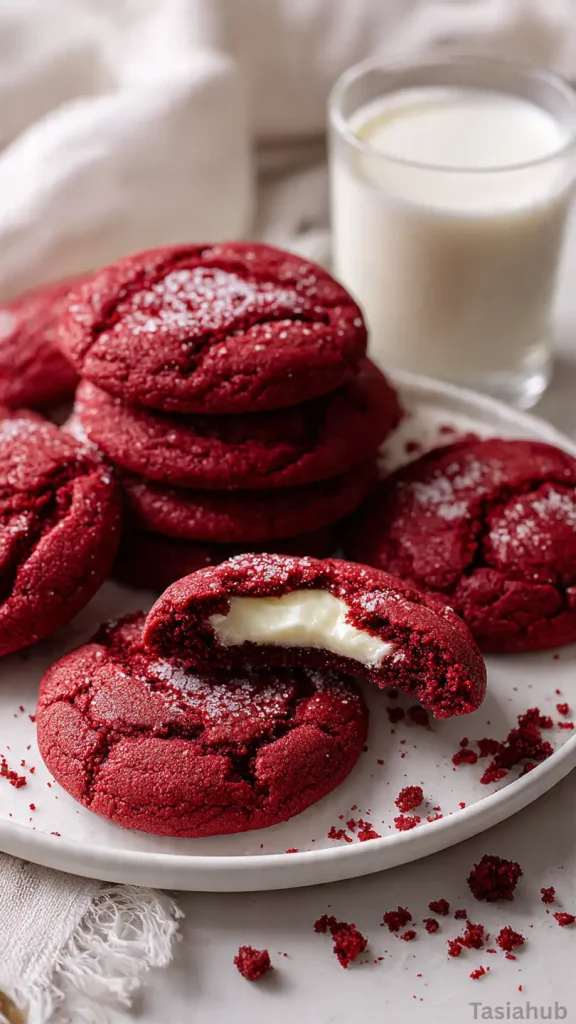
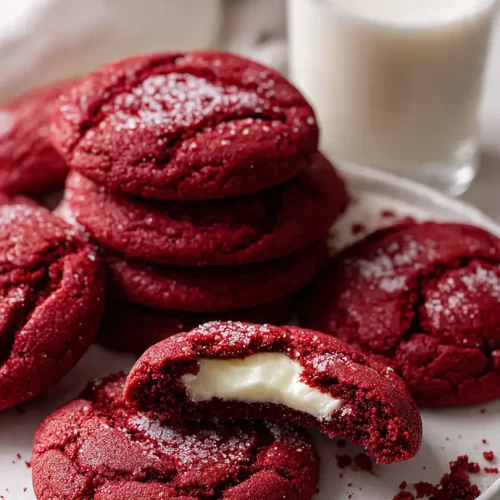
The first bite of a red velvet cheesecake cookie is pure magic—the soft, velvety texture of a classic red velvet cookie paired with the creamy, slightly tangy surprise of cheesecake in the center. These cookies are a delightful twist on traditional red velvet desserts, perfect for special occasions or even an everyday sweet treat. I love how the rich red color pops against the creamy cheesecake filling, making them as beautiful as they are delicious.
What I really enjoy about this red velvet cookie recipe is how approachable it is. Even if you haven’t tackled filled cookies before, this version is simple and straightforward. The cookie dough is soft and buttery, blending the classic cocoa-tinged flavor of red velvet with just the right amount of sweetness. And the cheesecake center? It bakes up to a creamy, melt-in-your-mouth surprise that perfectly complements the cookies.
These cookies are also a fun choice for holiday baking. Around Christmas, I like to pop a batch into the oven, letting the warm, chocolatey aroma fill the kitchen while the red velvet cookies bake to perfection. They’re festive, eye-catching, and guaranteed to impress at any holiday gathering. Whether you’re giving them as gifts or serving them on a cookie platter, these cookies bring a little extra joy to the season.
Even outside of the holidays, these red velvet cheesecake cookies are a treat worth making. They’re great for sharing with friends, enjoying with a cup of coffee, or sneaking a few straight from the oven (no judgment here!). The combination of soft cookie and creamy filling is irresistible, and once you make them, they’re bound to become a favorite in your red velvet desserts collection.
Why You’ll Love It
- Creamy Surprise in Every Bite – Each cookie hides a soft cheesecake center that melts in your mouth, giving the classic red velvet cookie a decadent twist.
- Perfectly Soft and Chewy – The cookie dough bakes up soft, tender, and slightly chewy, making each bite comforting and satisfying without being overly sweet.
- Festive and Eye-Catching – With its rich red hue and creamy filling, these cookies instantly brighten up any holiday cookie platter, especially around Christmas.
- Easy to Make at Home – This red velvet cookie recipe is approachable for bakers of all levels, so you can enjoy bakery-style treats without the fuss.
- Versatile Treat for Any Occasion – Whether it’s a holiday party, a birthday, or just a midweek treat, these cookies fit seamlessly into any dessert spread.
Ingredient List
For the Cookies
- 1 cup unsalted butter, softened
- 1 cup granulated sugar
- 1/2 cup brown sugar, packed
- 2 large eggs
- 2 teaspoons vanilla extract
- 2 1/2 cups all-purpose flour
- 2 tablespoons cocoa powder
- 1 teaspoon baking soda
- 1/2 teaspoon salt
- 2 tablespoons red food coloring
For the Cheesecake Filling
- 8 oz cream cheese, softened
- 1/4 cup granulated sugar
- 1 teaspoon vanilla extract
- 1 large egg
Ingredient Notes
- I always use unsalted butter for cookies—it gives me complete control over the sweetness and flavor.
- Brown sugar adds extra chewiness and a subtle caramel note that makes these cookies irresistible.
- Don’t skip the red food coloring! It gives the cookies that iconic red velvet look everyone loves.
- Cream cheese should be softened to room temperature; it makes the filling super creamy and smooth.
- A touch of cocoa powder balances the sweetness and gives the cookies that classic red velvet flavor.
Kitchen Equipment Needed
- Mixing bowls – For combining your cookie dough and cheesecake filling separately. I love using glass bowls so I can see everything clearly.
- Hand mixer or stand mixer – Makes creaming butter and sugar a breeze. My stand mixer saves me so much time.
- Measuring cups and spoons – For precise measurements, especially for baking. I keep a stainless steel set—it lasts forever.
- Spatula – Perfect for scraping down the sides of the bowl and folding in ingredients gently.
- Baking sheets – For evenly baked cookies. I prefer non-stick or lined with parchment paper for easy cleanup.
- Cooling rack – Lets cookies cool without getting soggy on the bottom. I always stack a couple for larger batches.
- Spoon or small cookie scoop – Helps portion cookies evenly and makes filling them with cheesecake simple.
Instructions
Step 1: Prepare the Cheesecake Filling
- In a medium bowl, add the softened cream cheese, granulated sugar, and vanilla extract.
- Beat with a hand mixer or stand mixer until smooth and creamy.
- Add the egg and mix until fully incorporated.
Pro Tip: Make sure your cream cheese is at room temperature; cold cream cheese can create lumps in your filling.
Step 2: Make the Cookie Dough
- In a large bowl, cream together the butter, granulated sugar, and brown sugar until light and fluffy.
- Add the eggs one at a time, mixing well after each addition, then stir in the vanilla extract.
- In a separate bowl, whisk together the flour, cocoa powder, baking soda, and salt.
- Gradually add the dry ingredients to the wet ingredients, mixing until just combined.
- Add the red food coloring and gently fold it in until the dough is evenly colored.
Pro Tip: Don’t overmix once you add the dry ingredients; overmixing can make the cookies tough instead of soft and chewy.
Step 3: Assemble the Cookies
- Preheat your oven to 350°F (175°C) and line a baking sheet with parchment paper.
- Scoop about 1.5 tablespoons of cookie dough and flatten it slightly in your hand.
- Place about 1 teaspoon of cheesecake filling in the center of the dough.
- Take another portion of cookie dough, flatten it, and place it over the filling, sealing the edges around the cheesecake.
- Place the assembled cookies onto the prepared baking sheet, leaving space between them.
Pro Tip: If the edges of the cookie aren’t sealed properly, the cheesecake can leak out during baking, so pinch the dough gently but firmly.
Step 4: Bake the Cookies
- Bake in the preheated oven for 12–15 minutes, until the edges are set but the centers are still soft.
- Let the cookies cool on the baking sheet for 5 minutes before transferring them to a cooling rack.
Pro Tip: Don’t overbake—these cookies are meant to be soft and slightly gooey in the center.
Step 5: Serve and Enjoy
- Once cooled, enjoy the cookies as is, or store them in an airtight container at room temperature for up to 3 days.
- These cookies also freeze beautifully—just wrap them individually for a quick treat anytime.
Tips and Tricks for Success
- Room Temperature Ingredients – Always use room temperature butter and cream cheese; it helps the dough and filling blend smoothly.
- Chill the Dough if Needed – If your kitchen is warm or the dough feels too soft, chill it for 10–15 minutes to make shaping easier.
- Even Cookie Sizes – Use a cookie scoop to portion dough evenly; it helps them bake uniformly.
- Seal the Filling Well – Pinch edges gently but firmly to prevent cheesecake from leaking out during baking.
- Don’t Overbake – Cookies should be soft in the center; they’ll continue to set as they cool.
Ingredient Substitutions and Variations
- Butter: Can swap with salted butter, just reduce added salt slightly.
- Cream Cheese: Neufchâtel cheese works as a lower-fat alternative.
- Flour: Use a 1:1 gluten-free baking flour for a gluten-free version.
- Red Food Coloring: Beet powder or natural red coloring works if you want to avoid artificial colors.
- Cheesecake Filling: Add chocolate chips or a swirl of Nutella for a fun twist.
- Extra Flavor: A teaspoon of espresso powder in the cookie dough enhances the cocoa flavor.
Serving Suggestions
- I love enjoying these red velvet cheesecake cookies with a tall glass of cold milk—it’s the ultimate indulgence!
- Serve them warm right out of the oven with a scoop of vanilla ice cream for a quick dessert that feels fancy.
- These cookies are perfect for holiday cookie platters—pair them with gingerbread or peppermint treats for a festive spread.
- I often pack a couple in a lunchbox with a hot cup of coffee—it makes a mid-morning snack feel special.
- They also make adorable edible gifts—wrap a few in cellophane with a ribbon for friends or neighbors.
Storage and Reheating Instructions
- Room Temperature: Store cookies in an airtight container for up to 3 days.
- Refrigerator: Keep in a sealed container for up to 1 week; cheesecake filling stays fresher.
- Freezer: Wrap cookies individually and store in a freezer-safe bag for up to 3 months.
- Reheating: Warm cookies in the microwave for 10–15 seconds for that just-baked feel.
- Tip: Let frozen cookies thaw at room temperature before reheating to avoid soggy centers.
Frequently Asked Questions
Can I make these cookies ahead of time?
Absolutely! You can assemble them a day in advance and keep them refrigerated until baking. They’ll still taste fresh and delicious.
Can I use a different food coloring?
Yes! You can use natural red coloring or even omit it for a subtle cocoa-colored cookie. The flavor stays just as amazing.
Can I freeze the cookies?
Definitely. Wrap them individually and store in a freezer-safe bag for up to 3 months. Thaw at room temperature before enjoying.
Can I make mini versions?
Yes! Just reduce the cookie dough and cheesecake filling proportionally. Baking time may be slightly shorter, around 10 minutes.
What if the cheesecake filling leaks?
Make sure to seal the cookie edges well. Chilling the dough slightly before baking can also help prevent leaks.
Can I substitute cream cheese with something else?
Neufchâtel cheese is a great lower-fat alternative, but regular cream cheese gives the creamiest, most classic filling.
Did you try this recipe? Let me know in the comments how it turned out! I love hearing your baking wins (and tips) too.
Red Velvet Cheesecake Cookies
Equipment
- Mixing Bowls
- Hand mixer or stand mixer
- Measuring cups and spoons
- Spatula
- Baking sheets
- Cooling Rack
- Spoon or small cookie scoop
Ingredients
For the Cookies
- 1 cup unsalted butter softened
- 1 cup granulated sugar
- 1/2 cup brown sugar packed
- 2 large eggs
- 2 teaspoons vanilla extract
- 2 1/2 cups all-purpose flour
- 2 tablespoons cocoa powder
- 1 teaspoon baking soda
- 1/2 teaspoon salt
- 2 tablespoons red food coloring
For the Cheesecake Filling
- 8 oz cream cheese softened
- 1/4 cup granulated sugar
- 1 teaspoon vanilla extract
- 1 large egg
Instructions
Step 1: Prepare the Cheesecake Filling
- In a medium bowl, add the softened cream cheese, granulated sugar, and vanilla extract.
- Beat with a hand mixer or stand mixer until smooth and creamy.
- Add the egg and mix until fully incorporated.
- Pro Tip: Make sure your cream cheese is at room temperature; cold cream cheese can create lumps in your filling.
Step 2: Make the Cookie Dough
- In a large bowl, cream together the butter, granulated sugar, and brown sugar until light and fluffy.
- Add the eggs one at a time, mixing well after each addition, then stir in the vanilla extract.
- In a separate bowl, whisk together the flour, cocoa powder, baking soda, and salt.
- Gradually add the dry ingredients to the wet ingredients, mixing until just combined.
- Add the red food coloring and gently fold it in until the dough is evenly colored.
- Pro Tip: Don’t overmix once you add the dry ingredients; overmixing can make the cookies tough instead of soft and chewy.
Step 3: Assemble the Cookies
- Preheat your oven to 350°F (175°C) and line a baking sheet with parchment paper.
- Scoop about 1.5 tablespoons of cookie dough and flatten it slightly in your hand.
- Place about 1 teaspoon of cheesecake filling in the center of the dough.
- Take another portion of cookie dough, flatten it, and place it over the filling, sealing the edges around the cheesecake.
- Place the assembled cookies onto the prepared baking sheet, leaving space between them.
- Pro Tip: If the edges of the cookie aren’t sealed properly, the cheesecake can leak out during baking, so pinch the dough gently but firmly.
Step 4: Bake the Cookies
- Bake in the preheated oven for 12–15 minutes, until the edges are set but the centers are still soft.
- Let the cookies cool on the baking sheet for 5 minutes before transferring them to a cooling rack.
- Pro Tip: Don’t overbake—these cookies are meant to be soft and slightly gooey in the center.
Step 5: Serve and Enjoy
- Once cooled, enjoy the cookies as is, or store them in an airtight container at room temperature for up to 3 days.
- These cookies also freeze beautifully—just wrap them individually for a quick treat anytime.
Notes
Nutritional Value (Per Cookie)
- Calories: ~220 kcal
- Carbohydrates: 27g
- Protein: 3g
- Fat: 11g
- Saturated Fat: 6g
- Cholesterol: 45mg
- Sodium: 130mg
- Fiber: 1g
- Sugar: 17g
- Calcium: 30mg