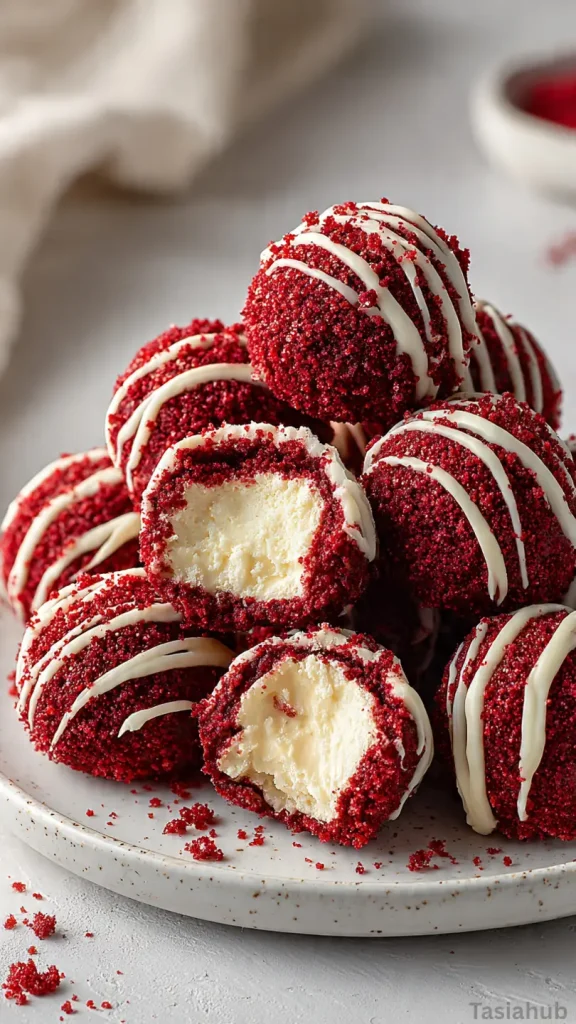
Red Velvet Cheesecake Bites

These red velvet cheesecake bites are pure indulgence in every little mouthful—rich, creamy, and coated in the irresistible taste of red velvet. Imagine velvety cheesecake centers wrapped in the flavor of red velvet cake, then rolled in red velvet cake crumbs for a beautiful finish. They’re festive, bite-sized treats that fit right in at any celebration, whether it’s Christmas, Valentine’s Day, or just a cozy weekend of fun baking.
What makes these cheesecake bites extra special is their smooth, creamy filling paired with the soft, crumbly texture of red velvet. Each bite feels like you’re savoring a tiny slice of red velvet cheesecake—without the hassle of slicing, baking, or serving. This is the kind of cheesecake bites recipe that makes you look like you spent hours in the kitchen, even though it’s one of the easiest no bake desserts you can make.
The red velvet flavor brings that classic cocoa richness with a hint of tang, balanced perfectly by the cheesecake’s creamy sweetness. They’re not overly sweet, just indulgent enough to keep you reaching for another bite. And because these are red velvet cake balls in disguise—miniature, handheld, and oh-so-pretty—they’re perfect for parties, dessert platters, and gifting during the holidays.
Whether you’re doing some Christmas baking or planning a sweet surprise for Valentine’s Day desserts, these cheesecake bites are guaranteed to impress. They’re fun to make, even more fun to eat, and look absolutely stunning on any dessert tray. Grab a few simple ingredients, roll them up, and watch these red velvet cheesecake bites disappear faster than you can say “dessert’s ready.”
Why You’ll Love It
- No oven needed: This is one of those easy no bake desserts that still tastes bakery-worthy. You can whip them up without turning on the oven—perfect for busy days or when you just don’t want the extra heat.
- Festive and pretty: Rolled in red velvet cake crumbs, these cheesecake bites look stunning on dessert trays. Their deep red color makes them a standout choice for Christmas desserts or romantic Valentine’s Day desserts.
- Perfect bite-size treats: No cutting, no mess—just grab, pop, and enjoy. They’re ideal for parties, gift boxes, or a late-night treat straight from the fridge.
- Rich, creamy texture: You get that classic red velvet flavor paired with luscious cheesecake creaminess. Every bite is smooth, decadent, and melts in your mouth.
- Fun to make: Whether you’re baking with family or prepping ahead for a celebration, this is fun baking at its best—rolling, dipping, and decorating these little delights is just as enjoyable as eating them.
Ingredient List
For the Cheesecake Filling:
- 8 oz cream cheese, softened
- ¼ cup powdered sugar
- ½ teaspoon vanilla extract
For the Red Velvet Coating:
- 1 prepared red velvet cake (boxed mix or homemade)
- 1 cup cream cheese frosting (store-bought or homemade)
- Red velvet cake crumbs (for rolling)
Optional:
- White chocolate, melted (for drizzling)
- Sprinkles or crushed candy canes (for garnish)
Ingredient Notes
- Cream cheese: Go for full-fat cream cheese—it gives that luscious, tangy flavor and creamy texture. I always use Philadelphia brand for the best consistency.
- Red velvet cake: You can bake your own or grab a boxed red velvet cake mix for convenience. If you’re doing some Christmas baking, make it ahead so it’s cool and crumbly when you’re ready to roll.
- Vanilla extract: Don’t skip this! It enhances the flavor of the cheesecake and balances the cocoa in the red velvet.
- Cream cheese frosting: This helps the cake crumbs stick together and adds extra creaminess. Use a thick, rich frosting (homemade or a quality store brand) so your mixture isn’t too soft.
- White chocolate drizzle: Totally optional—but it adds that elegant, festive touch, especially if you’re serving these as Christmas desserts or Valentine’s Day treats.
Kitchen Equipment Needed
- Mixing bowls: For blending the cheesecake filling and combining the red velvet crumbs. I like using glass bowls so I can easily see when everything’s evenly mixed.
- Hand mixer or stand mixer: Makes the cream cheese filling super smooth and lump-free—worth the extra minute to pull it out!
- Spatula: Perfect for scraping every bit of creamy cheesecake filling from the bowl (because we’re not wasting any of that goodness).
- Cookie scoop or tablespoon: Helps portion the cheesecake centers evenly so all your bites are the same size.
- Baking sheet: You’ll need this to line up and chill your cheesecake bites before coating them.
- Parchment paper: Keeps the bites from sticking and makes cleanup so much easier.
- Small bowl: For holding the melted white chocolate if you’re adding that pretty drizzle on top.
Instructions
1. Make the red velvet crumbs
- Preheat oven (if using a freshly baked cake) to 350°F (175°C) and cool the cake completely before crumbling.
- Tear the cake into chunks and pulse in a food processor until you have fine crumbs. If you don’t have a processor, crumble by hand in a large bowl—use the palms of your hands to get an even texture.
- Reserve about ¾ cup of the crumbs in a small bowl for rolling the cheesecake bites; keep the rest to mix with the frosting for the coating.
Pro tip: If your cake isn’t dry enough to form crumbs, bake the chunks on a sheet for 6–8 minutes to dry them out a touch—watch closely so they don’t brown.
2. Prepare the cheesecake filling
- Place the 8 oz softened cream cheese into a mixing bowl.
- Beat on medium speed with a hand mixer or in a stand mixer until completely smooth and lump-free (about 1–2 minutes).
- Add ¼ cup powdered sugar and ½ teaspoon vanilla extract. Beat again until fully incorporated and silky. Scrape the sides of the bowl with a spatula to make sure everything is even.
Pro tip: Start with room-temperature cream cheese—cold cream cheese will make the filling lumpy and require more mixing (and more elbow grease).
3. Combine cake crumbs + frosting for coating
- In a separate bowl, mix the prepared red velvet crumbs with 1 cup cream cheese frosting until the crumbs hold together when pinched—this is your outer coating mixture.
- If the mixture seems too wet, add a few more crumbs; if it’s too dry, add a teaspoon of frosting at a time until it’s tacky and moldable.
Pro tip: Aim for a tacky but not soggy texture—this helps the outer layer stick without sliding off once the bites are chilled.
4. Form the cheesecake bites
- Use a cookie scoop or tablespoon to portion out the cheesecake filling (about 1 tablespoon per bite).
- Roll each portion between your palms into a smooth ball. Try to keep them uniform in size for even chilling and coating.
- Place formed balls on a parchment-lined baking sheet, leaving a little space between each.
Pro tip: If the filling gets soft while you’re rolling, pop the tray in the freezer for 10–15 minutes—firmer centers roll and coat much more cleanly.
5. Chill the centers
- Refrigerate the tray of cheesecake balls for at least 30 minutes, or freeze for 10–15 minutes if you’re short on time.
- They should be chilled through but still slightly yielding—not rock hard.
Pro tip: Chilling is crucial. Cold centers help the coating adhere smoothly and prevent the bites from falling apart while you roll them in crumbs.
6. Coat and finish
- Take one chilled cheesecake center and gently press it into the red velvet crumb + frosting mixture so the crumbs adhere evenly.
- Roll the ball between your hands to smooth the coating. Transfer back to the parchment-lined sheet.
- Repeat until all centers are coated. If using white chocolate, melt it in a small bowl and drizzle over the bites with a fork or squeeze bottle. Add sprinkles or crushed candy canes while the drizzle is soft.
Pro tip: Work in batches if the coating mixture gets warm from your hands—place it briefly in the fridge to firm up so the crumbs don’t get gummy.
Tips and Tricks for Success
- Chill between steps: Don’t rush the chilling process. Cold cheesecake centers make rolling, coating, and decorating so much easier—and cleaner too.
- Use fine crumbs: The finer the red velvet crumbs, the smoother and prettier the coating. Large crumbs tend to fall off or make the surface uneven.
- Avoid overmixing the coating: Mix just until the crumbs and frosting hold together. Overmixing can make it too dense or sticky.
- Line everything with parchment: From rolling to setting, parchment paper keeps the bites from sticking and makes cleanup effortless.
- Decorate while soft: If you’re drizzling with white chocolate or adding sprinkles, do it before the drizzle hardens so everything adheres perfectly.
- Make ahead for parties: These taste even better after a night in the fridge—the flavors blend beautifully, and the texture firms up just right.
Ingredient Substitutions and Variations
- Red velvet cake: Swap with chocolate cake for a rich cocoa version, or try strawberry cake for a fun Valentine’s Day twist.
- Frosting: Cream cheese frosting is classic, but vanilla or buttercream frosting can work if you want something sweeter.
- Filling flavor: Add a splash of almond or peppermint extract to the cheesecake filling for a festive touch during Christmas baking.
- Coating ideas: Instead of rolling in red velvet cake crumbs, try crushed Oreos, graham cracker crumbs, or shredded coconut for a new flavor and texture.
- Drizzle options: Use dark chocolate, white chocolate tinted pink, or even red candy melts to match your theme—especially fun for Valentine’s Day desserts.
- Mini version: Make bite-sized red velvet cake balls by mixing the filling directly with the crumbs for a single-layer treat—great when you’re short on time.
Serving Suggestions
- Holiday dessert platter: Arrange these red velvet cheesecake bites on a festive tray with chocolate truffles and sugar cookies for an eye-catching Christmas dessert spread.
- Valentine’s treat box: I love packing these in mini cupcake liners and gifting them in pretty boxes—they look elegant and taste incredible.
- Party bites: Serve chilled on a tiered dessert stand alongside other mini treats for an easy, grab-and-go option at gatherings.
- After-dinner indulgence: Enjoy a few bites with a cup of hot coffee or cocoa—the creamy cheesecake pairs perfectly with warm drinks.
- Personal favorite: I love keeping a few in the fridge for those sweet-tooth moments—they’re the perfect late-night snack without feeling too heavy.
Storage and Reheating Instructions
- Refrigerate: Store in an airtight container in the fridge for up to 5 days. Keep them chilled until ready to serve for the best texture.
- Freeze: These freeze beautifully! Place them on a baking sheet to freeze individually, then transfer to a freezer-safe bag or container for up to 1 month.
- Thawing: Move to the refrigerator overnight or let them sit at room temperature for about 20 minutes before serving.
- Reheating: No need to reheat—these are meant to be enjoyed cold! But if you prefer a slightly softer texture, let them rest at room temperature for a few minutes before biting in.
- Pro tip: If freezing for gifting or party prep, skip the drizzle until after thawing—this keeps the coating looking fresh and smooth.
Frequently Asked Questions
Can I make these cheesecake bites ahead of time?
Absolutely! These bites actually taste better after a night in the fridge because the flavors meld together. Just store them in an airtight container and keep them chilled until serving.
How do I keep the coating from getting too soft?
If your coating feels sticky or too moist, add a few more red velvet crumbs until it firms up. Also, make sure your cheesecake centers are well chilled before rolling.
Can I use store-bought red velvet cake for this recipe?
Yes! Store-bought red velvet cake works perfectly and saves time. Just make sure it’s cool and crumbly before mixing it with the frosting.
What can I use instead of cream cheese frosting?
You can substitute vanilla frosting or buttercream, though cream cheese frosting gives that signature tang that complements the red velvet flavor beautifully.
Can I make these gluten-free?
Definitely. Use a gluten-free red velvet cake mix and check that your frosting and powdered sugar are certified gluten-free. The taste and texture will still be amazing!
How long do these last?
They’ll stay fresh for about 5 days in the refrigerator and up to a month in the freezer—if they last that long before everyone eats them!
Did you try this red velvet cheesecake bites recipe? Let me know in the comments how it turned out—I’d love to hear if you made them for Christmas, Valentine’s Day, or just a little weekend treat!
Red Velvet Cheesecake Bites
Equipment
- Mixing Bowls
- Hand mixer or stand mixer
- Spatula
- Cookie scoop or tablespoon
- Baking Sheet
- Parchment paper
- Small bowl
Ingredients
For the Cheesecake Filling:
- 8 oz cream cheese softened
- ¼ cup powdered sugar
- ½ teaspoon vanilla extract
For the Red Velvet Coating:
- 1 prepared red velvet cake boxed mix or homemade
- 1 cup cream cheese frosting store-bought or homemade
- Red velvet cake crumbs for rolling
Optional:
- White chocolate melted (for drizzling)
- Sprinkles or crushed candy canes for garnish
Instructions
Make the red velvet crumbs
- Preheat oven (if using a freshly baked cake) to 350°F (175°C) and cool the cake completely before crumbling.
- Tear the cake into chunks and pulse in a food processor until you have fine crumbs. If you don’t have a processor, crumble by hand in a large bowl—use the palms of your hands to get an even texture.
- Reserve about ¾ cup of the crumbs in a small bowl for rolling the cheesecake bites; keep the rest to mix with the frosting for the coating.
- Pro tip: If your cake isn’t dry enough to form crumbs, bake the chunks on a sheet for 6–8 minutes to dry them out a touch—watch closely so they don’t brown.
Prepare the cheesecake filling
- Place the 8 oz softened cream cheese into a mixing bowl.
- Beat on medium speed with a hand mixer or in a stand mixer until completely smooth and lump-free (about 1–2 minutes).
- Add ¼ cup powdered sugar and ½ teaspoon vanilla extract. Beat again until fully incorporated and silky. Scrape the sides of the bowl with a spatula to make sure everything is even.
- Pro tip: Start with room-temperature cream cheese—cold cream cheese will make the filling lumpy and require more mixing (and more elbow grease).
Combine cake crumbs + frosting for coating
- In a separate bowl, mix the prepared red velvet crumbs with 1 cup cream cheese frosting until the crumbs hold together when pinched—this is your outer coating mixture.
- If the mixture seems too wet, add a few more crumbs; if it’s too dry, add a teaspoon of frosting at a time until it’s tacky and moldable.
- Pro tip: Aim for a tacky but not soggy texture—this helps the outer layer stick without sliding off once the bites are chilled.
Form the cheesecake bites
- Use a cookie scoop or tablespoon to portion out the cheesecake filling (about 1 tablespoon per bite).
- Roll each portion between your palms into a smooth ball. Try to keep them uniform in size for even chilling and coating.
- Place formed balls on a parchment-lined baking sheet, leaving a little space between each.
- Pro tip: If the filling gets soft while you’re rolling, pop the tray in the freezer for 10–15 minutes—firmer centers roll and coat much more cleanly.
Chill the centers
- Refrigerate the tray of cheesecake balls for at least 30 minutes, or freeze for 10–15 minutes if you’re short on time.
- They should be chilled through but still slightly yielding—not rock hard.
- Pro tip: Chilling is crucial. Cold centers help the coating adhere smoothly and prevent the bites from falling apart while you roll them in crumbs.
Coat and finish
- Take one chilled cheesecake center and gently press it into the red velvet crumb + frosting mixture so the crumbs adhere evenly.
- Roll the ball between your hands to smooth the coating. Transfer back to the parchment-lined sheet.
- Repeat until all centers are coated. If using white chocolate, melt it in a small bowl and drizzle over the bites with a fork or squeeze bottle. Add sprinkles or crushed candy canes while the drizzle is soft.
- Pro tip: Work in batches if the coating mixture gets warm from your hands—place it briefly in the fridge to firm up so the crumbs don’t get gummy.
Store and serve
- Chill the finished cheesecake bites in the refrigerator for at least 15 minutes so the coating sets.
- Store in an airtight container in the fridge for up to 5 days or freeze for up to 1 month (thaw in the fridge before serving).
- Serve cold straight from the fridge or let them sit 5 minutes at room temperature for a slightly softer bite.
Notes
Nutritional Value (per bite, approximate):
- Calories: 120 kcal
- Total fat: 7 g
- Saturated fat: 4 g
- Cholesterol: 25 mg
- Sodium: 55 mg
- Total carbohydrates: 13 g
- Sugars: 10 g
- Protein: 2 g