Pumpkin Pie Cheesecake
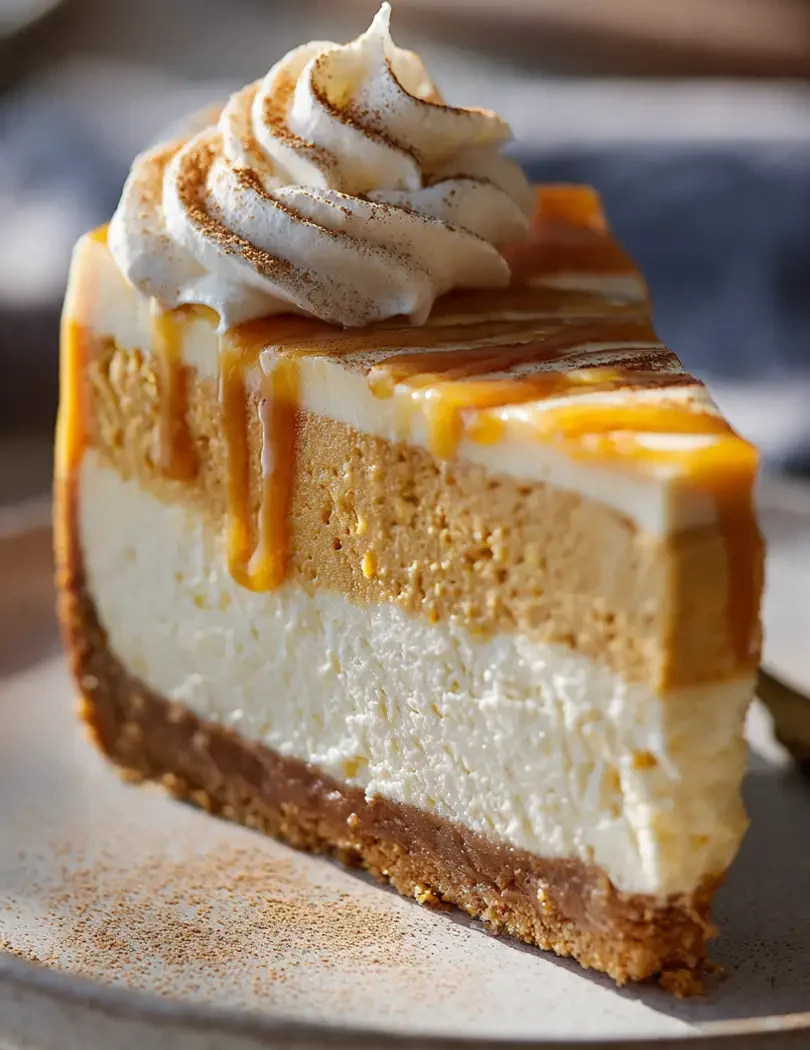
Pumpkin pie cheesecake is the kind of dessert that makes you feel cozy before you’ve even taken a bite. Imagine the warm, spiced flavor of pumpkin pie blended with the creamy richness of cheesecake—it’s a match that feels like it was always meant to be. The layers, the texture, and the hint of spice all come together to create a dessert that’s equal parts comforting and indulgent.
What makes this recipe stand out is the balance of flavors. Instead of choosing between pumpkin pie or cheesecake, you get both in one beautiful slice. The pumpkin pie cream cheese filling is silky smooth, while the graham cracker crust adds just the right amount of crunch. The layers give it that special wow factor, turning a simple dessert into a showstopper for your fall table.
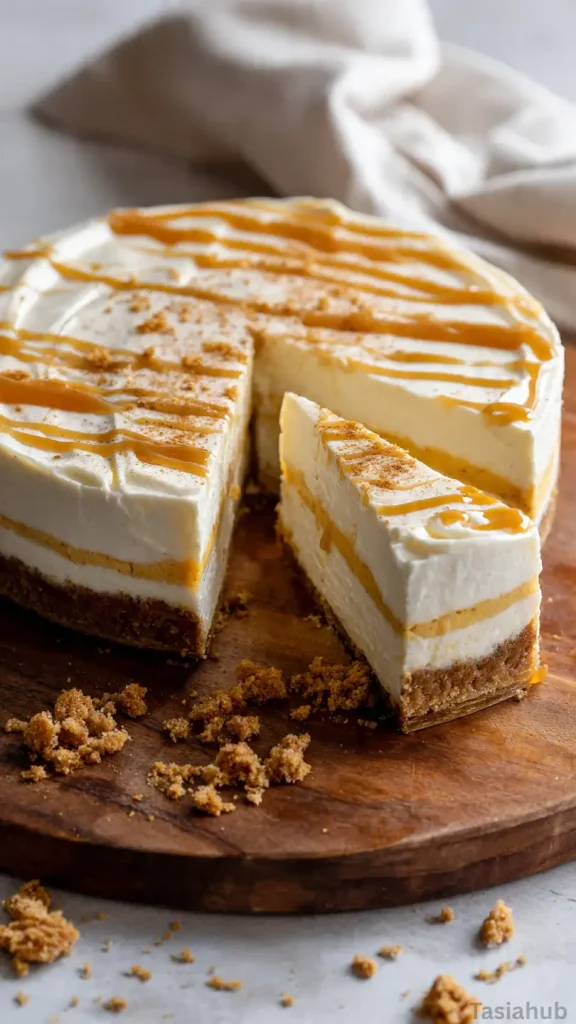
This easy pumpkin cheesecake doesn’t just look impressive—it’s surprisingly straightforward to make. With a little mixing and layering, you’ll have the best pumpkin cheesecake recipe that looks like it came from a bakery. The creamy cheesecake base topped with a pumpkin spice cheesecake layer creates a dreamy combination that even people who “don’t usually like pumpkin” end up loving.
If you’re planning your holiday menu, this layered pumpkin cheesecake absolutely deserves a spot. It’s one of those fall cheesecake recipes that feels festive without being fussy, and it fits perfectly among other Thanksgiving desserts. A single slice can carry all the cozy flavors of the season, making it a dessert you’ll want to come back to year after year.
Why You’ll Love It
- Two desserts in one. You don’t have to choose between pumpkin pie and cheesecake—this recipe combines both into one luscious layered treat.
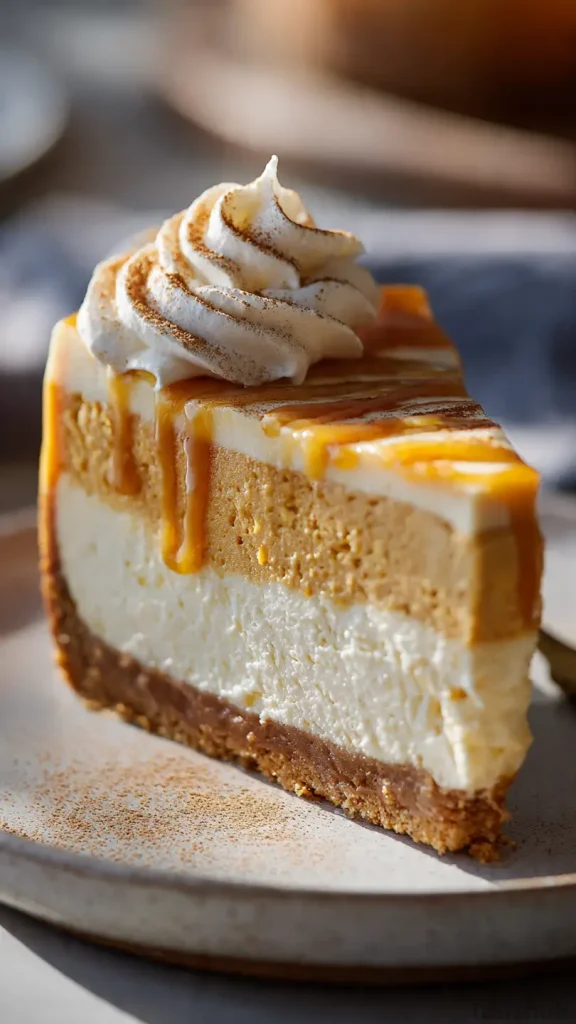
- Perfect texture. The creamy cheesecake layer balances beautifully with the light, spiced pumpkin layer, while the buttery crust ties it all together.
- Holiday showstopper. This dessert looks impressive on the table, making it an instant centerpiece for Thanksgiving or any fall gathering.
- Make-ahead friendly. Cheesecakes actually taste better after chilling overnight, so you can prep it ahead and enjoy stress-free serving.
- Customizable toppings. Add a swirl of whipped cream, a sprinkle of cinnamon, or even a caramel drizzle to dress it up however you like.
Ingredient List
For the Crust
- 1 ½ cups graham cracker crumbs
- ¼ cup granulated sugar
- ½ cup unsalted butter, melted
For the Cheesecake Filling
- 16 oz cream cheese, softened
- ¾ cup granulated sugar
- 2 large eggs
- 1 tsp vanilla extract
For the Pumpkin Layer
- 1 cup pumpkin purée (not pumpkin pie filling)
- ½ tsp ground cinnamon
- ½ tsp ground nutmeg
- ½ tsp ground ginger
- ¼ tsp ground cloves
- 2 tbsp all-purpose flour
- ½ cup brown sugar, packed
- 2 large eggs
Optional Toppings
- Whipped cream
- Caramel sauce
- Pinch of cinnamon or nutmeg
Ingredient Notes
- Cream cheese – Make sure it’s softened to room temperature for a smooth, lump-free cheesecake. I always go for full-fat cream cheese because it gives that rich, velvety texture.
- Pumpkin purée – Double-check the can! You want 100% pure pumpkin, not pumpkin pie filling, since that already has sugar and spices added.
- Spices – Freshly ground cinnamon and nutmeg take this pumpkin spice cheesecake to another level. Don’t skimp on them—they bring all the fall coziness.
- Graham cracker crumbs – You can buy them pre-crushed or pulse your own in a food processor. I like to leave mine a little coarse for extra crunch.
- Brown sugar – Adds depth and a caramel-like sweetness to the pumpkin layer. Light or dark works—go with whichever you prefer.
Kitchen Equipment Needed
- 9-inch springform pan – Essential for easy release and clean slices. I love mine with a nonstick coating—it makes life so much easier.
- Mixing bowls (various sizes) – For separating the cheesecake filling and pumpkin mixture. Glass bowls are my go-to since they don’t hold odors.
- Electric mixer or stand mixer – To beat the cream cheese until perfectly smooth and creamy. A hand mixer works just fine if that’s what you have.
- Rubber spatula – Great for scraping down the sides of the bowl so nothing gets wasted.
- Measuring cups and spoons – Accuracy matters in cheesecake, so don’t skip these.
- Baking sheet – Place the springform pan on top to catch any butter drips from the crust. Trust me, it saves your oven.
- Cooling rack – Helps the cheesecake cool evenly before chilling in the fridge.
Instructions
Step 1 — Preheat & prep your pan
- Preheat the oven to 350°F (175°C) — we’ll use this hotter temp briefly for the crust, then lower the temperature for the cheesecake bake.
- Wrap the bottom and sides of your 9-inch springform pan in two layers of heavy-duty foil if you plan to use a water bath (recommended). Make sure the seams are tight so no water can sneak in.
- Set a rimmed baking sheet nearby (you’ll bake the crust on it and use it later to help with the water bath).
Pro tip: Wrapping the pan well keeps the water out of your cake and saves a cracked disaster later.
Step 2 — Make and blind-bake the crust
- In a medium bowl, combine the graham cracker crumbs and ¼ cup granulated sugar. Pour in the melted butter and stir until the crumbs are evenly moistened.
- Dump the mixture into the prepared springform and press it firmly and evenly over the bottom (and about ¼–½ inch up the sides if you like a little crust lip). Use the bottom of a measuring cup to compact the crust.
- Place the crust on the rimmed baking sheet and bake at 350°F (175°C) for 8–10 minutes, or until it looks set and slightly fragrant.
- Remove from the oven and set aside while you make the fillings; lower the oven temperature to 325°F (163°C).
Pro tip: Press the crust firmly — a compact crust holds together when you slice. But don’t smash it so hard that it becomes rock-like.
Step 3 — Make the cheesecake filling (plain cream cheese layer)
- In a large bowl, beat 16 oz softened cream cheese on medium speed until smooth and free of lumps (about 2–3 minutes).
- Add ¾ cup granulated sugar and beat until fully incorporated and silky. Scrape the bowl with a rubber spatula.
- Add 2 large eggs one at a time, beating on low speed and mixing just until each is incorporated. Stir in 1 teaspoon vanilla extract.
- Give the batter one final scrape and gentle fold so everything is uniform.
Pro tip: Beat the cream cheese first, then add sugar. If you try to force lumps out after adding eggs, you’ll whip too much air into the batter and risk cracks while baking.
Step 4 — Make the pumpkin layer
- In a separate bowl, whisk together 1 cup pumpkin purée, ½ cup packed brown sugar, the spices (½ tsp cinnamon, ½ tsp nutmeg, ½ tsp ginger, ¼ tsp cloves), 2 tbsp flour, and 2 large eggs until smooth and even.
- Scrape the sides and give it one last whisk so there are no streaks of flour or brown sugar clumps.
Pro tip: If your brown sugar is lumpy, press it against the side of the bowl with the back of a spoon before mixing so it dissolves quickly.
Step 5 — Layer the cheesecake and pumpkin (the fun part)
- For neat, distinct layers: pour about half of the cream cheese batter over the cooled crust and smooth it into an even layer. (If you prefer a marbled look, you can skip dividing and dollop as described below.)
- Gently pour the pumpkin mixture over the cheesecake layer. Try to pour down the center and let it spread naturally — avoid splashing it into the crust edge.
- Spoon the remaining cheesecake batter over the pumpkin layer in dollops, then carefully smooth the top so the pumpkin is sealed between the two cream cheese layers.
- If you’d like a swirl: drag a thin knife through the batter in a few figure-eights — subtle is best so the layers stay mostly separate.
Pro tip: Pour slowly and use a rubber spatula to guide and level each layer — fast pouring makes the layers mix, not layer.
Step 6 — Bake in a water bath to prevent cracks
- Place the filled springform on the rimmed baking sheet. Slide both into the oven on the middle rack.
- Pour very hot (not boiling) water into the rimmed pan around the springform until it reaches about ½–1 inch up the sides. Be careful — hot water and a hot oven are a slippery combo.
- Bake at 325°F (163°C) for 50–65 minutes, or until the edges are set and the center still has a slight jiggle (it should not look liquid).
- Turn the oven off and crack the door open slightly — let the cheesecake sit inside for 30–60 minutes to cool gently.
Pro tip: The water bath gives you a silky, crack-free top. If you’re nervous about leaks, double-foil the pan or place the springform inside a second, larger pan before adding water.
Step 7 — Cool, chill, and finish
- After the oven-cooling step, remove the cheesecake from the water bath and transfer it to a cooling rack. Discard the foil when cool enough to handle.
- Let the cake come to room temperature, then cover loosely with plastic wrap and refrigerate for at least 6 hours, ideally overnight — this is when the texture firms up and the flavors meld.
- Before serving, run a thin knife around the springform edge to loosen, then release the ring.
Pro tip: Chill overnight if you can — it makes the cheesecake slice so clean and the flavors settle into that perfect pumpkin-cream balance.
Step 8 — Slice and serve
- For clean slices, dip a sharp knife in hot water, wipe it dry, slice, then re-dip between cuts.
- Top each slice with a dollop of whipped cream, a light dusting of cinnamon or nutmeg, or a drizzle of caramel sauce.
- Store leftovers covered in the fridge for up to 4 days (if you plan farther ahead, cheesecake freezes well — wrap slices tightly).
Tips and Tricks for Success
- Room temp is key. Let your cream cheese, eggs, and pumpkin purée sit out for a bit so they blend smoothly without lumps.
- Don’t overbeat. Once the eggs are in, mix gently. Overmixing whips in air and can cause cracks.
- Foil wrap with care. Double-wrap the springform pan in foil to keep water out during the bath — no soggy crusts here.
- Low and slow cooling. Allowing the cheesecake to cool gradually in the oven prevents dramatic temperature changes that can split the top.
- Chill overnight. The flavor deepens and the texture sets into that perfect creamy firmness when it has time to rest.
Ingredient Substitutions and Variations
- Crust swap. Try gingersnap cookies, vanilla wafers, or even chocolate sandwich cookies instead of graham crackers for a flavor twist.
- Sweetener options. Use coconut sugar or maple syrup in the pumpkin layer for a natural sweetness with depth.
- Spice blend. No pumpkin spice on hand? Mix cinnamon, nutmeg, ginger, and cloves yourself—or swap in apple pie spice.
- Lighter version. Use reduced-fat cream cheese and Greek yogurt in place of some cream cheese for a slightly lighter (but still creamy) cheesecake.
- Mini cheesecakes. Bake the layers in a muffin tin with liners for individual servings—great for parties and portion control.
- Topping ideas. Go classic with whipped cream, or get fancy with a caramel drizzle, candied pecans, or a sprinkle of crushed gingersnaps.
Serving Suggestions
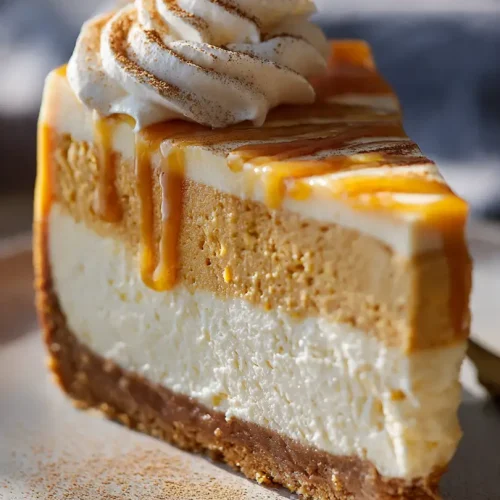
- I love serving this cheesecake with a swirl of freshly whipped cream and a light dusting of cinnamon—it adds just the right touch of cozy fall flavor.
- Pair a slice with a hot cup of coffee or spiced chai for the ultimate afternoon pick-me-up.
- For a fancier holiday vibe, drizzle caramel sauce over each slice and sprinkle crushed pecans on top.
- Serve alongside a scoop of vanilla ice cream if you’re going for a true indulgence—it makes the creamy pumpkin spice flavors pop.
- When I’m hosting, I like to plate smaller slices with a drizzle of chocolate sauce for guests who want “just a taste” without committing to a full wedge.
Storage and Reheating Instructions
- Refrigerator: Store covered in the fridge for up to 4 days. Keep it tightly wrapped or in an airtight container to prevent it from drying out.
- Freezer: Wrap slices individually in plastic wrap, then foil, and freeze for up to 2 months. Thaw overnight in the fridge before serving.
- Reheating: Cheesecake is best served chilled, but if you prefer a slightly warmer slice, let it sit at room temperature for 20–30 minutes before eating.
- Toppings: Add whipped cream, caramel, or other toppings right before serving—never before storing—to keep things fresh.
Frequently Asked Questions
Can I make this cheesecake ahead of time?
Yes! In fact, it’s best when made the day before. Cheesecake needs time to chill and set, so prepping it ahead is the perfect plan for busy holidays.
Do I have to use a water bath?
It’s highly recommended for that silky texture and crack-free top. If you really don’t want to, you can skip it—just know your cheesecake might have a few cracks (which you can always cover with whipped cream or caramel).
Can I use store-bought pumpkin pie spice instead of individual spices?
Absolutely! Use about 1 ½ teaspoons pumpkin pie spice in place of the listed spices. It’s a quick shortcut that still gives great flavor.
How do I know when my cheesecake is done?
Look for set edges and a slightly jiggly center. It shouldn’t be wet or soupy in the middle. The cheesecake will continue to firm up as it cools.
Can I make this gluten-free?
Yes! Swap the graham cracker crumbs for gluten-free cookies or gluten-free graham crackers. The rest of the recipe is naturally gluten-free.
What’s the best way to get clean slices?
Dip a sharp knife in hot water, wipe dry, slice, and repeat between cuts. It keeps each slice neat and picture-perfect.
Did you try this pumpkin pie cheesecake? I’d love to hear how it turned out for you—share your thoughts in the comments below!
Pumpkin Pie Cheesecake
Equipment
- 9-inch springform pan
- Mixing bowls (various sizes)
- Electric mixer or stand mixer
- Rubber spatula
- Measuring cups and spoons
- Baking Sheet
- Cooling Rack
Ingredients
For the Crust
- 1 ½ cups graham cracker crumbs
- ¼ cup granulated sugar
- ½ cup unsalted butter melted
For the Cheesecake Filling
- 16 oz cream cheese softened
- ¾ cup granulated sugar
- 2 large eggs
- 1 tsp vanilla extract
For the Pumpkin Layer
- 1 cup pumpkin purée not pumpkin pie filling
- ½ tsp ground cinnamon
- ½ tsp ground nutmeg
- ½ tsp ground ginger
- ¼ tsp ground cloves
- 2 tbsp all-purpose flour
- ½ cup brown sugar packed
- 2 large eggs
Optional Toppings
- Whipped cream
- Caramel sauce
- Pinch of cinnamon or nutmeg
Instructions
Step 1 — Preheat & prep your pan
- Preheat the oven to 350°F (175°C) — we’ll use this hotter temp briefly for the crust, then lower the temperature for the cheesecake bake.
- Wrap the bottom and sides of your 9-inch springform pan in two layers of heavy-duty foil if you plan to use a water bath (recommended). Make sure the seams are tight so no water can sneak in.
- Set a rimmed baking sheet nearby (you’ll bake the crust on it and use it later to help with the water bath).
- Pro tip: Wrapping the pan well keeps the water out of your cake and saves a cracked disaster later.
Step 2 — Make and blind-bake the crust
- In a medium bowl, combine the graham cracker crumbs and ¼ cup granulated sugar. Pour in the melted butter and stir until the crumbs are evenly moistened.
- Dump the mixture into the prepared springform and press it firmly and evenly over the bottom (and about ¼–½ inch up the sides if you like a little crust lip). Use the bottom of a measuring cup to compact the crust.
- Place the crust on the rimmed baking sheet and bake at 350°F (175°C) for 8–10 minutes, or until it looks set and slightly fragrant.
- Remove from the oven and set aside while you make the fillings; lower the oven temperature to 325°F (163°C).
- Pro tip: Press the crust firmly — a compact crust holds together when you slice. But don’t smash it so hard that it becomes rock-like.
Step 3 — Make the cheesecake filling (plain cream cheese layer)
- In a large bowl, beat 16 oz softened cream cheese on medium speed until smooth and free of lumps (about 2–3 minutes).
- Add ¾ cup granulated sugar and beat until fully incorporated and silky. Scrape the bowl with a rubber spatula.
- Add 2 large eggs one at a time, beating on low speed and mixing just until each is incorporated. Stir in 1 teaspoon vanilla extract.
- Give the batter one final scrape and gentle fold so everything is uniform.
- Pro tip: Beat the cream cheese first, then add sugar. If you try to force lumps out after adding eggs, you’ll whip too much air into the batter and risk cracks while baking.
Step 4 — Make the pumpkin layer
- In a separate bowl, whisk together 1 cup pumpkin purée, ½ cup packed brown sugar, the spices (½ tsp cinnamon, ½ tsp nutmeg, ½ tsp ginger, ¼ tsp cloves), 2 tbsp flour, and 2 large eggs until smooth and even.
- Scrape the sides and give it one last whisk so there are no streaks of flour or brown sugar clumps.
- Pro tip: If your brown sugar is lumpy, press it against the side of the bowl with the back of a spoon before mixing so it dissolves quickly.
Step 5 — Layer the cheesecake and pumpkin (the fun part)
- For neat, distinct layers: pour about half of the cream cheese batter over the cooled crust and smooth it into an even layer. (If you prefer a marbled look, you can skip dividing and dollop as described below.)
- Gently pour the pumpkin mixture over the cheesecake layer. Try to pour down the center and let it spread naturally — avoid splashing it into the crust edge.
- Spoon the remaining cheesecake batter over the pumpkin layer in dollops, then carefully smooth the top so the pumpkin is sealed between the two cream cheese layers.
- If you’d like a swirl: drag a thin knife through the batter in a few figure-eights — subtle is best so the layers stay mostly separate.
- Pro tip: Pour slowly and use a rubber spatula to guide and level each layer — fast pouring makes the layers mix, not layer.
Step 6 — Bake in a water bath to prevent cracks
- Place the filled springform on the rimmed baking sheet. Slide both into the oven on the middle rack.
- Pour very hot (not boiling) water into the rimmed pan around the springform until it reaches about ½–1 inch up the sides. Be careful — hot water and a hot oven are a slippery combo.
- Bake at 325°F (163°C) for 50–65 minutes, or until the edges are set and the center still has a slight jiggle (it should not look liquid).
- Turn the oven off and crack the door open slightly — let the cheesecake sit inside for 30–60 minutes to cool gently.
- Pro tip: The water bath gives you a silky, crack-free top. If you’re nervous about leaks, double-foil the pan or place the springform inside a second, larger pan before adding water.
Step 7 — Cool, chill, and finish
- After the oven-cooling step, remove the cheesecake from the water bath and transfer it to a cooling rack. Discard the foil when cool enough to handle.
- Let the cake come to room temperature, then cover loosely with plastic wrap and refrigerate for at least 6 hours, ideally overnight — this is when the texture firms up and the flavors meld.
- Before serving, run a thin knife around the springform edge to loosen, then release the ring.
- Pro tip: Chill overnight if you can — it makes the cheesecake slice so clean and the flavors settle into that perfect pumpkin-cream balance.
Step 8 — Slice and serve
- For clean slices, dip a sharp knife in hot water, wipe it dry, slice, then re-dip between cuts.
- Top each slice with a dollop of whipped cream, a light dusting of cinnamon or nutmeg, or a drizzle of caramel sauce.
- Store leftovers covered in the fridge for up to 4 days (if you plan farther ahead, cheesecake freezes well — wrap slices tightly).
Notes
Nutritional Value (per slice approximate)
- Calories: ~380
- Carbohydrates: 36g
- Protein: 6g
- Fat: 23g
- Saturated Fat: 13g
- Cholesterol: 95mg
- Sodium: 250mg
- Fiber: 1g
- Sugar: 27g