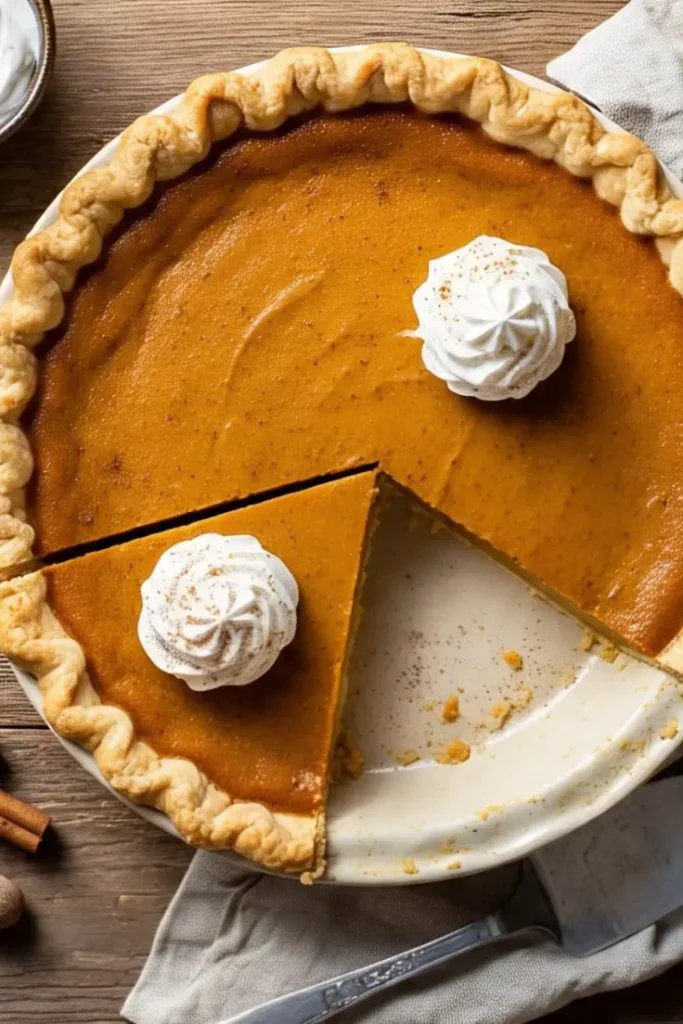
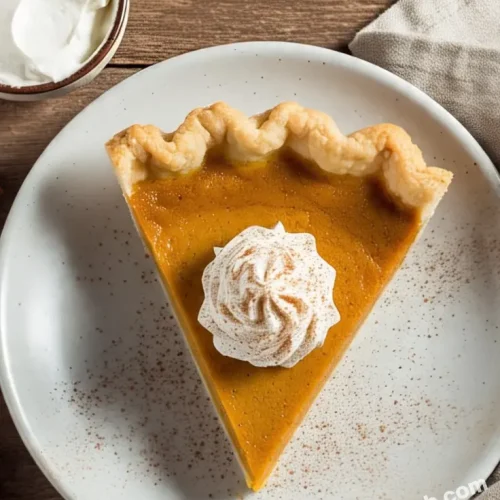
Pumpkin Pie
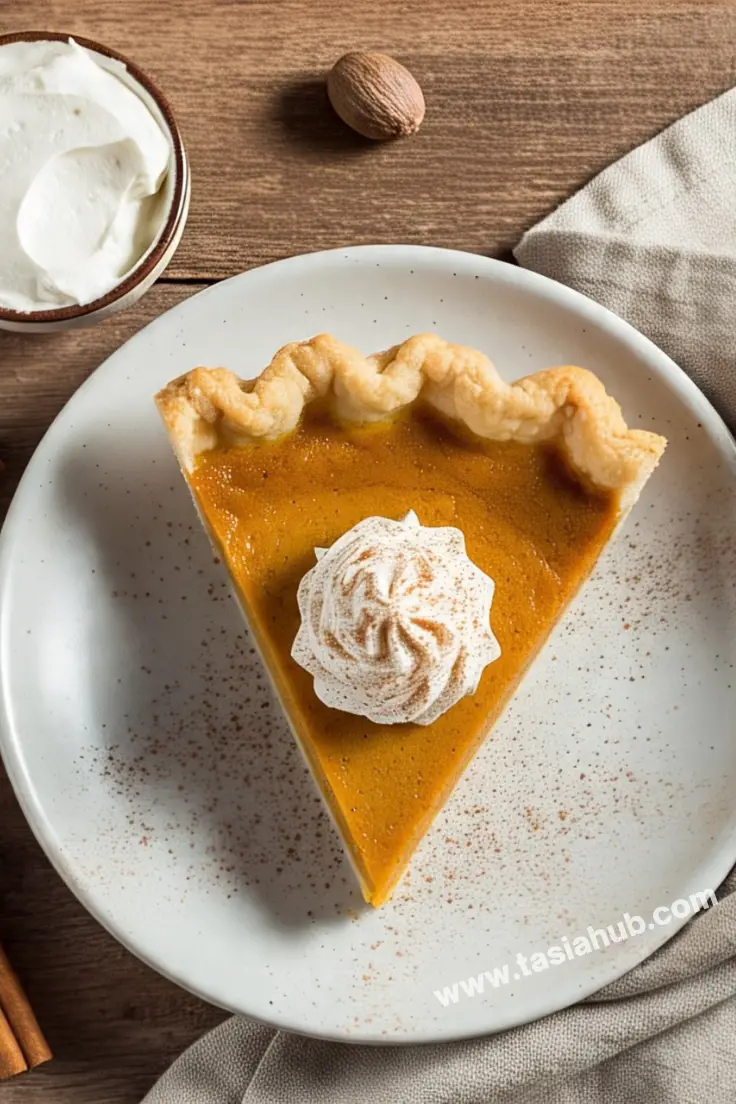
There’s a reason pumpkin pie is practically synonymous with fall desserts—it’s warm, comforting, and filled with the perfect blend of spices that instantly feels like a cozy hug. Whether you’re baking it for Thanksgiving, a family gathering, or just because you’re craving something seasonal and nostalgic, pumpkin pie always delivers. It’s the kind of dessert that brings everyone to the table, often asking for seconds before they’ve even finished the first slice.
What makes pumpkin pie so special isn’t just the creamy texture or the flaky, buttery crust—it’s the experience wrapped around it. The smell of cinnamon, nutmeg, and cloves drifting through the kitchen while it bakes is enough to spark memories of crisp autumn leaves, warm sweaters, and slow, cozy weekends. And once it’s out of the oven and cooling on the counter? That’s when the anticipation really kicks in.
Now, while you can grab a store-bought pumpkin pie, making it from scratch is honestly simpler than it seems—and way more rewarding. You get to control the spice level, adjust the sweetness to your taste, and even customize the crust if you’re feeling a little extra. Plus, there’s something pretty satisfying about serving up a homemade pie that tastes just as good as it looks.
Whether you’re a seasoned baker or this is your first pie adventure, this pumpkin pie recipe is straightforward and absolutely delicious. It’s creamy without being too dense, perfectly spiced, and a real crowd-pleaser. Let’s get into how to make it, because once you try this version, you might never go back to canned pies again.
Why You’ll Love It
- Perfectly Spiced and Creamy: This pumpkin pie hits all the right notes with warm spices like cinnamon, nutmeg, and cloves balanced in a smooth, velvety filling that’s not too sweet and not too bland—just right.
- Flaky Homemade Crust or Easy Store-Bought Option: Whether you go the homemade route or use a pre-made crust to save time, the filling holds up beautifully, giving you that ideal contrast of crisp and creamy.
- Make-Ahead Friendly: Pumpkin pie actually tastes even better after it’s had time to chill and set, making it the perfect dessert to prepare a day in advance for holidays or dinner parties.
- Crowd-Pleaser for All Ages: Kids love it, adults love it—there’s just something universally comforting about a slice of pumpkin pie with a dollop of whipped cream on top.
- Customizable to Your Taste: Want it spicier? Less sweet? Dairy-free? Gluten-free? This recipe is super adaptable, so you can tweak it to suit your preferences without sacrificing flavor.
Ingredient List
For the Pie Crust
- 1 ¼ cups all-purpose flour
- ½ teaspoon salt
- ½ cup (1 stick) unsalted butter, cold and cut into cubes
- 3-4 tablespoons ice water
For the Pumpkin Filling
- 1 can (15 oz) pure pumpkin puree (not pumpkin pie filling)
- ¾ cup granulated sugar
- ½ teaspoon salt
- 1 teaspoon ground cinnamon
- ½ teaspoon ground ginger
- ¼ teaspoon ground cloves
- 2 large eggs
- 1 can (12 fl oz) evaporated milk
Ingredient Notes
- I always use pure pumpkin puree, not pumpkin pie filling, to control the spices and sweetness myself.
- Cold butter is key for a flaky crust—don’t let it melt before mixing.
- Evaporated milk gives the filling a rich creaminess without making it too heavy.
- Freshly ground spices make a noticeable difference if you have them on hand.
- Don’t skip the salt in the crust and filling—it helps balance the sweetness and brings out the flavors.
Kitchen Equipment Needed
- 9-inch pie dish — for baking the pie evenly and shaping the crust
- Mixing bowls — to combine crust and filling ingredients separately
- Pastry cutter or fork — for cutting cold butter into the flour to make flaky crust
- Whisk — to blend the filling ingredients smoothly
- Measuring cups and spoons — for precise ingredient amounts
- Rolling pin — to roll out the pie dough evenly (I love a wooden one for control)
- Cooling rack — to let the pie cool properly without sogginess
- Aluminum foil or pie shield — to protect the crust edges from over-browning during baking
Instructions
Step 1: Prepare the Pie Crust
- Combine dry ingredients: In a large mixing bowl, whisk together the flour and salt.
- Cut in the butter: Add the cold, cubed butter to the flour. Using a pastry cutter or two forks, cut the butter into the flour until the mixture resembles coarse crumbs with pea-sized pieces of butter remaining.
Pro Tip: Keep the butter cold to ensure a flaky crust. If it starts to soften, pop the bowl in the fridge for 10 minutes. - Add ice water: Sprinkle 3 tablespoons of ice water over the mixture. Use a fork to gently mix until the dough just comes together. If it’s too dry, add another tablespoon of ice water, one teaspoon at a time.
- Form the dough: Gather the dough into a ball, flatten it into a disk, wrap it tightly in plastic wrap, and refrigerate for at least 30 minutes.
Pro Tip: Chilling the dough lets the gluten relax and keeps the butter cold, resulting in a tender, flaky crust.
Step 2: Roll Out and Fit the Crust
- Prepare your workspace: Lightly flour a clean surface and your rolling pin.
- Roll out the dough: Remove the dough from the fridge and roll it out into a 12-inch circle, about 1/8 inch thick.
- Transfer to pie dish: Gently lift the dough and place it into the 9-inch pie dish. Press it into the bottom and sides without stretching.
- Trim and crimp: Trim any excess dough, leaving about a 1-inch overhang. Fold the overhang under itself and crimp the edges using your fingers or a fork for a decorative finish.
- Chill again: Place the pie dish with dough back into the fridge while you prepare the filling.
Pro Tip: Chilling the crust before baking helps prevent shrinkage and keeps it crisp.
Step 3: Make the Pumpkin Filling
- Mix the dry spices: In a small bowl, combine cinnamon, ginger, cloves, sugar, and salt.
- Combine pumpkin and spices: In a large bowl, mix the pumpkin puree with the spice mixture until well combined.
- Add eggs: Beat the eggs lightly in a separate bowl, then stir them into the pumpkin mixture.
- Incorporate evaporated milk: Slowly pour in the evaporated milk while whisking gently to create a smooth, even filling.
Pro Tip: Whisk continuously but gently to avoid lumps and ensure everything blends smoothly.
Step 4: Assemble and Bake
- Preheat the oven: Set your oven to 425°F (220°C).
- Pour filling into crust: Carefully pour the pumpkin filling into the chilled pie crust, smoothing the top with a spatula.
- Bake at high heat: Bake at 425°F for 15 minutes to set the crust and start cooking the filling.
- Lower the temperature: Reduce the oven temperature to 350°F (175°C) and continue baking for 40-50 minutes.
- Check for doneness: The pie is done when the edges are set but the center still jiggles slightly when you gently shake the dish.
- Cool completely: Remove the pie from the oven and let it cool on a wire rack for at least 2 hours before slicing. This helps the filling fully set and develop flavor.
Pro Tip: To prevent the crust edges from burning, cover them with foil or a pie shield halfway through baking.
Step 5: Serve and Enjoy
- Optional: Add a dollop of whipped cream or a sprinkle of cinnamon on top.
- Slice carefully: Use a sharp knife, wiping it clean between cuts for neat slices.
- Store leftovers: Cover and refrigerate any leftovers; pumpkin pie keeps well for 3-4 days.
Enjoy your slice of classic, homemade pumpkin pie!
Tips and Tricks for Success
- Use cold ingredients, especially butter and water, for a flaky crust.
- Don’t overwork the dough—mix just until combined to avoid a tough crust.
- Chill the dough both before rolling out and after fitting it into the pie dish.
- Bake the pie on the lower rack of the oven to prevent the top from browning too quickly.
- Let the pie cool completely before slicing to ensure clean cuts and the best texture.
- Cover the crust edges with foil if they brown too fast during baking.
- Use fresh spices or grind your own for the best flavor punch.
- Avoid overbaking; a slightly jiggly center means perfect custard texture.
Ingredient Substitutions and Variations
- Substitute half-and-half or whole milk for evaporated milk if you don’t have it on hand.
- Use a gluten-free flour blend to make the crust gluten-free.
- Swap the butter in the crust for coconut oil or vegan butter for a dairy-free version.
- Replace granulated sugar with brown sugar or maple syrup for a deeper sweetness.
- Add a tablespoon of bourbon or vanilla extract to the filling for a unique flavor twist.
- Use fresh cooked and pureed pumpkin instead of canned for a homemade touch.
- Sprinkle chopped pecans or walnuts on top before baking for added crunch.
Serving Suggestions
- Serve a warm slice with a generous dollop of freshly whipped cream and a sprinkle of cinnamon — classic and irresistible!
- I love pairing pumpkin pie with a scoop of vanilla ice cream; the contrast between warm pie and cold ice cream is pure bliss.
- For a festive touch, drizzle a little caramel sauce over each slice before serving.
- Add a side of spiced roasted pecans or candied walnuts to give your slice some extra crunch.
- Serve alongside a hot cup of chai tea or coffee for the ultimate cozy dessert experience.

Storage and Reheating Instructions
- Store leftover pumpkin pie covered loosely with plastic wrap or foil in the refrigerator.
- Pumpkin pie keeps well in the fridge for 3 to 4 days—best eaten within this time for freshness.
- To freeze, wrap the whole pie tightly in plastic wrap and then aluminum foil; freeze for up to 1 month.
- Thaw frozen pie overnight in the refrigerator before serving.
- Reheat slices gently in a 300°F (150°C) oven for about 10 minutes to bring back that fresh-baked warmth.
- Avoid microwaving reheated pie as it can make the crust soggy.
Frequently Asked Questions
Can I use fresh pumpkin instead of canned puree?
Absolutely! Just roast or steam a small sugar pumpkin, then puree it until smooth. Use about 2 cups of fresh pumpkin puree to replace one 15-oz can.
How do I prevent the crust from getting soggy?
Chilling the dough before baking and baking the pie on the lower oven rack helps keep the crust crisp. Using a pie shield or foil on the edges also prevents over-browning.
Can I make this pie ahead of time?
Yes! Pumpkin pie actually tastes better the next day after the flavors meld. Just store it covered in the fridge and slice when ready to serve.
What’s the best way to store leftover pumpkin pie?
Cover leftover pie loosely with plastic wrap or foil and refrigerate. It stays fresh for 3 to 4 days. You can also freeze it for longer storage.
Can I substitute the evaporated milk for something else?
You can use half-and-half, whole milk, or even a dairy-free milk alternative like coconut milk, but evaporated milk gives the best creamy texture.
Did you try this recipe? Let me know in the comments how it turned out!
Don’t forget to share your photos on Instagram and tag me (@tasiahub_) or use the hashtag (#tasiahub). I’d love to see your creations!
Pumpkin Pie
Equipment
- 9-inch pie dish
- Mixing Bowls
- Pastry cutter or fork
- Whisk
- Measuring cups and spoons
- Rolling Pin
- Cooling Rack
- Aluminum foil or pie shield
Ingredients
For the Pie Crust
- 1 ¼ cups all-purpose flour
- ½ teaspoon salt
- ½ cup 1 stick unsalted butter, cold and cut into cubes
- 3-4 tablespoons ice water
For the Pumpkin Filling
- 1 can 15 oz pure pumpkin puree (not pumpkin pie filling)
- ¾ cup granulated sugar
- ½ teaspoon salt
- 1 teaspoon ground cinnamon
- ½ teaspoon ground ginger
- ¼ teaspoon ground cloves
- 2 large eggs
- 1 can 12 fl oz evaporated milk
Instructions
Step 1: Prepare the Pie Crust
- In a large mixing bowl, whisk together the flour and salt.
- Add the cold, cubed butter to the flour. Using a pastry cutter or two forks, cut the butter into the flour until the mixture resembles coarse crumbs with pea-sized pieces of butter remaining.
- Pro Tip: Keep the butter cold to ensure a flaky crust. If it starts to soften, pop the bowl in the fridge for 10 minutes.
- Sprinkle 3 tablespoons of ice water over the mixture. Use a fork to gently mix until the dough just comes together. If it’s too dry, add another tablespoon of ice water, one teaspoon at a time.
- Gather the dough into a ball, flatten it into a disk, wrap it tightly in plastic wrap, and refrigerate for at least 30 minutes.
- Pro Tip: Chilling the dough lets the gluten relax and keeps the butter cold, resulting in a tender, flaky crust.
Step 2: Roll Out and Fit the Crust
- Lightly flour a clean surface and your rolling pin.
- Remove the dough from the fridge and roll it out into a 12-inch circle, about 1/8 inch thick.
- Gently lift the dough and place it into the 9-inch pie dish. Press it into the bottom and sides without stretching.
- Trim any excess dough, leaving about a 1-inch overhang. Fold the overhang under itself and crimp the edges using your fingers or a fork for a decorative finish.
- Place the pie dish with dough back into the fridge while you prepare the filling.
- Pro Tip: Chilling the crust before baking helps prevent shrinkage and keeps it crisp.
Step 3: Make the Pumpkin Filling
- In a small bowl, combine cinnamon, ginger, cloves, sugar, and salt.
- In a large bowl, mix the pumpkin puree with the spice mixture until well combined.
- Beat the eggs lightly in a separate bowl, then stir them into the pumpkin mixture.
- Slowly pour in the evaporated milk while whisking gently to create a smooth, even filling.
- Pro Tip: Whisk continuously but gently to avoid lumps and ensure everything blends smoothly.
Step 4: Assemble and Bake
- Set your oven to 425°F (220°C).
- Carefully pour the pumpkin filling into the chilled pie crust, smoothing the top with a spatula.
- Bake at 425°F for 15 minutes to set the crust and start cooking the filling.
- Reduce the oven temperature to 350°F (175°C) and continue baking for 40-50 minutes.
- The pie is done when the edges are set but the center still jiggles slightly when you gently shake the dish.
- Remove the pie from the oven and let it cool on a wire rack for at least 2 hours before slicing. This helps the filling fully set and develop flavor.
- Pro Tip: To prevent the crust edges from burning, cover them with foil or a pie shield halfway through baking.
Step 5: Serve and Enjoy
- Optional: Add a dollop of whipped cream or a sprinkle of cinnamon on top.
- Use a sharp knife, wiping it clean between cuts for neat slices.
- Cover and refrigerate any leftovers; pumpkin pie keeps well for 3-4 days.
Notes
Nutritional Value (per slice, approx.)
- Calories: 320
- Fat: 15g
- Saturated Fat: 8g
- Carbohydrates: 40g
- Sugar: 24g
- Protein: 6g
- Fiber: 2g