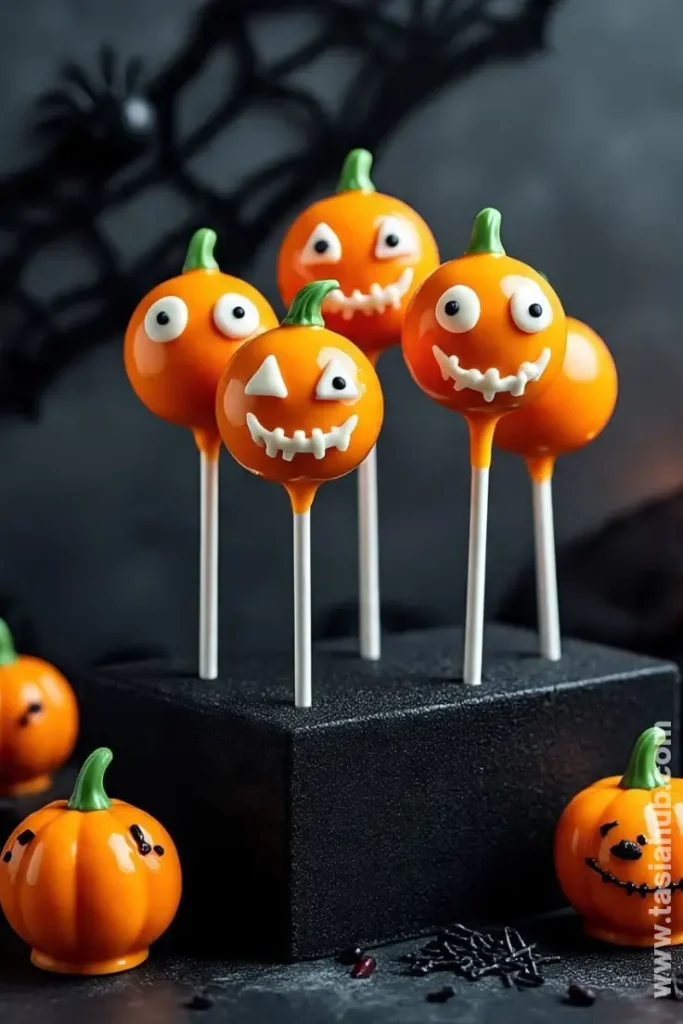
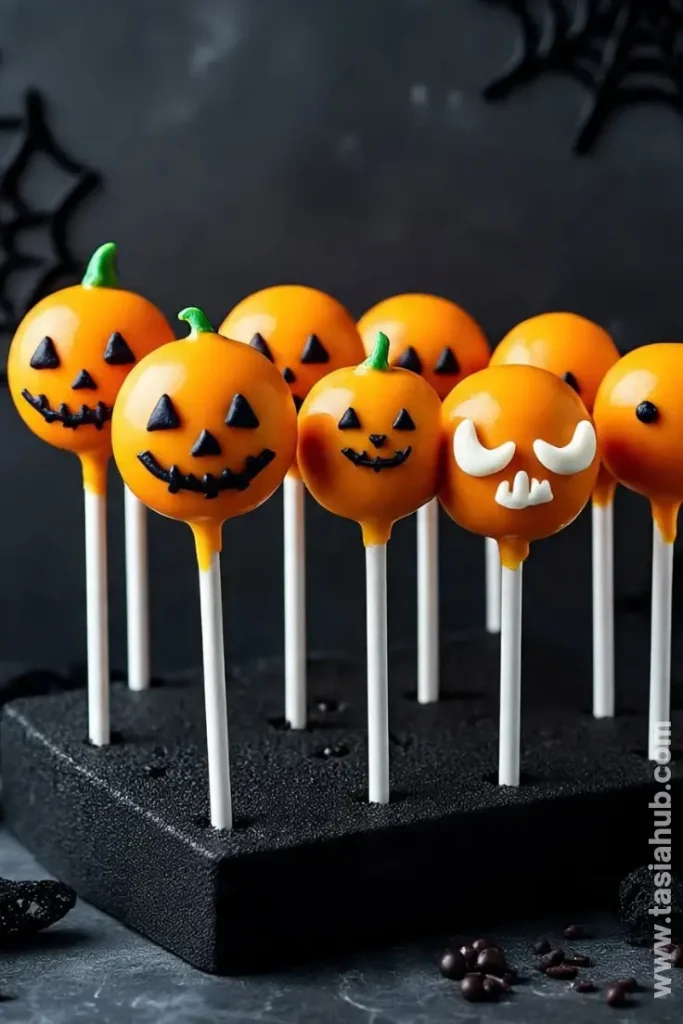
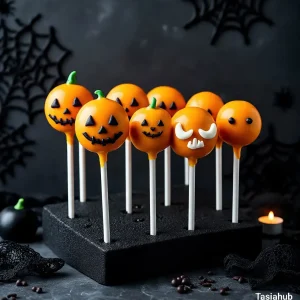
Pumpkin Halloween Cake Pops
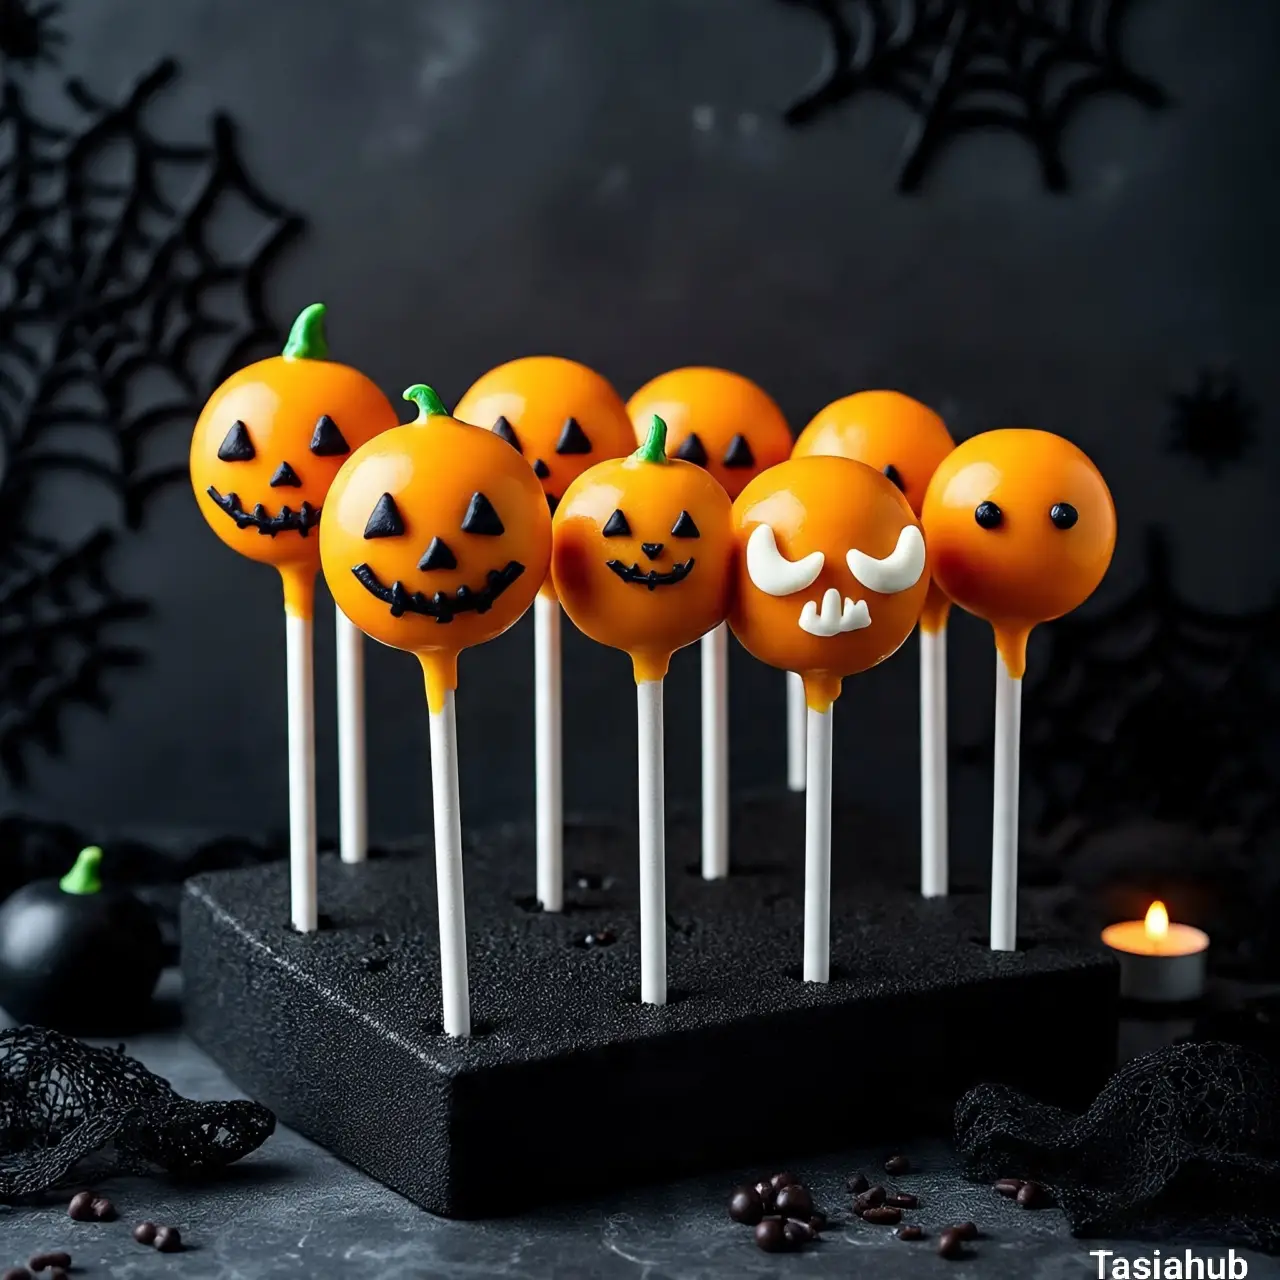
Halloween is the perfect excuse to get a little creative in the kitchen, and these pumpkin Halloween cake pops are just the treat to make your spooky season extra sweet. Imagine biting into a moist, pumpkin-flavored cake, perfectly balanced with a creamy frosting, all coated in a smooth layer of chocolate or candy melts. They’re fun to make, adorable to display, and even better to eat—what’s not to love?
These Halloween cake balls are a fantastic project whether you’re crafting with kids, hosting a fall party, or just want a festive treat for yourself. I love that you can customize them with different colors, designs, or even little edible eyes for a playful, spooky touch. They’re not just desserts—they’re mini works of art that bring a festive vibe to any table.
One of my favorite things about this Halloween cake pops recipe is how versatile it is. You can use pumpkin spice for that classic fall flavor, or mix in a bit of chocolate or caramel for an extra indulgent twist. And while they look fancy, they’re genuinely an easy Halloween cake pops project—you don’t need any professional baking skills to make these adorable treats.
Whether you’re searching for Halloween cake pops ideas for a party, a classroom snack, or just to satisfy your own fall cravings, these pumpkin cake pops hit every mark. They’re bite-sized, flavorful, and festive, making them a standout treat alongside other fall goodies like caramel apples and spiced cookies. And the best part? You can make a batch in under an hour, which means more time to enjoy the Halloween fun.
Why You’ll Love It
- Perfectly bite-sized fun: These pumpkin cake pops are small, festive, and just the right size to enjoy without feeling guilty. I love grabbing one while sipping my morning coffee or sharing a few with friends at a Halloween gathering.
- Super customizable: You can decorate them any way you like—add candy eyes for spooky cake pops, drizzle colorful chocolate, or sprinkle some edible glitter. Each batch can have its own personality!
- Fall flavors in every bite: With pumpkin spice and creamy frosting at the center, these fall cake pops capture the essence of autumn in a fun, handheld treat. They taste just like fall in dessert form.
- Kid-friendly activity: Rolling, dipping, and decorating these cake balls is so much fun for little hands. It’s a great way to get the kids involved without the stress of complicated baking.
- Easy to make, big impact: Even if you’re new to baking, this Halloween cake pops recipe is straightforward. Yet, they look like something from a bakery display—perfect for impressing guests without the effort.
Ingredient List
For the Cake Pops
- 1 box spice cake mix (or your favorite pumpkin cake mix)
- 1/2 cup unsalted butter, softened
- 2 large eggs
- 1/2 cup pumpkin puree
- 1/4 cup milk
For the Frosting
- 1/2 cup unsalted butter, softened
- 1 1/2 cups powdered sugar
- 1 teaspoon vanilla extract
- 2–3 tablespoons cream cheese (optional, for extra creaminess)
For the Coating & Decoration
- 12 oz orange candy melts
- 6 oz white chocolate or candy melts (for drizzle or eyes)
- Sprinkles or edible decorations (optional)
- Lollipop sticks
Ingredient Notes
- I always use fresh pumpkin puree—it adds a natural sweetness and keeps the cake moist.
- Don’t skip the cream cheese in the frosting! It makes these fall cake pops extra creamy and helps the cake balls stick together.
- Candy melts are my go-to for vibrant colors. I usually use Wilton—they melt perfectly and harden smooth.
- Spice cake mix works wonders if you want a shortcut, but homemade pumpkin cake is delicious too.
- Little decorations like candy eyes or sprinkles take these spooky cake pops from cute to extra festive!
Kitchen Equipment Needed
- Mixing bowls – For combining the cake and frosting; I love using glass bowls so you can see every step.
- Hand mixer or stand mixer – Makes blending the cake and frosting smooth and effortless.
- Baking pan (8×8 or 9×9) – For baking the cake evenly; nonstick pans work best.
- Cooling rack – To let your cake cool completely before crumbling.
- Large spoon or spatula – For mixing the cake crumbs with frosting.
- Lollipop sticks – Essential for holding your pumpkin cake pops; I like sturdy wooden sticks.
- Microwave-safe bowls – For melting candy melts quickly and evenly.
- Styrofoam block or cake pop stand – To let cake pops dry upright without tipping over.
- Parchment paper – Helps keep your workspace clean while decorating.
Instructions
1. Bake the Cake
- Preheat your oven to 350°F (175°C). Grease and line your baking pan with parchment paper.
- In a large mixing bowl, combine the cake mix, butter, eggs, pumpkin puree, and milk.
- Beat with a hand mixer on medium speed until smooth and fully combined.
- Pour the batter into the prepared pan and bake for 25–30 minutes, or until a toothpick inserted in the center comes out clean.
- Let the cake cool completely on a cooling rack.
Pro Tip: Make sure your cake is fully cooled before crumbling—it prevents the cake pops from being too sticky or falling apart.
2. Prepare the Frosting
- In a medium bowl, beat the butter and cream cheese until creamy.
- Gradually add powdered sugar, then stir in vanilla extract.
- Adjust consistency with a little milk if the frosting feels too thick.
Pro Tip: A slightly firmer frosting helps the cake balls hold their shape better when forming.
3. Make the Cake Balls
- Crumble the cooled cake into a large mixing bowl.
- Add a few tablespoons of frosting at a time and mix until the cake can be pressed together without falling apart.
- Roll the mixture into 1–1.5 inch balls and place them on a parchment-lined baking sheet.
Pro Tip: Chill the cake balls in the fridge for 15–20 minutes before dipping—they hold up better during coating.
4. Insert Sticks
- Melt a small amount of orange candy melts in a microwave-safe bowl.
- Dip the tip of each lollipop stick into the melted candy, then insert it halfway into each cake ball.
- Return the cake balls to the fridge for 5–10 minutes to set the sticks.
Pro Tip: Dipping the sticks in candy melts acts as glue, keeping your cake pops secure.
5. Coat the Cake Pops
- Melt the remaining orange candy melts until smooth.
- Dip each cake pop into the melted candy, letting the excess drip off.
- Stick the cake pop into a styrofoam block or cake pop stand to dry completely.
Pro Tip: Tap the stick gently against the side of the bowl to remove extra coating and keep a smooth finish.
6. Decorate Your Pumpkin Cake Pops
- Use white chocolate or candy melts to drizzle patterns, create pumpkin stems, or add cute faces.
- Add sprinkles or edible eyes while the coating is still wet.
- Let decorations fully set before serving.
Pro Tip: Work quickly when decorating—the candy coating hardens fast, so plan your design in advance.
Tips and Tricks for Success
- Chill your cake balls: Always refrigerate for at least 15–20 minutes before dipping—they hold their shape better.
- Use high-quality candy melts: They melt smoother, coat evenly, and give a glossy finish.
- Don’t overmix the frosting: Too much frosting can make the cake balls too soft and hard to shape.
- Work in small batches: Dip a few cake pops at a time to prevent the candy coating from hardening before you’re done.
- Let decorations set completely: Place cake pops upright in a styrofoam block so they don’t smudge while drying.
- Keep a damp paper towel handy: If the candy melts start to harden too quickly in the bowl, a quick zap in the microwave fixes it.
Ingredient Substitutions and Variations
- Cake mix: Use homemade pumpkin cake or spice cake instead of boxed mix for a richer flavor.
- Frosting: Swap cream cheese frosting for buttercream or flavored frosting like maple or cinnamon for a seasonal twist.
- Candy melts: White chocolate can replace colored candy melts, then add food coloring for your preferred hue.
- Pumpkin puree: Applesauce works in a pinch, though it changes the flavor slightly.
- Decorations: Use crushed cookies, sprinkles, or edible glitter instead of candy eyes for a unique look.
- Flavor boost: Add a teaspoon of pumpkin pie spice, cinnamon, or nutmeg to the cake mixture for extra fall flavor.
Serving Suggestions
- I love arranging these pumpkin cake pops on a festive Halloween platter with a few mini pumpkins and autumn leaves—it makes the table instantly cozy and fun.
- Serve them alongside a warm cup of spiced cider or pumpkin latte; the flavors together feel like a hug in dessert form.
- They’re perfect for a Halloween party dessert table—place them in a styrofoam block or cute jar for a cute, hands-on treat.
- Pack a few in small clear bags tied with orange ribbon for easy take-home favors or classroom treats.
- Pair them with other fall goodies like caramel apples or spiced cookies for a full festive spread; the bite-sized cake pops are a fun contrast to bigger treats.
Storage and Reheating Instructions
- Room temperature: Keep cake pops in an airtight container for up to 2 days—perfect for short-term serving.
- Refrigerator: Store in an airtight container for up to 1 week; bring to room temperature before serving for the best flavor and texture.
- Freezer: Wrap individually in plastic wrap, then store in a freezer-safe bag for up to 1 month. Thaw in the fridge, then let sit at room temperature.
- Avoid heat: Don’t store in a hot or humid place; candy coating can melt or get sticky.
- Reheat: Cake pops are best enjoyed as-is; avoid microwaving—they’re already moist and flavorful!
Frequently Asked Questions
Can I make these cake pops ahead of time?
Absolutely! You can prepare them a day or two in advance and store them in the fridge. Just make sure they’re in an airtight container to keep them fresh.
Can I use a different cake flavor?
Yes! While pumpkin or spice cake is perfect for fall, chocolate, vanilla, or red velvet work beautifully too. Feel free to get creative with your Halloween cake pops ideas.
How do I prevent the cake pops from falling off the sticks?
Dip the tip of each stick in melted candy before inserting it into the cake ball. Chilling the pops for a few minutes afterward helps them stay secure.
Can I freeze pumpkin cake pops?
Definitely! Wrap them individually and store in a freezer-safe bag for up to a month. Thaw in the fridge, then let them come to room temperature before serving.
What decorations work best for Halloween cake balls?
Candy eyes, sprinkles, chocolate drizzle, or edible glitter all make your spooky cake pops look festive. Let your imagination run wild!
Can I make them without candy melts?
Yes, white or dark chocolate works too. Just melt gently and dip as usual—you can even add food coloring if you want bright orange or spooky designs.
Did you try this recipe? Let me know in the comments how your pumpkin cake pops turned out—I love hearing about your festive creations!
Pumpkin Halloween Cake Pops
Equipment
- Mixing Bowls
- Hand mixer or stand mixer
- Baking pan (8×8 or 9×9
- Cooling Rack
- Large spoon or spatula
- Lollipop sticks
- Microwave-safe bowls
- Styrofoam block or cake pop stand
- Parchment paper
Ingredients
For the Cake Pops
- 1 box spice cake mix or your favorite pumpkin cake mix
- 1/2 cup unsalted butter softened
- 2 large eggs
- 1/2 cup pumpkin puree
- 1/4 cup milk
For the Frosting
- 1/2 cup unsalted butter softened
- 1 1/2 cups powdered sugar
- 1 teaspoon vanilla extract
- 2 –3 tablespoons cream cheese optional, for extra creaminess
For the Coating & Decoration
- 12 oz orange candy melts
- 6 oz white chocolate or candy melts for drizzle or eyes
- Sprinkles or edible decorations optional
- Lollipop sticks
Instructions
Bake the Cake
- Preheat your oven to 350°F (175°C). Grease and line your baking pan with parchment paper.
- In a large mixing bowl, combine the cake mix, butter, eggs, pumpkin puree, and milk.
- Beat with a hand mixer on medium speed until smooth and fully combined.
- Pour the batter into the prepared pan and bake for 25–30 minutes, or until a toothpick inserted in the center comes out clean.
- Let the cake cool completely on a cooling rack.
- Pro Tip: Make sure your cake is fully cooled before crumbling—it prevents the cake pops from being too sticky or falling apart.
Prepare the Frosting
- In a medium bowl, beat the butter and cream cheese until creamy.
- Gradually add powdered sugar, then stir in vanilla extract.
- Adjust consistency with a little milk if the frosting feels too thick.
- Pro Tip: A slightly firmer frosting helps the cake balls hold their shape better when forming.
Make the Cake Balls
- Crumble the cooled cake into a large mixing bowl.
- Add a few tablespoons of frosting at a time and mix until the cake can be pressed together without falling apart.
- Roll the mixture into 1–1.5 inch balls and place them on a parchment-lined baking sheet.
- Pro Tip: Chill the cake balls in the fridge for 15–20 minutes before dipping—they hold up better during coating.
Insert Sticks
- Melt a small amount of orange candy melts in a microwave-safe bowl.
- Dip the tip of each lollipop stick into the melted candy, then insert it halfway into each cake ball.
- Return the cake balls to the fridge for 5–10 minutes to set the sticks.
- Pro Tip: Dipping the sticks in candy melts acts as glue, keeping your cake pops secure.
Coat the Cake Pops
- Melt the remaining orange candy melts until smooth.
- Dip each cake pop into the melted candy, letting the excess drip off.
- Stick the cake pop into a styrofoam block or cake pop stand to dry completely.
- Pro Tip: Tap the stick gently against the side of the bowl to remove extra coating and keep a smooth finish.
Decorate Your Pumpkin Cake Pops
- Use white chocolate or candy melts to drizzle patterns, create pumpkin stems, or add cute faces.
- Add sprinkles or edible eyes while the coating is still wet.
- Let decorations fully set before serving.
- Pro Tip: Work quickly when decorating—the candy coating hardens fast, so plan your design in advance.
Notes
Nutritional Value (per cake pop, approx.)
- Calories: 160
- Carbohydrates: 20 g
- Protein: 2 g
- Fat: 8 g
- Cholesterol: 25 mg
- Sodium: 120 mg
- Fiber: 1 g
- Sugar: 14 g