Oreo Milkshake
When you think of a milkshake that hits all the right notes—creamy, chocolatey, nostalgic, and just the right amount of indulgent—an Oreo milkshake is hard to beat. It’s one of those treats that instantly brings joy, whether you’re sipping it through a straw at a diner or whipping it up at home in your kitchen. The beauty of it lies in its simplicity: a handful of Oreos, some ice cream, milk, and a blender. That’s it. And yet, the result feels like dessert magic.
What makes an Oreo milkshake so beloved is how it blends crunchy cookie bits with smooth vanilla ice cream to create a texture that’s both rich and satisfying. The cookie crumbles add that signature chocolate flavor with just a hint of cream, and as they soften in the ice cream, they create this velvety-cookie swirl that’s totally irresistible. It’s like cookies and cream turned into a slurpable dessert—what’s not to love?
The best part? You don’t need to be a professional barista or own a fancy milkshake machine. This is a no-fuss, crowd-pleasing recipe that anyone can make in five minutes flat. It’s perfect for cooling off on a hot day, treating yourself after dinner, or surprising your kids with a fun afternoon snack. You can even dress it up with whipped cream, chocolate drizzle, or more crushed Oreos if you’re feeling extra.
Whether you’re making it solo or blending up a batch to share, an Oreo milkshake is the kind of sweet, simple joy that never goes out of style. Let’s break down just how easy—and delicious—it is to make your own at home.
Why You’ll Love It
- Quick and Easy to Make – With just a few basic ingredients and a blender, you’ll have a creamy, crave-worthy milkshake ready in minutes. Perfect for when you need a fast treat!
- Rich Cookies & Cream Flavor – Every sip is packed with the classic Oreo taste you love, blended into silky vanilla ice cream for the ultimate cookies-and-cream experience.
- Totally Customizable – Want it thicker? Add more ice cream. Prefer it thinner? Pour in more milk. You can also mix in peanut butter, chocolate syrup, or even a shot of espresso for a fun twist.
- Kid-Friendly and Party-Approved – This is a go-to treat for birthdays, sleepovers, or just a fun afternoon snack. It’s always a hit with kids (and let’s be honest, adults too!).
- Budget-Friendly Dessert – No need to head to the ice cream shop. You probably have most of the ingredients on hand already, making it an affordable indulgence you can enjoy anytime.
Ingredient List
- 6 Oreo cookies
- 2 cups vanilla ice cream
- ½ cup whole milk
- 1 teaspoon vanilla extract (optional)
- Whipped cream (for topping)
- Extra crushed Oreos or chocolate syrup (optional garnish)
Ingredient Notes
- I always use Double Stuf Oreos for an extra creamy flavor, but regular works great too.
- Don’t skip the vanilla extract—it deepens the overall flavor and makes it taste like it came from a fancy dessert shop.
- Whole milk gives the creamiest texture, but feel free to use oat, almond, or any milk you have on hand.
- Go with a good quality vanilla ice cream—it’s the base of the shake, so better quality really pays off.
- If you love texture, reserve one Oreo to crumble on top instead of blending it all. It gives that signature cookie crunch!
Kitchen Equipment Needed
- Blender – To blend everything into a smooth, creamy milkshake.
Personal fave: Ninja or Nutribullet—they’re powerful and easy to clean. - Measuring cups – For getting the right milk and ice cream ratios.
Eyeballing works too, but measuring keeps it consistent! - Tall glass or milkshake cup – For serving that picture-perfect shake.
I love using mason jars for a cute, café-style look. - Spoon or straw – To sip, swirl, or scoop up those cookie bits.
Wide straws or milkshake spoons make it more fun to drink. - Ice cream scoop – Makes it easier to portion out your scoops cleanly.
A trigger-style scoop is a game-changer for less mess.
Instructions
Step 1: Prep Your Ingredients
- Grab your Oreos and break them in half. This helps the blender process them more evenly.
- Let your vanilla ice cream sit out for 2–3 minutes to soften slightly—this makes blending smoother and quicker.
- Measure out your milk and vanilla extract so they’re ready to go.
Pro Tip: Using slightly softened ice cream prevents over-blending and keeps your shake thick and creamy.
Step 2: Add to Blender
- Place the 6 halved Oreos into the blender first. This ensures they blend smoothly and don’t just float on top.
- Add the 2 cups of softened vanilla ice cream right on top of the Oreos.
- Pour in ½ cup of milk and the optional teaspoon of vanilla extract.
Pro Tip: If your blender has a hard time catching everything at once, pulse it a few times first before going full speed.
Step 3: Blend It Up
- Start blending on a low setting for about 10 seconds to break up the cookies.
- Increase to medium-high and blend for 20–30 seconds, or until smooth and creamy.
- Check the consistency—if it’s too thick, add a splash more milk and blend again briefly.
Pro Tip: Don’t over-blend! Too much blending can make the shake runny and melt the ice cream too much.
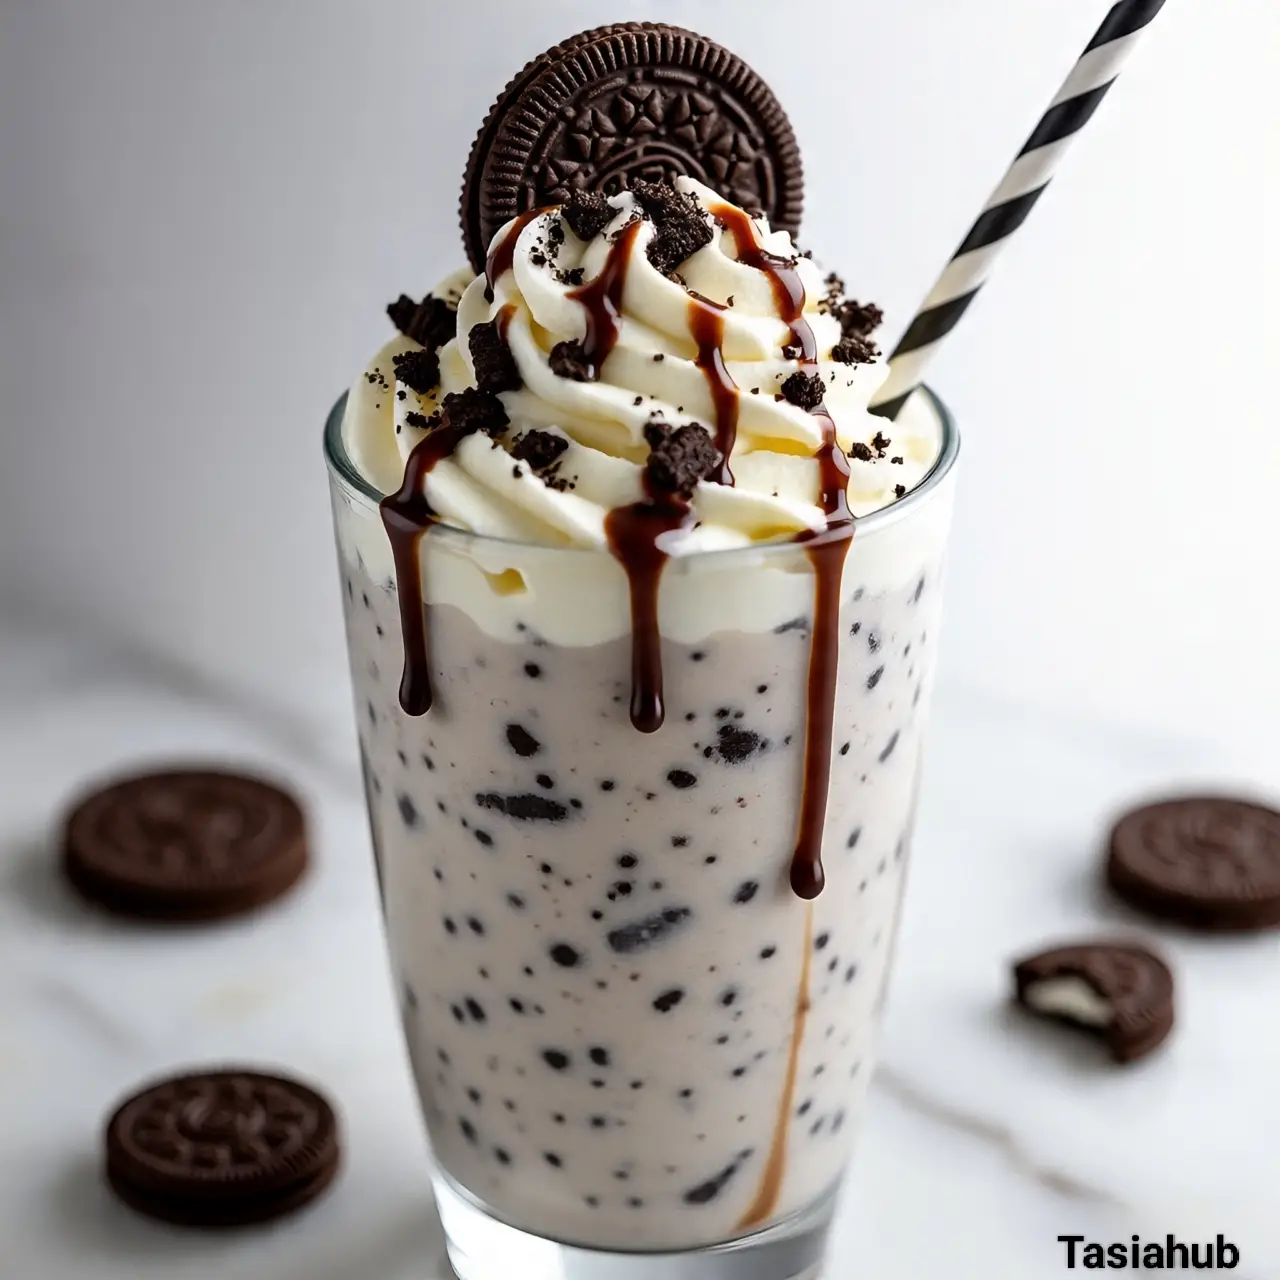
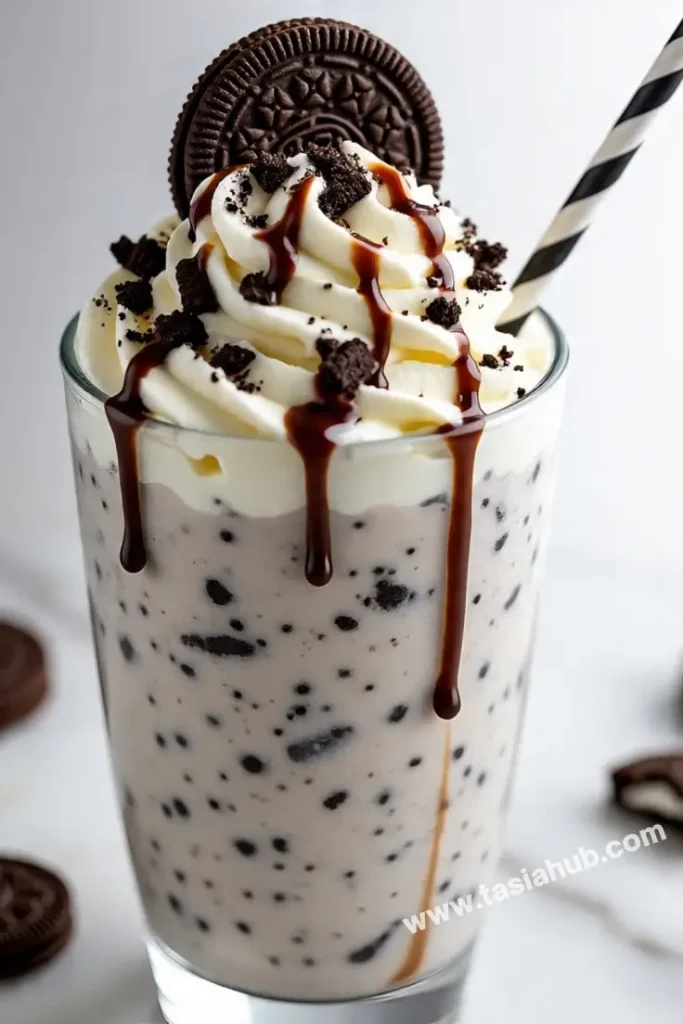
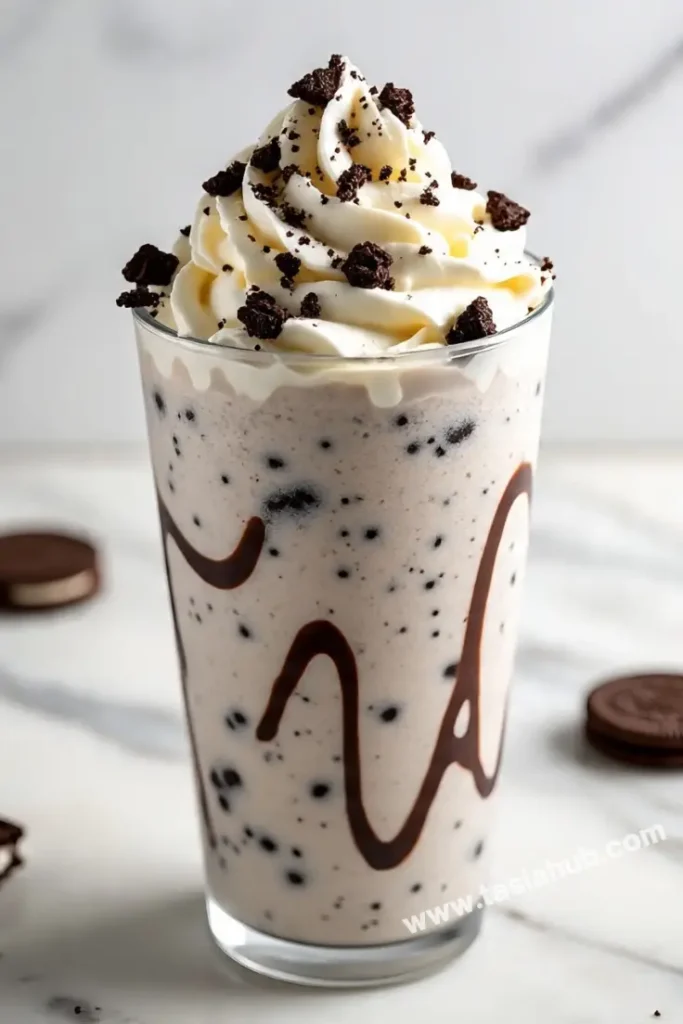
Step 4: Serve and Garnish
- Pour the milkshake into your favorite tall glass or jar.
- Top with a generous swirl of whipped cream.
- Sprinkle on crushed Oreo bits or drizzle with chocolate syrup for extra flair.
- Pop in a straw (or a long spoon if it’s thick!) and enjoy immediately.
Pro Tip: For an extra-cold shake, chill your glass in the freezer for 10 minutes before pouring—it helps the shake stay thick longer.
Tips and Tricks for Success
- Use cold ingredients – Ice cream that’s too soft or milk that’s room temp can water down the shake. Keep everything nice and cold for a thick, creamy result.
- Blend in stages – Start low and work your way up to high speed. It helps the Oreos break down gradually without making the shake too thin.
- Adjust to taste – Want it sweeter? Add a spoonful of sweetened condensed milk or a drizzle of chocolate syrup before blending.
- Serve immediately – Oreo milkshakes are best fresh. If it sits too long, the cookie bits get soggy and the texture changes.
- Clean your blender right after – Trust me, dried Oreo bits are a pain to scrub off. A quick rinse with warm water and soap saves the hassle.
Ingredient Substitutions and Variations
- Ice cream – Swap vanilla for chocolate, cookies & cream, or even mint chocolate chip for a fun twist.
- Milk – Use almond, oat, or soy milk to make it dairy-free (just know it may be slightly less creamy).
- Oreo types – Try Golden Oreos, Mint Oreos, or any seasonal flavor for a different vibe.
- Add-ins – Blend in peanut butter, Nutella, or a shot of cold brew coffee for a bolder flavor.
- Toppings – Crushed Oreos, whipped cream, chocolate chips, or even a scoop of extra ice cream right on top—go wild!
Serving Suggestions
- Top it like a sundae – Add whipped cream, crushed Oreos, chocolate drizzle, and even a cherry on top for that classic diner-style presentation.
- Pair with salty snacks – Serve alongside salty pretzels or popcorn for a fun sweet-and-salty combo—perfect for movie nights.
- Mini versions for parties – Pour into small cups or shot glasses for adorable party servings. Add mini straws or spoons for easy sipping!
- Make it a dessert float – Drop a scoop of vanilla ice cream into the finished shake and serve it like a float—it’s thick, creamy, and extra indulgent.
- Personal fave – I love enjoying this milkshake with warm chocolate chip cookies on the side. That hot-cold combo is unbeatable!
Storage and Reheating Instructions
- Best enjoyed fresh – Oreo milkshakes taste best right after blending when they’re cold, thick, and smooth.
- Short-term storage – If you need to make it slightly ahead, keep it in the freezer for up to 30 minutes. Give it a quick stir or blend before serving.
- Avoid refrigeration – The fridge melts the ice cream and separates the ingredients, leading to a watery shake.
- Freezing leftovers – Pour into an airtight container and freeze for up to 1 day. When ready, let it sit out for 10 minutes and re-blend to bring back the texture.
- Do not reheat – Since it’s a frozen drink, reheating isn’t necessary or recommended. Just blend again if needed to revive that creamy consistency.
Frequently Asked Questions
Can I make this milkshake without a blender?
Yes! You can crush the Oreos in a zip-top bag and stir them into softened ice cream and milk by hand. It won’t be as smooth, but it still tastes amazing and has more cookie texture.
What’s the best ice cream to use?
Classic vanilla works perfectly, but French vanilla or cookies & cream can add even more flavor. Just make sure it’s a good-quality, creamy brand for best results.
Can I use low-fat milk or non-dairy milk?
Absolutely! Low-fat, almond, oat, or soy milk all work. Just know that the shake might be slightly thinner, so reduce the milk a bit if you prefer a thicker consistency.
How can I make it extra thick?
Use less milk or add more ice cream. You can also freeze your Oreos for a few minutes before blending—they help thicken things up nicely!
Can I make this ahead of time?
It’s really best fresh, but if you have to prep ahead, blend and freeze it in an airtight container for up to a day. Re-blend or stir before serving to smooth it out again.
Are there any fun mix-in ideas?
Definitely! Try a spoonful of peanut butter, crushed mint candies, a drizzle of caramel, or even a splash of cold coffee. There’s tons of room to get creative.
Did you try this recipe? Let me know in the comments how it turned out!
Don’t forget to share your photos on Instagram and tag me @tasiahub_ or use the hashtag #tasiahub. I’d love to see your creations!

Oreo Milkshake
Equipment
- Blender
- Measuring cups
- Tall glass or milkshake cup
- Spoon or straw
- Ice cream scoop
Ingredients
- 6 Oreo cookies
- 2 cups vanilla ice cream
- ½ cup whole milk
- 1 teaspoon vanilla extract optional
- Whipped cream for topping
- Extra crushed Oreos or chocolate syrup optional garnish
Instructions
Step 1: Prep Your Ingredients
- Grab your Oreos and break them in half. This helps the blender process them more evenly.
- Let your vanilla ice cream sit out for 2–3 minutes to soften slightly—this makes blending smoother and quicker.
- Measure out your milk and vanilla extract so they’re ready to go.
- Pro Tip: Using slightly softened ice cream prevents over-blending and keeps your shake thick and creamy.
Step 2: Add to Blender
- Place the 6 halved Oreos into the blender first. This ensures they blend smoothly and don’t just float on top.
- Add the 2 cups of softened vanilla ice cream right on top of the Oreos.
- Pour in ½ cup of milk and the optional teaspoon of vanilla extract.
- Pro Tip: If your blender has a hard time catching everything at once, pulse it a few times first before going full speed.
Step 3: Blend It Up
- Start blending on a low setting for about 10 seconds to break up the cookies.
- Increase to medium-high and blend for 20–30 seconds, or until smooth and creamy.
- Check the consistency—if it’s too thick, add a splash more milk and blend again briefly.
- Pro Tip: Don’t over-blend! Too much blending can make the shake runny and melt the ice cream too much.
Step 4: Serve and Garnish
- Pour the milkshake into your favorite tall glass or jar.
- Top with a generous swirl of whipped cream.
- Sprinkle on crushed Oreo bits or drizzle with chocolate syrup for extra flair.
- Pop in a straw (or a long spoon if it’s thick!) and enjoy immediately.
- Pro Tip: For an extra-cold shake, chill your glass in the freezer for 10 minutes before pouring—it helps the shake stay thick longer.
Notes
Nutritional Value (per serving, approximate):
- Calories: ~450–500 kcal
- Fat: 20–25g
- Carbohydrates: 60–65g
- Protein: 6–8g
- Fiber: 1–2g