Melt-In-Your-Mouth Chicken

Let’s talk about the kind of dinner that requires minimal effort but delivers maximum flavor. The type that tastes like you spent hours in the kitchen when, in reality, it came together in under an hour. That’s the magic of Melt In Your Mouth Chicken — a creamy, savory, ultra-tender dish that practically falls apart with every bite. If you’re a fan of cozy, comforting meals that don’t skimp on flavor, you’re in for a treat.
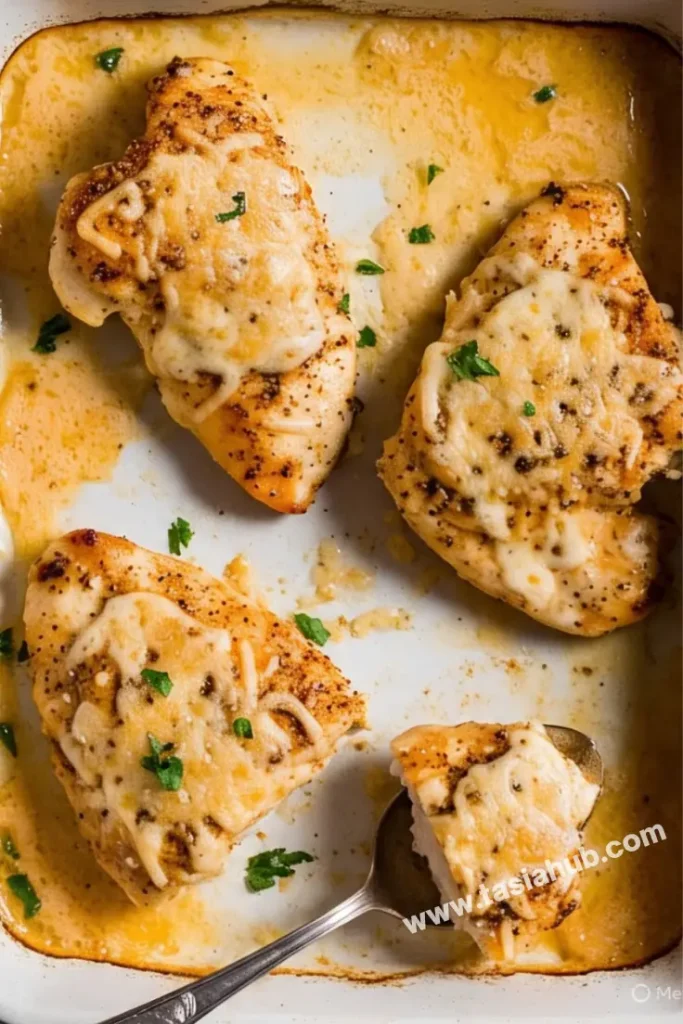
This recipe has been around for years, passed from kitchen to kitchen, slightly tweaked by everyone who tries it. But at its core, it’s beautifully simple: juicy chicken breasts coated in a creamy mayo-parmesan mixture, seasoned with just the right balance of garlic, onion, and paprika, then baked to perfection. The result? Golden-topped chicken that stays incredibly moist and full of flavor — no dry bites here!
What I love most is how low-maintenance it is. You don’t need any fancy ingredients or techniques. It’s the kind of recipe that lets the oven do the hard work while you go about your evening. Whether you’re cooking for your family on a weeknight or looking for something easy yet satisfying to serve guests, this one checks all the boxes.
And the leftovers? Even better the next day. Pair it with mashed potatoes, roasted veggies, or even spoon it over rice — it’s flexible, fuss-free, and just downright delicious. Ready to see how it comes together? Let’s get into it.
Why You’ll Love It
- Unbelievably Tender & Juicy – The creamy topping locks in moisture, so every bite is soft, flavorful, and never dry. The name truly says it all.
- Simple Ingredients, Big Flavor – You probably already have everything you need in your kitchen. Just a few pantry staples come together to make something really special.
- Minimal Prep Time – No marinating, no stovetop cooking. Just mix, spread, and bake. It’s the perfect hands-off dinner.
- Family-Friendly & Kid-Approved – The mild flavors and creamy texture make it a hit with picky eaters and adults alike.
- Great for Meal Prep – It reheats like a dream and stays just as tender the next day, making it ideal for lunches or quick dinners throughout the week.
Ingredient List
- 4 boneless, skinless chicken breasts
- 1 cup mayonnaise (or Greek yogurt for a lighter version)
- 1 cup grated Parmesan cheese
- 1 teaspoon garlic powder
- 1 teaspoon onion powder
- 1 teaspoon paprika
- ½ teaspoon salt (or to taste)
- ½ teaspoon black pepper
Ingredient Notes
- Chicken breasts – Try to use evenly sized pieces so they cook at the same rate. You can also use chicken thighs if you prefer dark meat.
- Mayonnaise – I usually go for full-fat mayo like Hellmann’s or Duke’s — it helps create that rich, creamy coating. Greek yogurt works well too if you want something lighter.
- Parmesan cheese – Use freshly grated if you can; it melts better and gives a bolder flavor than the pre-shredded kind.
- Garlic & onion powder – These add that savory depth without overwhelming the dish.
- Paprika – Don’t skip this! It adds a subtle smoky note and a lovely golden color to the top.
Kitchen Equipment Needed
- Baking dish (9×13-inch) – For holding the chicken and baking evenly; I love using a ceramic dish because it retains heat so well.
- Mixing bowl – To stir together the creamy topping — a medium-sized one works great.
- Measuring spoons & cups – For getting those seasonings and mayo-to-cheese ratio just right.
- Spatula or spoon – To spread the mayo-parmesan mixture over the chicken smoothly.
- Aluminum foil (optional) – Great for covering the dish if you want to keep it extra moist or prevent the top from browning too fast.
Instructions
Step 1: Preheat Your Oven
- Set your oven to 375°F (190°C) and let it fully preheat while you prep everything else.
- Lightly grease a 9×13-inch baking dish with oil or cooking spray. This keeps the chicken from sticking and makes cleanup easier.
Pro Tip: Let your baking dish sit at room temperature for a few minutes before adding cold ingredients—this helps prevent glass or ceramic dishes from cracking in the oven.
Step 2: Prepare the Chicken
- Pat your chicken breasts dry with paper towels. Removing excess moisture helps the topping stick better and gives the chicken a nice texture.
- Place the chicken breasts in a single layer inside the prepared baking dish.
Pro Tip: If your chicken breasts are super thick, slice them horizontally to create cutlets. This helps them cook faster and more evenly.
Step 3: Make the Creamy Topping
- In a mixing bowl, combine:
- 1 cup mayonnaise
- 1 cup grated Parmesan cheese
- 1 teaspoon garlic powder
- 1 teaspoon onion powder
- 1 teaspoon paprika
- ½ teaspoon salt
- ½ teaspoon black pepper
- Stir everything together until it’s smooth, creamy, and evenly blended.
Pro Tip: Taste the mixture before spreading — feel free to adjust salt or add a pinch of cayenne if you want a bit of heat.
Step 4: Coat the Chicken
- Spoon the creamy mixture evenly over each chicken breast.
- Use the back of the spoon or a spatula to spread it out, covering the top fully from edge to edge.
Pro Tip: Don’t worry if some topping slides off while baking — it turns into a delicious sauce at the bottom of the dish.
Step 5: Bake
- Place the baking dish in the preheated oven.
- Bake uncovered for 35–40 minutes, or until the chicken is cooked through (internal temp should hit 165°F/74°C).
- The top should be golden brown and slightly bubbly when it’s ready.
Pro Tip: If the top isn’t browning to your liking, switch on the broiler for the last 1–2 minutes. Keep a close eye so it doesn’t burn!
Step 6: Rest, Serve & Enjoy
- Remove the dish from the oven and let it rest for 5 minutes — this helps the juices settle and makes the chicken even more tender.
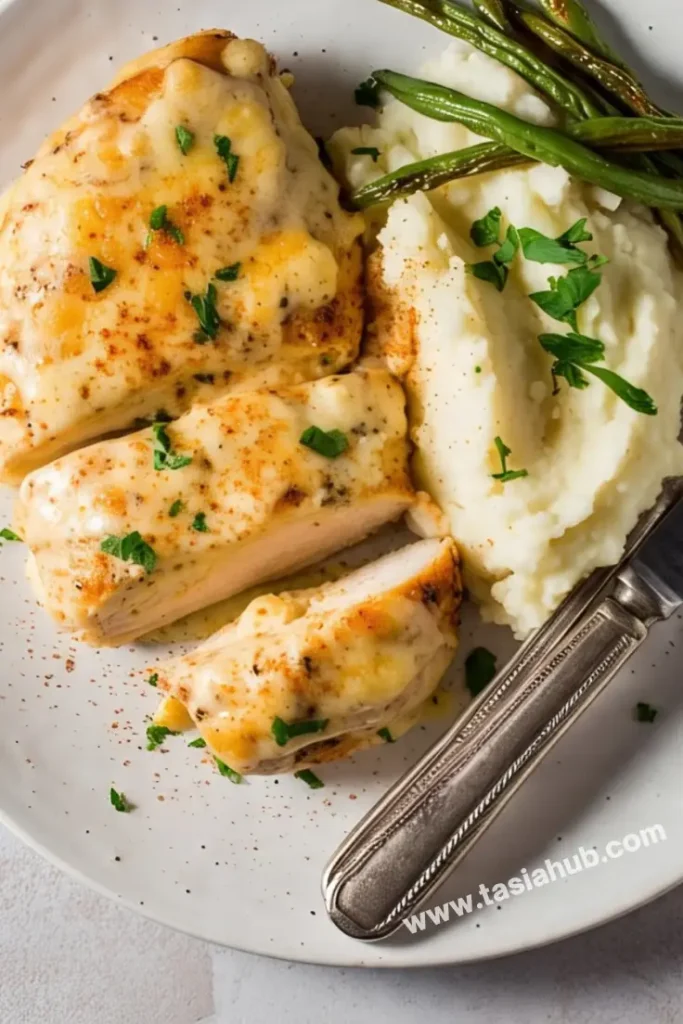
- Serve with your favorite sides like mashed potatoes, roasted veggies, or a simple green salad.
Pro Tip: Spoon a bit of that creamy sauce from the bottom of the pan over the chicken when serving — it’s full of flavor!
Tips and Tricks for Success
- Pound thick chicken breasts slightly for even cooking — it helps prevent dry edges and undercooked centers.
- Use a meat thermometer to avoid overbaking. Chicken is perfectly done at 165°F (74°C).
- Don’t overcrowd the pan — giving the chicken space helps the heat circulate and cooks everything evenly.
- Line your baking dish with parchment or foil for even easier cleanup, especially if you’re baking on busy weeknights.
- Let it rest before slicing — just 5 minutes makes a difference in how juicy and flavorful the chicken stays.
Ingredient Substitutions and Variations
- Greek yogurt instead of mayo – Great for a lighter version with a little tang.
- Cheddar or mozzarella instead of Parmesan – You’ll get a gooier, meltier topping (but it will be less sharp in flavor).
- Add breadcrumbs on top – For a little crunch, sprinkle seasoned breadcrumbs before baking.
- Use chicken thighs – Boneless, skinless thighs work well and stay extra juicy.
- Add herbs – Mix in some dried Italian seasoning, parsley, or thyme for an herby twist.
Serving Suggestions
- Mashed potatoes and roasted green beans – The creamy sauce pairs beautifully with fluffy mashed potatoes and crisp veggies.
- Steamed rice with sautéed spinach – Let the sauce soak into the rice—so satisfying and easy!
- Buttery egg noodles and peas – A cozy, comforting combo that comes together fast.
- Garlic bread and a simple salad – I love serving it this way! The bread is perfect for soaking up the sauce, and the salad keeps things light.
- Stuffed in a sandwich roll – Shred the leftover chicken and stuff it into a toasted hoagie roll with a little extra cheese on top for a delicious twist.
Storage and Reheating Instructions
- Refrigerate leftovers in an airtight container for up to 3–4 days.
- Reheat in the oven at 350°F (175°C) for about 15–20 minutes, covered with foil to retain moisture.
- Microwave for a quick option, but cover loosely with a damp paper towel and use medium power to avoid drying it out.
- Freeze for longer storage – wrap portions tightly and freeze for up to 2 months. Thaw overnight in the fridge before reheating.
- Add a splash of broth or water before reheating to help bring back the creaminess, especially if it looks a bit dry.
Frequently Asked Questions
Can I make this ahead of time?
Yes! You can assemble everything (except baking) up to a day ahead. Just cover and refrigerate, then pop it in the oven when you’re ready to cook.
What if I don’t have mayonnaise?
No problem — Greek yogurt is a great substitute. It gives a slight tang and still keeps the chicken super moist.
Is this recipe gluten-free?
Yes, the base recipe is naturally gluten-free. Just double-check your parmesan and seasonings if you’re using store-bought blends.
Can I use frozen chicken?
It’s best to thaw your chicken completely before baking. Using frozen chicken directly may cause uneven cooking.
How do I know when it’s done?
Use a meat thermometer! Chicken is perfectly cooked when it reaches 165°F (74°C) at the thickest part. The top should be golden and bubbly.
Can I double the recipe for a crowd?
Absolutely. Just use a larger baking dish or two pans and rotate them halfway through cooking for even results.
Did you try this recipe? Let me know in the comments how it turned out!
Don’t forget to share your photos on Instagram and tag me @tasiahub_ or use the hashtag #tasiahub. I’d love to see your creations!

Melt In Your Mouth Chicken
Equipment
- Baking dish (9×13-inch)
- Mixing Bowl
- Measuring spoons & cups
- Spatula or spoon
- Aluminum Foil (Optional)
Ingredients
- 4 boneless skinless chicken breasts
- 1 cup mayonnaise or Greek yogurt for a lighter version
- 1 cup grated Parmesan cheese
- 1 teaspoon garlic powder
- 1 teaspoon onion powder
- 1 teaspoon paprika
- ½ teaspoon salt or to taste
- ½ teaspoon black pepper
Instructions
Step 1: Preheat Your Oven
- Set your oven to 375°F (190°C) and let it fully preheat while you prep everything else.
- Lightly grease a 9×13-inch baking dish with oil or cooking spray. This keeps the chicken from sticking and makes cleanup easier.
- Pro Tip: Let your baking dish sit at room temperature for a few minutes before adding cold ingredients—this helps prevent glass or ceramic dishes from cracking in the oven.
Step 2: Prepare the Chicken
- Pat your chicken breasts dry with paper towels. Removing excess moisture helps the topping stick better and gives the chicken a nice texture.
- Place the chicken breasts in a single layer inside the prepared baking dish.
- Pro Tip: If your chicken breasts are super thick, slice them horizontally to create cutlets. This helps them cook faster and more evenly.
Step 3: Make the Creamy Topping
- In a mixing bowl, combine:
- 1 cup mayonnaise
- 1 cup grated Parmesan cheese
- 1 teaspoon garlic powder
- 1 teaspoon onion powder
- 1 teaspoon paprika
- ½ teaspoon salt
- ½ teaspoon black pepper
- Stir everything together until it’s smooth, creamy, and evenly blended.
- Pro Tip: Taste the mixture before spreading — feel free to adjust salt or add a pinch of cayenne if you want a bit of heat.
Step 4: Coat the Chicken
- Spoon the creamy mixture evenly over each chicken breast.
- Use the back of the spoon or a spatula to spread it out, covering the top fully from edge to edge.
- Pro Tip: Don’t worry if some topping slides off while baking — it turns into a delicious sauce at the bottom of the dish.
Step 5: Bake
- Place the baking dish in the preheated oven.
- Bake uncovered for 35–40 minutes, or until the chicken is cooked through (internal temp should hit 165°F/74°C).
- The top should be golden brown and slightly bubbly when it’s ready.
- Pro Tip: If the top isn’t browning to your liking, switch on the broiler for the last 1–2 minutes. Keep a close eye so it doesn’t burn!
Step 6: Rest, Serve & Enjoy
- Remove the dish from the oven and let it rest for 5 minutes — this helps the juices settle and makes the chicken even more tender.
- Serve with your favorite sides like mashed potatoes, roasted veggies, or a simple green salad.
- Pro Tip: Spoon a bit of that creamy sauce from the bottom of the pan over the chicken when serving — it’s full of flavor!
Notes
Nutritional Value (per serving, approx.)
- Calories: 450–500 kcal
- Protein: 35–40g
- Fat: 30–35g
- Carbohydrates: 2–4g
- Fiber: 0g
- Sugar: 1g