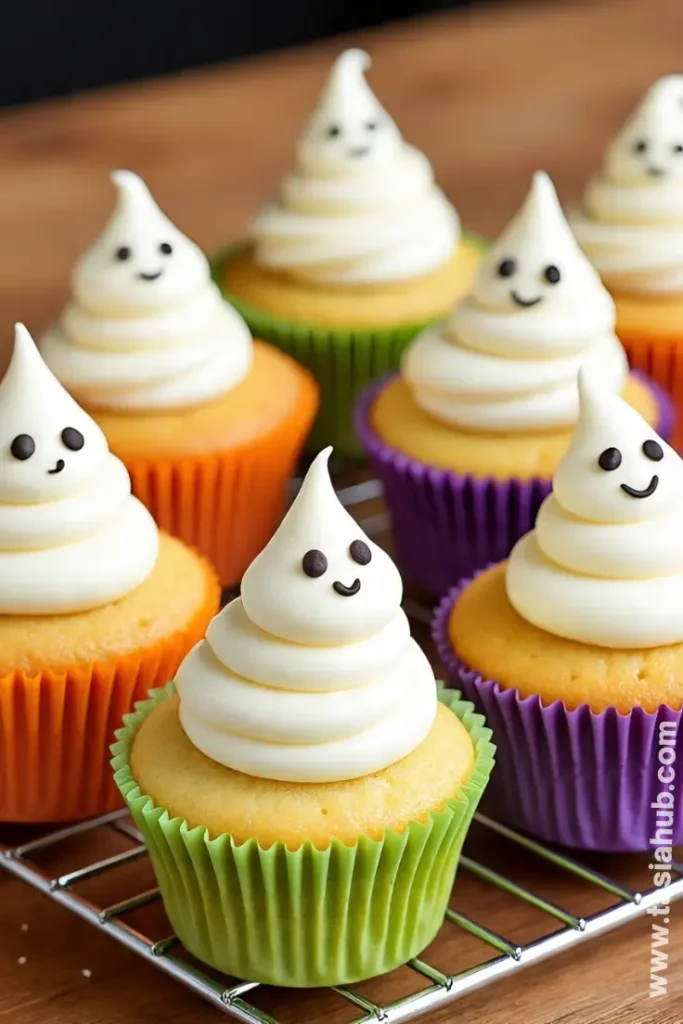
Halloween Ghost Cupcakes

Halloween is the perfect excuse to get creative in the kitchen, and these Halloween ghost cupcakes are just the kind of treat that makes everyone smile. They’re playful, a little spooky, and full of sweet, fluffy goodness. I love how simple Halloween cupcakes like these can transform a regular gathering into a festive celebration, whether you’re hosting friends, family, or even a kids’ party. There’s something so satisfying about piping a tiny ghost onto a cupcake and watching it come to life with just a few swirls of frosting.
These cupcakes are incredibly versatile. You can keep them straightforward with classic vanilla or chocolate bases, or experiment with pumpkin or spice flavors to lean into that cozy autumn vibe. For me, the fun is really in the Halloween cupcake decorating ideas—the way you can make each ghost unique with tiny candy eyes or a drizzle of chocolate. It turns baking into a little creative adventure, and everyone will be talking about your ghost cupcakes long after the party ends.
This post contains affiliate links, and I may earn a small commission when you click on the link at no additional cost to you. As an Amazon Affiliate, I earn from qualifying purchases. Thank you.
Halloween baking doesn’t need to be complicated to impress. These ghost cupcakes are a shining example of how simple ingredients and a little imagination can turn a basic cupcake into a standout Halloween dessert. I’ve used frosting techniques that are beginner-friendly, so even if you don’t consider yourself a skilled baker, you can still pull off these adorable, festive treats. Plus, they’re perfect as Halloween food for a party—you can make a batch ahead of time, store them safely, and wow your guests when it’s time to dig in.
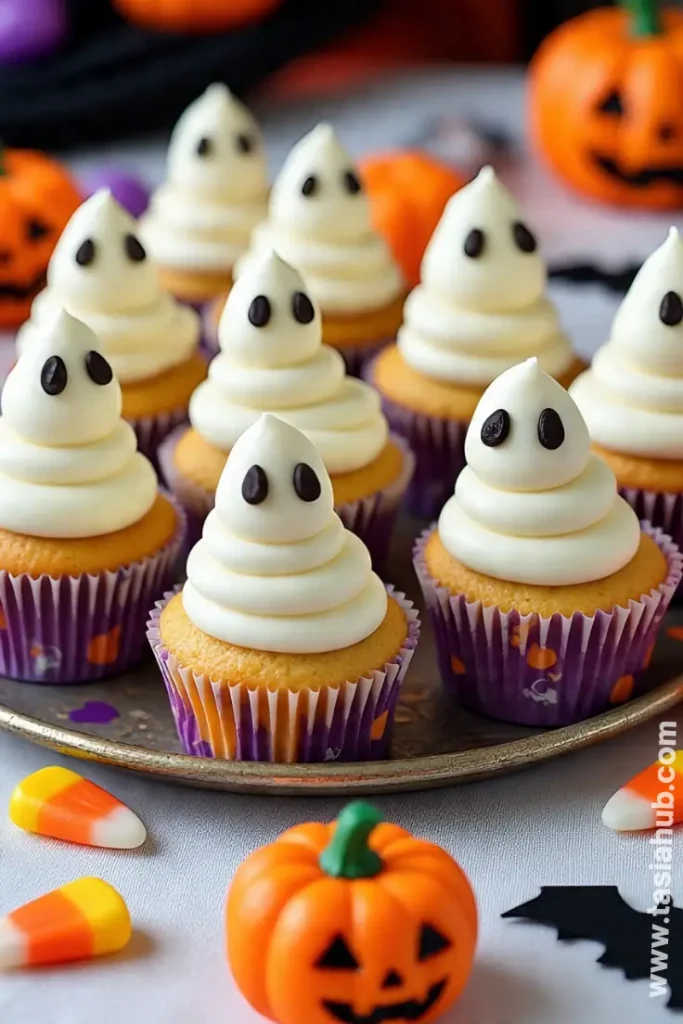
What I especially love about these ghost cupcakes is how they fit into any Halloween dessert table. They pair beautifully with other seasonal sweets, like caramel apples, pumpkin bars, or spooky cookies. And because they’re easy to customize, you can make them as cute or as spooky as you like. Whether you’re aiming for a friendly ghost that kids will adore or a slightly eerie look for a grown-up gathering, these cupcakes are a simple, fun way to get into the Halloween spirit.
Why You’ll Love It
- Adorable and Festive: These ghost cupcakes instantly elevate your Halloween spread. Each little ghost has its own personality, making them fun for kids and adults alike. Watching everyone’s faces light up when they see them is priceless.
- Beginner-Friendly Halloween Baking: Even if you’re new to baking, these cupcakes are simple to make. From mixing the batter to piping the frosting ghosts, every step is straightforward—perfect for a cozy afternoon of Halloween fun.
- Customizable Flavors and Looks: You can stick with classic vanilla or chocolate, or mix in pumpkin, spice, or even a swirl of funfetti for a festive twist. Plus, the ghost frosting can be as spooky or cute as you like, depending on your mood.
- Perfect for Halloween Parties: These cupcakes aren’t just for dessert—they’re little conversation starters. They fit beautifully on a Halloween party table, paired with other treats, and are the kind of Halloween food for a party that people remember.
- Fun Creative Outlet: Decorating these cupcakes is a mini creative project. You can experiment with candy eyes, chocolate chips, or even a drizzle of colored icing, turning simple Halloween cupcakes into edible art.
Ingredient List
For the Cupcakes:
- 1½ cups all-purpose flour
- 1 tsp baking powder
- ½ tsp baking soda
- ¼ tsp salt
- ½ cup unsalted butter, softened
- 1 cup granulated sugar
- 2 large eggs
- 2 tsp vanilla extract
- ¾ cup buttermilk
For the Frosting:
- 1 cup unsalted butter, softened
- 3–4 cups powdered sugar, sifted
- 2 tsp vanilla extract
- 2–4 tbsp milk or heavy cream (to reach desired consistency)
- Black decorating gel or mini chocolate chips (for the ghost eyes)
Ingredient Notes
- All-purpose flour: I always use King Arthur flour—it gives the cupcakes a perfect, tender crumb every time.
- Butter: Softened butter is key for both the cupcakes and frosting. Don’t skip this step, or your frosting won’t be smooth and fluffy!
- Buttermilk: This makes the cupcakes extra moist and adds a subtle tang that balances the sweetness.
- Powdered sugar: Sift it before mixing—trust me, it makes the frosting silky and easy to pipe.
- Black decorating gel or mini chocolate chips: Essential for giving your ghosts their adorable faces. Don’t leave this out—it’s the personality punch of the cupcakes!
Kitchen Equipment Needed
- Mixing bowls (2–3): For keeping dry and wet ingredients separate before combining. I love using glass bowls so I can see everything clearly.
- Electric mixer or stand mixer: Makes creaming butter and sugar a breeze—your frosting will be extra fluffy!
- Measuring cups and spoons: Accurate measurements are key for perfect cupcakes every time.
- Spatula: For scraping down the sides of bowls and folding ingredients gently. I always use a silicone one—it’s my favorite.
- Muffin tin: To bake the cupcakes evenly. Nonstick works best for easy removal.
- Cupcake liners: Keeps the cupcakes from sticking and makes cleanup simple.
- Piping bag + round tip: For piping the ghost frosting. No piping bag? A zip-top bag with a corner snipped works too!
- Cooling rack: Lets cupcakes cool completely before decorating—essential for a smooth frosting finish.
Instructions
Step 1: Preheat and Prepare
- Preheat your oven to 350°F (175°C).
- Line a 12-cup muffin tin with cupcake liners. I like using colorful or Halloween-themed liners—it adds instant festive charm.
- Set aside a cooling rack nearby so your cupcakes have a safe place to rest after baking.
Pro Tip: Make sure the oven is fully preheated before putting the cupcakes in. It helps them rise evenly and prevents sinking in the middle.
Step 2: Mix Dry Ingredients
- In a medium bowl, whisk together 1½ cups flour, 1 tsp baking powder, ½ tsp baking soda, and ¼ tsp salt.
- Set this bowl aside while you work on the wet ingredients.
Pro Tip: Whisk continuously to prevent lumps and evenly distribute the baking powder and soda.
Step 3: Cream Butter and Sugar
- In a large bowl, use an electric mixer to beat ½ cup softened butter and 1 cup sugar until light and fluffy (about 2–3 minutes).
- Add 2 eggs, one at a time, beating well after each addition.
- Mix in 2 tsp vanilla extract.
Pro Tip: Scrape down the sides of the bowl with a spatula occasionally to ensure everything is evenly combined.
Step 4: Combine Wet and Dry Ingredients
- Add the dry ingredients to the butter mixture in three parts, alternating with ¾ cup buttermilk in two additions.
- Mix gently after each addition until just combined—don’t overmix!
Pro Tip: Overmixing can make cupcakes dense. Stop as soon as there are no streaks of flour.
Step 5: Bake the Cupcakes
- Divide the batter evenly among the 12 cupcake liners, filling each about 2/3 full.
- Bake in the preheated oven for 18–22 minutes, or until a toothpick inserted into the center comes out clean.
- Remove from oven and let cool in the tin for 5 minutes, then transfer to a cooling rack.
Pro Tip: Avoid taking them out too early—they continue cooking slightly in the hot tin, which keeps them moist.
Step 6: Make the Frosting
- Beat 1 cup softened butter in a large bowl until creamy.
- Gradually add 3–4 cups powdered sugar, 2 tsp vanilla, and 2–4 tbsp milk or cream until you reach a smooth, pipeable consistency.
- Mix on medium speed for 2–3 minutes to make it extra fluffy.
Step 7: Decorate the Ghosts
- Fill a piping bag fitted with a round tip with the frosting.
- Starting from the center of each cupcake, pipe the frosting upward in a swirl to form the ghost shape.
- Use black decorating gel or mini chocolate chips for the eyes.
Pro Tip: If the frosting is too soft, chill it for 10–15 minutes—it makes piping cleaner and keeps the ghost shapes intact.
Tips and Tricks for Success
- Use room temperature ingredients: Butter and eggs that are too cold can make the batter lumpy and affect the texture of your cupcakes.
- Don’t overmix: When combining wet and dry ingredients, mix just until incorporated to keep cupcakes light and fluffy.
- Pipe with confidence: Hold the piping bag straight and use a gentle, steady pressure for smooth ghost shapes.
- Cool completely before frosting: Warm cupcakes can cause frosting to melt and lose shape.
- Customize the eyes carefully: Use a toothpick to adjust tiny chocolate chips or gel eyes—it helps avoid smudges and keeps each ghost looking cute.
Ingredient Substitutions and Variations
- Butter: Can swap for equal parts vegetable oil or coconut oil for a slightly different flavor and texture.
- Buttermilk: Substitute with ¾ cup milk plus 1 tsp lemon juice or vinegar, let sit 5 minutes before mixing.
- Vanilla Extract: Try almond or pumpkin spice extract for a seasonal twist.
- Cupcake Flavors: Chocolate, pumpkin, or red velvet bases work beautifully with the ghost frosting.
- Frosting: Cream cheese frosting is a tasty alternative that pairs especially well with spiced or pumpkin cupcakes.
- Eyes: Mini M&Ms, edible markers, or black icing can replace chocolate chips for the ghost faces.
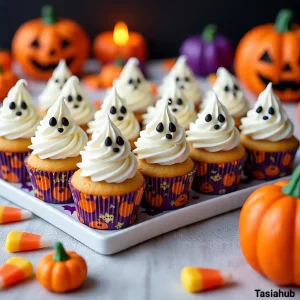
Serving Suggestions
- I love placing a few ghost cupcakes on a festive Halloween platter alongside caramel apples and chocolate bats—it creates an instant spooky dessert display!
- Pair a ghost cupcake with a warm mug of hot chocolate or spiced apple cider—it’s the perfect cozy treat for a chilly October evening.
- Serve these cupcakes at a Halloween party with small bowls of candy and pumpkin treats around—they double as decor and dessert.
- For a fun kids’ snack, add a little whipped cream “graveyard” and use the cupcakes as “ghosts” rising from the tomb—it always gets giggles.
- I sometimes top one with a drizzle of caramel or chocolate sauce for a grown-up twist—it balances the sweetness and makes it feel extra indulgent.
Storage and Reheating Instructions
- Room Temperature: Store in an airtight container for up to 2 days—frosting stays soft and fluffy.
- Refrigerator: Keep in an airtight container for up to 5 days. Let cupcakes come to room temperature before serving for the best texture.
- Freezer: Unfrosted cupcakes can be frozen for up to 3 months. Thaw at room temperature before decorating.
- Frosted Freezer Tip: You can freeze frosted cupcakes for up to 1 month. Wrap individually in plastic wrap to protect the frosting, then thaw in the fridge for a few hours before serving.
- Reheating: Warm in the microwave for 10–15 seconds to soften slightly if the cupcakes have chilled—don’t overdo it, or the frosting may melt.
Frequently Asked Questions
How long do these ghost cupcakes last?
Unfrosted cupcakes last up to 3 days at room temperature, while frosted ones are best eaten within 2 days. In the fridge, they stay fresh for up to 5 days.
Can I make these cupcakes gluten-free?
Yes! Substitute the all-purpose flour with a gluten-free blend. Make sure it’s a 1:1 substitution that includes xanthan gum for the best texture.
Can I use store-bought frosting instead of homemade?
Absolutely! A smooth, pipeable store-bought frosting works perfectly, especially if you’re short on time. Just make sure it’s firm enough to hold the ghost shape.
What’s the best way to pipe the ghost shapes?
Use a piping bag with a round tip and start from the center, swirling upward in one smooth motion. If the frosting is too soft, chill it for 10–15 minutes first.
Can I make these cupcakes ahead of time?
Yes! Bake and cool the cupcakes a day or two in advance. Decorate them on the day of the party for the freshest look.
Any tips for kid-friendly decorating?
Let the kids add the eyes or small candy decorations themselves. It’s a fun activity and makes each cupcake unique!
Did you try this recipe? Let me know in the comments how it turned out—I love hearing about your Halloween baking adventures!
Halloween Ghost Cupcakes
Equipment
- Mixing bowls (2–3)
- Electric mixer or stand mixer
- Measuring cups and spoons
- Spatula
- Muffin Tin
- Cupcake liners
- Piping bag + round tip
- Cooling Rack
Ingredients
For the Cupcakes:
- 1½ cups all-purpose flour
- 1 tsp baking powder
- ½ tsp baking soda
- ¼ tsp salt
- ½ cup unsalted butter softened
- 1 cup granulated sugar
- 2 large eggs
- 2 tsp vanilla extract
- ¾ cup buttermilk
For the Frosting:
- 1 cup unsalted butter softened
- 3 –4 cups powdered sugar sifted
- 2 tsp vanilla extract
- 2 –4 tbsp milk or heavy cream to reach desired consistency
- Black decorating gel or mini chocolate chips for the ghost eyes
Instructions
Step 1: Preheat and Prepare
- Preheat your oven to 350°F (175°C).
- Line a 12-cup muffin tin with cupcake liners. I like using colorful or Halloween-themed liners—it adds instant festive charm.
- Set aside a cooling rack nearby so your cupcakes have a safe place to rest after baking.
- Pro Tip: Make sure the oven is fully preheated before putting the cupcakes in. It helps them rise evenly and prevents sinking in the middle.
Step 2: Mix Dry Ingredients
- In a medium bowl, whisk together 1½ cups flour, 1 tsp baking powder, ½ tsp baking soda, and ¼ tsp salt.
- Set this bowl aside while you work on the wet ingredients.
- Pro Tip: Whisk continuously to prevent lumps and evenly distribute the baking powder and soda.
Step 3: Cream Butter and Sugar
- In a large bowl, use an electric mixer to beat ½ cup softened butter and 1 cup sugar until light and fluffy (about 2–3 minutes).
- Add 2 eggs, one at a time, beating well after each addition.
- Mix in 2 tsp vanilla extract.
- Pro Tip: Scrape down the sides of the bowl with a spatula occasionally to ensure everything is evenly combined.
Step 4: Combine Wet and Dry Ingredients
- Add the dry ingredients to the butter mixture in three parts, alternating with ¾ cup buttermilk in two additions.
- Mix gently after each addition until just combined—don’t overmix!
- Pro Tip: Overmixing can make cupcakes dense. Stop as soon as there are no streaks of flour.
Step 5: Bake the Cupcakes
- Divide the batter evenly among the 12 cupcake liners, filling each about 2/3 full.
- Bake in the preheated oven for 18–22 minutes, or until a toothpick inserted into the center comes out clean.
- Remove from oven and let cool in the tin for 5 minutes, then transfer to a cooling rack.
- Pro Tip: Avoid taking them out too early—they continue cooking slightly in the hot tin, which keeps them moist.
Step 6: Make the Frosting
- Beat 1 cup softened butter in a large bowl until creamy.
- Gradually add 3–4 cups powdered sugar, 2 tsp vanilla, and 2–4 tbsp milk or cream until you reach a smooth, pipeable consistency.
- Mix on medium speed for 2–3 minutes to make it extra fluffy.
Step 7: Decorate the Ghosts
- Fill a piping bag fitted with a round tip with the frosting.
- Starting from the center of each cupcake, pipe the frosting upward in a swirl to form the ghost shape.
- Use black decorating gel or mini chocolate chips for the eyes.
- Pro Tip: If the frosting is too soft, chill it for 10–15 minutes—it makes piping cleaner and keeps the ghost shapes intact.
Notes
Estimated Nutritional Value (per cupcake):
- Calories: ~280–320 kcal
- Total Fat: 14–16 g
- Cholesterol: 55–60 mg
- Carbohydrates: 38–42 g
- Sugars: 26–30 g
- Protein: 3–4 g
- Fiber: 1 g
- Sodium: 180–200 mg