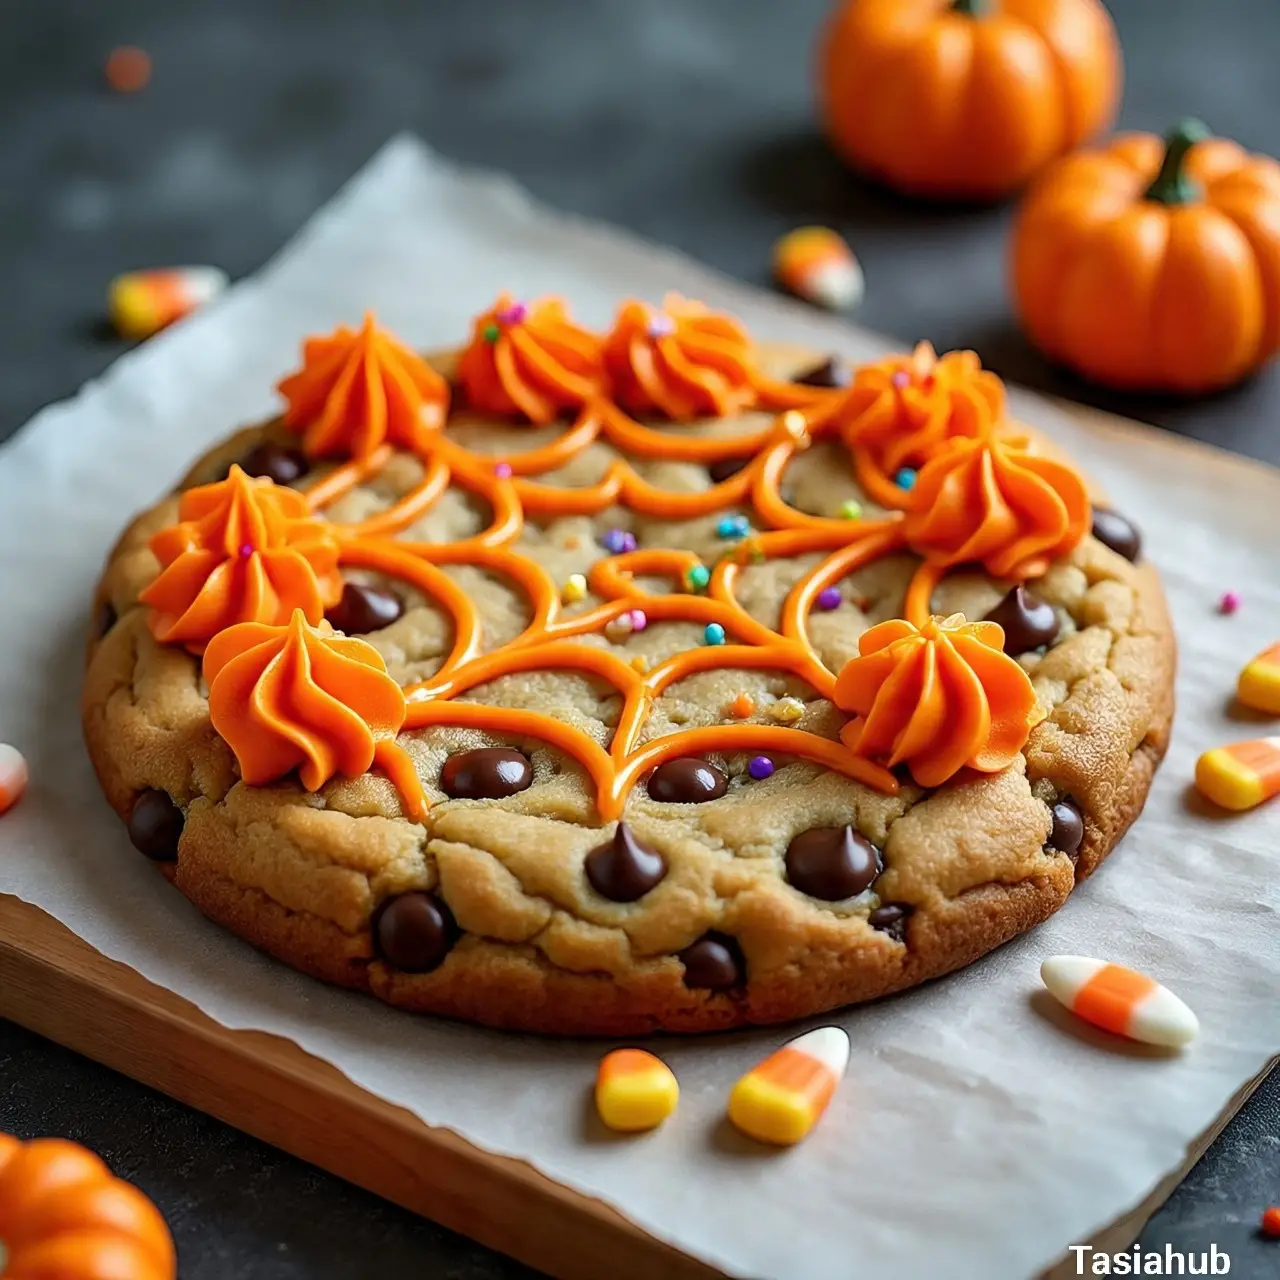
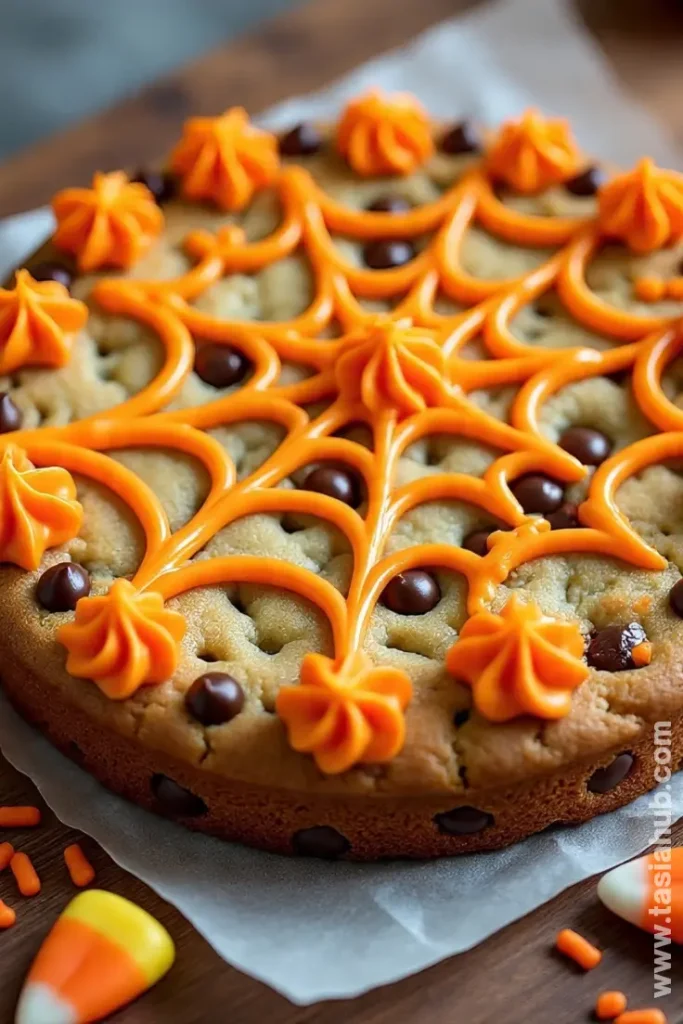
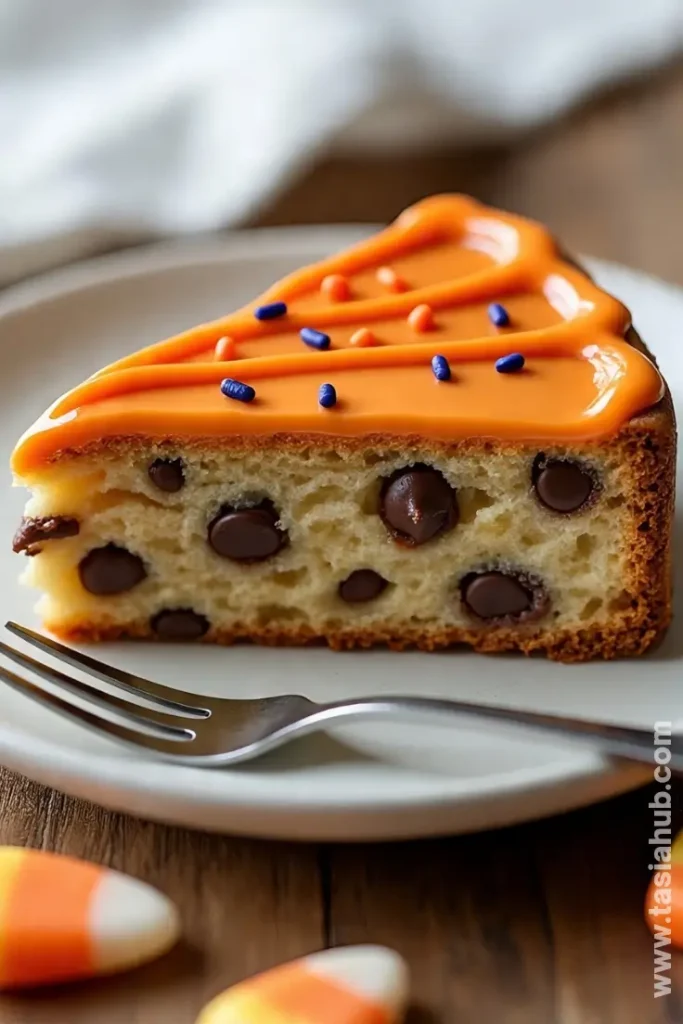
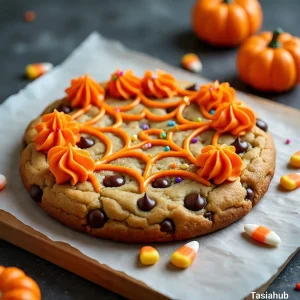
Halloween Cookie Cake
There’s nothing quite like the joy of Halloween treats, especially when they’re fun, festive, and totally shareable. This Halloween cookie cake takes all the best parts of your favorite cookie—soft, chewy, and rich—and transforms it into a crowd-pleasing centerpiece for your spooky celebrations. It’s the perfect dessert to bake with friends or family, and the best part? You don’t need any fancy equipment or complicated techniques.
I love how versatile Halloween cookie cakes can be. You can go classic with chocolate chips, get playful with colorful candies, or decorate it with whimsical designs that fit the Halloween theme. Whether it’s a cheerful jack-o’-lantern face, a spooky ghost, or even a cute witch hat, these cookie cakes are as much fun to decorate as they are to eat. Honestly, they bring a little extra magic to the table, especially when paired with your favorite Halloween desserts like pumpkin bars or candy popcorn.
One thing I love about these simple Halloween cakes is how approachable they are. Even if baking isn’t usually your thing, the recipe is forgiving, and it’s easy to tweak the flavors or decorations to your liking. You can make one large cookie cake to share or smaller individual ones for a fun twist that everyone can personalize.
And let’s not forget the smiles they bring! From the first bite, you can see why Halloween cookie cakes are such a hit—they’re festive, fun, and absolutely delicious. Whether you’re planning a Halloween party, a cozy movie night, or just want a seasonal treat to enjoy at home, this recipe is a must-try. If you’re hunting for cute Halloween cakes or unique Halloween cookie cakes ideas, this one definitely fits the bill.
Why You’ll Love It
- Fun to Decorate: From spooky spiders to cheerful jack-o’-lanterns, decorating this cookie cake is half the joy. It’s a creative outlet that turns dessert into a mini Halloween project!
- Crowd-Pleaser: Soft, chewy, and loaded with sweet treats, this cake satisfies kids and adults alike. It’s the kind of dessert that disappears fast at parties.
- Customizable Flavors: Chocolate chip, peanut butter, or even candy-studded—this recipe adapts to your favorite flavors, making it perfect for everyone at the table.
- Simple Yet Impressive: Even if you don’t bake often, this cookie cake looks like a showstopper. A few simple decorations make it feel festive and professional without stress.
- Perfect for Any Occasion: While it’s ideal for Halloween parties, it also works for casual family gatherings, movie nights, or just a sweet treat to brighten your day.
Ingredient List
For the Cookie Cake
- 1 cup (2 sticks) unsalted butter, softened
- 1 cup granulated sugar
- 1 cup packed brown sugar
- 2 large eggs
- 2 tsp pure vanilla extract
- 3 cups all-purpose flour
- 1 tsp baking soda
- ½ tsp salt
- 2 cups chocolate chips (or your favorite mix-ins like M&Ms, Reese’s pieces, or candy corn)
For Decoration
- 1 cup powdered sugar
- 2–3 tbsp milk
- 1 tsp vanilla extract
- Food coloring (orange, black, green, or whatever spooky shades you love)
- Halloween sprinkles or candy for accents
Ingredient Notes
- I always use unsalted butter because it lets me control the sweetness perfectly. It makes a big difference in flavor and texture.
- Don’t skip the brown sugar! It adds that chewy, caramel-y goodness that makes this cookie cake irresistible.
- Chocolate chips aren’t just for taste—they also help the cake hold together beautifully and give little pockets of melty joy in every bite.
- For decorating, powdered sugar icing is your best friend—it’s easy, quick, and colors beautifully. You can even use it as a base for piped designs.
- I love adding a handful of Halloween-themed sprinkles or candy for that cute, festive touch that instantly makes it a showstopper.
Kitchen Equipment Needed
- Mixing bowls: For combining your cookie dough ingredients smoothly. I love using glass bowls—they make it easy to see everything mixing together.
- Electric hand mixer or stand mixer: Speeds up creaming the butter and sugar. Totally worth it for a smooth, fluffy dough.
- Measuring cups and spoons: Essential for getting the right balance of sweet, salty, and chewy.
- Spatula: For scraping the bowl and folding in chocolate chips or candies. I swear by a silicone spatula—it’s gentle and flexible.
- Baking sheet or round cake pan: To shape your cookie cake. A round cake pan makes it look extra festive.
- Parchment paper: Keeps the cookie cake from sticking and makes cleanup a breeze.
- Cooling rack: Lets the cookie cake cool evenly without getting soggy underneath.
- Small bowls and spoons (optional): Perfect for mixing icing colors and decorating fun Halloween designs.
Instructions
Step 1: Preheat and Prepare
- Preheat your oven to 350°F (175°C).
- Line a round cake pan or baking sheet with parchment paper. This prevents sticking and makes cleanup a breeze.
- Pro Tip: If using a round cake pan, lightly grease it with butter before adding parchment for extra security.
Step 2: Cream the Butter and Sugars
- In a large mixing bowl, combine the softened butter, granulated sugar, and brown sugar.
- Use an electric hand mixer or stand mixer to beat on medium speed until light and fluffy (about 2–3 minutes).
- Pro Tip: Scrape down the sides of the bowl once or twice to make sure everything is evenly mixed.
Step 3: Add Eggs and Vanilla
- Crack in the eggs, one at a time, beating well after each addition.
- Stir in the vanilla extract until fully combined.
- Your mixture should be smooth and glossy at this point.
Step 4: Combine Dry Ingredients
- In a separate bowl, whisk together the all-purpose flour, baking soda, and salt.
- Gradually add the dry ingredients to the wet mixture, mixing on low speed until just combined.
- Pro Tip: Don’t overmix here—overworking the dough can make the cookie cake tough.
Step 5: Fold in Chocolate Chips or Candy
- Using a spatula, gently fold in your chocolate chips or chosen mix-ins until evenly distributed.
- Make sure they’re not all sinking to the bottom—give the spatula a few careful folds.
Step 6: Shape the Cookie Cake
- Transfer the dough to your prepared pan.
- Use a spatula to smooth the top into an even layer.
- Pro Tip: For a perfectly round cake, lightly press the dough into the edges of the pan without overworking it.
Step 7: Bake
- Place the cookie cake in the preheated oven and bake for 25–30 minutes, or until the edges are golden and the center is set.
- Check at the 25-minute mark; it should still look slightly soft in the middle—it will firm up as it cools.
Step 8: Cool Completely
- Remove the cookie cake from the oven and let it cool in the pan for 10 minutes.
- Transfer it to a cooling rack to cool completely before decorating.
- Pro Tip: Cooling fully prevents the icing from melting and ensures your decorations stay crisp.
Step 9: Decorate
- Mix powdered sugar, milk, and vanilla to make a smooth icing. Divide into small bowls and add food coloring.
- Use spoons, piping bags, or even a zip-top bag with a corner snipped to decorate with spooky designs, cute faces, or Halloween patterns.
- Sprinkle on candy or themed sprinkles for extra flair.
Tips and Tricks for Success
- Room Temperature Ingredients: Make sure butter and eggs are at room temperature for smoother mixing and a chewier cookie cake.
- Even Spreading: Use an offset spatula to spread the dough evenly in the pan—this ensures it bakes uniformly.
- Watch the Oven: Keep an eye on the cookie cake near the end of baking; ovens vary, and you don’t want it to overbake.
- Cool Completely Before Decorating: Patience pays off—decorating a warm cookie cake can make your icing run.
- Decorate Creatively: Don’t stress about perfection! Fun, whimsical designs give your Halloween cookie cake charm.
Ingredient Substitutions and Variations
- Butter: Swap with coconut oil or margarine for a different flavor or dairy-free version.
- Chocolate Chips: Use white chocolate, butterscotch chips, or seasonal candy pieces like candy corn or mini M&Ms.
- Flour: For a gluten-free version, try a 1:1 gluten-free flour blend.
- Sugar: Substitute coconut sugar for a slightly deeper, caramel-like sweetness.
- Icing: Swap powdered sugar icing for store-bought frosting, melted chocolate, or even a drizzle of caramel for a twist.
Serving Suggestions
- I love slicing this Halloween cookie cake into big, generous wedges and serving it with a cold glass of milk—it’s the ultimate nostalgic treat.
- Cut into smaller squares for a Halloween party platter alongside cupcakes, candy, and other Halloween desserts—it makes for a colorful, festive spread.
- Serve warm with a scoop of vanilla ice cream on top—the melty chocolate chips and soft cookie are heavenly together.
- Pair with hot cocoa or spiced apple cider for a cozy fall afternoon snack—it’s comfort in every bite.
- For a playful twist, let kids decorate their own mini slices with icing and sprinkles—it’s fun and interactive!
Storage and Reheating Instructions
- Room Temperature: Store in an airtight container for up to 3 days to keep it soft and chewy.
- Refrigerator: Keep in an airtight container for up to 1 week; bring to room temperature before serving.
- Freezer: Wrap tightly in plastic wrap and foil, freeze up to 3 months. Thaw overnight in the fridge.
- Reheating: Warm individual slices in the microwave for 10–15 seconds to get that fresh-baked feel.
- Decorations: Add icing or sprinkles after reheating if stored without decoration—it keeps them looking fresh and vibrant.
Frequently Asked Questions
Can I make this Halloween cookie cake ahead of time?
Absolutely! You can bake it a day or two in advance. Just store it in an airtight container at room temperature and decorate when ready to serve.
Can I use a different type of chocolate or candy?
Yes! Chocolate chips, white chocolate, butterscotch, or even candy pieces like M&Ms or candy corn work perfectly. Get creative with your Halloween cookie cakes ideas!
How do I keep the cookie cake soft and chewy?
Don’t overbake it! Pull it out when the edges are golden, and the center still looks slightly soft. It will firm up as it cools.
Can I make this gluten-free or dairy-free?
Definitely. Use a 1:1 gluten-free flour blend or substitute butter with coconut oil or a dairy-free alternative. It still tastes amazing!
What’s the best way to decorate it?
Powdered sugar icing is simple and colorful. Use food coloring, candy, or sprinkles to make cute Halloween cakes that impress everyone.
Can I make individual mini cookie cakes instead?
Yes! Divide the dough into smaller portions and bake on a lined sheet. They’re perfect for parties or personal servings, and decorating them can be extra fun.
Did you try this recipe? Let me know in the comments how your Halloween cookie cake turned out!
Halloween Cookie Cake
Equipment
- Mixing Bowls
- Electric hand mixer or stand mixer
- Measuring cups and spoons
- Spatula
- Baking sheet or round cake pan
- Parchment paper
- Cooling Rack
- Small bowls and spoons (optional)
Ingredients
For the Cookie Cake
- 1 cup 2 sticks unsalted butter, softened
- 1 cup granulated sugar
- 1 cup packed brown sugar
- 2 large eggs
- 2 tsp pure vanilla extract
- 3 cups all-purpose flour
- 1 tsp baking soda
- ½ tsp salt
- 2 cups chocolate chips or your favorite mix-ins like M&Ms, Reese’s pieces, or candy corn
For Decoration
- 1 cup powdered sugar
- 2 –3 tbsp milk
- 1 tsp vanilla extract
- Food coloring orange, black, green, or whatever spooky shades you love
- Halloween sprinkles or candy for accents
Instructions
Step 1: Preheat and Prepare
- Preheat your oven to 350°F (175°C).
- Line a round cake pan or baking sheet with parchment paper. This prevents sticking and makes cleanup a breeze.
- Pro Tip: If using a round cake pan, lightly grease it with butter before adding parchment for extra security.
Step 2: Cream the Butter and Sugars
- In a large mixing bowl, combine the softened butter, granulated sugar, and brown sugar.
- Use an electric hand mixer or stand mixer to beat on medium speed until light and fluffy (about 2–3 minutes).
- Pro Tip: Scrape down the sides of the bowl once or twice to make sure everything is evenly mixed.
Step 3: Add Eggs and Vanilla
- Crack in the eggs, one at a time, beating well after each addition.
- Stir in the vanilla extract until fully combined.
- Your mixture should be smooth and glossy at this point.
Step 4: Combine Dry Ingredients
- In a separate bowl, whisk together the all-purpose flour, baking soda, and salt.
- Gradually add the dry ingredients to the wet mixture, mixing on low speed until just combined.
- Pro Tip: Don’t overmix here—overworking the dough can make the cookie cake tough.
Step 5: Fold in Chocolate Chips or Candy
- Using a spatula, gently fold in your chocolate chips or chosen mix-ins until evenly distributed.
- Make sure they’re not all sinking to the bottom—give the spatula a few careful folds.
Step 6: Shape the Cookie Cake
- Transfer the dough to your prepared pan.
- Use a spatula to smooth the top into an even layer.
- Pro Tip: For a perfectly round cake, lightly press the dough into the edges of the pan without overworking it.
Step 7: Bake
- Place the cookie cake in the preheated oven and bake for 25–30 minutes, or until the edges are golden and the center is set.
- Check at the 25-minute mark; it should still look slightly soft in the middle—it will firm up as it cools.
Step 8: Cool Completely
- Remove the cookie cake from the oven and let it cool in the pan for 10 minutes.
- Transfer it to a cooling rack to cool completely before decorating.
- Pro Tip: Cooling fully prevents the icing from melting and ensures your decorations stay crisp.
Step 9: Decorate
- Mix powdered sugar, milk, and vanilla to make a smooth icing. Divide into small bowls and add food coloring.
- Use spoons, piping bags, or even a zip-top bag with a corner snipped to decorate with spooky designs, cute faces, or Halloween patterns.
- Sprinkle on candy or themed sprinkles for extra flair.
Notes
Nutritional Value (per serving)
- Calories: 410
- Carbohydrates: 55g
- Protein: 4g
- Fat: 20g
- Cholesterol: 55mg
- Sodium: 220mg
- Fiber: 2g
- Sugar: 35g