Grinch Sugar Cookies

The holidays are the perfect time to get a little creative in the kitchen, and these Grinch Sugar Cookies are a fun way to bring the mischievous spirit of Whoville straight to your plate. Bursting with festive colors and a playful twist on a classic treat, these cookies are sure to delight kids and adults alike. From their bright green icing to the whimsical red heart accents, they’re an eye-catching addition to any holiday cookie spread.
Baking these cookies is just as joyful as eating them. With a soft, chewy texture and a buttery flavor that melts in your mouth, they stand out among traditional Christmas themed cookies. You’ll find yourself reaching for seconds, and maybe even thirds, before you know it. These cookies also make an excellent addition to a holiday cookie exchange, showing off both your baking skills and your fun, festive side.
One of the best things about this Grinch cookies recipe is how approachable it is. Even if you’re new to baking, the steps are straightforward, and the results are impressive. You can customize the icing and decorations to match your personal style, making each cookie a tiny piece of edible art. And for those who love classic Christmas sugar cookie ideas, these put a playful twist on tradition while still giving that perfect chewy cookie experience everyone loves.
Beyond just being a sweet treat, these Grinch desserts bring a touch of whimsy to holiday gatherings. Whether you’re leaving them out for Santa, gifting them to friends, or enjoying them with a cozy cup of cocoa, they instantly add cheer to any occasion. They’re a great reminder that Christmas is about fun, laughter, and a little bit of mischief—just like the Grinch himself.
Why You’ll Love It
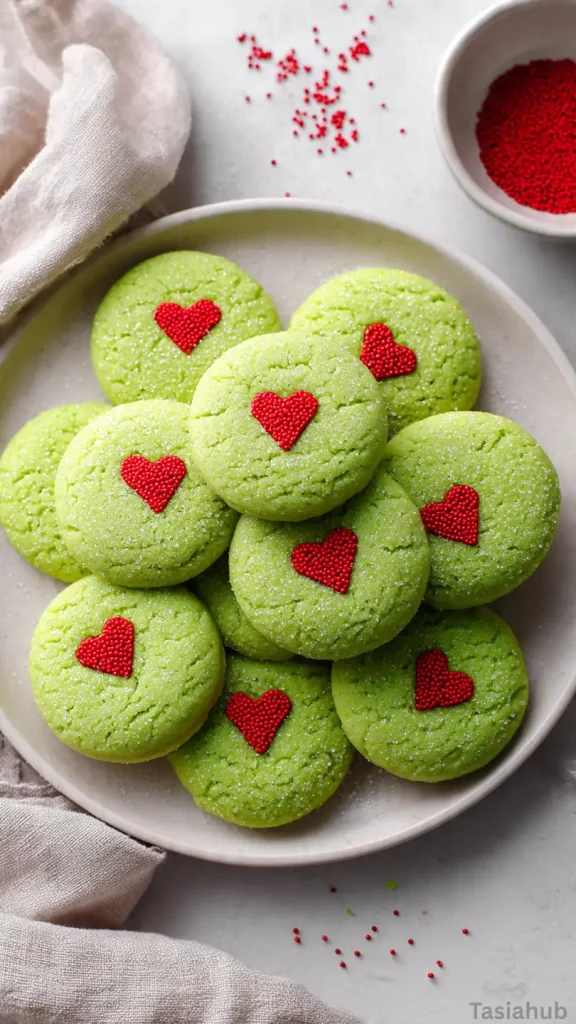
- Fun and Festive Design – These cookies instantly capture the playful, mischievous charm of the Grinch, making them a standout on any holiday cookie platter. Kids and adults alike will be drawn to the bright green color and the little red heart details.
- Perfectly Chewy Texture – Unlike some sugar cookies that can be dry, these Grinch sugar cookies stay soft and chewy, giving every bite that satisfying melt-in-your-mouth experience.
- Customizable Decorations – Whether you want to get intricate with icing or keep it simple, this recipe allows you to add your personal touch. Each cookie can be a mini masterpiece of your own creation.
- Great for Holiday Traditions – These cookies aren’t just treats—they’re a way to make memories. Baking them with family or friends adds a playful twist to your holiday traditions and spreads joy with every bite.
- Versatile for Any Occasion – While perfect for Christmas, these cookies can also brighten up winter parties, holiday exchanges, or even themed birthday celebrations. They’re fun, festive, and a little mischievous—just like the Grinch!
Ingredients
For the Cookies:
- 2 ¾ cups all-purpose flour
- 1 teaspoon baking soda
- ½ teaspoon baking powder
- ½ teaspoon salt
- 1 cup unsalted butter, softened
- 1 ½ cups granulated sugar
- 1 large egg
- 1 teaspoon vanilla extract
- ¼ teaspoon almond extract (optional, but adds great flavor)
- Green gel food coloring
- Red heart sprinkles or red M&Ms for decoration
- Optional: granulated or sanding sugar for sprinkling before baking
Ingredient Notes
- I always use unsalted butter because it gives you full control over the sweetness and keeps the cookies perfectly soft.
- Don’t skip the almond extract—just a touch adds a subtle warmth that makes these cookies extra special.
- Gel food coloring is the way to go for bright, vibrant green without changing the icing texture.
- I love using a small red candy melt or a tiny dab of icing for the Grinch’s heart—it’s the perfect finishing touch that makes these cookies adorable and festive.
Kitchen Equipment Needed
- Mixing Bowls – For combining wet and dry ingredients separately; I love using glass bowls so you can see everything clearly.
- Electric Mixer – Makes creaming the butter and sugar effortless; a hand mixer works perfectly too.
- Measuring Cups & Spoons – Accurate measurements are key for chewy cookies; I always use stainless steel for consistency.
- Baking Sheets – Nonstick or lined with parchment paper to prevent sticking and ensure even baking.
- Parchment Paper or Silicone Baking Mats – Keeps cookies from sticking and makes cleanup a breeze.
- Cooling Rack – Lets cookies cool completely without getting soggy on the bottom; I use a stackable set for efficiency.
- Spatula – For scraping the bowl and transferring cookies to the baking sheet.
- Piping Bags & Tips – Essential for decorating the Grinch’s face and tiny heart details; reusable bags make life easier.
- Toothpicks or Small Paintbrush – Handy for fine icing details and smoothing edges.
Instructions
Step 1 — Preheat & Prepare Baking Station
- Set your oven to 350°F (175°C).
- Line two baking sheets with parchment paper or silicone mats so cookies won’t stick.
- Place a cooling rack nearby and clear a small area for shaping cookies.
- Gather measuring cups, tablespoon or cookie scoop, a mixing bowl, spatula, electric mixer (or sturdy whisk), and a small bowl for food coloring.
Pro tip: If your butter is cold, cut it into small cubes and let it sit for 30 minutes — it should be soft but not greasy.
Step 2 — Combine Dry Ingredients (small, precise steps)
- In a medium bowl, add 2 ¾ cups all-purpose flour.
- Add 1 teaspoon baking soda, ½ teaspoon baking powder, and ½ teaspoon salt.
- Whisk the mixture 6–10 times until evenly distributed.
- Set this bowl aside so you can add it gradually later.
Pro tip: Whisk briefly and evenly — this prevents pockets of baking soda or salt that can impact texture.
Step 3 — Cream Butter & Sugar (build structure)
- Put 1 cup softened unsalted butter into a large mixing bowl.
- Add 1 ½ cups granulated sugar on top of the butter.
- Using an electric mixer, beat on medium speed for 2–3 minutes until the mixture is pale and fluffy.
- Pause once to scrape down the bowl sides with a spatula so everything mixes evenly.
Pro tip: Creaming until pale (not just combined) traps air — that gives you a light, tender cookie.
Step 4 — Add Egg & Extracts (folding in wet)
- Crack in 1 large egg and add 1 teaspoon vanilla extract and ¼ teaspoon almond extract (optional).
- Beat on low–medium until fully incorporated and the batter looks smooth.
- Scrape the bowl again so no streaks remain.
Step 5 — Add Dry Ingredients Gradually (easy control)
- With the mixer on low, add the dry flour mixture in two or three additions, mixing just until each addition disappears.
- Stop mixing as soon as you no longer see flour — overmixing makes cookies tough.
Step 6 — Color the Dough (even, baked-through color)
- Transfer the dough to a clean surface or leave in the bowl. Add several drops of green gel food coloring.
- Fold and knead gently using a spatula and/or clean hands until color is uniform throughout the dough.
- If you want a deeper green, add one drop at a time — gel is concentrated.
Pro tip: Use gel (not liquid) to avoid changing dough hydration; knead with a spatula first to keep hands cleaner.
Step 7 — Portion & Shape (consistent cookies)
- Use a tablespoon or cookie scoop to portion dough into even balls (about 1 tablespoon each).
- Roll each portion between your palms into a smooth ball.
- Place balls 2 inches apart on prepared baking sheets.
- Lightly press each ball to flatten into a gentle dome (about 1/2 inch thick).
Step 8 — Add Sparkle & Red Heart (visual finishing)
- If using, sprinkle a pinch of sanding or granulated sugar on each cookie for sparkle.
- Press one red heart sprinkle or a red M&M into the center of each cookie—press gently so it embeds but doesn’t flatten the cookie.
Step 9 — Bake (watch closely)
- Slide one sheet into the center of the preheated oven.
- Bake for 9–11 minutes, until the edges are just turning light golden while the centers still look slightly soft.
- Rotate the pan front-to-back halfway through if your oven runs unevenly.
Pro tip: Aim for slightly underbaked centers — cookies firm up as they cool and stay soft-chewy this way.
Step 10 — Cool & Finish
- Remove the sheet from the oven and let cookies rest 5 minutes on the baking sheet so they set.
- Transfer cookies to the cooling rack to cool completely.
- Once cooled, gently press any slightly lifted heart sprinkles back into place if needed.
Tips and Tricks for Success
- Don’t overmix the dough – Once the flour is added, mix just until combined to keep cookies soft and chewy.
- Chill the dough – A quick 10–15 minute chill prevents excessive spreading and helps the cookies keep their shape.
- Use gel food coloring – It gives bright, vibrant green without watering down the dough or icing.
- Cool completely before decorating – This prevents icing from melting and keeps your designs crisp.
- Use parchment paper or silicone mats – They ensure even baking and make cleanup so much easier.
- Pipe in layers if needed – For intricate details, let the base icing set before adding smaller decorations.
Ingredient Substitutions and Variations
- Butter: Can substitute with margarine or coconut oil for a slightly different flavor and texture.
- Egg: Use a flax or chia egg to make the cookies vegan-friendly.
- Almond extract: Replace with extra vanilla if you prefer a simpler flavor profile.
- Green icing: Mix yellow and blue gel if you don’t have green on hand—just add gradually to get the perfect shade.
- Red heart detail: Use mini M&Ms, red sprinkles, or even tiny pieces of fruit leather for a fun twist.
- Chewy texture: Swap half the all-purpose flour with cake flour for an even softer cookie.
Serving Suggestions
- I love serving these Grinch sugar cookies with a warm mug of hot cocoa topped with whipped cream—it’s like a cozy Christmas hug in a cup!
- They’re perfect for a holiday cookie platter alongside classic Xmas cookies like gingerbread and peppermint bark; the green really pops against reds and whites.
- Pack a few in festive treat bags as cute gifts for neighbors or coworkers—they always bring a smile!
- Serve them at a holiday movie night with “How the Grinch Stole Christmas” playing in the background for extra fun.
- I sometimes crumble a cookie over vanilla ice cream for a playful, crunchy topping—it’s a little whimsical and totally delicious.

Storage and Reheating Instructions
- Room Temperature: Store in an airtight container for up to 5 days to maintain softness.
- Refrigerator: Keep in a sealed container for up to 7 days; let them come to room temperature before serving.
- Freezer: Freeze cookies in a single layer on a baking sheet, then transfer to a freezer-safe bag for up to 3 months.
- Reheating: Warm in the microwave for 10–15 seconds or in a 300°F (150°C) oven for 3–4 minutes to refresh the chewy texture.
- Decorated Cookies: If icing is fully set, stack with parchment paper between layers to prevent sticking when storing.
Frequently Asked Questions
Can I make these cookies ahead of time?
Absolutely! You can make the dough a day in advance and keep it refrigerated, or bake the cookies and store them in an airtight container for a few days. They actually taste even better after sitting for a day.
How do I keep the cookies soft and chewy?
Don’t overbake! Remove them from the oven when the edges are just set and the centers still look slightly soft. Cooling on the baking sheet for a few minutes also helps maintain that chewy texture.
Can I use a different color for the icing?
Of course! You can customize your Grinch cookies with any color you like. Gel food coloring works best to keep the icing thick and vibrant.
Can these cookies be made vegan or gluten-free?
Yes! Swap the butter for a plant-based alternative, use a flax or chia egg, and replace the flour with a gluten-free blend. The texture may vary slightly, but they’ll still be delicious.
How do I decorate the cookies if I’m not confident with piping?
No worries! You can spread the icing with a small spatula and use a toothpick to add simple details. Mini candy melts or sprinkles work great for quick, easy designs.
Can I freeze the cookies with icing?
Yes, but make sure the icing is completely set before freezing. Place cookies in a single layer with parchment paper between layers, and thaw at room temperature before serving.
Did you try this Grinch sugar cookies recipe? Let me know in the comments how it turned out—I’d love to hear your festive creations!

Grinch Sugar Cookies
Equipment
- Mixing Bowls
- Electric mixer
- Measuring Cups & Spoons
- Baking sheets
- Parchment paper or silicone baking mats
- Cooling Rack
- Spatula
- Piping bags & tips
- Toothpicks or Small Paintbrush
Ingredients
- 2 ¾ cups all-purpose flour
- 1 teaspoon baking soda
- ½ teaspoon baking powder
- ½ teaspoon salt
- 1 cup unsalted butter softened
- 1 ½ cups granulated sugar
- 1 large egg
- 1 teaspoon vanilla extract
- ¼ teaspoon almond extract optional, but adds great flavor
- Green gel food coloring
- Red heart sprinkles or red M&Ms for decoration
- Optional: granulated or sanding sugar for sprinkling before baking
Instructions
Step 1 — Preheat & Prepare Baking Station
- Set your oven to 350°F (175°C).
- Line two baking sheets with parchment paper or silicone mats so cookies won’t stick.
- Place a cooling rack nearby and clear a small area for shaping cookies.
- Gather measuring cups, tablespoon or cookie scoop, a mixing bowl, spatula, electric mixer (or sturdy whisk), and a small bowl for food coloring.
- Pro tip: If your butter is cold, cut it into small cubes and let it sit for 30 minutes — it should be soft but not greasy.
Step 2 — Combine Dry Ingredients (small, precise steps)
- In a medium bowl, add 2 ¾ cups all-purpose flour.
- Add 1 teaspoon baking soda, ½ teaspoon baking powder, and ½ teaspoon salt.
- Whisk the mixture 6–10 times until evenly distributed.
- Set this bowl aside so you can add it gradually later.
- Pro tip: Whisk briefly and evenly — this prevents pockets of baking soda or salt that can impact texture.
Step 3 — Cream Butter & Sugar (build structure)
- Put 1 cup softened unsalted butter into a large mixing bowl.
- Add 1 ½ cups granulated sugar on top of the butter.
- Using an electric mixer, beat on medium speed for 2–3 minutes until the mixture is pale and fluffy.
- Pause once to scrape down the bowl sides with a spatula so everything mixes evenly.
- Pro tip: Creaming until pale (not just combined) traps air — that gives you a light, tender cookie.
Step 4 — Add Egg & Extracts (folding in wet)
- Crack in 1 large egg and add 1 teaspoon vanilla extract and ¼ teaspoon almond extract (optional).
- Beat on low–medium until fully incorporated and the batter looks smooth.
- Scrape the bowl again so no streaks remain.
Step 5 — Add Dry Ingredients Gradually (easy control)
- With the mixer on low, add the dry flour mixture in two or three additions, mixing just until each addition disappears.
- Stop mixing as soon as you no longer see flour — overmixing makes cookies tough.
Step 6 — Color the Dough (even, baked-through color)
- Transfer the dough to a clean surface or leave in the bowl. Add several drops of green gel food coloring.
- Fold and knead gently using a spatula and/or clean hands until color is uniform throughout the dough.
- If you want a deeper green, add one drop at a time — gel is concentrated.
- Pro tip: Use gel (not liquid) to avoid changing dough hydration; knead with a spatula first to keep hands cleaner.
Step 7 — Portion & Shape (consistent cookies)
- Use a tablespoon or cookie scoop to portion dough into even balls (about 1 tablespoon each).
- Roll each portion between your palms into a smooth ball.
- Place balls 2 inches apart on prepared baking sheets.
- Lightly press each ball to flatten into a gentle dome (about 1/2 inch thick).
Step 8 — Add Sparkle & Red Heart (visual finishing)
- If using, sprinkle a pinch of sanding or granulated sugar on each cookie for sparkle.
- Press one red heart sprinkle or a red M&M into the center of each cookie—press gently so it embeds but doesn’t flatten the cookie.
Step 9 — Bake (watch closely)
- Slide one sheet into the center of the preheated oven.
- Bake for 9–11 minutes, until the edges are just turning light golden while the centers still look slightly soft.
- Rotate the pan front-to-back halfway through if your oven runs unevenly.
- Pro tip: Aim for slightly underbaked centers — cookies firm up as they cool and stay soft-chewy this way.
Step 10 — Cool & Finish
- Remove the sheet from the oven and let cookies rest 5 minutes on the baking sheet so they set.
- Transfer cookies to the cooling rack to cool completely.
- Once cooled, gently press any slightly lifted heart sprinkles back into place if needed.
Step 11 — Store or Freeze
- Store cookies in an airtight container at room temperature for up to 5 days.
- To freeze: place cooled cookies in a single layer on a tray, freeze until solid, then transfer to a freezer bag for up to 3 months. Thaw at room temperature before serving.
Notes
Nutritional Value (Per Cookie):
- Calories: 165 kcal
- Carbohydrates: 23g
- Protein: 2g
- Fat: 7g
- Saturated Fat: 4g
- Cholesterol: 25mg
- Sodium: 85mg
- Sugar: 14g
- Fiber: 0.5g
- Calcium: 10mg
- Iron: 0.6mg