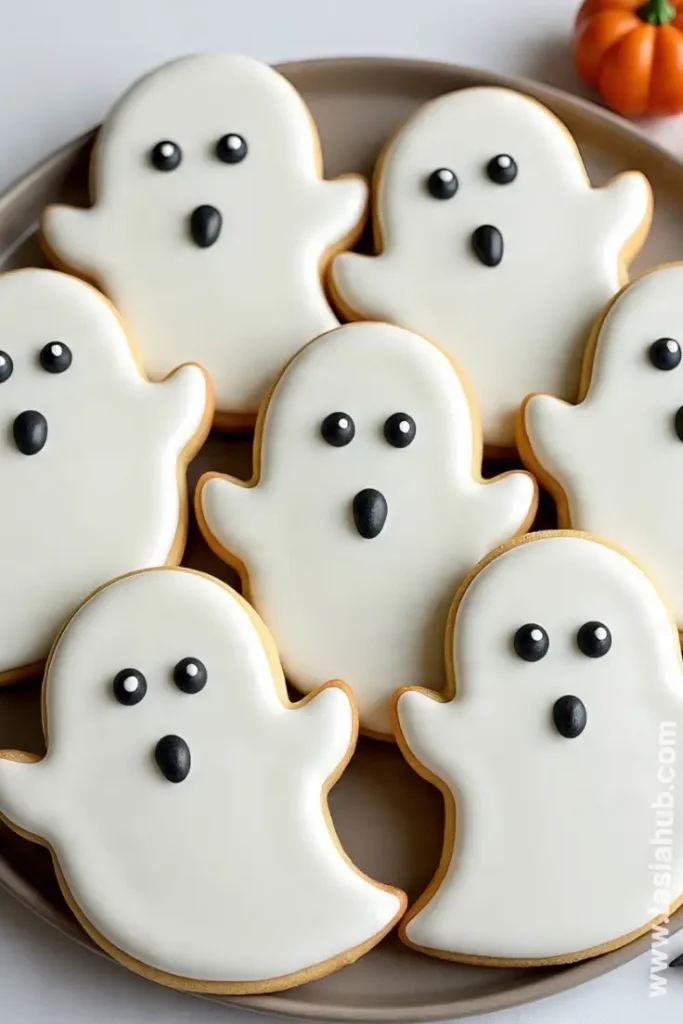
Ghost Sugar Cookies

Halloween is the perfect time to bring a little spooky charm to your kitchen, and these ghost sugar cookies are the sweetest way to do it. Fluffy, buttery, and perfectly soft, these cookies aren’t just delicious—they’re downright adorable. Whether you’re baking with kids or just want to impress your friends at a Halloween gathering, these cute ghost cookie designs are sure to steal the show.
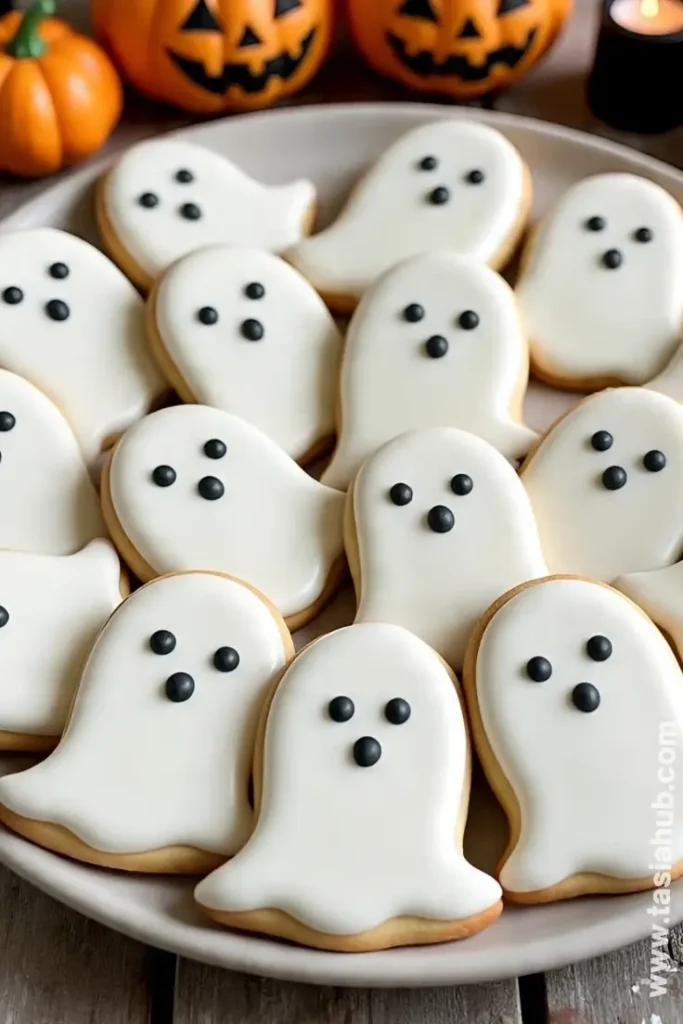
What makes these Halloween sugar cookies extra special is how versatile they are. You can keep them simple with a classic sugar cookie base, or dress them up with fun icing designs. Think spooky cookies with little smiling faces, eerie expressions, or playful ghost shapes that will make everyone grin. They’re the kind of scary Halloween cookies that are more cute than frightening, making them perfect for parties, bake sales, or just a cozy night of Halloween baking at home.
This post contains affiliate links, and I may earn a small commission when you click on the link at no additional cost to you. As an Amazon Affiliate, I earn from qualifying purchases. Thank you.
I love how baking ghost cookies brings out that cozy, festive feeling without requiring hours of complicated prep. With just a few basic ingredients and a little icing creativity, you can turn your kitchen into a Halloween wonderland. And the best part? The kids (or adults!) get to help decorate, which always adds an extra layer of fun—and maybe a little sugar-fueled chaos.
Plus, these Halloween iced cookies make a great treat for gifting. Wrap them up in cellophane with a ribbon, and suddenly they’re the perfect spooky snack to share with neighbors, friends, or coworkers. Whether you keep them simple or go all out with icing and sprinkles, these ghost sugar cookies are a festive, delightful way to celebrate the season.
Why You’ll Love It
- Adorably festive: These ghost sugar cookies strike the perfect balance between spooky and cute. The ghost cookie design is fun to decorate, making them a treat that’s as delightful to look at as it is to eat.
- Soft, buttery perfection: Each bite is tender and melts in your mouth, unlike some Halloween cookies that are overly crunchy. The texture is just right for decorating and enjoying fresh from the oven.
- Fun for all ages: Whether you’re baking with little helpers or hosting a Halloween party, these cookies are easy enough for kids to get creative with icing while still being a crowd-pleaser for adults.
- Versatile decorating options: From simple icing faces to elaborate spooky designs, you can get as playful—or as spooky—as you like. No two ghost cookies need to look the same!
- Perfect for gifting or parties: Halloween iced cookies like these make an instant festive treat. Package them for friends, neighbors, or party favors, and they’ll be a hit every time.
Ingredient List
For the Cookies
- 2 ½ cups all-purpose flour
- ½ teaspoon baking powder
- ¼ teaspoon salt
- ¾ cup unsalted butter, softened
- 1 cup granulated sugar
- 1 large egg
- 1 teaspoon vanilla extract
- ½ teaspoon almond extract (optional, but adds a nice depth!)
For the Icing
- 2 cups powdered sugar
- 2–3 tablespoons milk (or more for desired consistency)
- ½ teaspoon vanilla extract
- Gel food coloring (white for ghosts, plus optional black or orange for faces)
Ingredient Notes
- I always use unsalted butter for cookies—it lets you control the sweetness and really makes the flavor shine.
- Don’t skip the vanilla extract! It’s what gives the cookies that warm, comforting flavor.
- A pinch of almond extract in the dough adds a subtle depth, but it’s totally optional if you’re keeping things classic.
- For icing, start with less milk and add gradually—this makes decorating so much easier and keeps your cute ghost cookie designs crisp.
- Gel food coloring works best for vibrant colors without changing the icing texture.
Kitchen Equipment Needed
- Mixing bowls – For combining cookie dough and icing; I love using glass bowls so I can see everything clearly.
- Electric mixer – Makes creaming butter and sugar super easy and smooth.
- Measuring cups & spoons – For precise measurements; baking is all about accuracy!
- Rolling pin – To roll out the dough evenly; my silicone one prevents sticking.
- Cookie cutters (ghost-shaped) – Essential for creating those cute ghost cookie designs.
- Baking sheets – For baking the cookies; I line mine with parchment paper for easy cleanup.
- Cooling racks – Helps cookies cool evenly so icing doesn’t melt.
- Piping bags & tips – For decorating with icing; I keep a small round tip for faces.
- Spatula – For transferring cookies without breaking them; silicone works best.
Instructions
Step 1: Prepare the Dough
- In a medium bowl, whisk together flour, baking powder, and salt. Set aside.
- In a large mixing bowl, use an electric mixer to cream the butter and sugar until light and fluffy (about 2–3 minutes).
- Pro Tip: Scrape down the sides of the bowl halfway through to make sure everything is evenly mixed.
- Beat in the egg, vanilla extract, and almond extract until fully incorporated.
- Gradually add the dry ingredients to the wet mixture, mixing on low speed until a smooth dough forms.
Step 2: Chill the Dough
- Divide the dough into two disks and wrap each in plastic wrap.
- Chill in the refrigerator for at least 1 hour.
- Pro Tip: Chilling makes the dough easier to roll and helps the cookies hold their shape while baking.
Step 3: Roll and Cut the Cookies
- Preheat your oven to 350°F (175°C).
- On a lightly floured surface, roll out one dough disk to about ¼-inch thickness.
- Use your ghost-shaped cookie cutter to cut out shapes and transfer them to a lined baking sheet using a spatula.
- Pro Tip: If the dough gets sticky, lightly flour the rolling pin and surface, or chill the dough a few more minutes.
Step 4: Bake the Cookies
- Bake for 8–10 minutes, or until the edges are just starting to turn golden.
- Remove from the oven and let cookies cool on the baking sheet for 5 minutes before transferring to a cooling rack.
- Pro Tip: Letting cookies cool slightly on the sheet prevents them from breaking while moving.
Step 5: Prepare the Icing
- In a small bowl, whisk together powdered sugar, milk, and vanilla extract until smooth.
- Adjust consistency: add more milk for thinner icing (for flooding) or more powdered sugar for thicker icing (for details).
- Divide icing into separate bowls if using multiple colors.
Step 6: Decorate the Ghost Cookies
- Fill a piping bag with white icing and outline each ghost cookie. Flood the inside with more white icing using a spatula or spoon tip.
- Let the base icing set for 15–20 minutes before adding faces.
- Use a small round tip or toothpick to pipe black icing eyes and mouths, creating cute ghost cookie designs.
- Pro Tip: Don’t rush the icing—letting each layer set ensures smooth, clean lines for your spooky cookies.
Tips and Tricks for Success
- Chill dough thoroughly: This prevents the cookies from spreading too much and keeps the ghost shapes crisp.
- Use parchment paper or silicone mats: Makes transferring cookies easy and prevents sticking.
- Don’t overbake: Cookies should be just set with slightly golden edges for a soft, tender texture.
- Work in small batches with icing: Flooding and decorating one or two cookies at a time keeps icing from drying out too quickly.
- Clean piping tip often: Wipe between uses to keep your ghost faces neat and precise.
- Experiment with expressions: Each ghost can have a different cute or spooky face—makes decorating more fun!
Ingredient Substitutions and Variations
- Butter: Swap with margarine or coconut oil for a dairy-free version; texture may be slightly different.
- All-purpose flour: Try gluten-free flour blend to make them gluten-free—cookies may be a touch more delicate.
- Vanilla extract: Almond extract or maple extract can add a unique flavor twist.
- Icing: Use royal icing for a firmer, more detailed finish, or store-bought decorating icing for a quicker option.
- Cookie shapes: While ghosts are classic, you can also make bats, pumpkins, or witches for more variety.
- Colors: Add a drop of gel coloring to the base icing for fun, themed variations (think pastel ghosts or orange-and-black accents).
Serving Suggestions
- I love arranging these ghost sugar cookies on a festive Halloween platter with orange and black napkins—it instantly brightens up the table for a party.
- Serve them alongside hot chocolate or pumpkin spice lattes for a cozy autumn afternoon treat.
- Wrap a few in cellophane bags with ribbon for cute, homemade gifts for neighbors or coworkers.
- Add them to a Halloween dessert board with brownies, candy corn, and mini cupcakes for a fun, spooky spread.
- Pair them with a scoop of vanilla ice cream for a playful twist on dessert—soft cookies with cold, creamy ice cream is a dream combo!
Storage and Reheating Instructions
- Room temperature: Store in an airtight container for up to 5 days to keep them soft and fresh.
- Refrigerator: Keep in an airtight container for up to 1 week; allow cookies to come to room temperature before serving.
- Freezer: Wrap individually in plastic wrap and place in a freezer bag for up to 3 months. Thaw overnight at room temperature.
- Reheating: Warm slightly in a microwave (10–15 seconds) or in a 300°F oven for 3–5 minutes for that fresh-baked taste.
- Icing tip: If freezing decorated cookies, let icing harden completely before freezing to prevent smudging.
Frequently Asked Questions
Can I make these cookies gluten-free?
Absolutely! Swap the all-purpose flour for a gluten-free flour blend. The texture might be slightly softer, but they’ll still hold their ghost shapes beautifully.
How long will the cookies stay fresh?
Stored in an airtight container at room temperature, they stay fresh for about 5 days. You can also freeze them for longer storage.
Can I use store-bought icing?
Yes! Store-bought icing works perfectly if you want a quicker decorating option. Just make sure it’s thick enough to pipe details clearly.
Can I make the cookies ahead of time?
Definitely. You can bake and freeze undecorated cookies. Thaw completely before icing for best results.
How do I prevent icing from running?
Let each layer of icing set completely before adding details or additional colors. This keeps your cute ghost cookie designs neat and tidy.
Can I get creative with ghost designs?
Of course! Try different expressions, add tiny sprinkles, or even mini chocolate chips to make each ghost unique and fun.
Did you try this recipe? Let me know in the comments how your ghost sugar cookies turned out—I love seeing all the spooky, adorable creations!

Ghost Sugar Cookies
Equipment
- Mixing Bowls
- Electric mixer
- Measuring Cups & Spoons
- Rolling Pin
- Cookie cutters (ghost-shaped)
- Baking sheets
- Cooling racks
- Piping bags & tips
- Spatula
Ingredients
For the Cookies
- 2 ½ cups all-purpose flour
- ½ teaspoon baking powder
- ¼ teaspoon salt
- ¾ cup unsalted butter softened
- 1 cup granulated sugar
- 1 large egg
- 1 teaspoon vanilla extract
- ½ teaspoon almond extract optional, but adds a nice depth!
For the Icing
- 2 cups powdered sugar
- 2 –3 tablespoons milk or more for desired consistency
- ½ teaspoon vanilla extract
- Gel food coloring white for ghosts, plus optional black or orange for faces
Instructions
Step 1: Prepare the Dough
- In a medium bowl, whisk together flour, baking powder, and salt. Set aside.
- In a large mixing bowl, use an electric mixer to cream the butter and sugar until light and fluffy (about 2–3 minutes).
- Pro Tip: Scrape down the sides of the bowl halfway through to make sure everything is evenly mixed.
- Beat in the egg, vanilla extract, and almond extract until fully incorporated.
- Gradually add the dry ingredients to the wet mixture, mixing on low speed until a smooth dough forms.
Step 2: Chill the Dough
- Divide the dough into two disks and wrap each in plastic wrap.
- Chill in the refrigerator for at least 1 hour.
- Pro Tip: Chilling makes the dough easier to roll and helps the cookies hold their shape while baking.
Step 3: Roll and Cut the Cookies
- Preheat your oven to 350°F (175°C).
- On a lightly floured surface, roll out one dough disk to about ¼-inch thickness.
- Use your ghost-shaped cookie cutter to cut out shapes and transfer them to a lined baking sheet using a spatula.
- Pro Tip: If the dough gets sticky, lightly flour the rolling pin and surface, or chill the dough a few more minutes.
Step 4: Bake the Cookies
- Bake for 8–10 minutes, or until the edges are just starting to turn golden.
- Remove from the oven and let cookies cool on the baking sheet for 5 minutes before transferring to a cooling rack.
- Pro Tip: Letting cookies cool slightly on the sheet prevents them from breaking while moving.
Step 5: Prepare the Icing
- In a small bowl, whisk together powdered sugar, milk, and vanilla extract until smooth.
- Adjust consistency: add more milk for thinner icing (for flooding) or more powdered sugar for thicker icing (for details).
- Divide icing into separate bowls if using multiple colors.
Step 6: Decorate the Ghost Cookies
- Fill a piping bag with white icing and outline each ghost cookie. Flood the inside with more white icing using a spatula or spoon tip.
- Let the base icing set for 15–20 minutes before adding faces.
- Use a small round tip or toothpick to pipe black icing eyes and mouths, creating cute ghost cookie designs.
- Pro Tip: Don’t rush the icing—letting each layer set ensures smooth, clean lines for your spooky cookies.
Notes
Nutritional Value per Cookie (without icing):
- Calories: ~120 kcal
- Fat: ~6 g
- Saturated Fat: ~3.5 g
- Carbohydrates: ~16 g
- Sugars: ~9 g
- Protein: ~1 g
- Fiber: 0–1 g