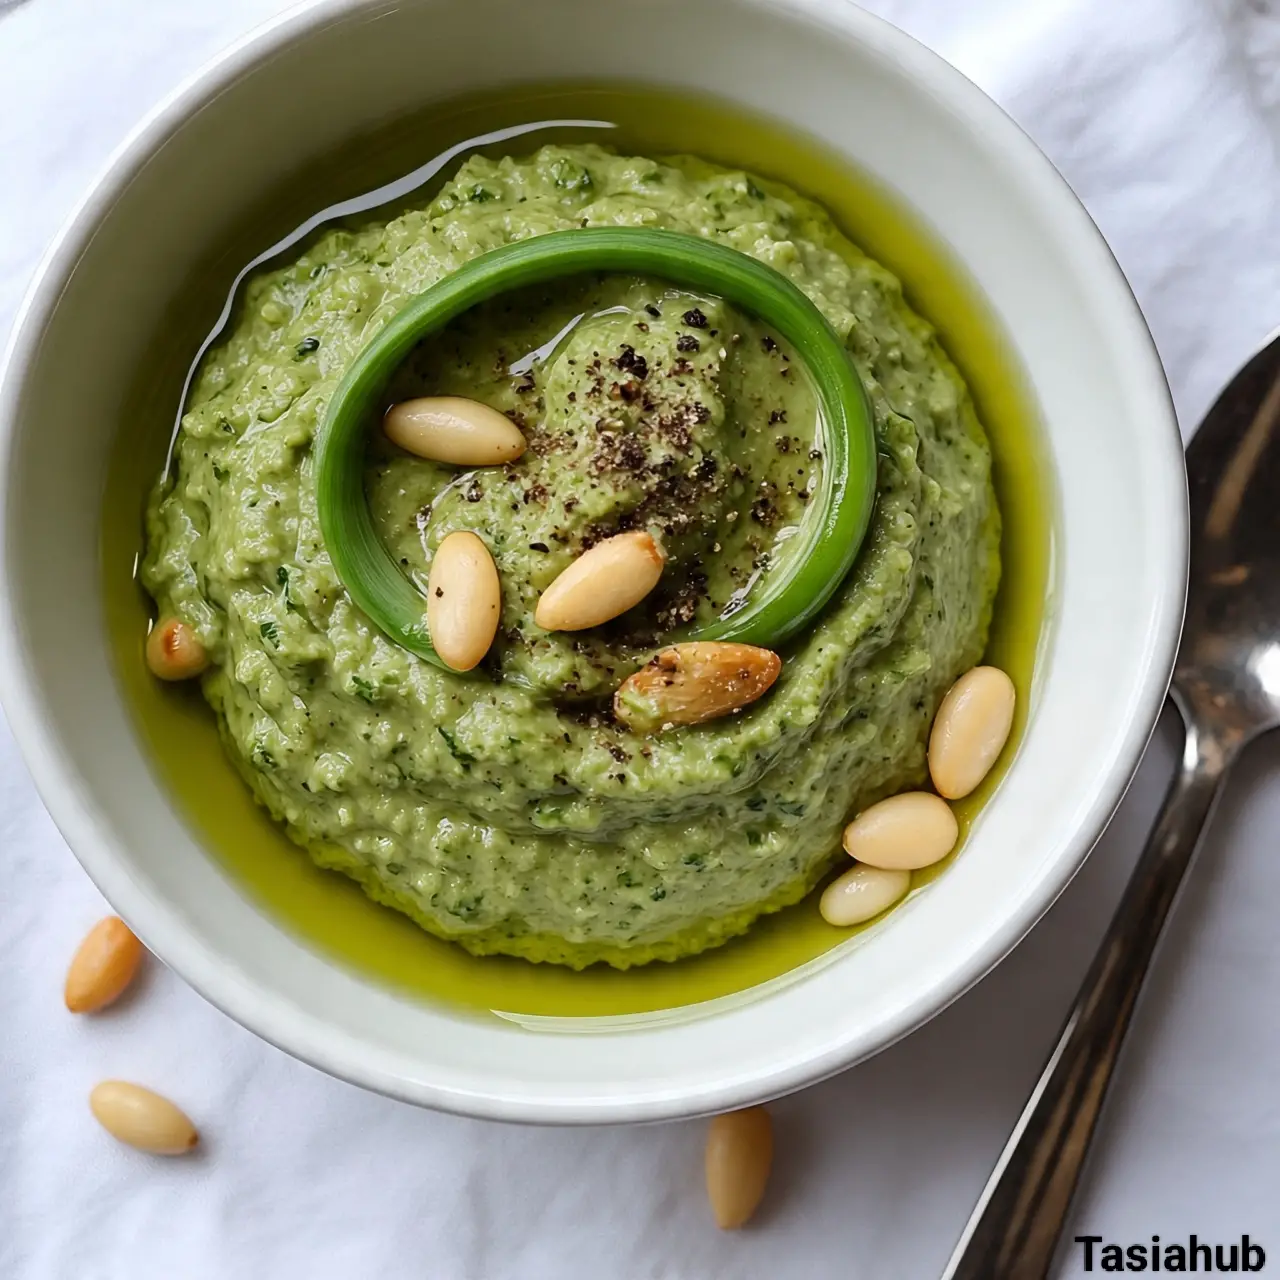
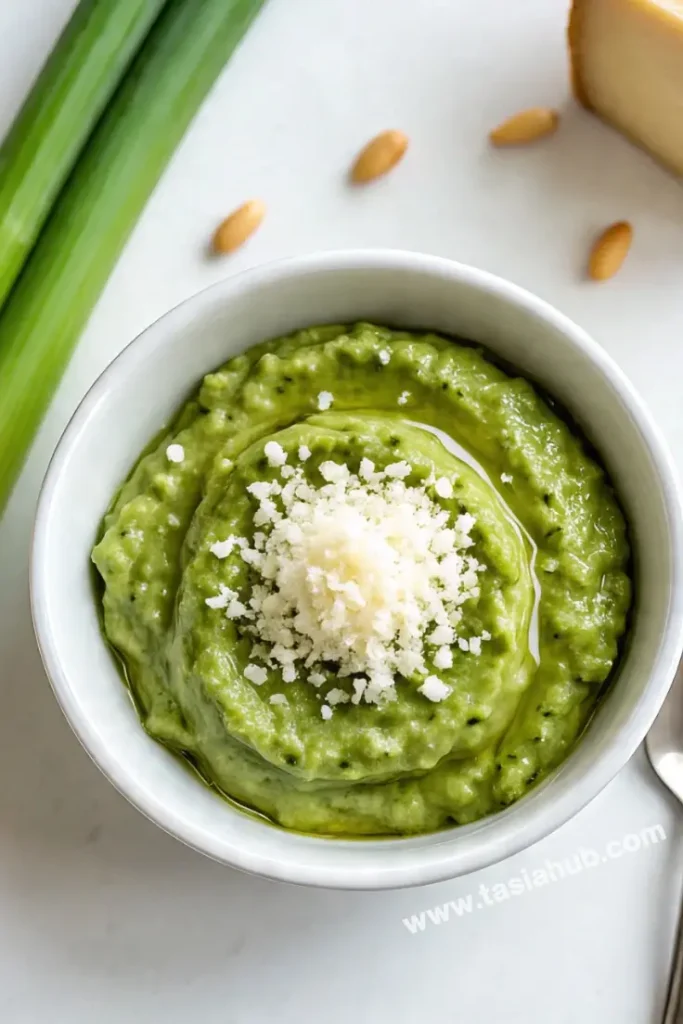
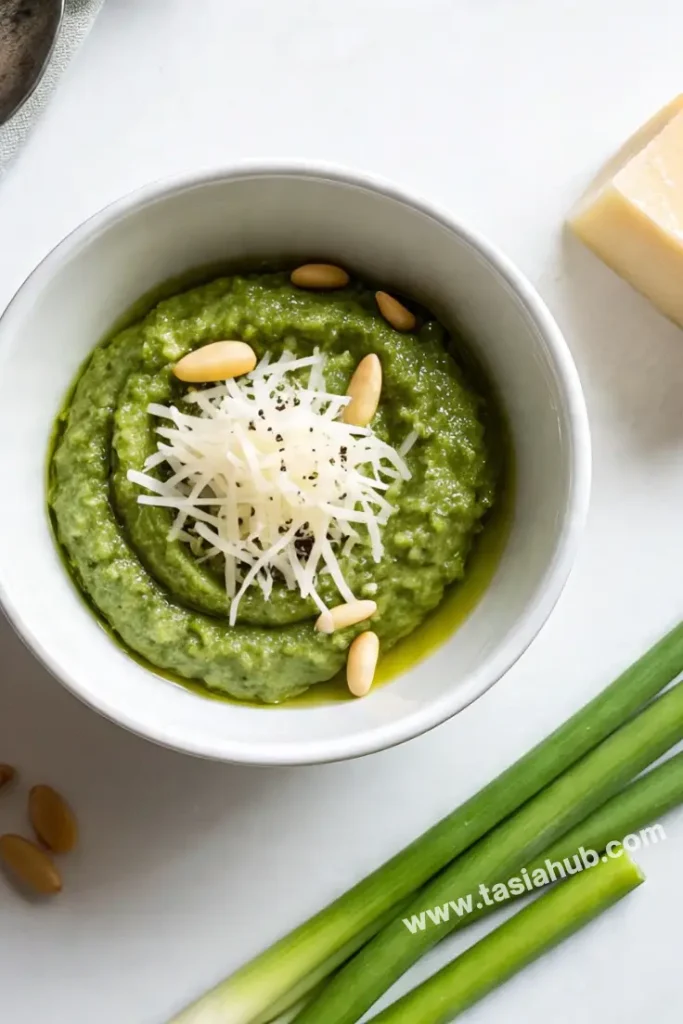
Garlic Scape Pesto
If you’ve never heard of garlic scapes before, you’re in for a treat! Garlic scapes are those long, curly, bright green shoots that grow from garlic bulbs in late spring and early summer. They’re kind of like the garlic bulb’s fun and feisty cousin—mildly garlicky but fresh, bright, and vibrant in flavor.
Gardeners love them because they pop up early and are super easy to harvest, and food lovers adore them for their unique taste and versatility. If you’re lucky enough to find garlic scapes at your local farmers’ market or grow them yourself, making garlic scape pesto is one of the best ways to enjoy their flavor.
Garlic scape pesto is like a delicious twist on traditional basil pesto, but with a garlicky punch and a fresher, more herbaceous vibe. It’s perfect for when you want to jazz up your pasta, spread on toast, drizzle over roasted veggies, or even mix into salad dressings. Plus, it’s incredibly easy to make with just a few ingredients and a blender or food processor. The texture is creamy and vibrant green, bursting with flavor that feels light yet deeply satisfying.
What’s really great about garlic scape pesto is that it’s a fantastic way to reduce food waste and use a part of the garlic plant that might otherwise get tossed aside. Garlic scapes have a mild garlic flavor but without the pungency or bite of the bulb itself, making this pesto more subtle and fresh than traditional versions. And if you’re looking for a fun cooking project that brings a little summer garden magic into your kitchen, this pesto is a delicious, bright way to celebrate seasonal ingredients.
Why You’ll Love It
- Fresh, vibrant flavor: Garlic scape pesto has a bright, mild garlic taste that’s less intense than raw garlic but still full of delicious garlicky goodness. It adds a fresh, herbal kick to any dish.
- Super versatile: Use it as a pasta sauce, a sandwich spread, a dip for veggies, a topping for grilled meats, or stirred into soups and salads. It’s a simple way to elevate almost any meal.
- Easy to make: With just a handful of ingredients—garlic scapes, nuts, cheese, olive oil, and lemon juice—you can whip up a batch in under 10 minutes. No complicated steps or fancy equipment needed.
- Great for reducing waste: Instead of throwing away garlic scapes, turn them into something delicious and useful. It’s a sustainable choice that makes the most of your ingredients.
- Long shelf life when stored properly: Garlic scape pesto freezes well or keeps in the fridge for up to a week, so you can make a big batch and enjoy it over time without any hassle.
Ingredient List
For the Garlic Scape Pesto:
- 1 cup garlic scapes, chopped
- 1/2 cup grated Parmesan cheese
- 1/3 cup toasted pine nuts (or walnuts for a budget-friendly option)
- 1/2 cup extra virgin olive oil
- 1 tablespoon fresh lemon juice
- Salt, to taste
- Freshly ground black pepper, to taste
Ingredient Notes
- I always use extra virgin olive oil for this—it adds a rich, fruity flavor that really lifts the pesto.
- Don’t skip the lemon juice! It brightens the pesto and balances the richness of the cheese and oil.
- Toasting the nuts beforehand is key—it brings out their natural oils and adds a delicious depth to the flavor.
- If you can’t find garlic scapes, young garlic tops or green garlic can work as a substitute, but the flavor won’t be quite the same.
- Fresh Parmesan is a must here. Pre-grated cheese doesn’t melt or blend as smoothly and can make the texture grainy.
Kitchen Equipment Needed
- Food processor or blender — To quickly and evenly blend the pesto ingredients into a smooth, creamy sauce. I prefer a food processor for better control over texture.
- Measuring cups and spoons — For accurate ingredient amounts to get the perfect balance of flavors.
- Sharp knife — To chop the garlic scapes into smaller pieces for easier blending.
- Cutting board — A sturdy surface for prepping your garlic scapes and nuts.
- Spatula or spoon — To scrape down the sides of the processor and transfer your pesto easily.
- Small jar or airtight container — For storing your pesto in the fridge or freezer. I love using glass jars with tight lids for freshness.
Instructions
Step 1: Prepare the Garlic Scapes
- Rinse the garlic scapes thoroughly under cold water to remove any dirt or grit.
- Pat them dry with a clean kitchen towel or paper towels.
- Trim off the tough, woody ends (usually the bottom 1-2 inches).
- Chop the scapes into roughly 1-inch pieces. This helps them blend more easily and evenly.
Pro tip: If your food processor struggles with fibrous pieces, chopping smaller will prevent uneven chunks in your pesto.
Step 2: Toast the Nuts
- Heat a small dry skillet over medium heat.
- Add the pine nuts or walnuts in a single layer.
- Toast them, stirring frequently, for about 3-5 minutes until they’re golden and fragrant.
- Immediately transfer to a plate to cool so they don’t keep cooking and burn.
Pro tip: Keep a close eye during toasting—nuts can go from perfectly toasted to burnt very quickly!
Step 3: Blend the Base Ingredients
- Add the chopped garlic scapes, toasted nuts, and grated Parmesan cheese to your food processor bowl.
- Pulse a few times to roughly combine and break down the ingredients.
Pro tip: Pulsing instead of running continuously helps control the texture, keeping it from turning into a paste too quickly.
Step 4: Add Olive Oil and Lemon Juice
- With the processor running on low speed, slowly drizzle in the olive oil through the feed tube.
- Add the lemon juice as well.
- Continue blending until the mixture is smooth and creamy but still has some texture—you want it silky, not watery.
Pro tip: If the pesto seems too thick, add olive oil a teaspoon at a time until you reach your desired consistency.
Step 5: Season and Taste
- Stop the processor and season with salt and freshly ground black pepper.
- Give it a quick pulse or two to mix in the seasoning.
- Taste and adjust the salt, pepper, or lemon juice as needed.
Pro tip: Don’t be shy with the seasoning—pesto flavors need to be bold to shine through your dishes.
Step 6: Store or Serve
- Transfer the pesto to a clean jar or airtight container.
- If not using immediately, drizzle a thin layer of olive oil on top to help preserve freshness.
- Store in the fridge for up to one week or freeze in small portions for longer storage.
Pro tip: Freezing pesto in ice cube trays is a great way to portion it out—just pop a cube or two into pasta or soups whenever you want a quick flavor boost!
Tips and Tricks for Success
- Use fresh garlic scapes – The younger and more tender they are, the better the flavor and texture of your pesto. Older scapes can be tougher and more fibrous.
- Don’t over-blend – Pulse in short bursts to keep a bit of texture. Over-processing can turn the pesto into a paste and dull the flavor.
- Balance the acidity – A little lemon juice goes a long way. Taste before adding more so it doesn’t overpower the garlic flavor.
- Adjust the oil gradually – Start with less and add more only if needed. Too much oil can make the pesto greasy.
- Freeze in small portions – Use silicone ice cube trays or small containers so you can defrost just what you need.
Ingredient Substitutions and Variations
- Nuts – Swap pine nuts with walnuts, almonds, or even sunflower seeds for a nut-free version.
- Cheese – Try Pecorino Romano instead of Parmesan for a saltier, sharper kick, or use nutritional yeast for a dairy-free option.
- Herbs – Mix in fresh basil, parsley, or mint to mellow the garlic flavor and add a twist.
- Add greens – Blend in a handful of spinach, arugula, or kale for extra nutrients and a deeper green color.
- Zingy boost – Add a pinch of red pepper flakes or a clove of roasted garlic if you want more heat or depth.
Serving Suggestions
- Toss with pasta – This is a classic! I love serving garlic scape pesto over warm linguine or penne with a sprinkle of extra Parmesan and a drizzle of olive oil.
- Spread on sandwiches or wraps – It adds a garlicky kick to grilled veggie wraps, chicken sandwiches, or even a breakfast egg sandwich.
- As a dip – Serve it as a dip with warm pita bread, crackers, or raw veggies. It’s a hit at casual get-togethers!
- Drizzle over grilled meats or fish – A spoonful over grilled chicken, shrimp, or salmon adds tons of flavor without overpowering the dish.
- Pizza base or finishing touch – Spread a thin layer on pizza dough instead of tomato sauce, or swirl it on top after baking for a fresh, garlicky finish. I love pairing it with mozzarella and cherry tomatoes!
Storage and Reheating Instructions
- Refrigerator storage – Store in an airtight container in the fridge for up to 7 days. Add a thin layer of olive oil on top to prevent browning.
- Freezer storage – Freeze in small portions (ice cube trays work great!) for up to 3 months. Once frozen, transfer cubes to a sealed freezer bag.
- Thawing – Let frozen pesto cubes thaw in the fridge or stir directly into hot pasta or soups for quick flavor.
- No reheating needed – Pesto is best served at room temp or stirred into warm dishes—it doesn’t need to be heated on its own.
- Freshen up leftovers – If it thickens or darkens slightly in the fridge, just stir in a splash of olive oil or lemon juice before using.
Frequently Asked Questions
Can I use garlic scape pesto raw or does it need to be cooked?
You can absolutely use it raw! In fact, that’s when it tastes the freshest and brightest. It’s perfect tossed with hot pasta, spread on toast, or stirred into dressings.
What if I don’t have a food processor?
No worries! A high-powered blender works too—just stop and scrape down the sides more often to get an even blend. A mini chopper could work in small batches as well.
Can I make it vegan?
Yes! Just swap out the Parmesan cheese for nutritional yeast or a plant-based hard cheese alternative. It’ll still be creamy and flavorful.
Why is my pesto turning brown in the fridge?
That’s just oxidation—it happens when pesto is exposed to air. To keep it bright green, smooth a thin layer of olive oil over the top before sealing the container.
Can I use the pesto as a marinade?
Absolutely. It makes a fantastic marinade for chicken, shrimp, or even tofu. Just don’t let it sit too long (2–3 hours is great) since the lemon juice can start to “cook” the protein.
How much pasta does this recipe make enough sauce for?
This recipe makes about 3/4 to 1 cup of pesto, which is perfect for 8–10 ounces of cooked pasta, depending on how saucy you like it!
Did you try this recipe? Let me know in the comments how it turned out!
Don’t forget to share your photos on Instagram and tag me @tasiahub_ or use the hashtag #tasiahub. I’d love to see your creations!

Garlic Scape Pesto
Equipment
- Food Processor or Blender
- Measuring cups and spoons
- Sharp Knife
- Cutting board
- Spatula or spoon
- Small jar or airtight container
Ingredients
For the Garlic Scape Pesto:
- 1 cup garlic scapes chopped
- 1/2 cup grated Parmesan cheese
- 1/3 cup toasted pine nuts or walnuts for a budget-friendly option
- 1/2 cup extra virgin olive oil
- 1 tablespoon fresh lemon juice
- Salt to taste
- Freshly ground black pepper to taste
Instructions
Step 1: Prepare the Garlic Scapes
- Rinse the garlic scapes thoroughly under cold water to remove any dirt or grit.
- Pat them dry with a clean kitchen towel or paper towels.
- Trim off the tough, woody ends (usually the bottom 1-2 inches).
- Chop the scapes into roughly 1-inch pieces. This helps them blend more easily and evenly.
- Pro tip: If your food processor struggles with fibrous pieces, chopping smaller will prevent uneven chunks in your pesto.
Step 2: Toast the Nuts
- Heat a small dry skillet over medium heat.
- Add the pine nuts or walnuts in a single layer.
- Toast them, stirring frequently, for about 3-5 minutes until they’re golden and fragrant.
- Immediately transfer to a plate to cool so they don’t keep cooking and burn.
- Pro tip: Keep a close eye during toasting—nuts can go from perfectly toasted to burnt very quickly!
Step 3: Blend the Base Ingredients
- Add the chopped garlic scapes, toasted nuts, and grated Parmesan cheese to your food processor bowl.
- Pulse a few times to roughly combine and break down the ingredients.
- Pro tip: Pulsing instead of running continuously helps control the texture, keeping it from turning into a paste too quickly.
Step 4: Add Olive Oil and Lemon Juice
- With the processor running on low speed, slowly drizzle in the olive oil through the feed tube.
- Add the lemon juice as well.
- Continue blending until the mixture is smooth and creamy but still has some texture—you want it silky, not watery.
- Pro tip: If the pesto seems too thick, add olive oil a teaspoon at a time until you reach your desired consistency.
Step 5: Season and Taste
- Stop the processor and season with salt and freshly ground black pepper.
- Give it a quick pulse or two to mix in the seasoning.
- Taste and adjust the salt, pepper, or lemon juice as needed.
- Pro tip: Don’t be shy with the seasoning—pesto flavors need to be bold to shine through your dishes.
Step 6: Store or Serve
- Transfer the pesto to a clean jar or airtight container.
- If not using immediately, drizzle a thin layer of olive oil on top to help preserve freshness.
- Store in the fridge for up to one week or freeze in small portions for longer storage.
Notes
Estimated per serving (1/4 cup pesto):
- Calories: ~250 kcal
- Fat: ~24g
- Carbohydrates: ~3g
- Protein: ~6g
- Fiber: ~1g
- Sodium: ~200–250mg
- Sugar: <1g