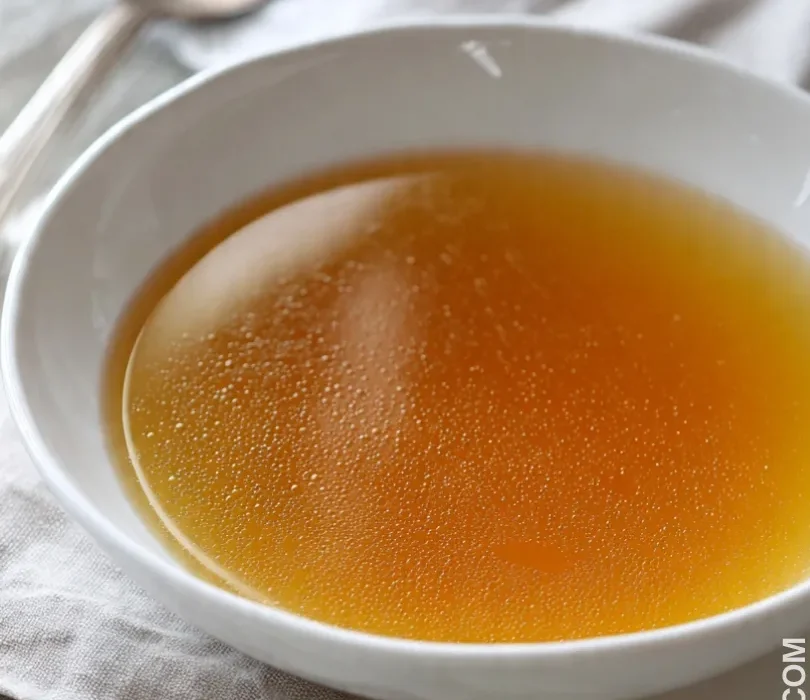
Crockpot Bone Broth
Bone broth has become a kitchen staple for anyone who loves a hearty, nourishing base for soups, stews, or even just sipping on its own. Using a crockpot makes the process effortless, letting the flavors develop slowly while you go about your day. This method ensures a rich, deeply flavorful broth that’s packed with nutrients and gelatin, perfect for boosting immunity, supporting joint health, and adding a natural depth to any recipe.
Making your own broth at home is surprisingly simple. With just a few ingredients—bones, vegetables, and seasonings—you can create a comforting liquid that’s far superior to store-bought versions. The slow cooking process extracts every bit of goodness from the bones, giving you a smooth, golden broth with a rich, savory taste.
This easy bone broth recipe works for any type of bones—beef, chicken, or even a mix—and is incredibly versatile. Once you have a batch simmering in your crockpot, the house fills with a cozy aroma that makes it feel like a warm hug in a bowl. It’s the perfect base for soups, risottos, or even cooking grains to add extra flavor.
The beauty of the crockpot is that it allows for hands-off cooking, so you can let your broth simmer for hours without worry. This approach not only produces the best slow cooker bone broth but also gives you the freedom to focus on other meals or chores while it develops its rich flavor. By the time it’s ready, you’ll have a batch of homemade bone broth that’s nourishing, versatile, and oh-so-satisfying.
Why You’ll Love It
- Nutrient-Packed Goodness – Each sip of this broth is loaded with minerals, collagen, and amino acids that support your joints, skin, and overall wellness. It’s like a little wellness boost in every bowl.
- Super Versatile – Use it as a base for soups, stews, sauces, or even to cook grains. It adds depth and richness to almost any recipe, making meals feel more wholesome.
- Effortless Cooking – Just toss your ingredients into the crockpot and let it work its magic. It’s a true set-it-and-forget-it recipe, freeing up your time while the broth develops rich flavors.
- Cost-Effective & Sustainable – Make the most of leftover bones from roast chicken or beef, reducing waste while creating a delicious, nutrient-dense broth.
- Comfort in a Cup – Hot, soothing, and savory, this broth is perfect for cozy evenings or whenever you need a warm, nourishing pick-me-up.
Ingredient List
For the Broth:
- 3–4 pounds beef or chicken bones (a mix works great)
- 2 large carrots, roughly chopped
- 2 celery stalks, roughly chopped
- 1 large onion, quartered
- 4 cloves garlic, smashed
- 2 tablespoons apple cider vinegar
- 1–2 bay leaves
- 1 teaspoon whole black peppercorns
- 10 cups cold water
- Optional: fresh herbs like thyme, rosemary, or parsley
Ingredient Notes
- I always use organic bones when I can—it makes such a difference in flavor and richness.
- Don’t skip the apple cider vinegar! It helps draw the minerals out of the bones and gives your broth that silky body.
- Fresh garlic and herbs add a warmth and depth you can’t get from dried spices—totally worth it.
- I like using a mix of chicken and beef bones for a layered flavor, but you can stick to one type if that’s what you have on hand.
- Make sure your water fully covers the bones but don’t overfill—the broth needs room to simmer and reduce slightly.
Kitchen Equipment Needed
- Crockpot/Slow Cooker – For hands-off, slow simmering. I love my 6-quart slow cooker; it fits plenty of bones without overflowing.
- Large Stockpot (optional) – If you prefer stovetop, this is perfect for simmering a big batch.
- Strainer or Fine Mesh Sieve – To remove bones and veggies for a clear broth.
- Ladle – For easy serving or transferring broth to storage containers.
- Mason Jars or Airtight Containers – For storing your homemade bone broth in the fridge or freezer.
- Tongs – Handy for moving hot bones without burning yourself.
Instructions
Step 1: Prepare the Bones
- Rinse the bones under cold water to remove any excess blood or impurities.
- Optional: Roast the bones at 400°F (200°C) for 20–30 minutes for deeper flavor.
Pro Tip: Roasting adds a rich, caramelized flavor, but you can skip this step for a lighter broth.
Step 2: Add Ingredients to the Crockpot
- Place the bones in the crockpot.
- Add chopped carrots, celery, onion, and smashed garlic.
- Toss in bay leaves, peppercorns, and any fresh herbs you’re using.
Step 3: Add Water and Vinegar
- Pour in 10 cups of cold water (or enough to cover the bones).
- Add 2 tablespoons of apple cider vinegar to help extract minerals.
Pro Tip: Let the bones sit in vinegar for 20–30 minutes before cooking—it really helps draw out nutrients.
Step 4: Slow Cook the Broth
- Cover the crockpot and set it to low.
- Cook for 12–24 hours. The longer it cooks, the richer and more gelatinous your broth will be.
- Check occasionally to ensure the bones remain submerged; add more water if needed.
Step 5: Strain the Broth
- Carefully remove the bones and large vegetables using tongs or a slotted spoon.
- Pour the broth through a fine mesh sieve or cheesecloth into a large bowl or pot.
Step 6: Cool and Store
- Let the broth cool to room temperature.
- Transfer to mason jars or airtight containers.
- Store in the fridge for up to 5 days or freeze for up to 3 months.
Pro Tip: Leave a little space at the top of containers if freezing, as the broth will expand.
Tips and Tricks for Success
- Use a mix of meaty bones and joints for a rich, gelatinous broth.
- Don’t rush the cooking—low and slow is key to extracting maximum flavor and nutrients.
- Skim off any foam or impurities during the first hour for a cleaner broth.
- Add herbs at the end of cooking for a fresher flavor, especially delicate ones like parsley.
- Freeze in ice cube trays for small, convenient portions to add to soups or sauces.
- Let the broth rest overnight in the fridge before straining; fat will solidify on top and can easily be removed if desired.
Ingredient Substitutions and Variations
- Swap beef bones for chicken or turkey bones depending on what you have.
- Use vegetables like leeks or parsnips if you want a slightly sweeter broth.
- Replace apple cider vinegar with white wine vinegar or lemon juice if needed.
- Add ginger, turmeric, or pepper flakes for an extra boost of flavor and warmth.
- For a lighter broth, omit roasted bones and simmer raw bones directly.
Serving Suggestions
- I love sipping a warm cup of this broth on its own—it’s soothing and incredibly nourishing, especially on chilly evenings.
- Use it as the base for a hearty vegetable or chicken soup; it turns a simple soup into something rich and flavorful.
- Cook grains like rice, quinoa, or barley in the broth instead of water for an extra layer of savory depth.
- Add it to sauces, gravies, or braises to enhance flavor without adding extra fat.
- Pour it over roasted vegetables or steamed greens for a subtle, delicious boost.
Storage and Reheating Instructions
- Refrigerate: Store in airtight containers for up to 5 days.
- Freeze: Pour into freezer-safe containers or ice cube trays for up to 3 months.
- Reheat on Stove: Warm gently over medium-low heat until steaming; avoid boiling to preserve nutrients.
- Reheat in Microwave: Use a microwave-safe container and heat in 1-minute intervals, stirring in between.
- Skim Fat if Desired: After chilling, remove solidified fat from the top for a leaner broth.
Frequently Asked Questions
Can I use any type of bones for bone broth?
Absolutely! Chicken, beef, turkey, or a mix all work. Using joints and meaty bones together gives the richest, most gelatinous broth.
How long should I cook bone broth in a crockpot?
For the best results, cook on low for 12–24 hours. Longer cooking extracts more nutrients and flavor, giving a richer broth.
Do I need to roast the bones first?
Roasting is optional, but it adds a deep, caramelized flavor. If you prefer a lighter broth, you can skip this step.
Can I make bone broth without a crockpot?
Yes! You can simmer the bones in a large stockpot on the stove for 6–12 hours. The slow cooker just makes it more hands-off.
How should I store and reheat bone broth?
Store in the fridge for up to 5 days or freeze for up to 3 months. Reheat gently on the stove or in the microwave in short intervals.
Can I add vegetables and herbs for flavor?
Definitely! Carrots, celery, onions, garlic, and fresh herbs like parsley or thyme add amazing flavor. Add delicate herbs toward the end of cooking for the best taste.
Did you try this recipe? Let me know in the comments how it turned out!
Crockpot Bone Broth
Equipment
- Crockpot (Slow Cooker)
- Large Stockpot (optional)
- Strainer or fine mesh sieve
- Ladle
- Mason jars or airtight containers
- Tongs
Ingredients
- 3 –4 pounds beef or chicken bones a mix works great
- 2 large carrots roughly chopped
- 2 celery stalks roughly chopped
- 1 large onion quartered
- 4 cloves garlic smashed
- 2 tablespoons apple cider vinegar
- 1 –2 bay leaves
- 1 teaspoon whole black peppercorns
- 10 cups cold water
- Optional: fresh herbs like thyme rosemary, or parsley
Instructions
Step 1: Prepare the Bones
- Rinse the bones under cold water to remove any excess blood or impurities.
- Optional: Roast the bones at 400°F (200°C) for 20–30 minutes for deeper flavor.
- Pro Tip: Roasting adds a rich, caramelized flavor, but you can skip this step for a lighter broth.
Step 2: Add Ingredients to the Crockpot
- Place the bones in the crockpot.
- Add chopped carrots, celery, onion, and smashed garlic.
- Toss in bay leaves, peppercorns, and any fresh herbs you’re using.
Step 3: Add Water and Vinegar
- Pour in 10 cups of cold water (or enough to cover the bones).
- Add 2 tablespoons of apple cider vinegar to help extract minerals.
- Pro Tip: Let the bones sit in vinegar for 20–30 minutes before cooking—it really helps draw out nutrients.
Step 4: Slow Cook the Broth
- Cover the crockpot and set it to low.
- Cook for 12–24 hours. The longer it cooks, the richer and more gelatinous your broth will be.
- Check occasionally to ensure the bones remain submerged; add more water if needed.
Step 5: Strain the Broth
- Carefully remove the bones and large vegetables using tongs or a slotted spoon.
- Pour the broth through a fine mesh sieve or cheesecloth into a large bowl or pot.
Step 6: Cool and Store
- Let the broth cool to room temperature.
- Transfer to mason jars or airtight containers.
- Store in the fridge for up to 5 days or freeze for up to 3 months.
- Pro Tip: Leave a little space at the top of containers if freezing, as the broth will expand.
Notes
Nutritional Value (per 1 cup serving, approximate)
- Calories: 50–70 kcal
- Protein: 8–10 g
- Fat: 2–4 g
- Carbohydrates: 1–2 g
- Fiber: 0 g
- Sodium: 200–300 mg
- Collagen/Gelatin: High
- Vitamins & Minerals: Calcium, Magnesium, Phosphorus, Potassium, Trace Minerals