Christmas Trifle Recipe
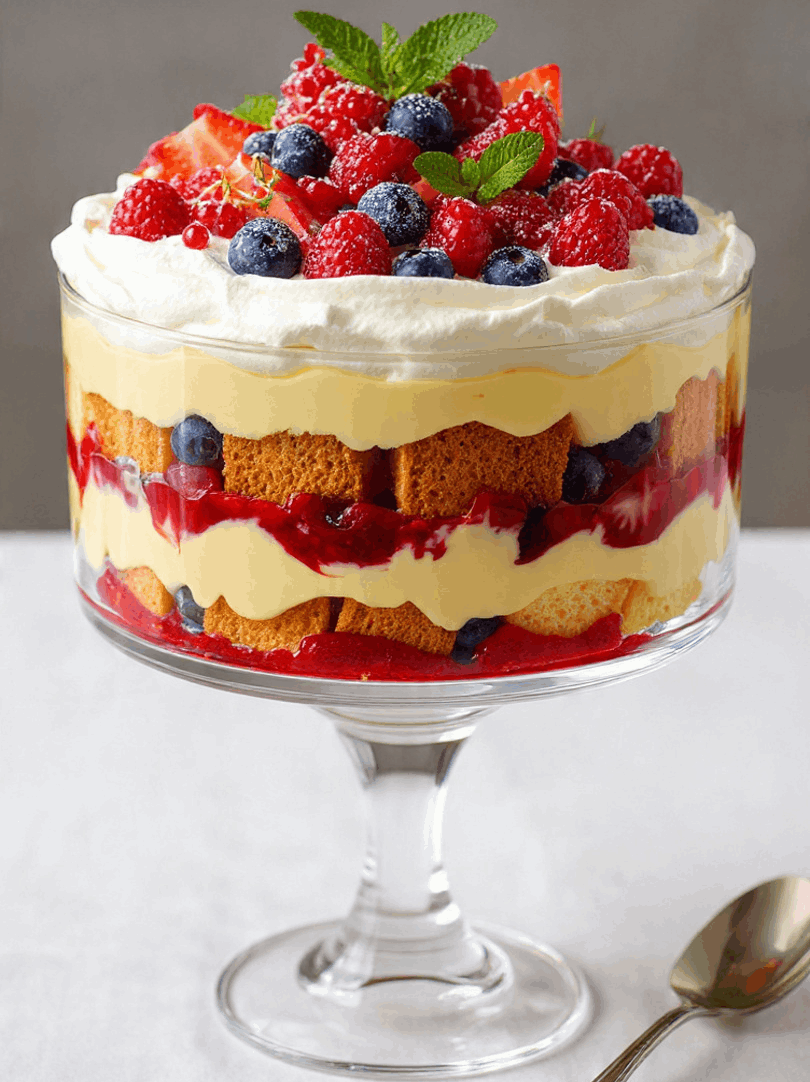
When it comes to holiday desserts, a trifle always steals the spotlight. Layers of creamy custard, fluffy whipped cream, soft sponge cake, and bursts of fresh berries make it a treat that’s both beautiful and irresistible. This Christmas trifle recipe brings all those festive flavors together into one show-stopping dessert that’s perfect for sharing with family and friends.
One of the things I love most about making this dessert is how easy it is to assemble. Even though it looks fancy and impressive, this is truly an easy Christmas trifle recipe that anyone can make. It’s great for when you’re short on time but still want to serve something that feels indulgent and special. Whether you’re hosting a big gathering or just want to treat your loved ones to something festive, this trifle fits right in.
What makes this one of the best Christmas desserts is its flexibility. You can use store-bought cake or make your own sponge, switch up the fruit, or even add a little holiday flair with a drizzle of sherry or a splash of vanilla syrup. Each layer adds its own texture and flavor, and when you scoop into it, every spoonful tastes like Christmas cheer.
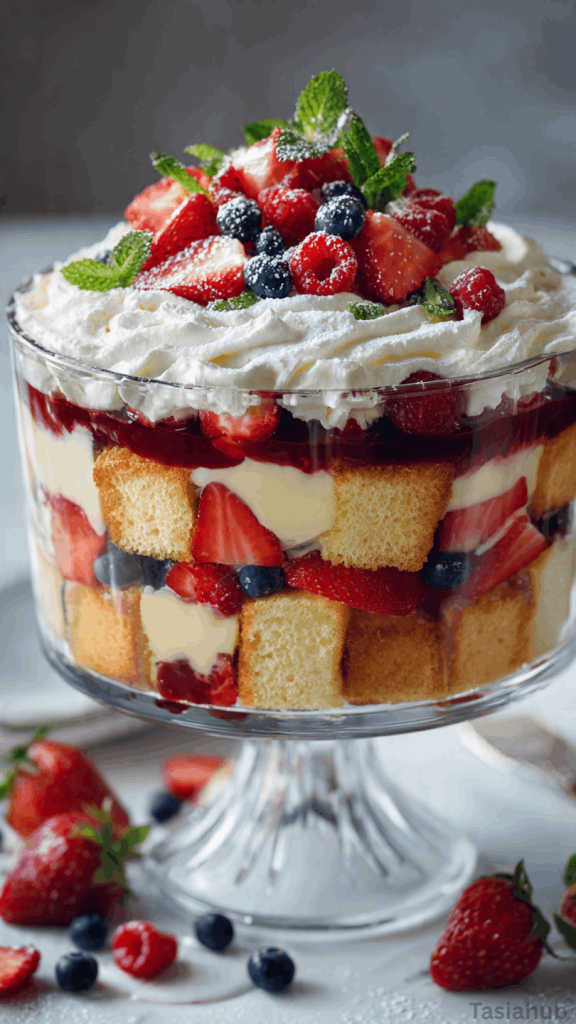
I also think trifles are some of the most underrated desserts for a dinner party. You can assemble them in a big glass bowl that looks gorgeous on the table, or make individual ones in smaller glasses for a more personal touch. Either way, this trifle is guaranteed to bring that cozy, festive vibe everyone loves during the holidays.
From its creamy layers to the sweet-tart balance of fruit and custard, this dessert is a must-try addition to your Christmas dessert ideas. Whether you’re new to trifle-making or looking for inspiration to update a classic, this is one of those holiday trifle desserts that never disappoints. It’s rich but refreshing, elegant yet simple — truly the best trifle recipe for winter gatherings.
If you’re planning a spread of winter trifle desserts, this one deserves a spot right at the center of the table. It’s a crowd-pleaser that looks stunning and tastes even better. Once you dig in, don’t be surprised if it disappears faster than anything else on the dessert table — it’s that good.
Why You’ll Love It
- Layered to perfection: Every spoonful gives you a bit of everything — soft cake, creamy custard, fresh fruit, and pillowy whipped cream. It’s a texture dream from top to bottom.
- Effortless elegance: It looks like you spent hours making it, but it’s surprisingly simple to put together. Perfect for when you want to impress without the stress.
- Customizable for any taste: Swap in your favorite fruits, use chocolate sponge instead of vanilla, or add a hint of liqueur for a grown-up twist — the possibilities are endless.
- A true crowd-pleaser: Whether it’s kids or adults, everyone loves a good trifle. It’s one of those holiday trifle desserts that never fails to disappear fast.
- Make-ahead friendly: You can prep it a day early, and it actually tastes even better as the flavors meld overnight — giving you more time to enjoy the party.
Ingredient List
For the Trifle Layers:
- 1 large sponge cake or pound cake (about 10–12 oz), cut into cubes
- 2 cups vanilla custard (homemade or store-bought)
- 2 cups whipped cream
- 2 cups mixed berries (strawberries, raspberries, blueberries)
- ½ cup berry jam or fruit preserves
- ¼ cup sherry or orange juice (optional)
For Garnish:
- Extra whipped cream for topping
- Fresh berries
- White chocolate shavings or crushed meringue (optional)
- Fresh mint leaves (for a festive touch)
Ingredient Notes
- Sponge cake: Use a light, airy cake that soaks up flavor beautifully. I often use a buttery pound cake — it holds up well under all those creamy layers.
- Custard: Go for a rich, velvety custard. If you’re short on time, a good-quality store-bought version works perfectly. (I always use Ambrosia vanilla custard — it’s smooth and delicious!)
- Whipped cream: Freshly whipped cream tastes so much better than canned. Don’t skimp — it gives the trifle that signature soft, cloud-like texture.
- Mixed berries: Use what’s in season or grab a frozen mix (just thaw and drain first). The vibrant color and tartness make each bite pop.
- Jam or preserves: A thin layer between the cake and custard keeps things moist and adds extra fruitiness. Don’t skip it — it makes a big difference!
- Sherry or juice: This step adds subtle flavor and moisture. I love using orange juice when serving kids or anyone avoiding alcohol.
Kitchen Equipment Needed
- Large glass trifle bowl: The star of the show — it lets those beautiful layers shine through. I use a clear, footed one for that elegant centerpiece look.
- Mixing bowls: For whipping cream, mixing custard, and prepping fruit — you’ll need at least two medium-sized ones.
- Electric hand mixer or whisk: To whip up that cream quickly and get it perfectly fluffy. (My trusty handheld mixer saves so much time!)
- Spatula or large spoon: Great for spreading each layer evenly without deflating the cream.
- Serrated knife: Helps slice the sponge cake neatly without tearing it apart.
- Measuring cups and spoons: For getting those custard and cream ratios just right.
- Small saucepan (optional): If you’re making homemade custard or heating jam to loosen it a bit.
Instructions
Step 1 — Make (or warm) the custard
- If using store-bought custard: gently warm it over very low heat in a small saucepan just until pourable, stirring occasionally. Remove from heat and let cool slightly.
- If making homemade custard: whisk egg yolks and sugar until smooth, heat milk with vanilla until steaming, then temper the yolks by whisking in a little hot milk, return to the pan and cook gently, stirring constantly until it thickens to coat the back of a spoon. Strain into a bowl to remove any cooked bits and chill.
- Chill the custard until it’s cool but still pourable before assembly.
Pro tip for custard: Whisk continuously when cooking the custard to prevent lumps and curdling — slow, steady heat is your friend.
Step 2 — Whip the cream
- Pour cold heavy cream into a chilled mixing bowl. Add a tablespoon or two of sugar and a splash of vanilla if you like.
- Use an electric hand mixer (or a whisk if you’re brave) to whip the cream until soft peaks form — you want it billowy and light, not grainy.
- Cover and refrigerate until ready to layer.
Pro tip for whipping: Start at low speed and increase to medium so the cream whips evenly; stop as soon as soft peaks form to avoid over-whipping.
Step 3 — Prep the cake and fruit
- Cut the sponge or pound cake into even, bite-sized cubes. If the cake is very fresh and soft, you can toast the cubes for a minute or two to give them structure.
- Hull and slice strawberries; rinse other berries and pat dry. If using frozen fruit, thaw fully and drain any excess liquid.
- If using sherry or orange juice: lightly brush or sprinkle the cake cubes — don’t soak them; you want moisture, not sogginess.
Pro tip for cake: If your cake is a bit stale, that’s actually perfect — it soaks up custard and jam beautifully.
Step 4 — Assemble the trifle
- Place the trifle bowl on a towel to prevent slipping. Start with a single, even layer of cake cubes across the bottom.
- Spoon a thin layer of jam or preserves over the cake.
- Pour or spoon a layer of custard to cover the cake and jam. Smooth gently with a spatula.
- Add a generous layer of mixed berries.
- Dollop or spread a layer of whipped cream over the fruit. Use an offset spatula or the back of a spoon to create a pretty, even surface.
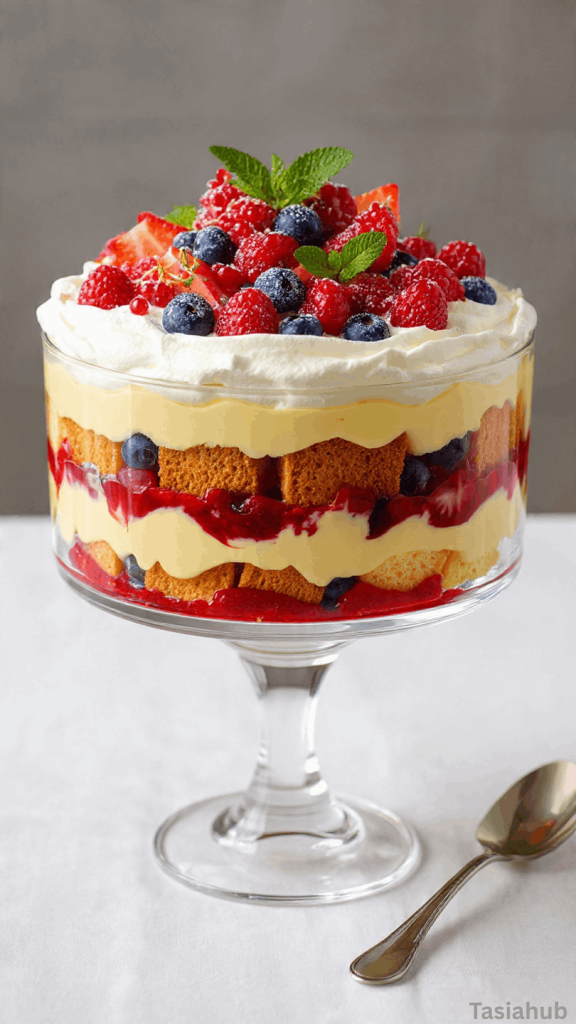
- Repeat layers (cake → jam → custard → fruit → whipped cream) until you reach the top of the bowl, finishing with a thick, decorative layer of whipped cream. Reserve some berries and chocolate/meringue for garnish.
Pro tip for layering: Keep layers even and don’t over-fill — leaving a little space at the top makes for the prettiest final presentation and easier serving.
Step 5 — Garnish, chill, and serve
- Decorate the top with a neat arrangement of fresh berries, white chocolate shavings or crushed meringue, and a few mint leaves for color.
- Cover the trifle with plastic wrap and chill for at least 3–4 hours, preferably overnight so the flavors meld and the cake soaks up those delicious custard juices.
- To serve, run a warm knife around the inside edge if you need cleaner slices for plated servings, or simply scoop generous portions into bowls so everyone gets every layer.
Pro tip for chilling: Chilling overnight improves flavor and texture — the custard and fruit have a little time to marry, and the whole thing becomes wonderfully cohesive.
Tips and Tricks for Success
- Chill your bowl and whisk: Cold equipment helps your cream whip faster and stay stable longer — especially helpful in warm kitchens.
- Layer neatly: Keep your bowl clean as you go; wipe down the sides between layers for that perfect, photo-worthy look.
- Use contrasting textures: Combine soft cake with juicy fruit and airy cream for the best mouthfeel.
- Don’t rush the chill time: Letting the trifle rest in the fridge allows the layers to set and the flavors to deepen beautifully.
- Garnish just before serving: This keeps berries looking fresh and prevents the cream from deflating.
- Make it ahead: You can assemble the trifle the night before your dinner party — just save the top garnish for the next day to keep it vibrant.
Ingredient Substitutions and Variations
- Cake options: Swap sponge cake for ladyfingers, angel food cake, or chocolate loaf for a richer twist.
- Custard swap: Try pastry cream, vanilla pudding, or even mascarpone mixed with cream cheese for a thicker layer.
- Fruit variations: Use tropical fruits like mango, kiwi, or pineapple for a sunny spin, or go classic with cherries and raspberries.
- Flavor boost: Brush your cake with coffee or rum for a tiramisu-inspired version, or use peppermint syrup for a festive holiday kick.
- Dairy-free version: Replace custard with coconut pudding and whipped cream with coconut whipped topping.
- Mini trifles: Assemble individual servings in clear cups or jars — they’re adorable, easy to serve, and perfect for parties.
- Chocolate lover’s twist: Add a layer of chocolate custard or sprinkle mini chocolate chips between the layers for extra indulgence.
Serving Suggestions
- I love serving this trifle as the grand finale to a cozy Christmas dinner — it’s light yet indulgent, so everyone still has room for dessert!
- For a festive touch, serve it in individual glass cups topped with fresh berries and a dusting of powdered sugar — so elegant for desserts for a dinner party.
- Pair it with a mug of hot chocolate or a spiced latte for the ultimate winter trifle dessert experience.
- If you’re hosting a dessert buffet, this trifle looks gorgeous next to cheesecakes, cookies, and fruit tarts — it instantly elevates the table.
- A fun personal favorite: I like sneaking a spoonful straight from the fridge the next morning — the flavors are even better the day after!
Storage and Reheating Instructions
- Refrigerate: Cover the trifle tightly with plastic wrap or a lid and refrigerate for up to 2–3 days. The flavors continue to develop as it chills.
- Avoid freezing: Freezing will affect the custard and cream texture, so it’s best kept chilled only.
- Refreshing leftovers: If the top layer loses some fluffiness, add a fresh dollop of whipped cream and a few new berries before serving again.
- Make-ahead tip: You can prepare all components (cake, custard, and whipped cream) a day ahead and assemble the trifle a few hours before serving.
- Serving cold: Always serve it chilled straight from the fridge — that cool, creamy texture is what makes it so irresistible!
Frequently Asked Questions
Can I make this Christmas trifle a day ahead?
Absolutely! In fact, it’s even better when made ahead. Assemble the trifle the night before, cover it, and refrigerate overnight so the flavors can blend beautifully. Just add the final whipped cream and garnish before serving.
What’s the best type of cake to use?
A light sponge or pound cake works best because it holds up well to the custard and cream. If you prefer a softer texture, angel food cake is a lovely choice too.
Can I make it alcohol-free?
Yes! Simply swap the sherry for orange juice, apple juice, or even a drizzle of vanilla syrup. It still adds great flavor and moisture without the alcohol.
How do I prevent my trifle from getting soggy?
The key is balance — don’t soak the cake! A light drizzle of liquid is enough. Also, let the custard cool slightly before layering so it doesn’t make the cake too soft.
Can I use frozen fruit?
Definitely. Just thaw the fruit completely and drain off any excess liquid before layering. It saves time and still gives a delicious, juicy flavor.
How long does trifle last in the fridge?
It’s best enjoyed within 2–3 days. After that, the layers start to blend too much, though it’ll still taste delicious if you don’t mind a softer texture.
Did you try this Christmas trifle recipe? Let me know in the comments how it turned out — I’d love to hear your twist on it!

Christmas Trifle Recipe
Equipment
- Large glass trifle bowl
- Mixing Bowls
- Electric hand mixer or whisk
- Spatula or large spoon
- Serrated knife
- Measuring cups and spoons
- Small Saucepan (Optional)
Ingredients
For the Trifle Layers:
- 1 large sponge cake or pound cake about 10–12 oz, cut into cubes
- 2 cups vanilla custard homemade or store-bought
- 2 cups whipped cream
- 2 cups mixed berries strawberries, raspberries, blueberries
- ½ cup berry jam or fruit preserves
- ¼ cup sherry or orange juice optional
For Garnish:
- Extra whipped cream for topping
- Fresh berries
- White chocolate shavings or crushed meringue optional
- Fresh mint leaves for a festive touch
Instructions
Step 1 — Make (or warm) the custard
- If using store-bought custard: gently warm it over very low heat in a small saucepan just until pourable, stirring occasionally. Remove from heat and let cool slightly.
- If making homemade custard: whisk egg yolks and sugar until smooth, heat milk with vanilla until steaming, then temper the yolks by whisking in a little hot milk, return to the pan and cook gently, stirring constantly until it thickens to coat the back of a spoon. Strain into a bowl to remove any cooked bits and chill.
- Chill the custard until it’s cool but still pourable before assembly.
- Pro tip for custard: Whisk continuously when cooking the custard to prevent lumps and curdling — slow, steady heat is your friend.
Step 2 — Whip the cream
- Pour cold heavy cream into a chilled mixing bowl. Add a tablespoon or two of sugar and a splash of vanilla if you like.
- Use an electric hand mixer (or a whisk if you’re brave) to whip the cream until soft peaks form — you want it billowy and light, not grainy.
- Cover and refrigerate until ready to layer.
- Pro tip for whipping: Start at low speed and increase to medium so the cream whips evenly; stop as soon as soft peaks form to avoid over-whipping.
Step 3 — Prep the cake and fruit
- Cut the sponge or pound cake into even, bite-sized cubes. If the cake is very fresh and soft, you can toast the cubes for a minute or two to give them structure.
- Hull and slice strawberries; rinse other berries and pat dry. If using frozen fruit, thaw fully and drain any excess liquid.
- If using sherry or orange juice: lightly brush or sprinkle the cake cubes — don’t soak them; you want moisture, not sogginess.
- Pro tip for cake: If your cake is a bit stale, that’s actually perfect — it soaks up custard and jam beautifully.
Step 4 — Assemble the trifle
- Place the trifle bowl on a towel to prevent slipping. Start with a single, even layer of cake cubes across the bottom.
- Spoon a thin layer of jam or preserves over the cake.
- Pour or spoon a layer of custard to cover the cake and jam. Smooth gently with a spatula.
- Add a generous layer of mixed berries.
- Dollop or spread a layer of whipped cream over the fruit. Use an offset spatula or the back of a spoon to create a pretty, even surface.
- Repeat layers (cake → jam → custard → fruit → whipped cream) until you reach the top of the bowl, finishing with a thick, decorative layer of whipped cream. Reserve some berries and chocolate/meringue for garnish.
- Pro tip for layering: Keep layers even and don’t over-fill — leaving a little space at the top makes for the prettiest final presentation and easier serving.
Step 5 — Garnish, chill, and serve
- Decorate the top with a neat arrangement of fresh berries, white chocolate shavings or crushed meringue, and a few mint leaves for color.
- Cover the trifle with plastic wrap and chill for at least 3–4 hours, preferably overnight so the flavors meld and the cake soaks up those delicious custard juices.
- To serve, run a warm knife around the inside edge if you need cleaner slices for plated servings, or simply scoop generous portions into bowls so everyone gets every layer.
- Pro tip for chilling: Chilling overnight improves flavor and texture — the custard and fruit have a little time to marry, and the whole thing becomes wonderfully cohesive.
Notes
Nutritional Value (Per Serving)
- Calories: ~380 kcal
- Carbohydrates: 42g
- Protein: 5g
- Fat: 20g
- Saturated Fat: 12g
- Cholesterol: 85mg
- Sodium: 180mg
- Fiber: 2g
- Sugar: 33g
- Calcium: 90mg
- Vitamin C: 20mg