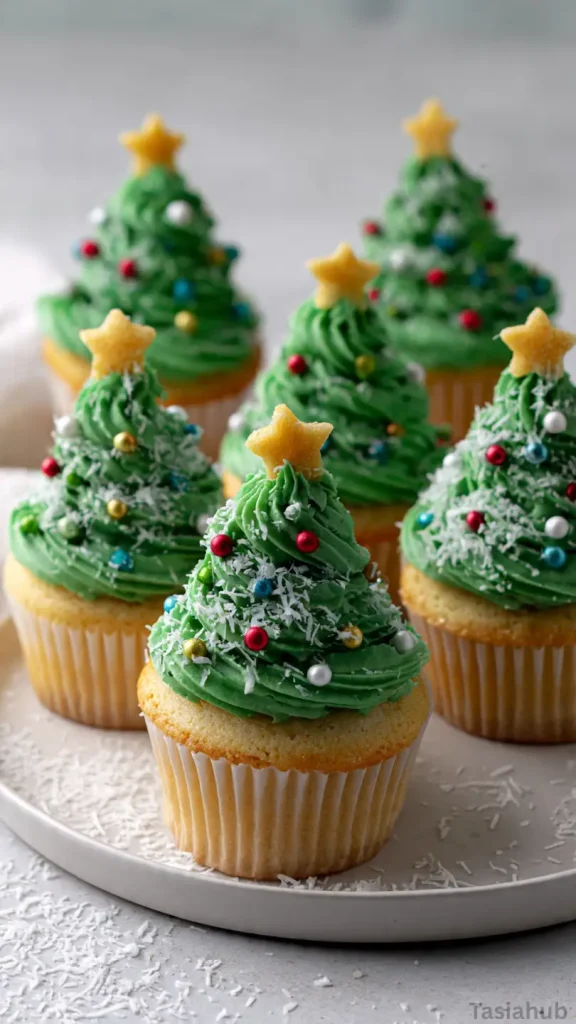
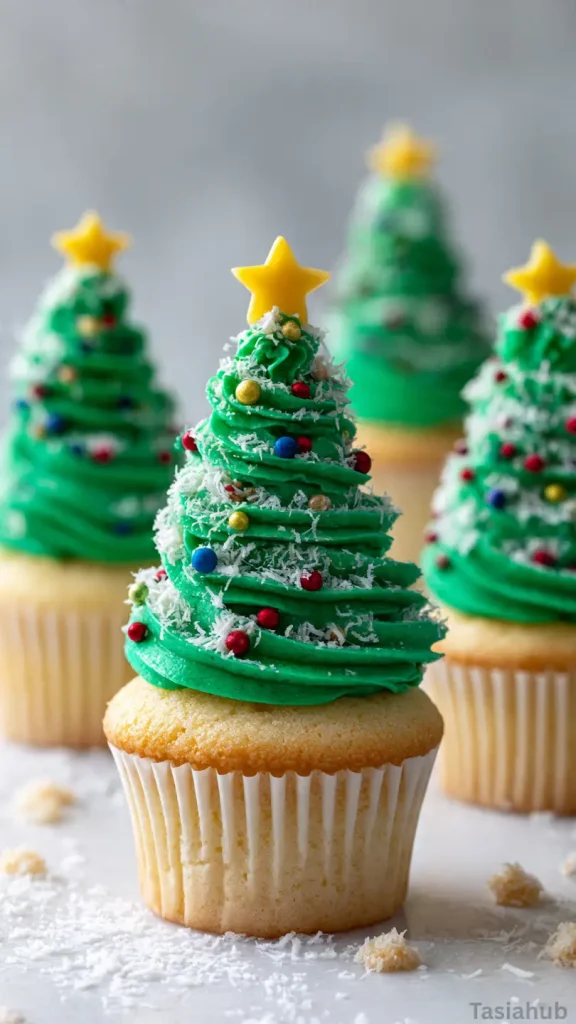
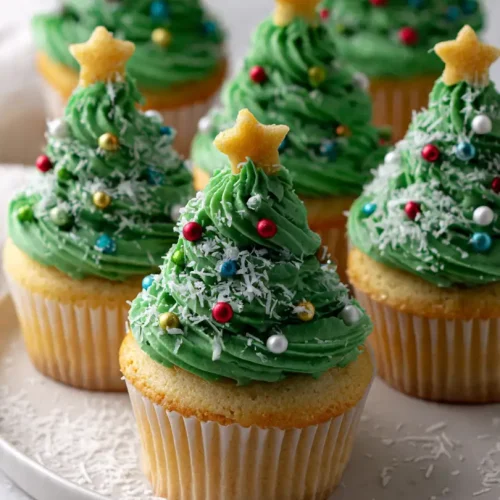
Christmas Tree Cupcakes
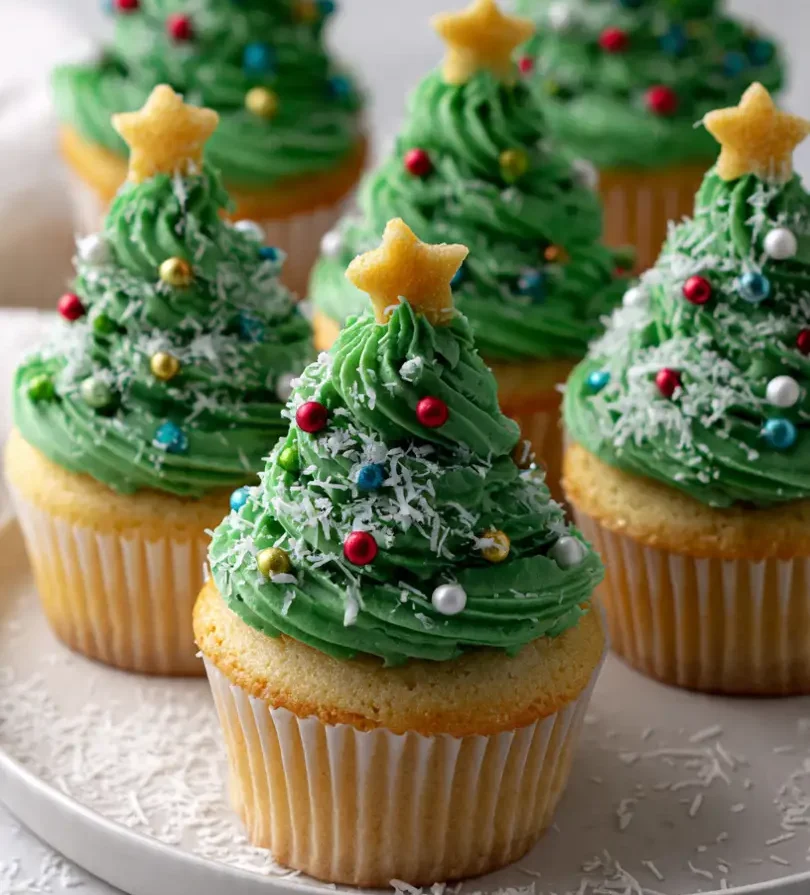
These Christmas Tree Cupcakes are the ultimate festive holiday cupcakes — cute, fun, and irresistibly delicious. Each little cupcake is topped with a swirl of green frosting shaped like a Christmas tree, decorated with colorful sprinkles and a tiny star on top. They’re the kind of treat that instantly brightens a dessert table and makes everyone smile.
What I love most about these cupcakes is how simple they are to make, even though they look so impressive. You start with your favorite cupcake base — vanilla, chocolate, or even red velvet — and then let the decorations do the magic. Once baked and cooled, each cupcake becomes a blank canvas for creativity, transforming into a mini Christmas tree that’s almost too pretty to eat (but way too tasty to resist).
These Christmas cupcakes are perfect for family baking nights or holiday gatherings. Kids can help with the frosting and toppings, and everyone can design their own unique tree. The best part is watching those little “trees” line up on a platter, creating a joyful, edible forest that feels straight out of a winter wonderland.
Whether you’re planning a cookie swap, a holiday dinner, or just want to surprise your loved ones with something special, these Christmas tree desserts will quickly become a seasonal favorite. With their charming look, rich flavor, and festive spirit, they’re a must-have on your list of Christmas cupcake ideas this year.
Why You’ll Love It
- They’re almost too cute to eat! Each cupcake looks like a mini Christmas tree — perfect for parties, dessert tables, or gifting to friends and neighbors.
- Simple to make, yet so impressive. You don’t need advanced decorating skills to pull these off. With green frosting and a few sprinkles, you’ll have bakery-worthy Christmas tree desserts in no time.
- Customizable for any flavor lover. Whether you prefer chocolate, vanilla, or even peppermint, these Christmas cupcakes work beautifully with any base flavor.
- Fun for the whole family. Kids will have a blast decorating their own “trees,” and it’s a festive holiday cupcake activity that doubles as dessert!
- Perfect for every Christmas celebration. From cozy family dinners to festive office parties, these cupcakes bring that magical holiday touch wherever they go.
Ingredient List
For the Cupcakes:
- 1 ½ cups all-purpose flour
- 1 ½ tsp baking powder
- ¼ tsp salt
- ½ cup unsalted butter, softened
- 1 cup granulated sugar
- 2 large eggs
- 2 tsp vanilla extract
- ½ cup milk
For the Frosting:
- 1 cup unsalted butter, softened
- 3–4 cups powdered sugar
- 2–3 tbsp heavy cream (or milk)
- 1 tsp vanilla extract
- Green gel food coloring
For Decorating:
- Star-shaped sprinkles (for the tree topper)
- Mini round sprinkles or nonpareils (for ornaments)
- Shredded coconut or white sanding sugar (optional “snow”)
Ingredient Notes
- Butter: Always use unsalted butter so you can control the saltiness. I prefer using real butter over margarine — it gives the cupcakes that rich, homemade flavor.
- Vanilla extract: Don’t skip the real vanilla! It adds a warm, cozy flavor that makes these Christmas desserts extra special.
- Green food coloring: A gel-based coloring works best for vibrant Christmas tree frosting — just a little goes a long way.
- Powdered sugar: Sift it before adding to your frosting to keep it silky smooth and easy to pipe.
- Sprinkles: Go wild here! I love using a mix of gold stars and red-green nonpareils for that festive, cheerful tree look.
Kitchen Equipment Needed
- Mixing bowls: For combining your wet and dry ingredients — I like using clear glass ones so I can see everything mixing evenly.
- Electric mixer or hand mixer: Makes creaming the butter and sugar so much easier and gives the batter that fluffy texture.
- Cupcake pan: Standard 12-cup muffin tin works perfectly for even baking.
- Paper cupcake liners: Keeps cleanup simple and adds a festive touch — I love using Christmas-themed liners for extra holiday charm.
- Piping bags with star tips: Essential for creating that beautiful green frosting swirl that looks like a Christmas tree.
- Cooling rack: Helps the cupcakes cool quickly so the frosting doesn’t melt when decorating.
- Spatula: Great for scraping every bit of batter and frosting — nothing goes to waste!
Instructions
1. Prep — get everything ready
- Preheat the oven to 350°F (175°C) and position a rack in the middle.
- Line a standard 12-cup muffin tin with paper cupcake liners.
- Measure out all ingredients and place them nearby (butter softened, eggs at room temperature). This keeps the process smooth and stress-free.
Pro tip: Take the butter out 30–60 minutes before you start so it’s soft enough to cream easily but not greasy.
2. Make the cupcake batter
- In a medium bowl, whisk together 1 ½ cups all-purpose flour, 1 ½ tsp baking powder, and ¼ tsp salt. Set aside.
- In a large bowl, add ½ cup softened unsalted butter and 1 cup granulated sugar. Use an electric mixer on medium speed to cream until light and fluffy, about 2–3 minutes.
Pro tip: Start the mixer on low for a few seconds, then increase speed to avoid sugar puffing everywhere. - Add the 2 large eggs, one at a time, beating well after each addition. Mix in 2 tsp vanilla extract.
- With the mixer on low, add about one-third of the dry ingredients, then half of the ½ cup milk, alternating until everything is combined. Finish with the remaining dry ingredients. Do not overmix — stop when the batter is just smooth.
Pro tip: Use a rubber spatula to give the bowl one gentle fold at the end so you don’t overwork the gluten.
3. Bake the cupcakes
- Divide the batter evenly among the 12 liners (about 2/3 full each).
- Bake in the preheated oven for 16–20 minutes, or until a toothpick inserted into the center comes out clean or with a few moist crumbs.
- Remove the pan from the oven and let cupcakes cool in the tin for 5 minutes, then transfer to a cooling rack to cool completely before frosting.
Pro tip: Cool completely (30–45 minutes) before piping frosting — warm cupcakes will make the buttercream melt and lose shape.
4. Make the green frosting
- In a large bowl, beat 1 cup softened unsalted butter on medium speed until smooth, about 1–2 minutes.
- Gradually add 3 cups powdered sugar, beating on low until incorporated; then increase speed and add 2–3 tbsp heavy cream (or milk) and 1 tsp vanilla extract. Add more powdered sugar or cream to reach a stiff, pipeable consistency.
- Add a few drops of green gel food coloring, then beat until the color is evenly distributed. Add more gel a little at a time to reach the shade you love.
Pro tip: Gel coloring gives vivid color without thinning the frosting—start with a tiny amount and build up.
5. Fill a piping bag and pipe the trees
- Fit a piping bag with a large open star tip (such as Wilton 1M or a similar star). Fill the bag about two-thirds full with the green frosting.
- Hold the piping bag straight above the cupcake, apply steady pressure, and pipe a tight swirl starting at the outer edge and working inward and upward to create a cone-shaped tree. Release pressure and lift up to finish with a small peak.
- Practice on a plate first if you need to — it helps you get comfortable with the pressure and rotation.
Pro tip: Rotate the cupcake slowly with your free hand as you pipe for an even, bakery-style tree.
6. Decorate the trees
- Immediately add a star-shaped sprinkle to the top of each frosting tree.
- Scatter mini round sprinkles or nonpareils around the frosting to look like ornaments. For a snowy effect, lightly dust with shredded coconut or white sanding sugar.
- If you want extra sparkle, add a tiny dab of edible gold or silver sanding sugar to a few “ornaments.”
7. Final touches
- Let the decorated cupcakes sit for 10–15 minutes so the frosting firms slightly before transferring to a serving platter.
- For gifting: arrange cupcakes in a box lined with parchment, securing them so decorations don’t shift.
Tips and Tricks for Success
- Start with room-temperature ingredients. This helps your batter mix evenly and gives your cupcakes a soft, fluffy crumb.
- Use gel food coloring, not liquid. Gel gives a vibrant green without thinning the frosting — perfect for shaping those Christmas trees.
- Don’t overfill cupcake liners. Stick to ⅔ full so your cupcakes rise evenly without overflowing.
- Cool completely before frosting. Warm cupcakes can melt buttercream and cause it to slide right off.
- Pipe in one steady motion. Hold the piping bag straight up, apply even pressure, and swirl slowly — no need to rush!
- Decorate right after piping. Add sprinkles while the frosting is still soft so they stick beautifully.
- Use a small offset spatula to lift mistakes. If you don’t love your first swirl, gently lift it off and start again — no stress!
Ingredient Substitutions and Variations
- Cupcake flavor: Swap vanilla for chocolate, red velvet, or peppermint cupcakes for a fun twist on your Christmas tree desserts.
- Buttercream base: Try cream cheese frosting if you want a tangy balance to the sweet decorations.
- Dairy-free option: Use plant-based butter and milk alternatives like oat milk or almond milk — they work great!
- Gluten-free version: Replace all-purpose flour with a 1:1 gluten-free baking blend.
- Toppings: Instead of sprinkles, use mini M&Ms, candy pearls, or crushed peppermint for unique ornament effects.
- Natural coloring: Prefer no food dye? Tint your frosting with matcha powder or spinach puree for a subtle green hue.
- Mini size: Make mini cupcakes for bite-sized party treats — just bake for 10–12 minutes instead.
Serving Suggestions
- Perfect for holiday parties: Arrange these festive holiday cupcakes on a tiered dessert stand — they make such a fun centerpiece that guests can’t resist.
- After-dinner treat: Serve them with a warm mug of hot cocoa or peppermint mocha for the ultimate cozy Christmas night.
- Gift-ready sweets: Place each cupcake in a clear box or wrap them in festive cellophane bags with a ribbon for thoughtful homemade gifts.
- Family decorating night: I love setting out bowls of sprinkles and candy so everyone can decorate their own “tree” — it turns dessert into a fun holiday memory.
- Dessert table display: Pair these with other Christmas desserts like sugar cookies or truffles for a beautiful, colorful holiday spread.
Storage and Reheating Instructions
- Room temperature: Store cupcakes in an airtight container for up to 2 days — perfect if you’re making them ahead for a party.
- Refrigerator: Keep them chilled for up to 4 days if your home is warm or if the frosting includes cream cheese. Let them sit at room temp for about 30 minutes before serving.
- Freezer: Freeze unfrosted cupcakes for up to 2 months. Thaw overnight in the fridge, then frost and decorate fresh.
- Frosting only: You can make the frosting up to 3 days ahead and store it covered in the fridge. Re-whip for a minute before piping to restore its fluffy texture.
- Avoid reheating: Since these are frosted, it’s best not to warm them — just bring to room temperature before serving for the best flavor and texture.
Frequently Asked Questions
Can I make these cupcakes ahead of time?
Yes! You can bake the cupcakes a day or two in advance and store them in an airtight container at room temperature. Frost and decorate them the day you plan to serve for the freshest look.
What if I don’t have green food coloring?
No problem! You can use natural options like matcha powder or spinach puree for a subtle green, or even mix yellow and blue gel colors until you reach the shade you want.
Can I use a different frosting?
Absolutely! Cream cheese frosting works beautifully, especially if you want a slightly tangy twist. Just make sure it’s stiff enough to hold the tree shape.
How do I make mini Christmas tree cupcakes?
Use a mini muffin pan and bake for 10–12 minutes. Pipe a smaller swirl of frosting and decorate with tiny sprinkles or candy pearls for the perfect bite-sized treat.
Can I freeze these cupcakes?
Yes, but it’s best to freeze unfrosted cupcakes. Thaw overnight in the fridge, then frost and decorate fresh for best results.
Any tips for decorating with kids?
Definitely! Let them add sprinkles or small candies after you pipe the trees. It’s a fun, hands-on activity, and no two trees will look the same — all part of the charm!
Did you try this recipe? Let me know in the comments how your Christmas Tree Cupcakes turned out!
Christmas Tree Cupcakes
Equipment
- Mixing Bowls
- Electric mixer or hand mixer
- Cupcake pan
- Paper Cupcake Liners
- Piping bags with star tips
- Cooling Rack
- Spatula
Ingredients
For the Cupcakes:
- 1 ½ cups all-purpose flour
- 1 ½ tsp baking powder
- ¼ tsp salt
- ½ cup unsalted butter softened
- 1 cup granulated sugar
- 2 large eggs
- 2 tsp vanilla extract
- ½ cup milk
For the Frosting:
- 1 cup unsalted butter softened
- 3 –4 cups powdered sugar
- 2 –3 tbsp heavy cream or milk
- 1 tsp vanilla extract
- Green gel food coloring
For Decorating:
- Star-shaped sprinkles for the tree topper
- Mini round sprinkles or nonpareils for ornaments
- Shredded coconut or white sanding sugar optional “snow”
Instructions
Prep — get everything ready
- Preheat the oven to 350°F (175°C) and position a rack in the middle.
- Line a standard 12-cup muffin tin with paper cupcake liners.
- Measure out all ingredients and place them nearby (butter softened, eggs at room temperature). This keeps the process smooth and stress-free.
- Pro tip: Take the butter out 30–60 minutes before you start so it’s soft enough to cream easily but not greasy.
Make the cupcake batter
- In a medium bowl, whisk together 1 ½ cups all-purpose flour, 1 ½ tsp baking powder, and ¼ tsp salt. Set aside.
- In a large bowl, add ½ cup softened unsalted butter and 1 cup granulated sugar. Use an electric mixer on medium speed to cream until light and fluffy, about 2–3 minutes.
- Pro tip: Start the mixer on low for a few seconds, then increase speed to avoid sugar puffing everywhere.
- Add the 2 large eggs, one at a time, beating well after each addition. Mix in 2 tsp vanilla extract.
- With the mixer on low, add about one-third of the dry ingredients, then half of the ½ cup milk, alternating until everything is combined. Finish with the remaining dry ingredients. Do not overmix — stop when the batter is just smooth.
- Pro tip: Use a rubber spatula to give the bowl one gentle fold at the end so you don’t overwork the gluten.
Bake the cupcakes
- Divide the batter evenly among the 12 liners (about 2/3 full each).
- Bake in the preheated oven for 16–20 minutes, or until a toothpick inserted into the center comes out clean or with a few moist crumbs.
- Remove the pan from the oven and let cupcakes cool in the tin for 5 minutes, then transfer to a cooling rack to cool completely before frosting.
- Pro tip: Cool completely (30–45 minutes) before piping frosting — warm cupcakes will make the buttercream melt and lose shape.
Make the green frosting
- In a large bowl, beat 1 cup softened unsalted butter on medium speed until smooth, about 1–2 minutes.
- Gradually add 3 cups powdered sugar, beating on low until incorporated; then increase speed and add 2–3 tbsp heavy cream (or milk) and 1 tsp vanilla extract. Add more powdered sugar or cream to reach a stiff, pipeable consistency.
- Add a few drops of green gel food coloring, then beat until the color is evenly distributed. Add more gel a little at a time to reach the shade you love.
- Pro tip: Gel coloring gives vivid color without thinning the frosting—start with a tiny amount and build up.
Fill a piping bag and pipe the trees
- Fit a piping bag with a large open star tip (such as Wilton 1M or a similar star). Fill the bag about two-thirds full with the green frosting.
- Hold the piping bag straight above the cupcake, apply steady pressure, and pipe a tight swirl starting at the outer edge and working inward and upward to create a cone-shaped tree. Release pressure and lift up to finish with a small peak.
- Practice on a plate first if you need to — it helps you get comfortable with the pressure and rotation.
- Pro tip: Rotate the cupcake slowly with your free hand as you pipe for an even, bakery-style tree.
Decorate the trees
- Immediately add a star-shaped sprinkle to the top of each frosting tree.
- Scatter mini round sprinkles or nonpareils around the frosting to look like ornaments. For a snowy effect, lightly dust with shredded coconut or white sanding sugar.
- If you want extra sparkle, add a tiny dab of edible gold or silver sanding sugar to a few “ornaments.”
Final touches and storage
- Let the decorated cupcakes sit for 10–15 minutes so the frosting firms slightly before transferring to a serving platter.
- Store in an airtight container at room temperature for 1–2 days, or refrigerate for up to 4 days (bring to room temperature before serving).
- For gifting: arrange cupcakes in a box lined with parchment, securing them so decorations don’t shift.
Notes
Nutritional Value (Per Cupcake):
- Calories: 320
- Total Fat: 16g
- Saturated Fat: 10g
- Cholesterol: 65mg
- Sodium: 90mg
- Carbohydrates: 42g
- Sugars: 32g
- Protein: 3g
- Fiber: 0.5g
- Calcium: 40mg